
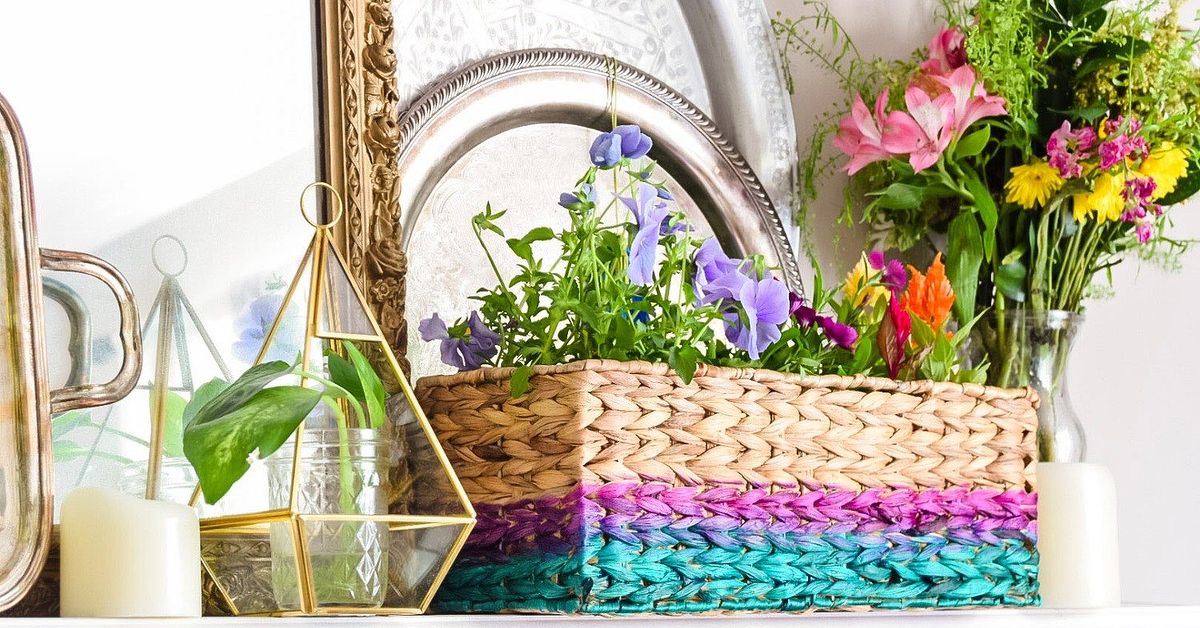
Some thrift-store baskets have excellent bones and unfortunate résumés. They once held potpourri, remote controls, or three suspiciously shiny fake apples. Fortunately, a boho chic basket makeover can turn a dated woven container into warm, useful decor with paint, cord, tassels, and a little patience.
Baskets already deliver what bohemian interiors love: natural texture, handmade character, practical storage, and slight imperfections. The goal is not to disguise the weave but to highlight it. A painted base, wrapped handle, simple pattern, or removable fabric liner can make an ordinary basket look collected rather than forgotten.
This guide covers preparation, painting, decorating, sealing, styling, common mistakes, and real-world lessons from several basket projectsbecause every honest DIY tutorial should admit that glue strings exist.
Why Baskets Work So Well in Boho Decor
Boho interiors mix natural materials, layered textiles, earthy or jewel-toned colors, greenery, vintage pieces, and personal objects. Wicker, rattan, cane, seagrass, and jute fit naturally into that relaxed formula. A basket also earns its floor space by hiding blankets, toys, towels, magazines, craft supplies, or entryway clutter.
The strongest makeovers usually leave part of the original material visible. Try painting only the lower third, adding a broad color band, wrapping the handles, or attaching tassels around the rim. The contrast between raw fiber and handmade decoration creates depth without making the basket look overworked.
Research basis: Boho interiors commonly combine natural materials, layered textures, greenery, mixed eras, and personal details; woven baskets add storage and warmth.
Choose a Basket Worth Making Over
Check the Structure
Choose a basket that sits level and keeps its shape when empty. Inspect the rim, base, and handles for broken reeds, sharp ends, mildew, or crumbling fibers. Small loose strands can be tucked back and secured with craft glue. A badly cracked handle should not be trusted with laundry, pets, or your collection of hardcover cookbooks.
Identify the Material
Natural wicker and rattan generally accept suitable paint when clean and dry. Glossy or previously sealed surfaces may need light sanding and primer. Seagrass is absorbent and can darken unevenly. Resin wicker needs a coating labeled for plastic or multiple surfaces, while wire baskets require paint intended for metal.
Choose Its Future Job
A shallow basket makes a coffee-table catchall. A wide basket can conceal a nursery pot. A sturdy handled basket suits blankets or towels. Small baskets organize keys, bathroom supplies, or the chargers nobody can identify but nobody dares discard.
Supplies for a Boho Chic Basket Makeover
- A sound woven basket
- Vacuum brush, dry paintbrush, or soft toothbrush
- Mild dish soap, water, and lint-free cloths
- Fine-grit sandpaper for glossy or flaking areas
- Painter’s tape and protective paper
- Compatible primer and paint
- Small brush or stencil brush
- Yarn, cotton rope, jute, raffia, tassels, or trim
- Wood beads, fabric, or leather strips
- Strong craft adhesive, hot glue, needle, and heavy thread
- Compatible clear matte sealer, if needed
Select two or three decorative elements rather than emptying the craft aisle onto one basket. Boho can be layered, but the basket does not need to dress for a three-day music festival.
Step-by-Step Boho Basket Makeover
1. Clean the Weave
Dust trapped inside the weave weakens paint adhesion. Vacuum the basket with a brush attachment or loosen debris with a dry paintbrush. If the material tolerates moisture, wipe it with a barely damp cloth and a drop of mild soap. Do not soak natural fibers. Remove residue and let the basket dry completely in a ventilated area.
2. Repair and Prepare
Glue loose strands, tuck in sharp ends, and lightly sand flaking paint or slick sealed areas. The goal is to remove loose material and dull gloss, not reduce the basket to mulch. Mask areas that will remain natural with painter’s tape and paper.
Research basis: Paint guidance emphasizes a clean, dry, sound surface; wicker may need light sanding and primer depending on its finish and coating.
3. Plan the Palette
Terracotta, clay pink, mustard, olive, cream, rust, charcoal, muted teal, and warm white all complement natural weave. For modern boho, pair tan fibers with cream and black. For a desert look, combine sand, cinnamon, and dusty rose. Test paint underneath the basket because shadows between fibers can make colors appear darker.
4. Paint in Thin Layers
For brushed designs, use a small amount of paint and dab it onto the raised weave without filling every opening. Two thin coats usually look better than one heavy coat.
Spray paint reaches intricate wicker efficiently. Work outdoors or in a properly ventilated area, protect nearby surfaces, wear the equipment required by the label, and follow the product directions. Use light, overlapping passes and rotate the basket so paint reaches several angles. Let each coat dry before applying another.
Primer is useful on dark, glossy, stained, or previously painted baskets and whenever the coating manufacturer recommends it. Match the paint to the basket material and to indoor or outdoor use.
Research basis: Wicker-painting guidance favors light coats, adequate ventilation, recommended spray distance, and multiple angles to reach the weave.
5. Add Texture
After the paint dries, wrap a handle with macramé cord, cotton rope, yarn, or narrow fabric strips. Anchor the starting point underneath, wrap with even tension, and hide the final join.
Make tassels from yarn, embroidery floss, raffia, or macramé cord. Three oversized tassels on one side create an easy focal point; smaller evenly spaced tassels feel more polished. Wood beads add detail to handle ties or tassel cords. Stitching and knots usually survive movement better than glue alone.
6. Paint a Simple Pattern
The weave naturally divides into rows, making it ideal for dots, short dashes, zigzags, or color blocks. Follow the basket’s texture rather than forcing perfect geometry. Slight variations look handmade; severe drips look like the paint developed its own agenda.
7. Add an Optional Liner
A washable liner protects the basket and introduces pattern. Press cotton fabric into the base and sides, trim with a generous allowance, hem the edge, and add an elastic or drawstring casing. A removable liner is more practical than permanently gluing fabric to the weave.
8. Seal and Cure
A compatible clear matte sealer can protect frequently handled painted areas, especially on outdoor baskets. Test first because some clear finishes deepen color or add shine. Follow the label’s drying and curing times before loading the basket.
Research basis: Clear sealers can improve durability, but compatibility and cure times vary by product.
Three Easy Boho Basket Designs
Modern Desert
Leave the upper section natural, paint the base terracotta, add three cream tassels, and wrap one handle with cotton cord.
Black-and-Cream Graphic
Paint a cream band around the center, add loose rows of black dashes, and finish with two black tassels and wood beads.
Colorful Market Basket
Use mustard, coral, dusty pink, and teal in alternating blocks. Wrap the handles with striped fabric and add a few multicolor tassels.
How to Style the Finished Basket
Fill a large basket with folded throws and let one blanket drape over the edge. In a bathroom, roll towels vertically and use a washable pouch for toiletries. On open shelves, baskets hide labels and packaging while adding texture.
When using a basket as a planter cover, keep the plant inside a waterproof pot with a saucer. Never water directly into natural wicker or seagrass. Repeat one basket color in a nearby pillow, lamp, rug, or art print so the makeover feels connected to the room.
Research basis: Home-decor guidance uses baskets for shelf storage, plants, towels, toys, blankets, and underused spaces while recommending cohesive color and natural texture.
Common Mistakes and Quick Fixes
Paint Drips Into the Weave
Blot wet drips, let the area dry, and return with lighter coats. Keep spray paint moving before, during, and after each pass.
The Finish Looks Patchy
Natural fibers absorb coatings unevenly. Let the first coat dry, inspect from several angles, and add a thin second coat.
The Tape Line Is Uneven
Correct obvious gaps with a small brush, or soften the entire line with dry brushing so it looks intentionally artisanal.
Decorations Fall Off
Clean the attachment point and use knots, stitches, or wire where possible. Adhesive should assist the connection, not single-handedly prevent tassel migration.
The Basket Smells Musty
Do not hide persistent odor under paint. If careful cleaning and complete drying do not remove mustiness or visible growth, replace the basket instead of using it for linens, food-related storage, or children’s items.
Real-World Experience: What Three Basket Makeovers Taught Me
My first serious makeover began with a thrift-store laundry basket whose orange varnish was loud enough to have its own zip code. The shape was excellent, so I planned a cream-and-clay color block and assumed the project would occupy one peaceful afternoon.
The first lesson came during cleaning. What looked like dark wicker was partly dust packed into the weave. A vacuum removed the obvious debris, but a dry paintbrush released another surprising layer. Painting immediately would have bonded the finish to old dust rather than the basket. After a gentle wipe and overnight drying, the surface looked lighter and felt less slick.
I taped the upper section and brushed clay paint onto the base. Coat one looked dreadful: thin in places, heavy in others, and determined to display every missed crevice. Adding more wet paint would have caused drips, so I waited. A second thin coat evened the color while preserving the texture. Three cream tassels finished the basket, which now holds blankets. The lesson was clear: wicker often looks dramatically better after coat two, provided coat one is not applied like cake frosting.
The second project was a small bathroom basket. I left it natural and wrapped the handles with black cotton cord. Loose wrapping slid; overly tight wrapping distorted the handle. Working in short sections with steady tension and tiny hidden dots of adhesive produced the cleanest result. I stitched both ends because thread felt more trustworthy than glue on a flexible handle.
I also made a removable striped-cotton liner with a drawstring casing. That became the most practical feature. Lotions and bathroom products eventually leak because they appear to have formed a committee. Being able to wash the liner kept stains away from the fibers.
The third basket received a charcoal-and-mustard zigzag. Painter’s tape could not seal perfectly against the uneven weave, and one edge bled. Instead of repainting everything, I feathered the line with a dry brush and repeated the effect around the pattern. The mistake became a weathered border that suited the basket better than a rigid stripe.
This project also taught restraint. I originally gathered beads, pom-poms, fringe, tassels, and a fabric bow. Once the pattern was finished, I kept only two tassels. The weave and paint already provided enough detail. A successful boho makeover is not measured by how many decorations survive the hot-glue gun. It is measured by whether the basket feels layered, useful, and at home.
Scale mattered more than expected, too. Tiny tassels disappeared against a large laundry basket, while oversized decorations overwhelmed the smaller bathroom piece. Laying every embellishment beside the basket before attaching it saved materials and prevented several design decisions that would have looked better on a parade float.
Across all three makeovers, the most reliable order was clean, dry, repair, test, decorate, and cure. Skipping drying time caused more trouble than choosing an imperfect color. Knots, stitches, and wraps lasted longer than adhesive alone. Most importantly, every basket looked better when some natural weave remained visible. That contrast is where boho style earns its charm.
Conclusion
A boho chic basket makeover is inexpensive, forgiving, and useful. Start with a sound basket, prepare it carefully, choose coatings suited to the material, and build the design in thin layers. Paint adds structure; cord, tassels, beads, or fabric add personality; and the original weave keeps everything warm and organic.
The best result is not always the most elaborate. One terracotta band, a wrapped handle, or a washable liner may be enough. Let the irregular texture guide the design, embrace small handmade variations, and allow every layer to dry. Your basket has already survived one decorating era. It can handle anotherwith considerably better tassels.














