
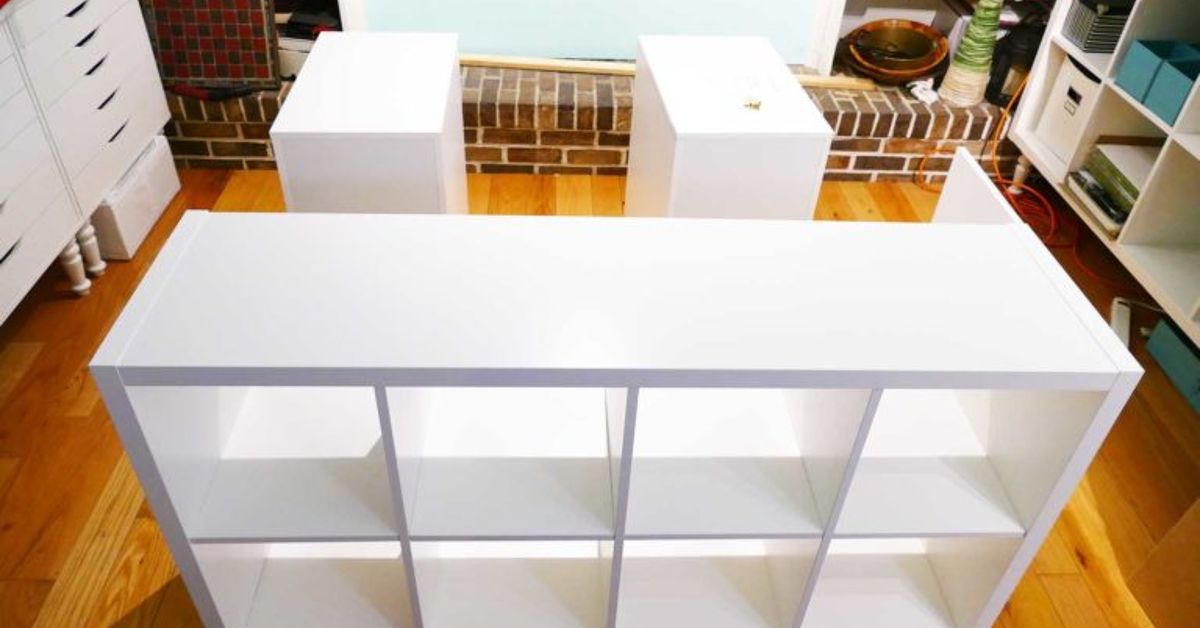
A dedicated craft table can turn a chaotic collection of paper, fabric, paint, vinyl, beads, and mysterious little plastic pieces into a workspace that actually invites creativity. Instead of clearing the dining table every time someone wants dinner, you can keep projects organized, protect supplies, and give every tool a sensible home.
This DIY craft table with storage combines a spacious worktop with two sturdy cubby towers. The design is simple enough for a careful beginner, customizable enough for an experienced woodworker, and practical for sewing, scrapbooking, Cricut projects, painting, jewelry making, gift wrapping, or general household projects. It is essentially a creative command centerminus the spinning office chair and dramatic mission-control countdown.
Why Build a Craft Table Instead of Buying One?
Ready-made craft furniture can be attractive, but it may not match your room, supplies, preferred working height, or storage containers. Building your own table lets you choose the dimensions, shelf spacing, finish, and accessories. You can create tall cubbies for rolls of vinyl, shallow compartments for paper, open shelves for baskets, or a clear area for a sewing-machine foot pedal.
Successful craft-table designs typically combine a generous work surface with open storage, expandable sections, shelves, drawers, pegboards, or mobile components. Craft-room planning guidance also recommends mixing visible storage for frequently used materials with concealed or contained storage for visually messy supplies.
A homemade table can also evolve. Add doors later, replace baskets, install a paper-roll holder, or attach a cutting mat. Unlike a fixed retail product, your DIY craft station can grow along with your hobbieswhich is convenient because hobbies have a suspicious habit of multiplying.
Recommended Craft Table Dimensions
The plan below creates a table approximately:
- 60 inches wide
- 30 inches deep
- 36 inches high
- 30 inches of open knee space
- Two 15-inch-wide storage towers
A 60-by-30-inch top provides room for a cutting mat, sewing machine, laptop, or several smaller project zones without consuming an entire room. A height near 36 inches works well for many standing activities, including cutting fabric, assembling paper projects, and wrapping gifts. Workbench plans from major home-improvement and DIY publishers commonly use heights in the mid-30-inch range, while mobile designs emphasize locking casters and adaptable layouts.
Adjust the Height for Your Body and Craft
Do not treat 36 inches as a sacred woodworking number carved into an ancient oak tree. Measure yourself and consider how you will use the table. A seated sewing or drawing station may need to be closer to desk height, while a standing cutting table can be taller.
For seated work, choose a combination of chair and tabletop height that lets your shoulders relax, keeps your elbows close to your body, and allows your wrists and forearms to remain reasonably straight. Leave enough knee and foot clearance beneath the center opening. OSHA workstation guidance recommends neutral arm positions, supported feet, relaxed shoulders, and sufficient space beneath a work surface.
Materials for a DIY Craft Table With Storage
Wood and Building Materials
- Two sheets of 3/4-inch cabinet-grade plywood
- One 60-by-30-inch tabletop, butcher-block panel, or laminated plywood top
- One sheet of 1/4-inch plywood for the cabinet backs
- Iron-on edge banding or 1-by-2 lumber for exposed plywood edges
- 1-1/4-inch pocket-hole screws or suitable cabinet screws
- 1-1/4-inch wood screws
- Wood glue
- Wood filler
- Sandpaper in medium and fine grits
- Primer and durable interior paint, or wood stain and clear protective finish
- Adjustable furniture glides or optional locking casters
- Baskets, bins, trays, or cube-storage containers
Suggested Cut List
This cut list creates two open storage towers supporting the tabletop:
- Four side panels: 35-1/4 by 29 inches
- Two bottom panels: 13-1/2 by 29 inches
- Four adjustable or fixed shelves: 13-1/2 by 28-1/4 inches
- Four upper stretchers: 13-1/2 by 4 inches
- Two 1/4-inch plywood backs: approximately 15 by 35-1/4 inches
- One tabletop: 60 by 30 inches
Measure the actual thickness of your plywood before cutting shelves and bottom panels. Material sold as 3/4 inch is not always exactly 3/4 inch thick. A small discrepancy can turn an easy cabinet assembly into an afternoon of wondering why geometry has suddenly betrayed you.
Tools
- Circular saw with a straightedge guide or table saw
- Drill and driver
- Pocket-hole jig, if using pocket-hole joinery
- Random-orbit sander or sanding block
- Tape measure, carpenter’s square, and pencil
- Clamps
- Level
- Brad nailer or hammer for attaching thin back panels
- Eye protection, hearing protection, and a suitable dust mask or respirator
How to Build the Craft Table
Step 1: Plan the Storage Before Cutting Wood
Inventory your supplies first. Measure your sewing machine, paper trimmer, storage baskets, vinyl rolls, fabric bins, and cutting mat. Designing shelves around containers you already own is easier than building beautiful cubbies and later discovering that every basket is half an inch too wide.
Divide supplies into three groups: frequently used items, occasional materials, and messy backups. Keep daily tools near the top and front. Place heavier machines or paper collections on lower shelves. Store tiny objects in labeled bins or divided trays rather than letting them roam freely through the table like craft-room wildlife.
Step 2: Cut the Plywood Panels
Mark each panel with its final location before cutting. Support full plywood sheets on rigid foam insulation or sawhorses, and use a sharp fine-tooth blade for cleaner edges. Clamp a straightedge guide to the sheet so the circular saw follows a predictable line.
Cut the four side panels first, then the bottoms, shelves, stretchers, and backs. Check matching parts against one another. It is more important for corresponding pieces to be identical than for every cut to achieve laboratory-level perfection.
Step 3: Sand and Prepare the Pieces
Sand the faces and exposed edges before assembly, when every surface is easy to reach. Smooth splinters and sharp corners, but do not aggressively round the edges where panels must meet. Remove dust with a vacuum and clean cloth.
Beginner woodworking projects are generally more approachable when they use straightforward cuts, basic tools, and repeatable box construction. Proper surface preparation also makes the final piece look intentional rather than like plywood that escaped from the garage.
Step 4: Assemble the First Storage Tower
Lay two side panels on a flat surface. Mark the position of the bottom panel and shelves on both pieces using a square. If you want adjustable shelving, drill shelf-pin holes with a jig instead of attaching all shelves permanently.
Apply wood glue to the bottom-panel edges. Position the bottom between the two sides and fasten it with pocket-hole screws or countersunk cabinet screws. Attach a front and rear stretcher near the top. The stretchers keep the tower square and provide solid mounting areas for the tabletop.
Add fixed shelves using the same method. Keep the lowest compartment tall enough for heavy supplies or a large basket. Use clamps while driving screws so the panels do not wander out of alignment.
Step 5: Square the Tower and Attach the Back
Measure diagonally from corner to corner. When both diagonal measurements match, the cabinet is square. Attach the 1/4-inch plywood back with glue and brad nails or small screws. The back prevents side-to-side racking and makes a surprisingly large difference in stability.
Repeat the process for the second tower. Before continuing, place both units upright and confirm that their heights match.
Step 6: Install Edge Banding or Wood Trim
Cover visible plywood edges with iron-on veneer edge banding for a clean modern appearance. Apply it according to the manufacturer’s directions, trim the excess carefully, and sand it lightly.
For a thicker furniture-style edge, attach narrow solid-wood strips with glue and brad nails. Wood trim is more impact-resistant than thin veneer, which can be helpful if rotary cutters, storage bins, or enthusiastic children regularly collide with the table.
Step 7: Position the Storage Towers
Place the towers 30 inches apart, with their fronts aligned. Check that both units sit level. Install adjustable glides if the floor is uneven.
For a mobile craft table, mount appropriately rated locking casters beneath the towers and shorten the side panels to compensate for the wheel height. Locking wheels allow a work surface to be repositioned while helping prevent movement during use, a strategy frequently used in workshop and utility-table designs.
Step 8: Attach the Tabletop
Center the tabletop over the two towers. A 60-inch top should sit flush with the outside edges and create a small front or rear overhang, depending on how you position the bases.
Drive screws upward through the stretchers into the underside of the top. Select screw lengths carefully so they do not break through the work surface. If you are using solid butcher block, enlarge the mounting holes slightly or use tabletop fasteners so seasonal wood movement is not restricted.
Step 9: Finish the Surface
Fill visible holes, allow the filler to dry, and sand the repaired areas smooth. For paint, prime bare wood before applying a durable, washable topcoat. A satin or semi-gloss finish is easier to clean than flat paint, which tends to preserve every glue smear and paint fingerprint as if it were documenting an archaeological site.
Furniture-finishing guidance recommends cleaning the surface, smoothing rough areas, removing sanding dust, priming bare wood, and applying an easy-to-clean finish. Wear respiratory protection while sanding and follow the drying and ventilation instructions for the products you select.
For a natural wood top, apply a compatible protective clear coat. Allow the finish to cure fully before placing cutting mats, machines, bins, or adhesive vinyl on the surface.
Smart Storage Ideas for the Finished Table
Create Supply Zones
Assign each cubby a job. One tower might hold paper crafts, while the other stores fabric and sewing supplies. Grouping materials by activity reduces setup time and makes it easier to return everything to the correct place.
Use Bins That Can Be Removed
Open bins are excellent for frequently used supplies. Lidded containers work better for glitter, beads, spare blades, adhesives, and anything else capable of creating a household incident. Add labels to the front and top so the contents remain identifiable from different angles.
Craft-storage guidance commonly recommends clear containers, baskets, shelf dividers, drawer inserts, vertical storage, and dedicated categories for items such as paper, ribbon, fabric, and small embellishments.
Add Vertical Organization
Attach pegboard to the outer side of one tower for scissors, rulers, rotary cutters, tape, and small containers. A dowel mounted beneath the tabletop can hold ribbon or wrapping paper. Magnetic strips can organize metal tools, provided sharp objects remain safely positioned.
Protect the Worktop
Use a self-healing cutting mat for rotary cutting and paper crafts. Keep a silicone mat for hot glue, resin tools, or paint. For especially messy projects, cover the table with butcher paper that can be replaced when it becomes part paint palette, part glue trap, and part accidental abstract masterpiece.
Optional Upgrades
- Power strip: Mount a surge-protected strip beneath the top for a sewing machine, lamp, glue gun, or electronic cutting machine.
- Drawer boxes: Install shallow drawers in one or two upper cubbies for hand tools and small accessories.
- Pull-out trays: Add sliding shelves for printers, heat presses, or machines that do not need to remain on the tabletop.
- Drop leaf: Use a hinged extension when extra cutting or wrapping space is needed.
- Paper slots: Add closely spaced vertical dividers for cardstock, cutting mats, canvases, and pattern books.
- Tool rail: Attach hooks or a narrow rail to the table ends for rulers, headphones, aprons, or reusable shopping bags.
- Task lighting: Install a bright adjustable lamp that can be directed toward detailed work.
Common Craft Table Mistakes to Avoid
Making the top too small: Measure your largest machine and cutting mat together, not separately. Projects rarely respect neat boundaries.
Skipping the back panels: Thin backs help square the storage towers and resist side-to-side movement.
Choosing appearance over access: Deep cabinets can swallow small supplies. Use pull-out bins, trays, or shallow compartments so materials do not disappear into the back.
Forgetting legroom: Storage is valuable, but an uncomfortable center opening makes seated work frustrating. Preserve adequate knee and foot space.
Using nonlocking wheels: A mobile table that rolls while you cut fabric is not charming. Use locking casters and engage the brakes before working.
Rushing the finish: Paint or clear coat that feels dry may not be fully cured. Loading the shelves too early can leave marks, stuck baskets, or permanent impressions.
Experience-Based Lessons From Building and Using a Craft Table
The most valuable lessons often appear after the sawdust settles and the table enters daily use. A design that looks perfect on paper can reveal small inconveniences once scissors, cords, fabric, paint bottles, and half-finished projects arrive. The following practical observations can help make the table more useful from the first day.
Storage Should Match Actual Habits
Many builders begin by creating identical cubbies because symmetry looks clean. In practice, craft supplies are not symmetrical. Cardstock is flat, yarn is bulky, paint bottles are short, fabric is floppy, and cutting machines occupy the space of a small appliance. Mixed shelf heights are usually more useful than a flawless grid.
A smart approach is to place empty bins and equipment on the unfinished shelves before deciding their final positions. Adjustable shelves offer flexibility, but even fixed shelves can be tested temporarily with scrap-wood supports. This simple rehearsal can prevent a tall machine from becoming a permanent countertop resident because it misses fitting into a cubby by one frustrating inch.
A Clear Worktop Requires an Easy Reset System
A large surface does not automatically remain organized. In fact, an empty tabletop often behaves like a magnet for mail, shopping bags, coffee cups, charging cables, and projects that were supposedly going to be finished “later today.”
The most effective solution is a reset bin. Place one basket beneath the table for active projects. When the worktop must be cleared, collect the project materials in that basket instead of scattering them across several shelves. The project stays together, and the table becomes usable again in minutes.
A five-minute cleanup at the end of each session also prevents clutter from hardening into a permanent geological layer. Return cutting tools, close adhesives, discard scraps, and wipe the work surface before leaving the room.
Open Storage Is Convenient but Visually Busy
Open cubbies make supplies easy to reach, which is excellent during a project. They can also make a room feel cluttered when every shelf contains a different color, shape, and package design. Matching bins calm the visual noise without sacrificing accessibility.
Not every container needs to be identical. A consistent label style or limited color palette can provide enough unity. Clear bins are useful for small materials, while opaque baskets hide tangled cords, fabric scraps, unfinished experiments, and purchases that seemed absolutely necessary at the craft store.
Mobility Is Useful Only When the Table Remains Stable
Casters are helpful in shared rooms, garages, basements, and multipurpose studios. The table can move toward better lighting, roll away from a wall for cleaning, or create temporary space for a larger project. However, wheel quality matters. Small inexpensive casters may struggle on rugs, thresholds, or uneven floors.
Use wheels rated for more than the estimated total weight of the table, equipment, and stored supplies. Locking mechanisms should be easy to reach. Lock at least two wheels during light work and all available brakes when cutting, pressing, or operating equipment that creates movement.
The Best Accessory Is Often Better Lighting
Builders frequently focus on storage and forget illumination. General room lighting may be adequate for sorting supplies but insufficient for threading needles, matching colors, cutting detailed shapes, or removing tiny pieces of vinyl.
An adjustable lamp with a broad, glare-controlled beam makes the table more comfortable and reduces the temptation to lean toward the project. Position cords along the back or underside of the tabletop, leaving enough slack for adjustable lights without creating loops that catch tools or chair arms.
Leave Room for the Hobby to Change
A craft table should support the supplies you own today without becoming obsolete tomorrow. Avoid permanently dividing every cubby into tiny compartments. Use removable organizers inside a few larger openings so the storage can change from scrapbooking to sewing, painting, model building, or another creative interest.
The most successful DIY craft table is not necessarily the one with the most elaborate joinery. It is the one that makes starting a project easier, cleanup faster, and supplies simpler to find. When the table reduces setup friction, creativity has fewer excuses to remain trapped in a labeled plastic box.
Final Thoughts
A DIY craft table with storage can provide more than another piece of furniture. It creates a dependable place to work, protects the rest of the home from project clutter, and organizes supplies according to the way you actually use them.
Start with a sturdy top, two square storage towers, sensible legroom, and flexible shelving. Then customize the table with bins, pegboard, lighting, drawers, wheels, or a power strip. Careful measuring and patient surface preparation will have a greater effect on the finished result than complicated woodworking techniques.
Once completed, the table may not guarantee that every project gets finished. It will, however, eliminate the classic excuse that the scissors have disappeared again.














