
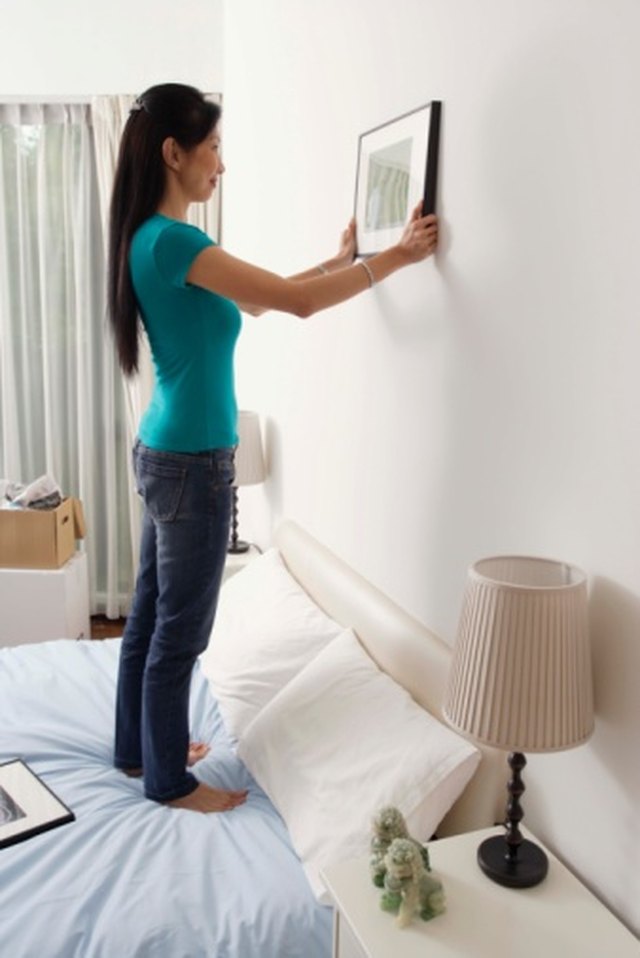
Hanging a picture on drywall looks like a five-minute job right up until the frame tilts, the nail loosens, or a mysterious crater appears where your family portrait was supposed to live. The good news is that drywall is not the enemy. It simply demands the right hardware, accurate measurements, and a tiny amount of patience before the hammer starts freelancing.
The best way to hang pictures on drywall is to match the fastener to the frame’s actual weight, use a wall stud whenever practical, and choose a properly rated drywall anchor or picture hook when a stud is unavailable. Plan the height first, measure the hanging hardware on the back of the frame, install the support correctly, and finish with a level and wall bumpers. That method works for a single photograph, a heavy framed print, or an ambitious gallery wall that says, “I own a tape measure and occasionally use it.”
Why Hanging Pictures on Drywall Requires a Plan
Drywall is a gypsum panel covered with paper. It creates smooth, attractive walls, but the hollow area between studs cannot grip an ordinary screw the way solid wood can. A nail driven into bare drywall may hold a very light frame, yet heavier artwork can gradually enlarge the hole and pull the fastener forward.
The solution is not automatically “use the biggest anchor in the store.” Oversized hardware can create unnecessary damage, and the wrong anchor may still fail. A better approach considers four factors: the weight of the picture, the type of hanging hardware on the frame, the condition and thickness of the drywall, and the location of the wall studs.
Start With the Frame, Not the Wall
Weigh the Complete Picture
Do not estimate by lifting the frame and saying, “Feels light enough.” Glass, backing boards, wood frames, and metal hardware add weight quickly. Use a bathroom or luggage scale when the manufacturer does not list the finished weight. Select hanging hardware with a rated capacity comfortably above that number, and follow the package instructions for the exact wall material.
Inspect the Backing Hardware
Frames commonly use a sawtooth hanger, hanging wire, D-rings, keyhole slots, or a cleat. The backing determines how many wall fasteners you need and where they must be placed.
- Sawtooth hanger: Usually works well for small and medium frames with one centered hook or nail.
- Hanging wire: Can hang from one hook, but two hooks spread the load and help prevent crooked frames.
- Two D-rings: Require two carefully leveled mounting points and provide excellent stability.
- Keyhole slots: Need screw heads positioned at the correct depth so the frame locks into place.
- French cleat: A strong, level-friendly choice for large or heavy artwork when installed according to its rating.
Confirm That the Wall Is Drywall
Drywall, plaster, masonry, tile, and wood paneling need different fasteners. Do not assume every smooth painted wall is drywall. Plaster is generally harder and more brittle, while masonry requires specialized bits and anchors. When the wall construction is uncertain, test in an inconspicuous area or ask a qualified professional before drilling.
Choose the Right Picture-Hanging Hardware
For Lightweight Pictures: Angled Picture Hooks
A traditional picture hook with a small nail is often the cleanest choice for lightweight framed photos and prints. The nail enters the drywall at a downward angle, allowing the hook to direct much of the load toward the wall instead of pulling straight out. Use the weight rating printed on the package rather than a generic online chart, because ratings differ by design and wall condition.
An angled hook usually leaves a small hole, is easy to remove, and works with sawtooth hangers or wire. It is a much better option than balancing a frame on a random finishing nail and hoping gravity takes the weekend off.
For Light, Flat Frames: Removable Adhesive Strips
Picture-hanging strips can be useful in rentals, dorm rooms, offices, and other places where holes are discouraged. They work best on clean, smooth, sound surfaces and on frames that sit flat against the wall. The frame material, paint condition, humidity, surface texture, and installation technique all matter.
Clean and prepare the wall exactly as the manufacturer directs. Respect the required curing time for fresh paint, press the strips for the stated duration, wait before loading them, and never exceed the product’s weight or frame-size limits. Avoid using adhesive strips for valuable, irreplaceable, unusually heavy, or sharp-edged artwork. They are convenient hardware, not a magical treaty with physics.
For Medium-Weight Frames: Drywall Anchors or Tool-Free Hooks
When a picture is too heavy for a basic hook and no stud is available, use a weight-rated drywall anchor or a specialty hook designed to engage the back of the drywall. Common options include self-drilling threaded anchors, expansion anchors, metal hollow-wall anchors, and curved tool-free hooks.
The pilot hole must match the anchor instructions. A hole that is too large can leave the anchor spinning uselessly; a hole that is too small can crush the drywall or damage the anchor during installation. Drive screws straight, stop when the hardware is snug, and do not overtighten. Overtightening can strip the gypsum and turn a sturdy installation into decorative confetti.
For Heavy Pictures and Mirrors: Studs, Toggles, or Cleats
A wall stud is generally the preferred attachment point for heavy framed art, large mirrors, and expensive pieces. Locate the stud with a reliable stud finder, verify its edges, and drive a suitable screw into the center of the wood stud. Check for possible wiring or plumbing before drilling, especially near outlets, switches, kitchens, and bathrooms.
If the desired location does not line up with a stud, a properly rated toggle-style anchor, metal hollow-wall anchor, or mounting cleat may be appropriate. Heavy and wide frames often benefit from two attachment points because they distribute the load, reduce swinging, and make leveling easier. For oversized, unusually valuable, or overhead installations, professional picture-hanging service is inexpensive compared with broken glass, damaged art, or an extremely memorable 2 a.m. crash.
The Best Step-by-Step Method for Hanging a Picture on Drywall
1. Decide the Visual Height
A reliable starting point is to place the center of the artwork roughly 57 to 60 inches above the finished floor. This is a guideline, not a courtroom sentence. Artwork above a sofa, console, headboard, or mantel should relate visually to the furniture rather than floating near the ceiling. In many rooms, leaving approximately 4 to 10 inches between the furniture and the bottom of the frame creates a connected composition.
2. Mock Up the Position
Trace the frame on kraft paper, wrapping paper, or newspaper and cut out the shape. Tape the template to the wall with low-tack painter’s tape. Step back, sit in the room, and check the placement from the doorway. This simple preview prevents the classic three-hole installation: wrong, less wrong, and finally correct.
3. Find and Mark the Hanging Point
Mark the top center of the frame’s planned position. Then measure from the top of the frame to the point where the wall hardware will actually support it.
For a hanging wire, pull the wire upward at the center with moderate tension and measure from that point to the top of the frame. Transfer the same distance downward from the top-center wall mark. For two D-rings, measure the distance between the rings and their distance from the frame’s top edge. Painter’s tape stretched across the back can help transfer both mounting points accurately.
4. Check for a Stud and Hidden Hazards
Scan the area with a stud finder. If the mark lands on a stud, choose a screw or rated hanger suitable for wood. If it lands in the hollow space, select the appropriate drywall fastener. Before drilling, consider nearby electrical outlets, switches, water fixtures, and wall-mounted equipment. A stud finder with wire detection can be helpful, but it should not replace cautious judgment.
5. Install the Fastener Correctly
Install an angled picture hook with the supplied nail at the designed angle. For a drywall anchor, use the specified drill-bit size and insert the anchor without enlarging the hole. For a self-drilling anchor, keep it perpendicular to the wall and turn it slowly. For toggles, make sure the wings or strap fully engage behind the drywall before tightening.
Leave enough screw head exposed to capture the frame’s D-ring, keyhole, wire, or bracket. Too far out and the frame leans; too far in and the hardware cannot engage.
6. Hang, Level, and Stabilize
Lower the frame gently onto the hook or screws instead of dragging it across the paint. Place a bubble level on the top edge and adjust. Add small rubber or felt bumpers to the lower corners to protect the wall, reduce rattling, and help the picture stay straight. Finally, apply a gentle downward test with your hands near the framenot a pull-up auditionto confirm that the hardware is seated.
How to Hang a Gallery Wall on Drywall
A gallery wall multiplies every measurement, which is why planning on the floor or with paper templates is so valuable. Treat the entire arrangement as one large artwork. Position the visual center of the group near eye level, then keep spacing consistent. About 2 to 3 inches between frames often looks cohesive, while wider spacing can work for oversized pieces or a relaxed arrangement.
Begin with the largest or most important frame near the center and build outward. Mark each template with its frame name and exact fastener location. When the layout feels balanced, install hardware directly through the paper marks, remove the templates, and hang the real frames. Use two hooks for wide wire-backed frames when possible; they resist tilting and share the load.
Common Drywall Picture-Hanging Mistakes
- Guessing the weight: Hardware capacity should be based on the complete frame, not optimism.
- Using a bare screw in hollow drywall: Without a stud or suitable anchor, the threads have little material to grip.
- Using drywall screws as picture hardware: Drywall screws are designed for installing drywall to framing, not as universal wall anchors.
- Ignoring the frame’s backing: Wire, D-rings, keyholes, and sawtooth hangers require different measurements.
- Overtightening anchors: Crushing the gypsum reduces holding strength.
- Hanging art too high: A picture should relate to people and furniture, not apply for residency near the smoke detector.
- Skipping package instructions: Weight ratings depend on correct installation and compatible wall conditions.
- Trusting adhesive on weak paint: A strip can hold perfectly while a poorly bonded layer of paint peels away from the drywall.
Frequently Asked Questions
Can You Hang a Picture Directly on Drywall?
Yes, lightweight pictures can often be hung with a properly rated picture hook, pin-style hanger, or adhesive system made for the surface. Medium and heavy frames usually need a drywall anchor, specialty hollow-wall hook, or a fastener driven into a stud.
Is One Hook or Two Better?
One hook is sufficient for many small frames. Two hooks are often better for wide or heavier wire-backed frames because they distribute the load and reduce sideways movement. Both hooks must be level and rated for the application.
What Is the Strongest Way to Hang a Heavy Picture?
Fastening suitable hardware into one or more wood studs is commonly the strongest practical method in a conventional drywall wall. When stud placement does not match the artwork, properly installed heavy-duty hollow-wall anchors or a rated cleat system may provide an alternative. Always follow the hardware and frame manufacturer’s instructions.
How Do You Keep Pictures From Going Crooked?
Use two hooks for wire-backed frames, add felt or rubber bumpers at the bottom corners, and make sure the wire or hanging hardware is centered. In high-traffic areas, consider security-style hangers or locking hardware that resists bumps and vibration.
Hands-On Experience: What Actually Makes Picture Hanging Easier
The most useful lesson from real-home picture-hanging projects is that the difficult part is rarely driving the nail. The difficult part is deciding exactly where that nail belongs. Projects that go smoothly usually begin with the frame resting on a table while someone checks the back, measures the wire, and weighs the complete piece. Frustrating projects begin with a hammer already in hand and a person saying, “This looks about right.”
Paper templates are the biggest time-saver for gallery walls. Laying frames on the floor helps, but it does not show how the arrangement relates to a sofa, lamp, doorway, or ceiling line. Full-size paper shapes on the wall make awkward gaps obvious before they become holes. Labeling each template also prevents the comedy of installing perfect hardware for the wrong frame.
Another practical lesson is to keep several types of hanging hardware available. A small kit with angled hooks, self-drilling anchors, screws, two or three sizes of specialty drywall hooks, felt bumpers, and painter’s tape handles most ordinary artwork. Trying to force one fastener type to work for every frame is like using one shoe size for the entire family: technically efficient, emotionally chaotic.
Two attachment points are worth the extra measuring on wide frames. A single wire hook may support the weight, but the picture can drift out of level whenever a door closes or someone brushes past it. Two level hooks create a calmer installation and reduce the need to straighten the frame every Tuesday for the rest of your natural life. A strip of painter’s tape across two D-rings or brackets makes transferring the spacing surprisingly easy.
Wall condition matters more than many instructions admit. Drywall near a repaired area may be softer. Older paint may have poor adhesion. Textured walls may prevent adhesive strips from making full contact. A fastener that feels loose during installation should not be “fixed” by tightening harder. Move to sound material, use a different anchor, or find a stud. The wall is giving feedback; it is polite to listen.
Placement improves when you view the frame from where people actually use the room. Check artwork from the sofa, dining chair, hallway, and doorwaynot only while standing six inches from the wall. A technically perfect 57-inch center can still feel wrong above tall furniture or in a room where viewers are usually seated. Measurements create consistency, but the room gets the final vote.
The final habit that pays off is a gentle load check. Once the frame is hung, verify that the wire, ring, or cleat is fully engaged, then apply light downward pressure while supporting the frame. Listen for movement and inspect the wall. Add bumpers, level the piece, and stop. Do not repeatedly remove and rehang heavy art unless necessary, because every attempt can scrape paint or disturb hardware.
In the end, the best way to hang pictures on drywall is not one special hook. It is a reliable process: know the weight, understand the frame hardware, choose a stud or correctly rated drywall fastener, measure the true support point, and test the finished installation. Follow those steps and your artwork should stay where it belongson the wall, level, admired, and notably absent from the floor.














