
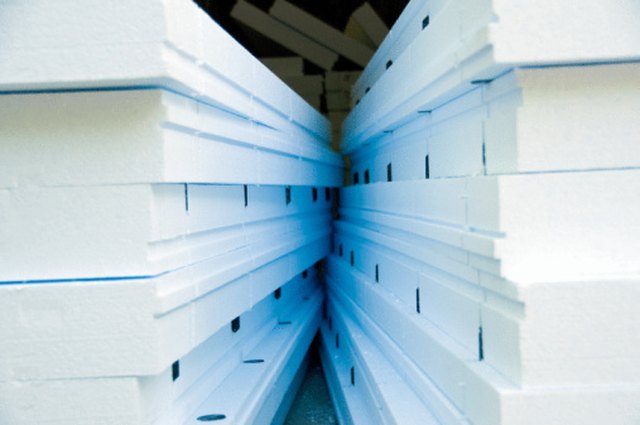
Foam insulation and wood can make an excellent team. Wood provides strength, foam slows heat flow, and together they can improve walls, attic hatches, garage doors, workshop panels, crawl spaces, and countless DIY projects. Unfortunately, the relationship falls apart quickly when the wrong adhesive enters the picture.
Some construction adhesives contain solvents that attack polystyrene foam. Instead of creating a strong bond, they can dissolve channels into the board, produce a suspicious chemical smell, and leave you holding something that resembles a giant pink potato chip. The solution is not simply “more glue.” It is choosing a foam-compatible adhesive, preparing the wood correctly, applying the product according to its label, and supporting the panel while the bond cures.
This guide explains how to stick foam insulation to wood without melting the foam, trapping moisture, or watching the panel slide down the wall five minutes after you congratulate yourself.
Can You Glue Foam Insulation Directly to Wood?
Yes, rigid foam insulation can usually be bonded directly to plywood, oriented strand board, dimensional lumber, and other wood surfaces. The success of the installation depends on four things:
- The type and facing of the foam board
- The adhesive’s compatibility with both foam and wood
- The condition of the wood surface
- Whether the application also requires mechanical fasteners
For a small attic hatch, removable access panel, or craft project, an approved adhesive may provide enough holding power by itself. For exterior walls, ceilings, roofs, crawl spaces, or panels that will support finishes, adhesive is normally only one part of the attachment system. Foam board is nonstructural, and building assemblies may require cap fasteners, screws, washers, furring strips, or another approved fastening method.
In other words, adhesive can hold the insulation against the wood, but it should not be asked to become a framing contractor.
Identify the Foam Before Choosing an Adhesive
“Foam insulation” is a broad label. Several materials may look similar while reacting differently to chemicals and installation conditions.
Expanded Polystyrene
Expanded polystyrene, or EPS, often has a visible bead-like texture. It is lightweight, economical, and available in numerous densities and thicknesses. EPS can be installed with compatible adhesives, cap nails, screws, or staples when allowed by the manufacturer. Because polystyrene can be damaged by certain solvents, the adhesive label must specifically approve use with foam board or polystyrene.
Extruded Polystyrene
Extruded polystyrene, or XPS, is commonly sold as smooth colored boards. It is closed-cell, moisture resistant, and frequently used on foundation walls, exterior sheathing, basement walls, and other applications that benefit from continuous insulation. Use a product explicitly labeled for XPS, polystyrene, or foamboard insulation.
Polyisocyanurate
Polyisocyanurate, often shortened to polyiso, typically has foil, fiberglass, or coated facers. The adhesive bonds to the facer rather than directly to the foam core, so compatibility with that facing matters. A product approved for bare polystyrene is not automatically approved for every foil-faced or glass-faced panel.
Specialty Foam Panels
Composite insulation may include OSB, plywood, foil, fiberglass mat, or another factory-applied layer. Follow the panel manufacturer’s instructions because the approved attachment method may emphasize mechanical fastening instead of field-applied adhesive.
Best Adhesives for Sticking Foam Insulation to Wood
Foamboard Construction Adhesive
A purpose-made foamboard construction adhesive is the safest default for most DIY projects. These products are formulated to bond foam insulation to materials such as wood, plywood, drywall, masonry, and concrete without attacking the foam.
Many foam-safe products use latex or another water-based chemistry. They are convenient for indoor work and typically have less odor than solvent-heavy construction adhesives. Check whether the product is approved for exterior exposure, damp locations, cold-weather application, or the particular foam facing you are using.
Low-Expansion Polyurethane Foam Adhesive
Some one-component polyurethane products are designed specifically to bond foam panels and common construction materials. They cure with moisture and can provide good initial grab, gap filling, and broad substrate compatibility.
Choose an adhesive product rather than an ordinary expanding gap filler. Standard canned spray foam may expand unpredictably and push a rigid board away from the wood. A low-expansion construction adhesive is engineered to behave more politely. It still needs to be used exactly as directed, including any requirements for temperature, moisture, bead size, working time, and bracing.
Foam-Safe Spray Adhesive
Spray adhesive can be useful for small, lightweight panels, models, or temporary interior projects. It is generally less suitable for large construction panels, overhead installations, damp environments, or assemblies that must resist significant movement.
Never assume a multipurpose spray is safe for polystyrene. The label should clearly identify foam, foam board, EPS, or XPS as an approved material.
Adhesives to Avoid
Avoid any adhesive that does not confirm foam compatibility. Solvent-based products can soften, pit, shrink, or completely dissolve polystyrene. Hot glue can deform foam, while ordinary wood glue may cure too slowly or bond poorly to nonporous foam facers. Contact cement, automotive adhesive, flooring adhesive, and general-purpose construction adhesive should not be used unless their technical instructions specifically approve the exact insulation material.
When the label is vague, perform a test on a scrap. A five-minute experiment costs much less than replacing an entire sheet.
Tools and Materials
- Rigid foam insulation
- Foam-compatible construction adhesive
- Caulk gun or approved dispensing tool
- Utility knife or insulation saw
- Straightedge and tape measure
- Pencil or marker
- Clean rags and vacuum
- Temporary braces, weights, or painter’s tape
- Foam-board screws, cap nails, washers, or furring strips when required
- Gloves and eye protection
- Ventilation appropriate for the adhesive
A respirator may also be required by the adhesive’s safety instructions or by project conditions. Read the product label and safety data before opening the container, not after the room begins smelling like an experimental tire factory.
How to Stick Foam Insulation to Wood Step by Step
1. Confirm the Assembly Is Appropriate
Before cutting anything, determine whether the foam will be installed indoors, outdoors, overhead, between framing members, or over structural sheathing. Check the insulation manufacturer’s instructions and local building requirements.
Foam plastic used inside a building often needs an approved thermal or ignition barrier. Gypsum board is commonly used, but the required protection depends on the location, occupancy, product listing, and applicable code. Exposed foam should not be treated as a finished interior surface merely because it looks clean and modern.
2. Make Sure the Wood Is Dry
Do not cover wet, moldy, or actively leaking wood with foam. Wood and other moisture-sensitive materials should be kept dry because trapped moisture can contribute to mold, decay, and adhesive failure.
Repair roof, plumbing, flashing, or condensation problems first. When there is uncertainty, check the wood with a moisture meter and follow the limits stated by the adhesive, insulation, or building-system manufacturer.
3. Clean the Surface
Remove dust, sawdust, loose paint, oil, wax, frost, and construction debris. Vacuum plywood and OSB rather than merely sweeping them with your sleeve. Adhesive bonds to the surface it touches, so a layer of sawdust creates a strong bond to sawdust and a remarkably weak bond to the wall.
Lightly sand glossy painted wood if the adhesive manufacturer permits it. Remove deteriorated coatings instead of bonding over them.
4. Measure and Dry-Fit the Foam
Measure the area carefully and cut the foam with a sharp utility knife, handsaw, or insulation knife. Dry-fit every panel before applying adhesive. The board should lie flat without excessive force, rocking, or large unsupported gaps.
Leave any required expansion space at adjoining materials. Plan joints so they can be taped, sealed, or covered according to the wall or roof design.
5. Test the Adhesive
Apply a small amount to a scrap of foam and a scrap of the same wood. Allow it to sit long enough to reveal softening, pitting, discoloration, facer separation, or poor curing. This test is especially important when using an unfamiliar product or faced insulation.
6. Apply the Correct Bead Pattern
Load the cartridge into a caulk gun and cut the nozzle to the bead size required by the label. Apply the adhesive in the manufacturer’s specified pattern. This is often a series of evenly spaced beads rather than a thick coating across the entire board.
Do not improvise by emptying half a tube into several heroic blobs. Oversized deposits can cure slowly, create high spots, waste adhesive, and prevent the panel from lying flat.
Keep adhesive away from panel edges when squeeze-out would interfere with joint tape, sealant, or finished trim. Some products have a short open time, so work on one panel at a time.
7. Position and Press the Board
Set the panel against the wood in its final position. Press across the entire surface rather than only at the corners. A clean scrap of plywood can help distribute pressure without denting the foam.
Some adhesives instruct the installer to press the panel in place, pull it away briefly, and then reposition it. Others require immediate placement without disturbance. Follow the product label rather than combining instructions from two different tubes found in the garage.
8. Brace the Panel
Use temporary braces, battens, weights, or another non-damaging support until the adhesive develops enough strength. Painter’s tape may hold a small panel, but it is rarely sufficient for a full sheet on a wall and should never be trusted as the sole support for an overhead installation.
Avoid crushing the foam with concentrated pressure. Use a flat board between the brace and insulation to spread the load.
9. Add Mechanical Fasteners When Required
For walls, ceilings, exterior sheathing, and other permanent building applications, install the specified cap nails, screws with insulation washers, furring strips, or cladding attachment system. Fasteners should penetrate framing or the approved structural substrate by the required amount.
Adhesive may reduce movement while panels are being fastened, but it does not automatically replace a tested fastening schedule. Wind loads, gravity, siding weight, temperature movement, and fire requirements all matter.
10. Allow the Adhesive to Cure
Respect the product’s working time and cure time. Low temperatures, high humidity, dry air, nonporous facers, and thick adhesive beads can change curing behavior. Do not install heavy finishes or remove braces early simply because the exposed edge feels dry.
Should You Seal Foam-Board Seams?
Bonding the board to wood does not automatically create an air barrier. Air can still move through joints, edges, penetrations, and transitions to nearby materials.
When the foam is intended to function as part of an air-control or water-control layer, use compatible sheathing tape, flashing, gasket, sealant, or spray foam at the locations specified by the assembly design. Seams must be clean and dry before taping. Roll pressure-sensitive tape firmly with a manufacturer-approved roller.
Do not assume that every foil tape, duct tape, or leftover roll from a moving box will provide a durable building-envelope seal. Tape and sealant compatibility matters just as much as adhesive compatibility.
Common Mistakes and How to Fix Them
The Adhesive Melts the Foam
Remove the damaged material and stop using the product. Replace the affected foam and select an adhesive explicitly approved for that insulation type. Do not attempt to fill deep solvent damage with more adhesive.
The Board Slides Down the Wall
The adhesive may have weak initial grab, the bead may be too thick, the surface may be dusty, or the panel may not have been braced. Reposition the board within the allowed working time and add temporary support. If the adhesive has skinned over or cured, remove it as directed and start again.
The Panel Will Not Lie Flat
Check for bowed wood, oversized adhesive blobs, protruding fasteners, or a warped foam sheet. Correct the substrate and use distributed pressure. Do not force a stiff board over a serious framing defect and hope the glue negotiates a peace agreement.
The Adhesive Stays Soft
Some water-based adhesives cure slowly between nonporous materials, while moisture-curing polyurethane products need appropriate conditions. Verify temperature, humidity, bead thickness, and substrate requirements. Contact the manufacturer when the product remains uncured beyond its published range.
The Foam Pulls Away After Several Days
Possible causes include wet wood, incompatible facing, inadequate surface preparation, early loading, temperature movement, or failure to use required fasteners. Remove loose sections and correct the cause rather than adding random screws through compromised material.
Where Adhesive Alone Is Not Enough
Use mechanical attachment or a listed installation system when foam is installed:
- On ceilings or other overhead surfaces
- On exterior walls exposed to wind loads
- Beneath siding, stucco, roofing, or heavy finishes
- Over uneven or questionable substrates
- Where the manufacturer specifies fasteners
- Where code requires a tested wall, roof, or fire assembly
Exterior continuous insulation also affects window flashing, wall bracing, cladding attachment, drainage, and drying potential. A whole-wall design should be reviewed before foam is added to an existing assembly. A board that feels secure when pushed by hand has not necessarily been engineered for a thunderstorm.
Practical Experience Notes: Lessons from Foam-to-Wood Projects
The most common lesson from small foam-insulation projects is that preparation takes longer than gluing, and that is perfectly normal. Consider an attic-access panel made from plywood. The job appears simple: cut foam, squeeze adhesive, press. In practice, the plywood may be dusty, the foam may interfere with trim, and the access panel may no longer close after insulation is added. Dry-fitting first reveals those problems while they are still easy to fix. Once adhesive is involved, every adjustment becomes stickier, literally and emotionally.
Another familiar situation occurs when insulating a workshop wall. A full sheet of foam is placed against plywood, but it bows outward in the center. The instinctive response is to press harder or add more adhesive. The real problem may be a slightly warped sheet or uneven sheathing. A temporary plywood batten spanning the panel distributes pressure far better than several narrow braces. It also reduces the chance of denting the insulation. When mechanical fasteners are part of the approved system, installing them while the board is properly aligned provides a much more dependable result than relying on adhesive grab alone.
Adhesive temperature also causes surprises. A tube stored in a cold garage can be extremely difficult to dispense, and a cold panel may not bond as expected. Bringing materials into the permitted application-temperature range before work begins makes the bead more consistent and the installation less frustrating. This does not mean placing adhesive beside a heater or inventing a home-built warming chamber. It means following the storage and application temperatures printed by the manufacturer.
One of the easiest mistakes is confusing gap-filling spray foam with foam-panel adhesive. Both may come in pressurized cans, and both contain the word “foam,” which is the home-improvement equivalent of two strangers wearing identical jackets. Ordinary expanding foam is excellent for sealing certain cracks and penetrations, but it may expand enough to lift a rigid panel away from the wood. Low-expansion adhesive foam is formulated for bonding and controlled application. Reading the full product name prevents an impressive but unwanted three-dimensional wall.
Moisture is another lesson that often arrives late. Covering damp wood may hide the stain, but it does not solve the leak. In a basement, crawl space, or exterior wall, the foam can slow drying in one direction. That may be beneficial in a properly designed assembly, but dangerous when rainwater, ground moisture, or plumbing leakage is already present. Successful projects begin by identifying how the assembly gets wet and how it will dry. The adhesive is only a connector; it is not a waterproofing strategy.
Finally, neatness improves performance. Straight cuts reduce gaps. Clean surfaces improve adhesion. Consistent beads help panels sit flat. Sealed seams support air-control goals when the assembly is designed for them. Proper fasteners keep the board secure after the adhesive ages. None of these steps is exciting enough to star in a renovation television montage, but together they separate a durable installation from a foam sheet that falls off during the first dramatic temperature swing.
Final Thoughts
The best way to stick foam insulation to wood is to identify the foam, select an adhesive specifically approved for both materials, clean and dry the substrate, dry-fit the panel, apply the recommended bead pattern, and brace it throughout the required cure period.
For permanent walls, ceilings, roofs, or exterior systems, use the mechanical fasteners and protective coverings required by the product instructions and local code. Foam-safe adhesive provides a bond; good building practice provides durability.
Take the extra few minutes to read the label and test a scrap. It is not glamorous, but neither is explaining why your insulation has melted into abstract art.













