
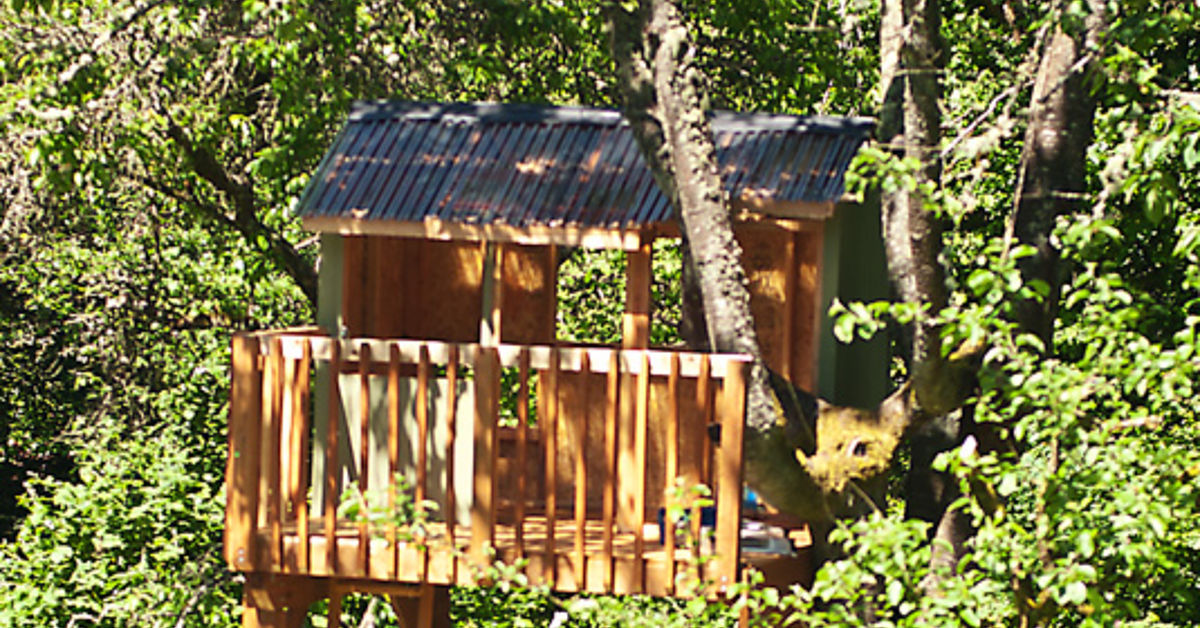
A treehouse is part woodworking project, part backyard architecture, and part childhood dream with a tool belt. Done well, it becomes a shady reading room, a pirate command center, or the only household meeting space where snacks are accepted as legal tender. Done poorly, it becomes an expensive collection of crooked boards arguing with a tree.
Building a treehouse requires more than attaching lumber to the nearest sturdy-looking trunk. A tree is a living structure that grows, sways, absorbs water, responds to wounds, and changes over time. Your design must accommodate that movement while supporting the platform, walls, roof, occupants, furniture, and whatever mysterious rocks children decide to store inside.
This guide explains how to plan a safe DIY treehouse, evaluate the site, protect the host tree, choose appropriate materials, frame the platform, reduce fall hazards, and maintain the finished structure. It is intended for practical planning, not as a replacement for site-specific advice from a certified arborist, structural engineer, or local building official.
Start With Permission, Not Plywood
Before buying lumber, contact your local building or zoning department. Treehouses may be regulated as play structures, decks, accessory structures, or small buildings. Requirements can depend on the platform height, enclosed area, electricity, plumbing, property-line setback, neighborhood rules, and whether the tree is protected, shared, or located in a public right-of-way.
Rules are not consistent across the United States. For example, some jurisdictions exempt very small residential treehouses, while others regulate attachments to street or heritage trees. Portland requires permits for attaching objects to street trees, and Seattle regulates substantial work involving trees in the public right-of-way. The District of Columbia provides a permit exemption for certain treehouses or playhouses no larger than 36 square feet, illustrating why local verification matters more than advice from an enthusiastic stranger holding a circular saw.
Questions to Ask Before Designing
- Is a building, zoning, or tree-work permit required?
- How far must the structure remain from property lines?
- Are there limits on platform height or enclosed floor area?
- Does your homeowners association restrict elevated structures?
- Could the treehouse overlook a neighbor’s private space?
- Will your insurer cover the structure and its intended use?
A five-minute call can prevent a five-week disagreement involving inspectors, neighbors, and the phrase “unauthorized elevated clubhouse.”
Choose a Healthy Tree and a Sensible Location
The best treehouse tree is mature, vigorous, structurally sound, and growing in stable soil. It should not have significant cavities, fungal growth near the base, peeling bark, major dead limbs, storm cracks, a split trunk, exposed damaged roots, or a pronounced lean that has recently changed.
Hardwoods such as oak, maple, and beech are often considered suitable because many mature specimens have strong wood and substantial branching. However, species alone cannot prove that an individual tree is safe. Internal decay may be invisible, and an impressive-looking trunk may have a compromised root system. A certified arborist can evaluate the tree’s health, structure, attachment points, surrounding soil, and likely response to construction.
Avoid Problem Locations
Do not build near utility lines, over septic components, above a steep slope, beside a busy road, or where occupants could fall onto rocks, fencing, concrete, garden edging, or outdoor equipment. Leave room around the tree for construction access without repeatedly driving, stacking lumber, or mixing concrete over the root zone.
Tree roots commonly spread through a broad, shallow area extending at least beneath the canopy. Soil compaction, excavation, grade changes, and root cutting can reduce the tree’s access to air and water while weakening its stability. Protect the ground around the tree throughout the project rather than turning the root zone into a temporary parking lot for wheelbarrows and unearned confidence.
Design the Treehouse Before Building It
A detailed drawing is not excessive. It is the difference between a planned structure and a lumber-based improvisational performance.
Draw the platform from above and from the side. Mark the tree trunks, branches, beams, joists, posts, flooring, railing, access opening, roof, and intended attachment points. Record actual measurements instead of estimating them from the kitchen window. Trees have a habit of looking conveniently symmetrical from far away.
Keep the Platform Modest
A lower, lighter treehouse is generally easier to support, enter, inspect, and maintain. It also reduces potential fall distance. Avoid enlarging the platform simply because one branch “looks like it could handle it.” Every additional foot adds lumber, fasteners, wind exposure, live load, and leverage against the support system.
Separate the essential structure from decorative features. Build a reliable platform, guard system, and access route first. Add shutters, signs, telescopes, and dragon-warning systems only after the important parts are secure.
Plan for Tree Movement and Growth
A tree grows outward and moves in the wind. Two trunks may sway in different directions, and a rigid beam locked between them can experience substantial stress. Designs spanning multiple trees often require engineered sliding or flexible connections that allow controlled movement.
Leave appropriate clearance around trunks and branches passing through floors, walls, or roofs. Do not build tight collars around living wood. Rope, wire, chain, and narrow straps can become embedded or create girdling pressure as the tree expands, damaging the living tissues responsible for transporting water and nutrients.
Select Outdoor-Rated Materials
A treehouse lives outdoors every hour of the year. Lumber, panels, connectors, screws, finishes, and roofing materials must tolerate moisture, temperature changes, ultraviolet exposure, and insects.
Lumber and Panels
Use structurally graded lumber appropriate for exterior exposure. Pressure-treated lumber is commonly used for beams, joists, posts, and other components vulnerable to moisture. Naturally durable species may be suitable for decking, siding, trim, or railings when properly selected and maintained.
Modern residential treated lumber typically uses preservatives different from the chromated copper arsenate formulations once common in decks and playgrounds. The EPA notes that manufacturers voluntarily canceled virtually all residential uses of CCA at the end of 2003. New residential construction should use products currently approved and labeled for the intended application. Never repurpose old utility poles, railroad ties, or unidentified treated lumber for a children’s play structure.
Fasteners and Connectors
Use structural fasteners rather than drywall screws, general-purpose interior screws, or whatever happens to be rattling around in a coffee can. Fasteners must be rated for the expected load, exterior exposure, lumber treatment, and connector being used.
Copper-based wood preservatives can accelerate corrosion in incompatible metal hardware. Depending on the treatment level and environment, appropriate options may include hot-dip galvanized or stainless-steel connectors and fasteners. Follow the lumber label, fastener manufacturer, connector manufacturer, approved plans, and local code. Do not mix metals casually, because incompatible materials can create corrosion problems even when every individual component looked shiny on the store shelf.
Build a Stable Support System
The platform is the structural heart of the treehouse. Walls and roofs may attract compliments, but the platform quietly performs the useful job of preventing gravity from winning.
Tree-Supported, Post-Supported, or Hybrid?
A tree-supported design transfers much of the load into one or more trunks using purpose-designed attachment hardware. A post-supported design places most loads on footings and posts, allowing the structure to surround the tree without relying heavily on it. A hybrid combines tree attachments with independent posts.
For many residential projects, independent posts or a carefully engineered hybrid design can simplify load management and reduce the number of penetrations into the tree. Footings must still comply with local requirements for soil conditions, frost depth, drainage, uplift, and lateral stability.
Treehouse attachment bolts and engineered brackets are not interchangeable with ordinary lag screws. The correct attachment size, embedment, spacing, and load capacity depend on the tree, platform geometry, hardware system, and expected forces. This is one area where professional design is considerably cheaper than structural failure.
Frame the Platform Carefully
- Establish a reference level. Mark the planned platform elevation and verify it from several directions.
- Install the primary supports. Follow the engineered plan and hardware specifications precisely.
- Add beams and joists. Confirm spacing, bearing, blocking, and connector requirements.
- Check for square. Measure both diagonals before fastening the frame permanently.
- Install temporary bracing. Keep the frame stable while flooring, railings, and permanent braces are added.
- Inspect every connection. Look for missing fasteners, split lumber, poor bearing, and hardware that is not fully seated.
Wood strength, moisture behavior, grade, span, loading, and connection design all affect structural performance. Generic deck tables can provide useful background, but a treehouse is not automatically equivalent to a conventional residential deck attached to a stationary building.
Install Decking, Railings, and Safe Access
Install deck boards with appropriate drainage gaps and corrosion-resistant fasteners. Avoid large openings around the tree, but preserve enough clearance for growth and movement. Cover unavoidable gaps with flexible details that do not bind the trunk or create pinch points.
Guard the Open Sides
Every exposed platform edge should have a sturdy guard system designed for the intended occupants and local requirements. Avoid horizontal rail patterns that invite climbing. Close off dangerous openings, cap protruding bolts, round sharp edges, and remove snag points.
CPSC home-playground guidance emphasizes guardrails on elevated platforms, inspection for protruding hardware, and careful control of openings that could trap a child’s head or body. Its checklist advises that entrapment-prone spaces measure less than 3.5 inches or more than 9 inches. These recommendations are valuable safety references, although local residential codes and professional plans may impose additional requirements.
Choose an Age-Appropriate Entrance
Stairs with handrails are usually easier to use than a vertical ladder. An angled ladder with wide, evenly spaced rungs may work for older children, provided it is securely attached and ends at a protected opening. Avoid rope ladders as the only route in or out; they are difficult for young children, unstable during emergencies, and especially entertaining to anyone who is not carrying a snack tray.
Use a self-closing gate or protected opening where practical. Make sure adults can reach the platform quickly for supervision, maintenance, or rescue.
Create a Safer Landing Area
Grass and bare soil may feel soft under ordinary footsteps, but they are not reliable impact-absorbing surfaces. Remove rocks, roots, edging, stored tools, exposed concrete, and other hard obstacles from the potential fall zone.
CPSC guidance for home playgrounds recommends protective surfacing extending at least 6 feet in all directions from most play equipment. Its home checklist recommends at least 9 inches of wood chips, mulch, or shredded rubber for equipment up to 7 feet high, with regular maintenance because loose fill settles and moves. Safety-tested unitary surfacing may also be used according to its rated critical height and installation instructions.
Protective surfacing reduces injury risk; it does not make excessive height harmless. The best combination is a low platform, secure guards, supervised use, controlled access, and a well-maintained landing surface.
Add Walls and a Weather-Resistant Roof
Walls can be framed like lightweight exterior partitions, but keep weight under control. Open rail sections, partial walls, or screened openings may provide better ventilation and visibility than a fully enclosed miniature cabin.
Use lightweight roofing materials, adequate slope, drip edges, and flashing aroundnot tightly againsttrunks or branches. Direct runoff away from walking surfaces and the tree’s base. Avoid trapping leaves against wood, because damp leaf piles are charming only until they become compost with structural ambitions.
If electricity is desired, use a permitted outdoor-rated system installed by a qualified electrician. Battery-powered or solar lighting is often simpler. Do not run household extension cords permanently through the yard or attach cables tightly around the tree.
Inspect and Maintain the Treehouse
A treehouse is not finished forever on opening day. It should be inspected before each play season, after major storms, and whenever the tree or structure appears to have changed.
- Check the tree for cracks, dead limbs, decay, fungi, leaning, and root disturbance.
- Inspect bolts, brackets, joist hangers, braces, posts, and footings.
- Look for corrosion, loosened hardware, split lumber, and water damage.
- Confirm that trunks and branches still have room to grow and move.
- Repair loose railings, worn steps, sharp edges, and protruding fasteners.
- Restore displaced protective surfacing beneath and around the platform.
- Remove leaves and debris that hold moisture against the structure.
- Restrict access until storm damage or structural concerns are professionally evaluated.
Construction damage can affect a tree’s stability long after the builders have cleaned up. Changes in drainage, compacted soil, severed roots, and trunk injuries may lead to gradual decline. Regular inspections by an arborist are especially valuable for large, heavily used, or tree-supported structures.
Building A Treehouse: What the Experience Is Really Like
The most common surprise during a treehouse project is that the tree refuses to behave like a square piece of lumber. The trunk curves. Branches emerge at unhelpful angles. Measurements taken at shoulder height mysteriously change when transferred eight feet upward. A board that looked perfectly aligned from the ground may resemble a ski jump once installed.
Consider a typical family build involving a compact platform around a mature backyard tree. The original plan might call for a large enclosed clubhouse with a porch, two windows, a trapdoor, and enough floor space for six children. After measuring the tree, checking setbacks, and speaking with an arborist, the family discovers that a smaller post-supported platform would be safer and easier to maintain. The dream is not canceled; it simply loses a few hundred pounds and an unnecessary second story.
The first productive day is often spent doing work that does not look productive. The builders measure trunk positions, locate underground utilities, mark the root-protection area, revise the drawing, and organize hardware. No dramatic walls rise into the sky. Nobody posts a heroic completion photo. Yet this planning day may prevent more mistakes than any later afternoon with power tools.
Platform framing creates the first thrilling moment. Once the outer frame is level and temporarily braced, the project finally resembles a place rather than a lumber delivery. This is also when small errors become obvious. A support may interfere with a branch. A planned ladder opening may be too close to the trunk. The railing posts may need to be repositioned. Experienced builders expect revisions and resist the urge to solve every conflict with a larger screw.
Working at height changes everything. A simple cut becomes slower when the board must be lifted, aligned, clamped, and supported safely. Tools develop an intense desire to fall. Pencils disappear into alternate dimensions. Precutting components on the ground, using tool lanyards where appropriate, and maintaining a controlled work area make the process calmer. Children can help with painting signs or assembling ground-level components, but they should remain away from overhead work, cutting operations, and unfinished platforms.
Another lesson arrives during the first rain. Water reveals every lazy detail. It finds flat roof sections, unsealed end grain, poorly placed joints, and debris-catching corners. Builders who slope surfaces, preserve drainage gaps, flash roof transitions, and coat exposed wood spend less time chasing leaks later.
The finished treehouse also teaches families how children actually play. A complicated rope feature may be ignored, while a simple shelf becomes a restaurant counter, science lab, and stuffed-animal hospital. The most popular feature is often not the most expensive one. A chalkboard, pulley bucket, reading cushion, or small observation window can inspire more imaginative play than an elaborate decorative tower.
Finally, ownership becomes an ongoing ritual. Each spring, an adult checks the tree, tightens approved connections where required, cleans the roof, examines the railings, and refreshes the landing surface. Children may complain that inspection delays the grand reopening by twelve minutes, but maintenance is what allows the treehouse to remain a happy memory instead of becoming a cautionary photograph.
Conclusion
Building a treehouse successfully begins with restraint. Choose a healthy tree, confirm local rules, protect the roots, keep the platform low and light, use compatible structural hardware, and design every opening and walking surface with falls in mind. A professional arborist can evaluate the living support, while an engineer or experienced builder can help resolve structural questions that generic online plans cannot answer.
The reward is more than an elevated room. It is a family project that combines problem-solving, craftsmanship, outdoor time, and imagination. Build it thoughtfully, inspect it regularly, and leave enough flexibility for both the tree and its young occupants to grow.
Note: This article provides general educational guidance. Tree condition, soil, climate, hardware, loads, and building regulations vary. Obtain site-specific professional advice before constructing or allowing anyone to use an elevated structure.










