
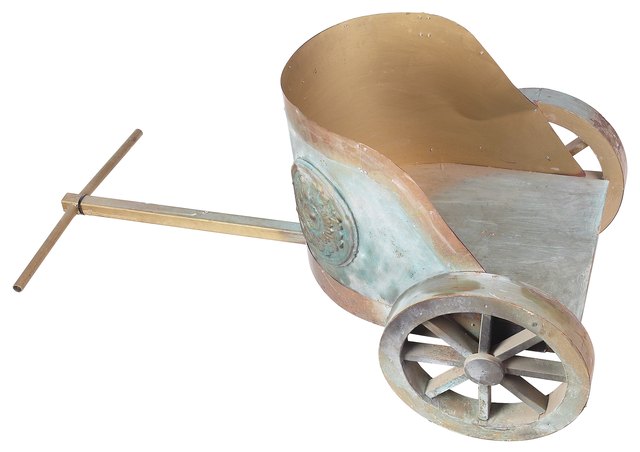
Some craft projects sit politely on a shelf. A homemade chariot rolls across the floor, transports action figures, stars in dramatic races, and occasionally crashes into a table leg with the dignity of an ancient emperor. That makes a chariot craft an excellent project for children who enjoy building, decorating, experimenting, and imaginative play.
This guide explains how to make a sturdy cardboard chariot with working wheels using inexpensive household materials. The basic version is suitable for elementary-age children with adult supervision, while simplified and advanced variations make it easy to adapt the project for preschoolers, classrooms, homeschool lessons, history units, or rainy afternoons.
What Is a Chariot?
A chariot is a lightweight, horse-drawn vehicle that usually has two wheels, a standing compartment, and a long pole connecting the vehicle to the horses. Chariots appeared in several ancient civilizations and were used for transportation, ceremonies, hunting, warfare, and racing.
Historical examples varied by culture and purpose. Egyptian chariots often had a small cab, two rear-mounted wheels, and a long central pole attached to a team of horses. Ancient Greek and Roman artwork also shows teams of two or four horses pulling chariots, sometimes in athletic competitions or ceremonial scenes.
A children’s chariot craft does not need to be an exact archaeological model. The goal is to borrow the recognizable featuresround wheels, an open passenger area, a front rail, reins, and horseswhile giving children room to create their own designs.
Why Make a Chariot Craft?
This activity combines art, engineering, history, and play in one manageable project. Children practice measuring, tracing, cutting, gluing, aligning parts, and solving problems when the wheels refuse to cooperate. Those tasks support hand strength, coordination, and fine motor development.
Open-ended decorating also allows children to make meaningful choices. They can select colors, invent symbols, design armor, name the horses, and decide whether the finished chariot belongs to a racer, a royal messenger, a mythological hero, or a hamster with unusually grand ambitions. Creative projects that involve painting, gluing, cutting, and building can support fine motor skills, language, problem-solving, and imaginative expression.
Skills Children Can Practice
- Planning and following a sequence
- Recognizing circles, rectangles, and curved shapes
- Measuring and comparing wheel sizes
- Understanding wheels, axles, balance, and friction
- Using art materials to express original ideas
- Learning vocabulary related to ancient history
- Testing a design and improving it after failure
Materials for a Cardboard Chariot
Most supplies can be found in a recycling bin, classroom cabinet, or that kitchen drawer where tape, mystery batteries, and three lonely birthday candles live together.
Basic Materials
- Corrugated cardboard
- Thin cardboard from a cereal or tissue box
- Four identical bottle caps or two large cardboard circles
- One drinking straw
- One wooden skewer, thin dowel, or straight pencil
- White school glue or child-safe craft glue
- Masking tape or clear tape
- Child-safe scissors
- A ruler
- A pencil
- Crayons, washable markers, or tempera paint
- Yarn, ribbon, or string for reins
- Construction paper or cardstock
Optional Decorations
- Craft sticks
- Foil paper
- Stickers
- Washable glitter glue
- Paper straws
- Feathers
- Pipe cleaners
- Foam shapes
- Small toy figures
- Printed or hand-drawn horses
Important Safety Preparations
Choose art supplies specifically labeled for children. Avoid products carrying warnings such as “Danger,” “Poison,” or “Keep Out of Reach of Children.” Water-based, washable materials are generally better choices for a family craft area than solvent-based paints, permanent adhesives, or aerosol products.
An adult should cut thick cardboard, trim wooden skewers, make axle holes, and operate any craft knife or glue gun. A low-temperature glue gun may speed up adult assembly, but children should use white school glue or another age-appropriate adhesive whenever possible. The U.S. Consumer Product Safety Commission advises close supervision around sharp tools, heated equipment, and materials that may create small parts. The American Academy of Pediatrics also recommends choosing child-appropriate art products with clear safety labeling.
Bottle caps, beads, short straw pieces, and other detachable components can be choking hazards. Keep them away from children younger than three and from any child who still places objects in the mouth.
How to Make a Chariot Craft for Children
Step 1: Draw a Simple Plan
Before cutting anything, ask the child to sketch the chariot. The drawing does not need to impress an architect. It only needs to show the body, wheels, front, back, and horse connection.
Discuss a few design questions. Will the chariot carry one figure or two? Should its sides be high or low? Will it have a rounded front like a historical racing chariot or a rectangular shape that is easier to construct?
Step 2: Cut the Chariot Floor
Cut a rectangle of corrugated cardboard measuring approximately 5 by 7 inches. This will be the floor and main chassis. For a larger toy figure, use a 7-by-10-inch rectangle.
Corrugated cardboard is useful because its layered structure is stronger than a single sheet of paperboard. Try to keep the floor flat. A warped base may cause the chariot to lean as though its driver has taken a very sharp turn.
Step 3: Build the Passenger Compartment
Cut one long strip of thin cardboard approximately 3 inches high. Bend it gently into a shallow U shape and attach it around the front and sides of the floor. Leave the back open so a toy passenger can enter easily.
Use masking tape to hold the wall in place while the glue dries. Add a second strip inside the compartment if the cardboard feels weak. Children can also glue craft sticks vertically along the sides to create decorative rails.
Step 4: Make the Axle Holder
Cut a straw so it is slightly narrower than the chariot floor. Tape or glue the straw underneath the rear portion of the base. It must run straight from one side to the other.
The straw acts as a bearing or sleeve through which the axle can rotate. Push a wooden skewer through the straw and check that it turns freely. If it sticks, use a wider straw, straighten the skewer, or remove tape that may be squeezing the straw.
This wheel-and-axle arrangement is similar to systems used in many cardboard vehicle activities. Keeping the axle straight, the wheels parallel, and friction low helps a model roll more smoothly.
Step 5: Create Two Matching Wheels
For a simple chariot, use two identical bottle caps. An adult can carefully make a centered hole in each cap. Slide one wheel onto each end of the axle and secure it with a small piece of reusable adhesive putty, tape, or modeling clay.
To make cardboard wheels, trace the same cup or lid twice on thick cardboard. Cut out both circles and mark the exact center of each. Adult assistance is usually needed to pierce the center holes.
Matching wheels are important. A chariot with one large wheel and one small wheel will turn toward the smaller side. That can be a useful engineering experiment, although it is less useful when the driver is trying to reach the finish line rather than a nearby chair leg.
Step 6: Add the Front Pole
Glue two craft sticks together end to end, or use a paper straw as the chariot pole. Attach one end beneath the center front of the chariot. The pole should extend several inches forward.
For extra strength, place a small rectangle of cardboard over the joint and tape it securely. This reinforcement prevents the pole from tearing away when children pull the finished model.
Step 7: Make the Horses
Draw two horse profiles on cardstock and cut them out. Children who prefer an easier approach can use printed horse outlines, toy horses, or simple shapes made from construction paper.
Strengthen paper horses by gluing each one to thin cardboard. Add folded cardboard supports beneath their feet so they can stand. Position the horses side by side in front of the chariot pole.
Connect the horses with a small crossbar made from a craft stick. Tape the center of the crossbar to the end of the chariot pole. This arrangement gives the model a recognizable horse-drawn appearance without requiring a complicated harness.
Step 8: Add Reins
Cut two pieces of yarn or ribbon. Attach one end of each rein near a horse’s neck or harness. Place the loose ends inside the passenger compartment so the charioteer can “hold” them.
Keep the reins short enough that they cannot wrap around the axle. Long string and spinning wheels are natural enemies, much like cats and closed bathroom doors.
Step 9: Decorate the Chariot
Now the engineering department can hand the project to the royal decorating committee. Paint the body, draw patterns, add a number for a racing chariot, or cover selected areas with foil for a metallic effect.
Children might choose historically inspired geometric borders, suns, wings, laurel leaves, horses, shields, or lightning bolts. They can also invent a completely original theme such as a space chariot, rainbow chariot, dinosaur chariot, or superhero rescue vehicle.
Step 10: Let Everything Dry
Place the craft on a flat surface until all glued connections are fully dry. White glue may require several hours. Avoid testing the chariot too early because a loose wheel or damp side panel can turn a triumphant first run into a tiny transportation disaster.
Step 11: Test and Improve the Design
Roll the chariot gently across a smooth floor or tabletop. Observe what happens instead of immediately repairing everything for the child.
Ask useful questions: Are the wheels rubbing against the body? Is the axle crooked? Is one wheel loose? Is the front pole touching the ground? Encourage the child to suggest a change, test it, and compare the results.
How to Fix Common Chariot Problems
The Wheels Do Not Turn
Check whether glue or tape has entered the straw. Make sure the skewer can rotate inside it. The wheels should be attached to the axle, not glued directly to the cardboard body.
The Chariot Turns Sideways
Confirm that both wheels have the same diameter. Check that the axle is straight and positioned at a right angle to the body. Even a small alignment error can steer the model sideways.
The Wheels Wobble
The axle holes may be too large or off-center. Add a small piece of modeling clay, foam, or rolled tape between the axle and wheel. Cardboard wheels can also be reinforced with a second matching circle.
The Chariot Tips Backward
Move the axle slightly closer to the center of the body or add a small cardboard support beneath the front. A heavy toy passenger may also need to stand farther forward.
The Horses Fall Over
Add folded triangular supports behind their legs or mount the horses on a shared cardboard platform. Toy horses are another sturdy option for children who care more about racing than paper engineering.
Easy Chariot Craft Variations
Preschool Paper-Plate Chariot
Give each child a pre-cut chariot body made from cardstock. Glue on two paper circles as decorative wheels rather than functional ones. Add paper horses, yarn reins, stickers, and washable coloring materials. This version avoids skewers and other small mechanical components.
Roman Racing Chariot
Give the chariot a curved front, a racing number, and two or four horses. Create a paper driver wearing a simple tunic and helmet. Children can build a track from masking tape and stage slow, hand-pushed races.
Ancient Egyptian Chariot
Use gold, red, blue, and green decorations. Add geometric patterns and a quiver made from a small rolled piece of paper. Explain that real historical chariots should be studied through reliable museum sources rather than movies, which occasionally treat history as a suggestion.
STEM Challenge Chariot
Provide groups with the same materials but no fixed design. Challenge them to build a chariot that rolls three feet, carries a small figure, or survives a gentle ramp test. Have students record their designs, problems, modifications, and final results.
Recycled-Materials Chariot
Use cereal boxes, shipping cardboard, bottle caps, paper tubes, and leftover ribbon. This variation encourages children to see ordinary packaging as a building material rather than instant trash.
Turn the Craft Into a Learning Activity
Explore History
Compare chariot images from ancient Egypt, Greece, Rome, China, and other cultures. Ask children to identify similarities and differences in wheel placement, passenger space, decoration, horse teams, and intended use.
Explore Simple Machines
A wheel and axle form a simple machine. In the model, the straw holds the axle while allowing it to rotate. Children can experiment with wheel size, axle thickness, weight, and surface texture to see how each variable changes the motion.
Practice Mathematics
Measure the body, calculate wheel diameter, compare distances, or time several test runs. Older students can create a table showing which design traveled farthest.
Encourage Storytelling
Ask the child to name the chariot, horses, passenger, and destination. A short story might describe a race, royal parade, rescue mission, or journey through a mythical kingdom. The craft becomes more memorable when it belongs to a larger imaginary world.
Experiences and Lessons From Making Chariot Crafts With Children
The first lesson adults usually learn is that children are not especially interested in producing an exact copy of the sample. An adult may carefully demonstrate a bronze-colored historical chariot, only to watch a child create a purple vehicle with six stars, dragon wings, and a driver named Captain Waffles. That is not a failed history project. It is evidence that the child understood the basic structure and then made independent creative decisions.
Building the wheels is usually the most challenging stage. During early attempts, children may attach the wheels directly to the body because that looks correct while the model is resting on the table. The problem becomes obvious when the chariot refuses to roll. Showing how the axle turns inside a straw creates a satisfying discovery. Children quickly realize that a wheel needs space to rotate and that glue should not touch every available surface.
Another useful experience involves resisting the urge to repair the craft immediately. When a chariot pulls to one side, adults often see the crooked axle within seconds. Instead of silently fixing it, ask the child to push the model again and observe the path. Comparing both wheel sizes or looking underneath the body helps transform a frustrating flaw into an engineering puzzle. The child experiences the full design process: build, test, identify a problem, modify, and test again.
Group projects reveal a different set of lessons. One child may enjoy measuring, another may prefer drawing horses, and another may become deeply committed to applying stickers to every square inch. Assigning flexible roles helps children cooperate without forcing everyone to perform the same task. Rotating responsibilities also prevents one enthusiastic builder from becoming the emperor of the entire cardboard kingdom.
Drying time deserves more respect than it normally receives. Children naturally want to race the chariot the moment the last wheel is attached. Preparing a separate decoration activity while the glue dries can prevent broken joints. Children might design a flag, create a driver, draw a racetrack, or write a nameplate during this pause.
It is also worth preparing extra wheels. Cardboard circles can bend, bottle-cap holes may be off-center, and one wheel will occasionally disappear beneath furniture with astonishing speed. Spare parts keep the activity moving and reduce frustration.
The best finished chariots are not always the neatest ones. A slightly lopsided model may produce a long conversation about history, motion, horses, racing, and ancient technology. It may also inspire hours of pretend play after the formal craft session ends. The real success is not perfect symmetry. It is the moment a child pushes the chariot forward, watches the wheels turn, and announces that the next version will be even faster.
Final Thoughts
Learning how to make a chariot craft for children is less about creating a museum-quality miniature and more about combining imagination with practical problem-solving. Cardboard supplies the structure, a straw and axle create movement, and a pair of paper horses completes the ancient-vehicle theme.
Allow children to participate at every safe stage, including planning, measuring, decorating, testing, and troubleshooting. Adults can manage sharp tools and difficult cuts without taking control of the entire design. A handmade chariot should look as though a child had ideasnot as though a perfectionist adult secretly completed a graduate program in cereal-box engineering.
Once the glue dries, add a passenger, clear a racetrack, and let the chariot roll. Whether it becomes a historical model, a STEM experiment, or a royal vehicle for Captain Waffles, the project offers plenty of opportunities to create, learn, laugh, and try again.










