
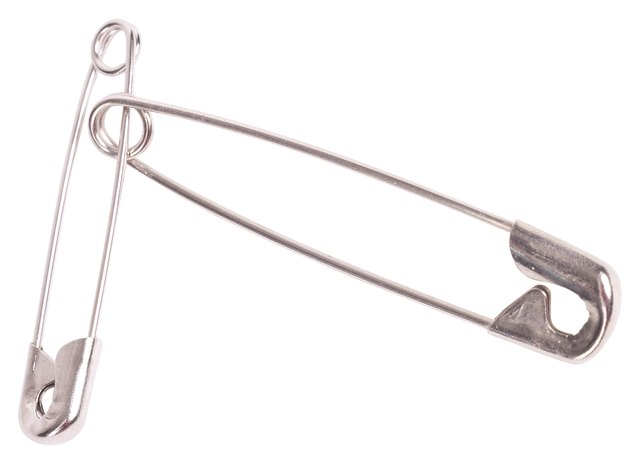
There is something delightfully unexpected about turning ordinary safety pins into a sparkling angel. One minute, the pins are waiting patiently in a sewing drawer; the next, they are wearing beads, spreading wings, and looking ready for a promotion to the top half of the Christmas tree.
Beaded safety pin angels are inexpensive, customizable, and surprisingly beginner-friendly. They can become Christmas ornaments, gift toppers, memorial keepsakes, lapel pins, tabletop decorations, or small handmade gifts for teachers, neighbors, and family members. The project also offers plenty of room for creative choices, from classic white-and-gold angels to rainbow guardians with enough sparkle to be visible from the moon.
This tutorial explains how to make a freestanding bead angel using 12 safety pins, craft wire, and assorted beads. Bead and pin sizes vary between brands, so treat the suggested quantities as a practical starting point rather than a commandment carved into a craft-store tablet.
What Is a Beaded Safety Pin Angel?
A safety pin bead angel is a small three-dimensional figure constructed by filling safety pins with beads and joining them with wire. The beaded pins flare outward to form the angel’s skirt. Additional beads create the torso, wings, head, halo, and sometimes arms.
Traditional patterns often use gold or silver safety pins with pearl-like beads, but there is no requirement that your angel follow a strict celestial dress code. Clear faceted beads create an icy look, pastel beads work beautifully for spring decorations, and birthstone colors can turn the project into a personalized keepsake.
Existing patterns vary considerably. Some use six pins for a compact lapel angel, while others use 11 or 12 pins for a fuller ornament. A common modern arrangement uses 12 beaded pins, separator beads between the pin heads, and flexible 24-gauge wire to build the structure.
Materials and Tools
Essential supplies
- 12 small gold or silver safety pins
- Approximately 36 small beads for filling the pins
- 13 medium round separator beads, about 6 mm
- 22 small beads for the wings, about 3 mm
- 8 small beads for the halo
- 10 small beads and 1 accent bead for the arms, optional
- 1 round bead for the torso, about 6 mm
- 1 wooden, acrylic, or pearl bead for the head, about 10 mm
- 24-gauge craft or jewelry wire
- Ribbon, metallic cord, or fishing line for hanging
Helpful tools
- Wire cutters
- Needle-nose pliers
- Round-nose pliers, optional
- A ruler
- A shallow bead tray or folded towel
- Clear jewelry adhesive, optional
A shallow tray is not glamorous, but neither is crawling under the dining table looking for a runaway 3 mm bead. A piece of felt, a folded towel, or a bead mat will stop most supplies from rolling away.
How to Choose the Right Wire and Beads
Selecting wire
Twenty-four-gauge wire is a useful choice because it is thin enough to pass through many small bead holes while remaining strong enough to support a lightweight ornament. Remember that wire gauge numbers work backward: a lower gauge number indicates thicker wire, while a higher number indicates thinner wire.
Dead-soft or similarly flexible craft wire is easy to manipulate, although it may not retain a rigid shape as firmly as harder wire. Half-hard wire holds loops well but can be more stubborn when several passes must be made through small beads. For this project, flexibility is usually more valuable than heroic stiffness.
Selecting beads
Before filling all 12 pins, test one pin. Open it carefully and slide on the beads you plan to use. The beads should sit neatly along the shaft without preventing the pin from closing completely.
Three 4 mm beads fit many small safety pins, but manufacturing differences matter. Some pins may hold four smaller beads, while others fit only two chunky faceted beads. The correct number is simply the number that fills the pin attractively while allowing it to close securely.
Use beads with consistent hole sizes. If the wire slides through nine beads and then meets one bead that refuses entry like an overly serious nightclub bouncer, set that bead aside rather than forcing it.
Step-by-Step Instructions
Step 1: Fill the safety pins
Open one safety pin and slide three small beads onto the straight shaft. Close the pin securely. Repeat until you have 12 matching beaded pins.
Lay the pins side by side with all clasps facing the same direction. Consistent orientation is important. When the pins are assembled, the beads should face outward rather than turning randomly toward the inside of the skirt.
Step 2: Join the pin heads
Cut a piece of 24-gauge wire approximately 5 to 7 inches long. Thread the wire through the small opening near the clasp of the first safety pin. Add one 6 mm separator bead, followed by another pin.
Continue alternating one pin and one separator bead until all 12 pins are on the wire. Finish with a separator bead so the pattern remains balanced when the circle closes.
Curve the wire into a ring. Pull the ends together until the pins and beads sit snugly beside one another, then twist the wire several times to secure the circle. Trim the excess, leaving a short tail that can be pressed inward with pliers.
The ring should be firm but not crushed. If the wire is pulled too tightly, the pins may overlap. If it is too loose, the skirt will resemble a collapsing patio umbrella.
Step 3: Join the lower ends of the pins
Cut a second piece of wire about 24 inches long. Thread it through the coil or lower opening of every safety pin. Keep the wire centered so roughly equal lengths remain on both sides.
Pull both ends gradually until the lower portions of the pins form a second circle. This creates the flared skirt. Adjust individual pins with your fingers so the spacing looks even.
Do not trim this wire. Its two long ends will be used to construct the torso, wings, head, halo, and arms. This two-ring construction is the structural backbone used in many full-skirt safety pin angel patterns.
Step 4: Add the torso
Slide one 6 mm round bead onto the right wire. Pass the left wire through the same bead from the opposite direction. Pull both ends until the bead rests directly above the skirt.
This crossed-wire method locks the bead into the center and keeps the torso from wandering sideways. Tighten gently and confirm that both wire ends remain approximately equal.
Step 5: Form the wings
String 11 small beads onto one wire end. Bend the beaded section into a loop and twist the wire once or twice near the torso bead. Repeat with 11 beads on the opposite wire.
Shape the loops into wings. They can be rounded, pointed, or slightly swept upward. Aim for matching size rather than laboratory-level perfection. Handmade angels are allowed to have personality.
If you prefer larger wings, add more beads. If the figure will be worn as a lapel pin, use fewer beads so the wings remain compact and do not attempt to take flight during dinner.
Step 6: Attach the head
Twist the two wire ends together two or three times above the wings. Pass both wires upward through the 10 mm head bead, then slide the bead down until it rests against the wings.
A plain wooden bead gives the angel a warm, minimalist appearance. A pearl bead creates a traditional look, while a painted bead can include a face. Use permanent markers or acrylic paint only after testing them on a spare bead.
Step 7: Make the halo
Place eight small beads on one wire. Pass the second wire through the same beads from the opposite direction. Pull until the beads form a ring, leaving a tiny gap between the halo and the head.
Twist the wires beneath the beaded ring and bend the halo backward slightly so it appears to float over the angel’s head. Adjust it carefully with pliers if necessary.
Step 8: Add optional arms
Pass the wire ends back down through the head bead. Guide each wire through the torso bead from opposite sides.
String five small beads onto each wire. Add one contrasting bead between the two strands to represent clasped hands. Cross the wires through the opposite rows of beads and pull gently until two curved arms form across the front.
Twist the remaining wire ends together behind the angel. Trim the excess and use needle-nose pliers to press the cut ends flat against the back.
Step 9: Add a hanging loop
Thread a short piece of narrow ribbon, metallic cord, or clear fishing line through the halo. Tie the ends securely to form a hanging loop.
For a lapel angel, omit the hanging cord and attach a flat pin back with jewelry adhesive. Allow the adhesive to cure completely before wearing or packaging the piece.
How to Keep the Angel Balanced
Set the finished angel on a level surface. If it leans, inspect the bottom wire and redistribute the safety pins. The pin bases should form an even circle, and the torso bead should sit directly above the center.
Uneven wings can also pull the figure sideways. Count the wing beads and compare both loops. A single extra bead can create more weight than expected in such a small ornament.
When hanging the angel, position the cord at the center of the halo. If the loop is tied too far to one side, the angel may spend the holidays looking thoughtfully toward the floor.
Creative Variations
Classic Christmas angel
Combine gold safety pins with white pearl beads, clear crystal-style spacers, and a gold halo. This version looks elegant on traditional red, green, and metallic holiday decorations.
Winter ice angel
Use silver pins, transparent blue beads, frosted white beads, and clear wings. Add a pale blue hanging ribbon for a snowy ornament that does not require shoveling.
Birthstone angel
Choose skirt and wing beads in a recipient’s birthstone color. Add a small letter charm or dated tag to make the angel a personalized birthday, baptism, or memorial gift.
Rainbow angel
Fill each safety pin with a different color, arranging the pins in rainbow order. Use clear separator beads so the skirt remains colorful without becoming visually crowded.
Memorial angel
Select colors associated with a loved one, a favorite flower, or a meaningful cause. Attach a tiny initial charm beneath the hands or write a name and date on the back of the head bead.
Common Problems and Easy Fixes
The safety pins will not close
Remove one bead or replace the beads with smaller ones. Never force the clasp shut, because a bent pin may spring open later.
The skirt is too loose
Untwist the joining wire, remove excess slack, and retwist it. Separator beads should touch the adjacent pins without pushing them into overlapping positions.
The wire keeps breaking
Avoid repeatedly bending the same spot. Metal weakens when it is folded back and forth. If a section becomes kinked, replace it rather than asking it to survive one more dramatic twist.
The halo falls forward
Twist the wire more firmly beneath the halo and angle the ring slightly backward. A small dab of clear jewelry adhesive behind the head can provide additional support.
The beads look uneven
Sort the beads before beginning and remove pieces that differ noticeably in size. Faceted beads from mixed packages sometimes vary enough to affect the alignment of a small project.
Important Safety Tips
This craft contains sharp pins, cut wire ends, and small beads. It is best suited to adults, teenagers, and older children working under close adult supervision. Keep all beads and pins away from babies and toddlers.
The U.S. Consumer Product Safety Commission treats objects small enough to fit within its small-parts test cylinder as potential choking, ingestion, or aspiration hazards for children younger than three. The American Academy of Pediatrics also identifies beads and pins as household objects that can be dangerous if swallowed.
Use new components from a dependable craft or jewelry supplier, especially when making gifts for children. The CDC notes that lead can be present in some jewelry components, particularly items obtained through informal or unregulated sources. These angels are decorations, not toys, and should not be placed where young children can chew or handle them.
Collect dropped beads immediately, store unfinished supplies in closed containers, and point wire cutters away from faces. Poison Control recommends careful supervision and safe storage when children use arts-and-crafts products.
Experience: What I Learned While Making Safety Pin Bead Angels
The first lesson arrived before the angel did: never pour tiny beads directly onto a smooth table. They do not remain in a polite little pile. They scatter with astonishing confidence, and at least one will immediately locate the darkest, least accessible corner of the room. Working over a towel made the second attempt far calmer.
I also learned that bead measurements on packaging tell only part of the story. Two beads both labeled 4 mm may have different hole sizes, shapes, or faceting. My first test pin looked excellent until I tried to close it. The final bead sat directly in the path of the clasp, apparently determined to prevent the project from proceeding. Removing that bead solved the problem, which proved that testing one pin before filling the entire set is not optional busywork. It is a small investment in avoiding 11 identical mistakes.
Pin orientation made a larger visual difference than expected. When two pins faced the wrong direction, the skirt technically held together, but the beads disappeared toward the inside. The angel looked as though part of its dress had been installed backward. Laying every completed pin in the same direction before threading the wire prevented that issue.
The most delicate stage was tightening the two wire circles. Pulling too little left the angel floppy, while pulling too hard caused the pins to stack over one another. The best approach was to tighten gradually, pause, arrange the pins with my fingers, and then tighten again. Crafting sometimes rewards enthusiasm, but this step rewarded the emotional energy of someone slowly adjusting a lampshade.
The wings were the most enjoyable part because they transformed a ring of safety pins into something recognizably angelic. At first, one wing was round and the other looked like a bent comma. Rather than restringing everything, I adjusted the wire near the torso and gently reshaped both loops. Flexible wire allows a surprising amount of correction, provided it is not bent repeatedly in the same place.
Using a wooden head bead also turned out to be helpful. It was lighter than glass, easy to center, and simple to decorate. A tiny face made with an ultra-fine permanent marker looked charming, although practicing on a spare bead was wise. Drawing directly onto the finished angel without practice is an excellent way to discover that eyebrows can express alarm.
For gift-making, assembling several angels in batches was much faster than completing them one at a time. I filled every pin first, prepared the wire pieces, sorted the beads into small containers, and then assembled each angel. This production-line method reduced tool switching and helped keep the bead patterns consistent.
Packaging mattered, too. A finished angel may feel sturdy, but the halo and wings can bend when tossed into a gift bag. A small box lined with tissue paper protected the shape and made the craft look more polished. Adding a handwritten tag with the year turned a simple ornament into a keepsake.
Most importantly, the project did not require flawless jewelry-making skills. Small irregularities made each angel feel handmade rather than manufactured. Once the structure was secure and the wire ends were safely tucked away, slight differences in wing shape or skirt spacing became part of the charm. The finished angels looked best when they were treated not as tiny engineering examinations, but as cheerful gifts made from humble supplies and a reasonable amount of patience.
Conclusion
Learning how to make bead angels with safety pins is a satisfying way to transform basic sewing and jewelry supplies into meaningful handmade decorations. The process is simple: bead the pins, join them into a skirt, build the body with wire, and finish the figure with wings, a head, and a halo.
Once you understand the basic construction, the design can be adapted almost endlessly. Change the colors, adjust the wings, add charms, create a hanging loop, or attach a pin back. Whether the angel becomes a Christmas ornament, a memorial keepsake, or a small gift, it carries the unmistakable appeal of something made by handand possibly rescued from a sewing drawer.
Note: Patterns differ by safety pin length, bead diameter, and wire type. Test the fit of your materials before completing the full set, secure all cut wire ends, and treat the finished angel as a decorative item rather than a toy.










