
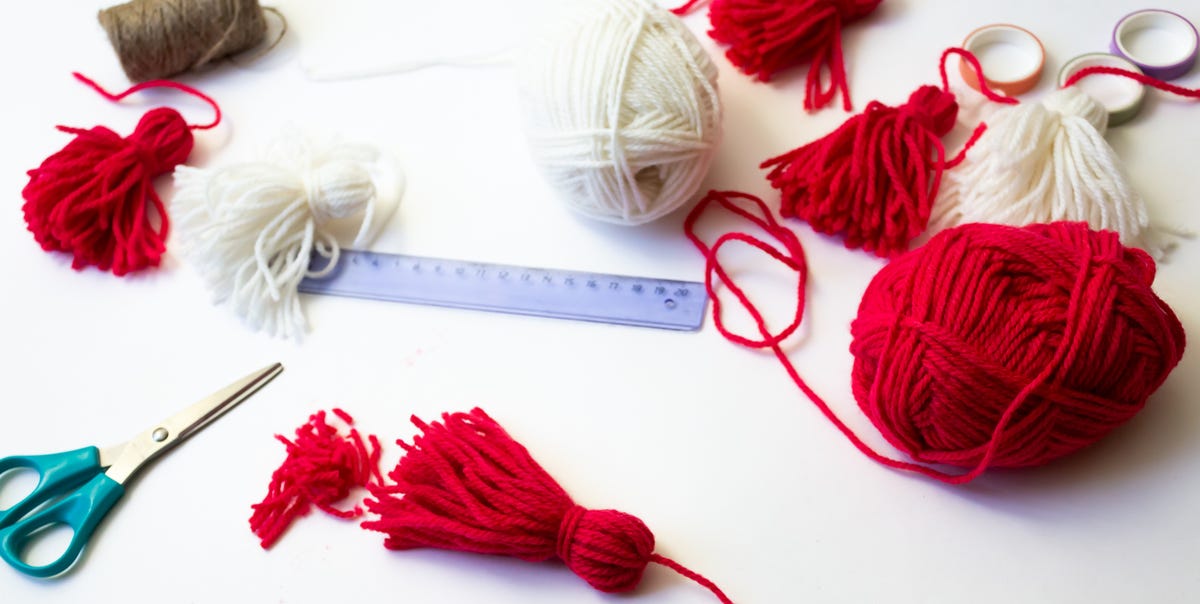
Yarn tassels are proof that impressive craft projects do not always require expensive equipment, advanced skilbellishment in just a few minutes.
This DIY yarn tassel tutorial explains the entire process, from choosing yarn and sizing your template to tying a secure neck and trimming the fringe. You will also learn how to make matching tassels, fix common problems, experiment with colors, and attach your finished creations to blankets, bags, pillows, bookmarks, garlands, and gifts.
Why Learn How to Make Yarn Tassels?
A handmade yarn tassel is inexpensive, customizable, and surprisingly versatile. It can make a plain object feel thoughtfully designed without forcing you to sew an entire quilt or crochet until next Tuesday.
Tassels are especially useful for using leftover yarn. Even short amounts remaining from knitting or crochet projects can become colorful decorations instead of slowly taking over a drawer. You can coordinate them with an existing project, create bold contrasts, or mix several scraps for a playful, multicolored effect.
Finished tassels can be used to decorate:
- Blanket and pillow corners
- Scarves, shawls, and knitted hats
- Zipper pulls and keychains
- Bookmarks and gift tags
- Garlands and wall hangings
- Baskets, curtains, and lampshades
- Handbags, totes, and backpacks
- Wrapped gifts and holiday ornaments
Supplies You Need for DIY Yarn Tassels
The basic supply list is refreshingly short. You probably own most of it already, which is excellent news for both your wallet and the yarn scraps currently living rent-free in your home.
Essential Materials
- Yarn: Any color, fiber, texture, or weight you prefer
- Cardboard: A firm piece cut to the desired tassel size
- Sharp scissors: Fabric or embroidery scissors work especially well
- Ruler: Helpful when making several matching tassels
- Tapestry needle: Optional, but useful for hiding knots and attaching tassels
- Comb: Optional for separating fibers and creating a fluffier finish
What Can You Use Instead of Cardboard?
A piece of cardboard makes a reliable tassel template because it can be cut to an exact measurement. However, you can also wrap yarn around a book, planner, notepad, credit card, fork, or your fingers.
A rigid template is best when you want several identical tassels. Finger wrapping is faster for casual projects, but the size and tension may vary slightly from one tassel to another. That is perfectly acceptable for a whimsical garland and less ideal when four pillow corners are supposed to look like they belong to the same family.
How to Choose the Best Yarn for Tassels
Almost any yarn can become a tassel, but different fibers produce noticeably different results. Consider how the tassel will look, where it will be used, and whether the finished item needs to be washed.
Acrylic Yarn
Acrylic is affordable, widely available, and easy to work with. It holds color well and is a practical choice for garlands, children’s crafts, seasonal decorations, and beginner projects. Some acrylic yarn can also be gently brushed to create a soft, fluffy fringe.
Cotton Yarn
Cotton produces smooth strands with attractive drape and clear definition. It works well for bookmarks, bags, keychains, table linens, and washable home accessories. Because cotton has less natural bounce than wool, the strands tend to hang neatly.
Wool Yarn
Wool creates warm, full tassels that pair beautifully with knitted scarves, hats, and blankets. It may become fuzzy with friction, so check the yarn label before washing or brushing it.
Embroidery Floss and Fine Thread
Embroidery floss is ideal for tiny tassels used on jewelry, bookmarks, napkins, or gift tags. Fine fibers make elegant tassels, although more wraps are generally needed to achieve a full appearance.
Novelty and Textured Yarn
Chenille, metallic, boucle, and variegated yarn can produce dramatic results. Highly textured yarn may be harder to trim evenly, so begin with a simple smooth yarn if this is your first attempt.
How to Determine Yarn Tassel Size and Fullness
The template controls the approximate length of your finished tassel. When yarn is wrapped around a piece of cardboard and cut along one edge, the resulting strands are roughly twice the template length before they are folded. After folding, tying the neck, and trimming the ends, the final tassel will be close to the height of the cardboard.
For example, a 4-inch cardboard template generally creates a tassel slightly shorter than 4 inches after trimming. Cut the template about one-half inch longer than the exact finished length you want if you prefer room for a generous final haircut.
Suggested Wrap Counts
There is no universal wrap count because yarn thickness varies, but the following ranges offer useful starting points:
- Fine yarn or embroidery floss: 40 to 80 wraps
- Sport or lightweight yarn: 30 to 50 wraps
- Worsted-weight yarn: 25 to 40 wraps
- Bulky yarn: 15 to 25 wraps
- Super-bulky yarn: 10 to 18 wraps
Fewer wraps create a light, relaxed tassel. More wraps produce a dense, luxurious one. Stop before the center becomes so thick that tying it securely feels like wrestling a tiny yarn octopus.
How to Make Yarn Tassels Step by Step
Step 1: Cut the Cardboard Template
Cut a sturdy rectangle of cardboard slightly longer than the desired finished tassel. The width is not critical, but 2 to 4 inches is comfortable for most hands.
If you plan to make several tassels, label the template with its measurement and save it. A collection of templates in common sizes can make future projects much faster.
Step 2: Prepare the Hanging Cord
Cut a separate piece of yarn approximately 10 to 15 inches long. This strand will secure the top of the tassel and later serve as an attachment loop.
Place it nearby before wrapping. Preparing it now prevents the traditional craft experience of holding a bundle with one hand while searching for scissors with the other.
Step 3: Wrap the Yarn Around the Template
Hold the loose end of the working yarn against the cardboard. Wrap the yarn around the template repeatedly until you reach the desired fullness.
Keep the wraps parallel and maintain gentle, consistent tension. Pulling too tightly can bend the cardboard and create strands of different lengths. Wrapping too loosely can make the loops slide around and become difficult to control.
Count the wraps when making a matching set. Write the number on the cardboard so every tassel has approximately the same density.
Step 4: Secure the Top
Slide the prepared hanging cord beneath all the wrapped strands at the top edge of the cardboard. Pull it upward and tie a tight double knot.
Make sure the knot sits at the center of the bundle. Uneven placement can leave one side of the tassel longer than the other and require extra trimming later.
Step 5: Remove the Yarn From the Cardboard
Gently slide the wrapped bundle off the template while holding the top knot. Avoid tugging individual loops. The bundle should remain compact and aligned.
Another option is to leave the bundle on the cardboard and insert the scissors beneath the loops at the opposite edge. This can make cutting easier when the template has enough space for the scissor blade.
Step 6: Cut the Bottom Loops
Cut through every loop directly opposite the top knot. Use sharp scissors and work carefully so the fibers are cut cleanly rather than stretched or chewed into submission.
Once cut, allow the strands to fall downward around the knot. Smooth them with your fingers and adjust the bundle until both sides look balanced.
Step 7: Create the Tassel Neck
Cut another piece of yarn about 12 to 18 inches long. Position it approximately one-half inch below the top of a small tassel or about 1 inch below the top of a larger one.
Wrap this strand tightly around the entire bundle six to ten times. Keep each wrap close to the previous one for a clean band. Tie the ends in a firm double knot.
Use a tapestry needle to pull the knot ends beneath the wrapped band, or let them blend into the tassel fringe. Hiding the knot creates a more polished result.
Step 8: Trim the Fringe
Hold the tassel by its hanging cord and lightly shake it so the strands settle naturally. Trim the bottom with sharp scissors, removing small amounts at a time.
For an especially straight edge, place the tassel on a cutting mat and use a ruler as a guide. You can also wrap a strip of paper around the fringe and cut along its bottom edge.
Resist the temptation to keep correcting one strand, then another, then another. That path leads to a tassel that began at 5 inches and somehow graduated as a keychain.
How to Make Multicolored Yarn Tassels
Multicolored tassels can coordinate several shades from a room, garment, or party theme. They are also an excellent way to combine small yarn leftovers.
For a blended look, hold two or three yarn colors together and wrap them around the template at the same time. For distinct blocks of color, wrap one shade for a set number of rounds, cut it, and continue with another shade.
You can also make the body in one color and use a contrasting shade for the neck. Metallic thread wrapped around the neck adds a subtle decorative accent without making the entire tassel resemble a disco ball.
How to Make Fluffy Yarn Tassels
To create a softer, fuller tassel, choose loosely twisted acrylic or wool yarn. After completing the tassel, gently separate the yarn plies with a tapestry needle or fine-tooth comb.
Brush from the ends upward in short sections while holding the neck firmly. Do not yank from the top, or you may loosen the construction. Trim the brushed fibers when the desired shape is achieved.
Test brushing on a small yarn sample first. Some fibers become beautifully fluffy, while others become frizzy enough to appear personally offended.
How to Attach Yarn Tassels
Attaching Tassels to Fabric
Thread the two hanging cords through a tapestry needle and pass them through the corner or edge of the fabric. Tie the ends securely on the reverse side. For washable projects, reinforce the attachment with several small stitches.
Attaching Tassels to Knitted or Crocheted Items
Use a crochet hook to pull the hanging cords through a sturdy stitch. Tie a double knot on the wrong side and weave in the ends. Avoid attaching a heavy tassel to a delicate or loose stitch that may stretch.
Making a Tassel Keychain
Thread the hanging cord through a key ring before tying the top knot. Add a wooden bead, metal cap, or decorative charm above the tassel for a finished accessory.
Making a Tassel Garland
Create several tassels using the same template and wrap count. Tie them to a long cord at evenly measured intervals. Alternate colors or arrange them in an ombré sequence for a more intentional design.
Common Yarn Tassel Problems and Solutions
The Tassel Looks Thin
Increase the number of wraps or use thicker yarn. You can also combine two yarn strands while wrapping to build fullness more quickly.
The Strands Are Uneven
Check that the top knot is centered before cutting. Use a rigid template, maintain consistent tension, and trim only after the tassel has been tied completely.
The Neck Keeps Coming Loose
Wrap the neck more tightly, use additional rounds, and finish with a double knot. Pulling the ends underneath the wrapped band with a needle provides extra security.
The Cardboard Bends
Use thicker cardboard or reduce your wrapping tension. Foam board, a small book, or two stacked cardboard pieces can provide a stronger template.
The Tassel Looks Lopsided
Smooth the strands around the top knot before wrapping the neck. Rotate the tassel as you work so the fringe remains evenly distributed on every side.
The Scissors Will Not Cut Cleanly
Use sharp fabric scissors and cut smaller sections at a time. Dull scissors pull fibers out of alignment and create ragged ends.
Creative Yarn Tassel Project Ideas
Once you know how to make a basic yarn tassel, the same technique can be adapted for dozens of projects.
- Boho pillow: Sew a medium tassel to each corner of a plain pillow cover.
- Tassel bookmark: Attach a small tassel to ribbon, braided cord, or a paper bookmark.
- Gift topper: Replace a disposable bow with a reusable yarn tassel.
- Drawer pull accent: Loop a long tassel around a cabinet or dresser handle.
- Holiday ornament: Add beads, felt shapes, bells, or metallic thread.
- Bag charm: Combine several small tassels on a clasp or key ring.
- Party garland: Make tassels in colors that match birthdays, graduations, showers, or holidays.
- Petite jewelry: Use embroidery floss to create earrings or necklace pendants.
Care Tips for Projects With Yarn Tassels
Check the care instructions on the yarn label before washing a tassel-decorated item. Cotton and many acrylic yarns are washable, while wool and specialty fibers may require hand washing.
Place small accessories in a mesh laundry bag to reduce tangling. Wash delicate tassels in cool water and reshape the strands while damp. Allow them to air-dry flat or hang freely so the fringe remains straight.
If a tassel becomes wrinkled, gently steam it from a safe distance while smoothing the fibers. Avoid pressing a hot iron directly onto synthetic yarn because high heat can flatten or damage it.
My Experience Making DIY Yarn Tassels
The first yarn tassel I made looked less like a polished decoration and more like a nervous paintbrush. I wrapped yarn around my hand, guessed at the number of loops, tied the top somewhere vaguely near the middle, and then attacked the bottom with household scissors that had not been sharp since the previous century.
It was technically a tassel, but only in the generous way that toast burned black is technically still bread. That first attempt taught me that this simple craft has only a few steps, yet small details make a major difference.
The most useful change was switching from my fingers to a cardboard template. Finger wrapping is convenient when making one casual tassel, but cardboard gives you repeatable measurements. When I needed four matching tassels for a pillow, I cut one template, counted every wrap, and wrote the number directly on the cardboard. The results were much more consistent.
I also learned not to wrap the yarn too tightly. At first, I assumed tighter wraps would make a neater tassel. Instead, the cardboard curved, the yarn stretched, and the strands relaxed to different lengths after cutting. Gentle, even tension produced a smoother result and made the bundle easier to remove.
Another important lesson involved the top tie. It needs to be secured before the bottom loops are cut. On one memorable attempt, I cut first and watched the yarn scatter across the table like colorful spaghetti. Now I prepare the hanging cord before I begin wrapping and leave it next to the template.
Sharp scissors made the greatest improvement to the finished appearance. A clean tassel depends heavily on a crisp final trim. I now shake the tassel, comb the strands with my fingers, and trim only a small amount at a time. Cutting aggressively usually creates a slanted edge that demands another correction, followed by another, until the tassel becomes unexpectedly miniature.
Experimenting with different fibers was equally helpful. Worsted acrylic created cheerful, sturdy tassels for garlands. Cotton produced smooth, elegant strands for bookmarks and bag charms. Embroidery floss worked beautifully for tiny tassels, although it required more wraps and greater patience. Brushed acrylic became fluffy and soft, while a heavily textured boucle yarn looked interesting but resisted every attempt at a perfectly straight haircut.
For multicolored tassels, I found that wrapping two shades together creates a natural speckled blend. Wrapping colors in separate groups produces more visible stripes. Using a contrasting neck color is the easiest way to add detail without complicating the basic technique.
My favorite practical project has been reusable gift toppers. A small yarn tassel tied to simple kraft paper looks personal, costs very little, and can be saved as an ornament or bag charm. Tassel garlands are another forgiving project because slight variations make the display feel handmade rather than incorrect.
The biggest lesson is that the final trim should never be rushed. Wrapping and knotting build the tassel, but trimming gives it character. A straight edge feels modern, a rounded edge looks soft, and an intentionally uneven fringe creates a relaxed bohemian style.
After making enough tassels, the process becomes almost automatic: measure, wrap, tie, cut, bind, and trim. It is an easy craft to complete while listening to music, chatting with friends, or pretending to watch a movie you have already seen six times. Best of all, every small scrap of yarn begins to look less like clutter and more like a future decoration.
Conclusion
Learning how to make yarn tassels requires only a few basic supplies and a simple sequence of steps. Wrap yarn evenly around a template, secure the top, cut the lower loops, bind the neck, and trim the fringe. Once you understand those fundamentals, you can change the size, fullness, fiber, and color to suit almost any project.
Begin with smooth, medium-weight yarn and a sturdy cardboard template. Count your wraps when making a set, tie every knot firmly, and save the final trimming until the tassel is completely assembled. Your first attempt may have a stray strand or two, but that is why scissorsand second chancesexist.














