
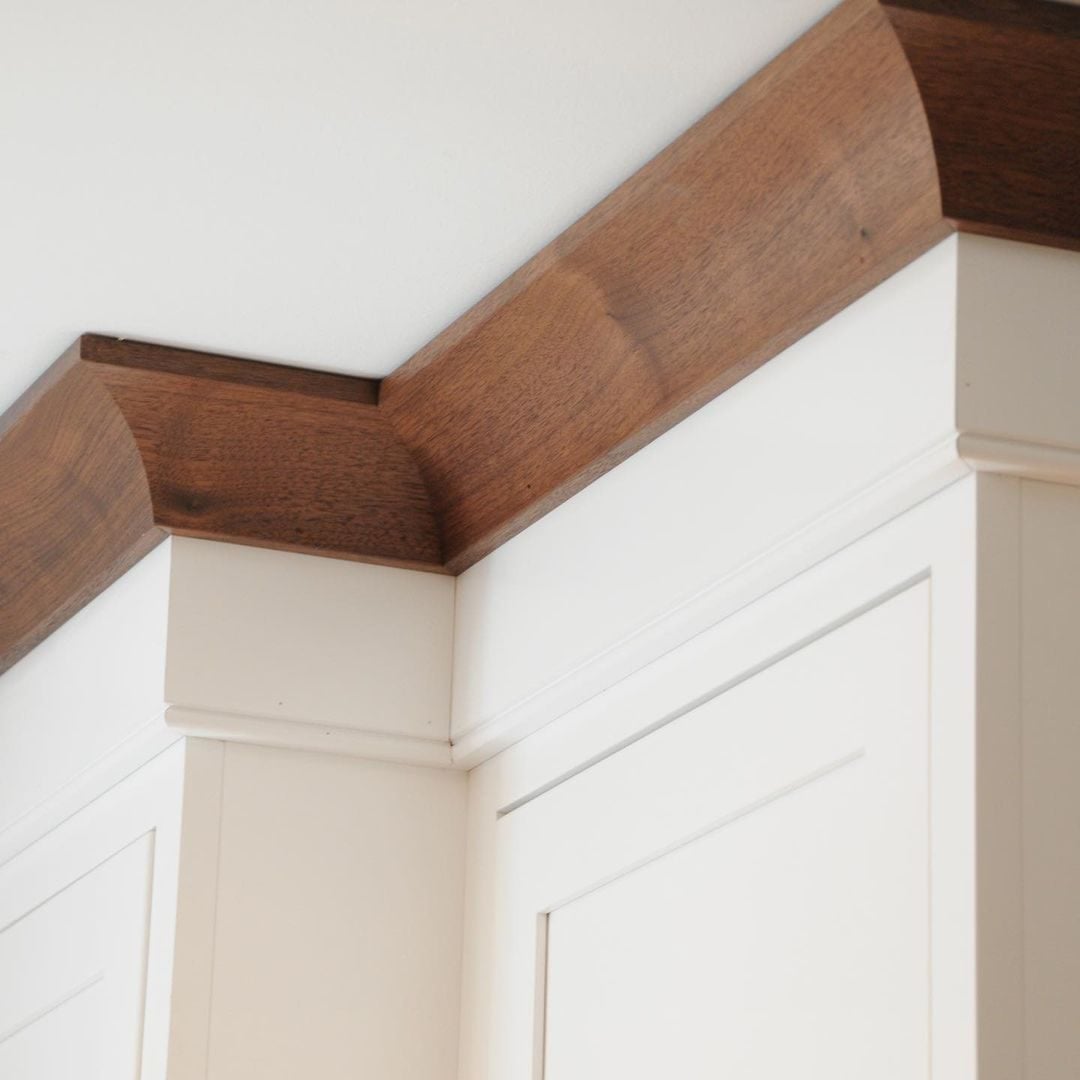
Crown molding may occupy only a narrow strip of real estate, but it can completely change how a room feels. Installed where the walls meet the ceiling, this architectural trim softens an abrupt transition, adds visual structure, and gives even a basic box-shaped room a more finished personality.
It is also far more versatile than its formal reputation suggests. Crown molding designs can be slim and modern, richly layered, brightly painted, fitted with hidden lighting, or coordinated with kitchen cabinets. In other words, you do not need a ballroom, a powdered wig, or a chandelier the size of a compact car to make crown molding work.
The following eight crown molding ideas cover traditional, contemporary, colorful, and practical approaches. Each one includes guidance on scale, materials, color, and placement so you can choose a treatment that looks as though it has always belonged in your home.
What to Consider Before Choosing Crown Molding
The most successful crown molding complements a room’s architecture instead of competing with it. Start by looking at ceiling height, room size, existing window and door casings, baseboards, cabinetry, and overall decorating style.
Match the molding to the room’s scale
Wide, deeply projected profiles generally feel balanced in spacious rooms with tall ceilings. Smaller rooms and standard eight-foot ceilings usually benefit from slimmer molding with restrained details. An oversized cornice can make a low room feel top-heavy, while a tiny profile may disappear in a two-story entry.
There is no universal measurement that works in every house. Tape a short molding sample near the ceiling and view it from several positions. A profile that looks enormous in your hand can appear surprisingly modest once it is installed ten feet away.
Coordinate the full trim package
Crown molding should have a visual relationship with baseboards, door casings, window trim, wainscoting, or built-ins. The pieces do not have to match exactly, but they should speak the same design language. Pairing delicate contemporary baseboards with an extremely ornate Victorian crown can make the room look as though two renovation crews arrived with very different instructions.
Choose the right material
Solid wood offers crisp details and can be painted or stained, but it may expand and contract as humidity changes. Medium-density fiberboard, or MDF, provides a smooth paint-ready surface at a relatively accessible price. Lightweight polyurethane and foam products are easier to lift and may reproduce elaborate patterns. PVC and moisture-resistant synthetic molding are practical choices for bathrooms, laundry rooms, and other humid areas.
1. Install Simple Crown Molding for a Modern Interior
Modern crown molding favors clean geometry over elaborate leaves, scrolls, and dentil blocks. Look for a narrow cove, a shallow stepped profile, or a flat stock buildup with only one or two changes in depth. The result creates a deliberate border without turning the ceiling into the main attraction.
This approach works especially well in contemporary living rooms, home offices, and bedrooms where the furniture has streamlined silhouettes. A simple molding can also make a newer house feel more thoughtfully constructed without pretending it is a historic mansion.
How to make it work
Paint the molding the same white or neutral color as the ceiling for a subtle transition. For an even quieter result, match the crown to the walls. The profile will remain visible because of natural light and shadow, but the room will not be divided by a high-contrast stripe.
Keep the rest of the trim restrained. Square-edged baseboards and simple window casings reinforce the modern appearance. Matte or satin paint usually feels more contemporary than a mirror-like finish, although a slightly higher sheen can make the molding easier to clean.
2. Build a Layered Traditional Cornice
A dramatic crown does not always come from one enormous piece of lumber. Carpenters can combine a central crown profile with flat stock, bed molding, picture molding, or other small trim pieces. This layered construction creates greater height and projection while allowing the proportions to be customized for the room.
Layered crown molding is an excellent choice for formal dining rooms, libraries, entryways, and living spaces with ceilings of nine feet or higher. Classical elements such as egg-and-dart patterns, dentils, or Greek key details can introduce historical character, but restraint matters. One beautifully organized cornice is elegant; six unrelated patterns may resemble a decorative pastry experiencing an identity crisis.
Best color strategy
Painting all components one color unifies the individual pieces and lets their shadows reveal the construction. Crisp white against a deep wall color creates a formal outline. For a softer effect, use a warm off-white that relates to the room’s flooring, fabrics, and lighting.
If the house already contains original millwork, use it as the design reference. Matching its general scale and level of detail will produce a more authentic result than selecting whichever molding has the most swirls per linear foot.
3. Turn the Crown Molding into a Color Accent
White trim is familiar, but it is not mandatory. Painting crown molding in a contrasting color can draw attention upward, emphasize ceiling height, and give an otherwise restrained room an unexpected spark.
Consider sage green molding with warm white walls, dusty blue trim against patterned wallpaper, or charcoal crown beneath a pale ceiling. A subdued contrast can feel sophisticated, while a vivid color creates a playful, maximalist effect. This technique is particularly effective in powder rooms, dining rooms, nurseries, and creative workspaces where a stronger design gesture feels appropriate.
Connect the accent to another feature
Repeat the molding color on the baseboards, wainscoting, built-in shelves, doors, or fireplace surround. Repetition makes the color look intentional rather than like an enthusiastic paint sample escaped from the hardware store.
Always test the color near the ceiling. Light hits upper trim differently than it hits a wall, and shadows can make a hue appear darker. View the sample in daylight and under the room’s evening lighting before committing to the entire perimeter.
4. Color-Drench the Walls, Trim, and Crown
Color drenching means painting walls, crown molding, baseboards, doors, and sometimes the ceiling in the same hue or closely related shades. Instead of outlining every architectural element in white, the treatment creates one immersive envelope of color.
This crown molding idea feels surprisingly modern, even when the trim profile is traditional. Deep forest green can make a library intimate, muted terracotta can warm a dining room, and smoky blue can bring calm to a bedroom. Because the profile is revealed through shadow instead of contrast, ornate molding becomes architectural texture rather than visual clutter.
Use sheen to preserve definition
The color can remain consistent while the finish changes. For example, use matte or eggshell paint on the walls and satin paint on the crown and other woodwork. The subtle difference in reflectivity emphasizes the molding and improves durability without interrupting the monochromatic effect.
In a room with a low ceiling, consider continuing the wall color across the crown while keeping the ceiling slightly lighter. This reduces the strong horizontal line that can visually shorten the walls.
5. Integrate Crown Molding with Kitchen Cabinets
Crown molding can make stock or semi-custom cabinets look more like built-in furniture. When cabinets stop below the ceiling, a carefully proportioned crown provides a finished top edge and makes the gap above them feel intentional. When cabinetry reaches the ceiling, trim can bridge small variations and create a polished transition.
For the most cohesive result, repeat the cabinet crown around the room or select a ceiling molding with similar curves and steps. Painting the cabinetry and molding the same color creates a seamless, custom appearance. This is especially effective with navy, cream, olive, or warm gray cabinets.
Plan for uneven ceilings
Ceilings are rarely perfectly level, particularly in older homes. Installing cabinetry tight against an uneven surface can expose irregular gaps. A scribe strip, small filler, or thoughtfully designed two-piece crown allows an installer to accommodate those variations without making the cabinets look crooked.
Keep the profile proportional to the cabinet doors. Simple Shaker cabinets generally pair well with clean stepped molding, while raised-panel doors can support a more substantial traditional profile.
6. Frame a Tray or Coffered Ceiling
Tray and coffered ceilings naturally invite layered trim. Crown molding installed around the room’s perimeter and inside the raised or recessed sections defines the ceiling architecture and creates a strong focal point above a dining table, bed, or seating area.
For a quiet design, paint every surface one light color and let the changes in depth provide contrast. For more drama, apply wallpaper, a mural, wood paneling, or a deeper paint color inside the central tray. The crown then acts like a frame that separates the decorative ceiling from the surrounding walls.
Balance the ceiling with the furnishings
Center a chandelier or pendant within the ceiling treatment whenever the room layout allows. The architectural border, light fixture, and furniture arrangement should share a visual center. Otherwise, the ceiling may appear to be holding a formal meeting that the dining table forgot to attend.
Use substantial molding in large rooms, but avoid stacking so many layers that they consume the tray’s depth. The ceiling still needs enough open area to breathe.
7. Add Hidden LED Uplighting
Crown molding can conceal LED tape or compact linear lighting, creating a soft glow that washes across the ceiling. Instead of sitting tightly in the wall-ceiling corner, the molding is mounted slightly lower and configured with space behind it for the light source.
This design works beautifully in bedrooms, media rooms, hallways, and contemporary living spaces. Warm-white light creates a comfortable atmosphere, while dimmable fixtures allow the same installation to provide subtle nighttime illumination or brighter ambient light.
Plan the lighting before installation
Determine where the driver, wiring, controls, and accessible connections will be located before the molding goes up. Select LED products approved for the intended application, follow manufacturer instructions, and use a qualified electrician when new permanent wiring is required.
The interior of the light cove should be smooth and light-colored so it reflects illumination evenly. Keep individual diodes out of normal sight lines, and leave enough distance between the LEDs and ceiling to reduce visible hot spots. A dimmer is strongly recommended; nobody wants relaxing accent lighting that accidentally resembles an airport runway.
8. Celebrate Natural Wood Crown Molding
Painted molding dominates many interiors, but stained or clear-finished wood brings warmth, grain, and craftsmanship to the ceiling line. Oak, walnut, cherry, and other hardwoods can complement wood floors, exposed beams, cabinetry, or a fireplace mantel.
Natural wood crown is especially effective in Craftsman, rustic, lodge-inspired, and traditional interiors. A simple profile lets the grain take center stage, while a more detailed design can reinforce historic architecture. In a contemporary room, narrow walnut crown against cream walls can look crisp rather than old-fashioned.
Avoid the “almost matching” problem
Wood species and stains do not need to be identical throughout a room, but their undertones should cooperate. Compare samples with the flooring and furniture under actual room lighting. A red-toned cherry crown placed above yellow oak cabinets may look less collected and more like a family reunion with unresolved issues.
Because filler, caulk, and imperfect joints are harder to disguise on stained wood, installation requires accurate cuts and careful finishing. Paint-grade molding is more forgiving; natural wood tends to keep score.
How to Choose the Best Crown Molding Idea for Your Home
Begin with architecture rather than trends. Traditional rooms generally welcome curved or layered profiles, while contemporary spaces benefit from cleaner lines. Next, decide whether the molding should blend into the room, frame it, or become a focal point.
- For low ceilings: Choose a slim profile, limited projection, and low-contrast paint treatment.
- For tall ceilings: Consider wide molding, a layered cornice, or a stronger contrasting color.
- For humid rooms: Explore PVC, polyurethane, or another moisture-resistant material.
- For historic character: Study existing trim and use profiles appropriate to the home’s architectural period.
- For an easy-care painted finish: Primed MDF or finger-jointed wood can provide a smooth, consistent surface.
- For natural warmth: Use stain-grade wood and hire an experienced finish carpenter if the joints will remain visible.
Order samples before purchasing an entire room’s worth of material. Also allow extra length for test cuts, scarf joints, defects, and the occasional board sacrificed to the miter-saw gods.
Experience Notes from Real-World Crown Molding Projects
The first lesson from crown molding projects is that rooms are considerably less square than they pretend to be. A corner that looks like a perfect 90 degrees may be several degrees off, and that small difference becomes painfully obvious when two detailed profiles meet near eye-catching lighting. Measuring each corner, practicing on scrap material, and test-fitting before fastening can prevent expensive mistakes.
Inside corners often look better when one piece is installed square and the adjoining profile is coped to fit it. Coping takes practice, but it can accommodate seasonal wood movement and slightly irregular walls better than two basic miter cuts. Preformed corner blocks are another useful option for inexperienced DIYers because the long molding pieces can terminate in straight cuts. The tradeoff is a more decorative corner treatment, which should suit the rest of the room.
Mockups reveal more than product photos
A short sample temporarily taped in place can settle debates that online images cannot. View it from the doorway, from a seated position, and beside the window casing. Large profiles frequently look well proportioned near a showroom display but overpower a compact bedroom. Conversely, a delicate crown chosen from a close-up photograph can virtually disappear in a tall living room.
Paint samples deserve the same treatment. White is not one universal color; cool whites, warm whites, and creamy off-whites react differently to flooring, wall paint, daylight, and lightbulbs. Testing the final trim color on a primed molding sample provides a more accurate preview than painting a square in the middle of the wall.
Preparation creates the “custom” finish
The difference between average and polished crown molding is often found after installation. Nail holes need filling, joints need sanding, and small seams should be finished with paintable caulk where appropriate. Caulk can disguise hairline gaps, but it is not a substitute for a wildly inaccurate cut. If a corner requires enough filler to qualify as sculpture, recutting the piece is usually the better choice.
Priming and applying an initial coat of paint before installation can reduce time spent working from a ladder. The final coat then covers filled nail holes and installation marks. Wood molding should be stored flat and allowed to adjust to the room’s conditions according to the supplier’s recommendations, reducing the chance of noticeable movement after it is fitted.
Plan around obstacles early
Air vents, curtain rods, tall cabinets, window heads, smoke alarms, and access panels can interfere with a crown molding layout. Identify these conflicts before ordering materials. Moving a curtain rod a few inches is easy during planning and surprisingly irritating after the molding has been painted.
Long pieces are also much easier to install with a helper. One person can maintain the correct spring angle while the other aligns joints and fastens the molding. Working alone is possible with temporary support blocks, but wrestling a sixteen-foot board from the top of a ladder is not the moment most people discover their inner elegance.
Consistency matters more than extravagance
A modest profile installed neatly and coordinated with the room’s other trim usually looks more expensive than an ornate molding chosen in isolation. Repeating paint colors, aligning cabinet and ceiling trim, and maintaining consistent proportions create the impression of intentional architecture.
Ultimately, the best crown molding design is the one that supports the room. It may quietly soften the wall-ceiling junction or announce itself with color, layered millwork, and light. Either approach can succeed when scale, material, finish, and installation are considered together.
Conclusion
Crown molding is not limited to formal white trim. It can sharpen a modern room, restore period character, complete kitchen cabinetry, frame a decorated ceiling, introduce natural wood, or hide a sophisticated lighting system. The strongest crown molding ideas respect the size and style of the space while adding just enough detail to make the architecture feel complete.
Choose samples before committing, coordinate the crown with existing millwork, and treat careful installation as part of the design. When those elements align, a relatively narrow strip of molding can make the entire room look taller, richer, and much more intentional.













