
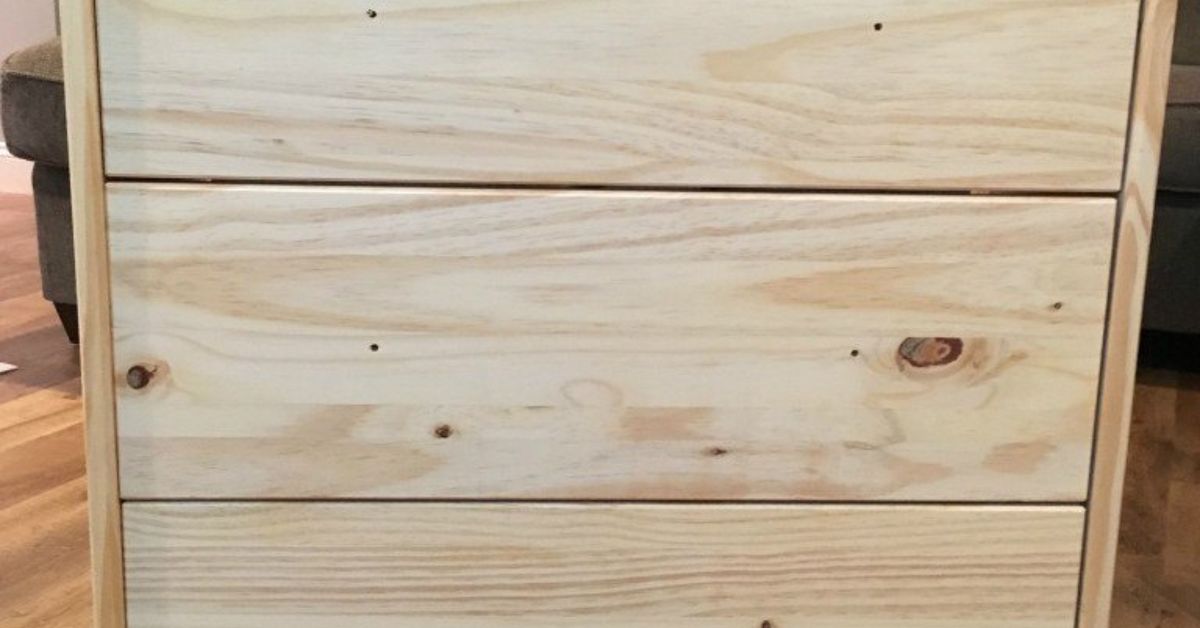
An IKEA RAST dresser may begin life as a plain pine box with three drawers, but give it a little paint, thoughtful hardware, and serious childproofing, and it can become a charming toddler nightstand with surprisingly useful storage. It is the furniture equivalent of showing up to preschool in sweatpants and returning home dressed for a family portrait.
The RAST is especially appealing for a DIY makeover because much of its structure is solid pine. Unlike slick laminated furniture that may require specialized bonding products, unfinished pine can be sanded, primed, painted, stained, or sealed in dozens of ways. Its compact footprint also makes it practical for a small toddler bedroom where every square inch is already negotiating with stuffed animals.
This project is not simply about making a dresser look cute, however. Because the RAST is a chest of drawers, it must be securely anchored to the wall. A toddler can turn an open drawer into a climbing step faster than an adult can say, “Please do not do that.” Safety comes first; scalloped trim and adorable paint colors come second.
Research basis for current RAST construction, measurements, care, and anchoring requirements.
Why the IKEA RAST Works as a Toddler Nightstand
The current three-drawer RAST measures approximately 24 3/8 inches wide, 13 3/4 inches deep, and 26 3/4 inches high. That makes it wider and more spacious than a conventional bedside table without occupying the depth of a full-size dresser. The shallow profile can work especially well beside a toddler bed, provided the room layout allows the drawers to open without blocking a walkway.
The outer frame, rails, drawer fronts, and most drawer components are solid pine, while the back and drawer bottoms are fiberboard. Pine is relatively easy to customize, although its knots and resin can occasionally bleed through pale paint. Proper preparation prevents most of those little wooden surprises from reappearing after the project is finished.
Three Drawers Are Better Than One Tiny Shelf
A toddler nightstand rarely stores only bedtime items. It gradually collects pajamas, extra sheets, pull-ups, storybooks, socks, night-light accessories, and one mysterious plastic dinosaur that apparently has permanent residency.
The RAST’s three drawers let you create separate storage zones:
- Top drawer: bedtime essentials such as pajamas, sleep sacks, tissues, and spare bedding.
- Middle drawer: books, puzzles, quiet toys, and comfort items used during the evening routine.
- Bottom drawer: bulkier or less frequently needed supplies.
Small drawer organizers can keep tiny items from forming the traditional household storage category known as “everything thrown together.” Closed storage also helps a child’s bedroom feel calmer because fewer objects remain visible.
It Is a Blank Canvas for a Child-Friendly Design
The simple shape can fit woodland, coastal, Scandinavian, modern, vintage, or colorful bedroom themes. Popular IKEA RAST hacks use paint, stain, molding, cane panels, fluting, decorative feet, and replacement hardware. For an adult bedroom, dramatic structural changes can be fun. For a toddler’s room, however, the best makeover is generally low, sturdy, smoothly finished, and securely anchored.
Design research synthesized from established IKEA-hack and home-design publications.
Plan the Toddler Nightstand Before Opening the Toolbox
A successful makeover begins with decisions, not paint. Decide where the piece will sit, how it will be anchored, what it needs to store, and which surfaces the child can reach. Then design around those realities.
Measure the Bed and Available Floor Space
Measure the height of the mattress, the width of the wall section, and the clearance needed for the drawers. A nightstand does not need to align perfectly with the mattress, but the top should not become a convenient launching platform into the bed.
Leave enough walking space between the furniture and nearby doors, closets, or play areas. Painter’s tape can be used to mark the RAST’s footprint on the floor before purchase or assembly. This simple trick is far easier than discovering later that the bottom drawer opens directly into a rocking chair.
Choose a Simple, Durable Finish
A toddler-room finish should tolerate fingerprints, damp cleaning cloths, toy impacts, and the occasional unidentified sticky substance. Satin or semi-gloss furniture paint is usually easier to wipe clean than a completely flat finish. A muted blue, warm white, soft green, dusty rose, mushroom beige, or natural wood tone can remain attractive as the child grows.
Consider keeping the design simple enough to update later. A neutral frame with removable decorative knobs is easier to refresh than a complicated theme painted across every surface.
Materials and Tools
The exact supplies depend on the chosen design, but a practical child-safe makeover may require:
- IKEA RAST three-drawer dresser
- Manufacturer-provided anti-tip hardware
- Wall fasteners appropriate for the wall construction
- Screwdriver and drill
- Stud finder when anchoring into a framed wall
- 120-, 180-, and 220-grit sandpaper or sanding sponges
- Vacuum, tack cloth, or clean lint-free cloth
- Wood filler for dents or unused hardware holes
- Stain-blocking primer suitable for pine
- Water-based furniture or cabinet paint
- Small foam roller and quality angled brush
- Water-based protective topcoat, when compatible with the paint
- Smooth, rounded replacement knobs or pulls
- Painter’s tape and drop cloth
- Optional drawer organizers or properly installed child-safety latches
Read every product label before use. Dry-to-the-touch time and full cure time are not the same thing. Furniture may feel dry while the finish remains too soft for normal use.
How to Turn an IKEA RAST Into a Toddler Nightstand
Step 1: Inspect Every Part
Before assembly, check the wood for cracks, deep splits, warped panels, damaged fastener holes, or broken hardware. Pine naturally contains knots and color variations, but structural damage is different from character. Replace defective parts rather than trying to hide a serious problem beneath primer.
If the dresser has already been assembled, confirm that the frame is square, the back is attached correctly, and each drawer moves securely. A wobbly piece should be repaired before decorating.
Step 2: Test-Fit the Assembly
Follow the manufacturer’s assembly instructions. Avoid removing structural rails or improvising with the drawer system for a child’s room. Adult RAST transformations sometimes flip the frame, cut the side panels, or add a new top. Those techniques can create beautiful nightstands, but a toddler version benefits from preserving the original low-profile structure.
Do not attach the final wall anchor yet if the piece still needs to be moved into a painting area. Do, however, identify the future anchor location before decorating.
Step 3: Sand the Pine Smooth
Sand with the grain rather than scrubbing in random circles. Start with 120- or 180-grit paper where the wood feels rough, then finish with 220 grit. Pay extra attention to drawer-front edges, the top corners, and any spot a small hand might touch.
The goal is not to erase the natural grain. The goal is to remove splinters, raised fibers, pencil marks, and rough manufacturing edges. Lightly soften sharp-feeling corners without changing the dimensions needed for proper assembly.
Vacuum the dust and wipe every surface clean. Paint applied over sanding dust tends to produce a finish resembling a granola bar, which is rarely the desired design direction.
Step 4: Fill Unwanted Holes and Imperfections
If replacement hardware requires a different hole pattern, fill unused holes with paintable wood filler. Let the filler dry completely, sand it flush, and remove the dust. Fill dents that could become rough or difficult to clean, but do not fill joints or openings required for assembly.
Step 5: Prime the Wood
Bare wood absorbs paint unevenly, so primer creates a more uniform surface and improves adhesion. Pine knots can release resin or discolor light paint. A stain-blocking primer designed for resinous wood helps reduce bleed-through.
Apply a thin coat in the direction of the grain. After it dries according to the manufacturer’s directions, lightly sand with fine paper and remove the dust. A second primer coat may be useful over prominent knots or filled areas.
Finishing guidance synthesized from professional furniture-painting resources covering sanding, bare-wood primer, pine knots, adhesion, and durable coatings.
Step 6: Apply the Paint
Use a small foam roller on broad panels and an angled brush around corners, rails, and edges. Apply two or three thin coats rather than one heroic coat thick enough to preserve a fossil. Thin layers level more evenly, dry more predictably, and are less likely to drip.
Paint drawer fronts and visible frame surfaces, but avoid coating drawer runners, sliding contact points, screw threads, or other mechanical areas unless the instructions permit it. Excess paint in those locations can make drawers stick.
Allow each coat to dry fully before recoating. Lightly sanding between coats with very fine paper can improve smoothness, but only after the paint is sufficiently dry.
Step 7: Protect the Finish
A durable furniture paint may not require a separate clear coat, so check the product directions. When additional protection is recommended, choose a compatible water-based topcoat that will not yellow the selected color.
Apply thin, even layers and let the finish cure in a ventilated area away from the child’s sleeping space. Low-VOC or zero-VOC labels can be useful starting points, but they do not automatically mean a product contains no potentially irritating ingredients. Review the full label, follow ventilation instructions, and do not move the nightstand into the bedroom while it still has a noticeable odor.
Indoor-air and coating guidance based on current EPA recommendations concerning VOCs, product selection, and ventilation.
Step 8: Add Smooth Hardware
Replace the basic knobs when a different look is desired, but choose hardware with rounded edges and secure attachment points. Avoid sharp corners, fragile ceramic pieces, loose leather loops, or long protruding handles that can catch clothing.
Large wooden knobs are easy for small hands to operate, while recessed finger pulls create a cleaner profile. Tighten all hardware firmly and inspect it regularly. Thread-locking products should only be used when suitable for the hardware and safe under the manufacturer’s directions.
Step 9: Anchor the Nightstand to the Wall
This is the most important step. IKEA states that the RAST must be securely anchored, and its current product includes wall-anchoring hardware. The U.S. Consumer Product Safety Commission likewise recommends anchoring dressers because children may pull on drawers or use them as climbing steps.
Use fasteners designed for the actual wall material. Drywall, wood studs, brick, and concrete require different fastening methods. The restraint should connect to a structurally appropriate point rather than decorative trim or an unsupported section of drywall. When the correct installation is uncertain, hire a qualified professional.
After anchoring, pull gently on the upper frame to confirm that the restraint remains secure. Recheck the anchor periodically and whenever the furniture is moved.
Child-safety basis: manufacturer warning, CPSC Anchor It guidance, and pediatric home-safety recommendations.
Toddler-Safe Styling Ideas
Keep the Top Boring in the Best Possible Way
A toddler nightstand does not need a heavy ceramic lamp, framed glass picture, scented candle, fishbowl, or twelve-foot charging cable. Keep the top light and uncluttered. A soft book basket, securely placed sound machine, or lightweight clock may be enough.
Wall-mounted lighting can free the top surface, but its cord must be routed securely and kept beyond the child’s reach. Battery-powered products should have secured battery compartments and be used according to their safety instructions.
Create a Two-Tone Scandinavian Look
Paint the frame warm white or pale gray and leave the drawer fronts natural. Seal the natural pine with a clear, child-appropriate finish after testing it on a hidden area. This approach highlights the wood grain while keeping the overall appearance light.
Try a Soft Color-Block Design
Paint the frame one neutral color and give each drawer a coordinated tone. For example, combine cream, muted sage, and dusty blue. Limiting the palette to three related colors creates personality without making the dresser resemble a box of markers after an emotional event.
Add Simple Wooden Shapes
Thin decorative molding can create arches, half-moons, or rectangular panels on the drawer fronts. Attach every piece securely, sand the edges smooth, and avoid loose appliqués that could become small parts. Keep the added details shallow so they do not become footholds.
Common Mistakes to Avoid
- Skipping the wall anchor: A low dresser can still tip when drawers are opened or climbed.
- Adding tall legs or casters: Raising the center of gravity or making the piece mobile is unnecessary in a toddler room.
- Painting over sanding dust: Dust weakens adhesion and leaves a rough finish.
- Ignoring pine knots: Resin may discolor pale paint unless an appropriate primer is used.
- Reassembling too early: Soft paint can stick, dent, or peel around drawer contact points.
- Using decorative but sharp hardware: Smooth, firmly attached pulls are a better choice.
- Overloading the drawers: Store ordinary lightweight bedroom items and inspect drawer bottoms and runners regularly.
- Placing climbing temptations on top: Favorite toys and interesting electronics encourage children to reach upward.
How to Maintain the Finished Nightstand
Wipe the surface with a damp cloth, then dry it with a clean cloth. Avoid soaking the pine, drawer joints, or fiberboard components. Use gentle cleaning products compatible with the chosen finish.
Every few weeks, check the following:
- The wall restraint remains tight and undamaged.
- Knobs and pulls have not loosened.
- Drawer runners and stops work correctly.
- No cracks, sharp chips, or splinters have developed.
- The top remains free of heavy, breakable, or climb-enticing objects.
Touch up small paint chips before exposed wood becomes rough. If the frame becomes unstable, a drawer component breaks, or the anchoring system is damaged, stop using the piece until it has been properly repaired.
Real-World Experience: What This IKEA RAST Toddler Nightstand Project Teaches You
The first lesson from converting an IKEA RAST into a toddler nightstand is that preparation takes longer than painting. The exciting part is opening the paint can and watching plain pine become something beautiful. The useful part is spending an afternoon sanding edges that nobody will compliment at the next family gathering.
That unglamorous preparation makes the finished piece feel noticeably better. Drawer fronts slide under small hands without rough edges. The paint looks smoother. Knots remain hidden. Cleaning becomes easier because juice, fingerprints, and mysterious bedtime residue cannot settle into unfinished grain.
The second lesson is that a toddler evaluates furniture differently from an adult. An adult sees three storage drawers. A toddler may see three increasingly ambitious steps leading to the top. This is why the wall anchor cannot be treated as an optional accessory left in the famous drawer of leftover hardware. Anchoring changes the project from decorative crafting into responsible furniture setup.
During a typical makeover, it is tempting to add stylish legs, oversized brass pulls, or a thick decorative top. Those details can look excellent in photographs, but they are not always practical beside a toddler bed. Keeping the RAST close to its original height provides useful storage without turning it into a miniature monument. Smooth wooden knobs usually feel more appropriate than long metal bars, especially when children frequently brush against the furniture while climbing into bed.
The third lesson is that curing time tests adult patience more effectively than any toddler ever could. Paint may feel dry within hours but remain soft underneath. Installing hardware too early can leave circular dents. Closing the drawers can make painted edges stick together. Placing books on the top may create permanent outlines that look like accidental modern art.
Letting the finish cure properly produces a tougher surface and reduces odor before the piece enters the bedroom. Painting in a separate, ventilated workspace also prevents the room from becoming a temporary chemistry experiment. Even when using a low-VOC water-based product, ventilation and label directions still matter.
The storage plan may also change after a few weeks of use. The original idea might place books in the top drawer, but toddlers often prefer choosing stories independently. A lightweight floor basket may work better for books, leaving the top drawer available for pajamas and bedtime supplies. The middle drawer can hold spare sheets, while the lowest drawer becomes the home of bulky blankets or seasonal items.
It is useful to keep the heaviest reasonable contents in the bottom drawer, but no storage arrangement replaces anchoring. A child may empty every drawer within three minutes simply because silence in a toddler’s bedroom is rarely a sign that an organizational system is succeeding.
Another practical discovery is that simple designs age better. A nightstand painted with an elaborate baby-animal mural may be adorable for a year, while a soft green or warm white finish can survive changing interests. New knobs, removable drawer liners, and updated wall art can refresh the entire look later without rebuilding the furniture.
Most importantly, the project proves that useful children’s furniture does not need to be disposable or visually chaotic. The IKEA RAST can provide bedside storage, complement the room, and evolve with the child. The transformation succeeds not because the dresser becomes unrecognizable, but because every decision serves a purpose: smoother edges, durable paint, manageable storage, restrained decoration, and a secure connection to the wall.
Final Verdict
An IKEA RAST turned toddler nightstand is a practical weekend project for families who want affordable, personalized bedroom storage. Its compact dimensions and paintable pine structure offer plenty of creative freedom. The best version is not necessarily the fanciest one. It is the version that is carefully assembled, smoothly finished, easy to clean, sensibly organized, and securely anchored before a child uses the room.
Note: Furniture modifications are undertaken at the owner’s responsibility. Follow the current IKEA assembly and anchoring instructions, use fasteners appropriate for the wall, and seek professional installation advice when uncertain.













