
There are home projects that require a contractor, a spreadsheet, three emotional support coffees, and a tiny prayer to the renovation gods. Then there are projects like an easy fireplace schmear: affordable, dramatic, surprisingly forgiving, and just messy enough to make you feel like a true DIY legend.
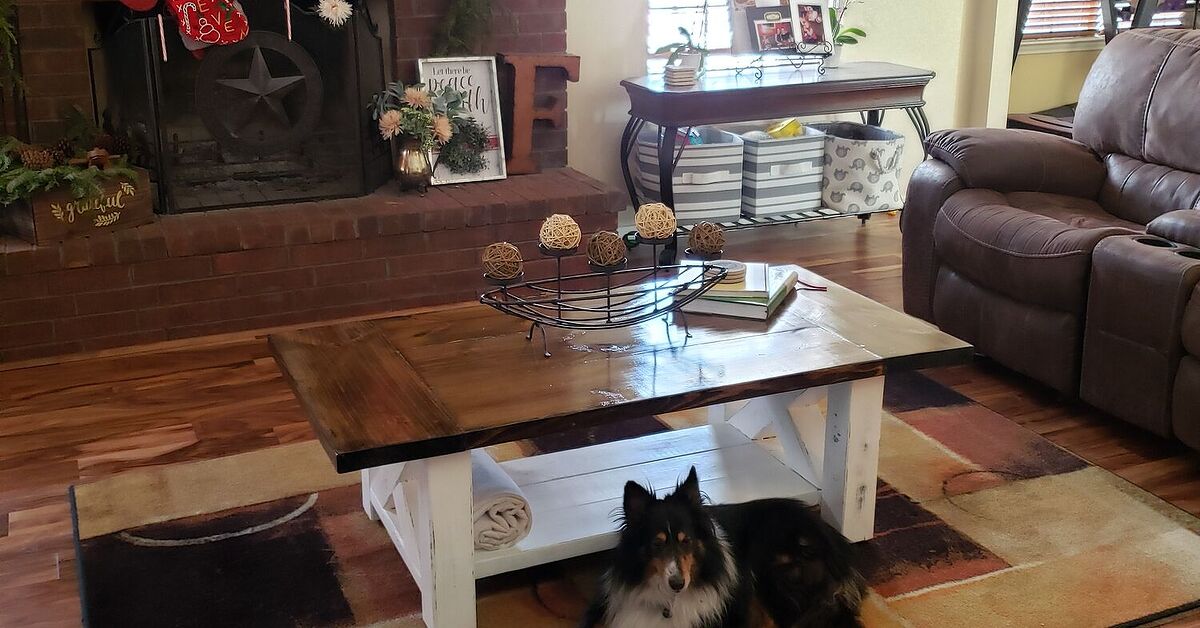
My living room had one of those dark brick fireplaces that looked perfectly respectable in theory but made the entire room feel like it was wearing a heavy winter coat in July. The bricks were reddish-brown, the mortar lines were deep, and the whole fireplace seemed to absorb light instead of reflecting it. I did not want to rip it out. I did not want to cover it with tile. I definitely did not want to spend thousands of dollars just because my fireplace had “sad lodge basement” energy.
So I tried a fireplace schmear, also called a German schmear or mortar wash. The idea is simple: apply a light-colored mortar mixture over brick, then wipe or scrape some of it away so the original brick peeks through. The result is rustic, soft, textured, and brighter without looking flat or overly painted. Think old-world cottage charm, but without having to inherit a castle or learn how to milk a goat.
What Is a Fireplace Schmear?
A fireplace schmear is a decorative brick finish created by spreading a thin layer of mortar over brick and partially removing it before it fully sets. Unlike painting brick, which coats the surface with a uniform layer of color, a schmear adds texture and dimension. Some brick remains visible, some is softened, and the mortar settles into the joints to create a weathered, timeworn effect.
The technique is often called German schmear, German smear, or mortar wash. The name sounds fancy, but the process is very down-to-earth. You mix mortar with water, apply it to the brick, and adjust the coverage until it looks the way you want. More mortar creates a lighter, creamier look. Less mortar lets more red, brown, or orange brick show through.
That flexibility is exactly why I chose it. My living room needed brightness, but I did not want a fireplace that looked like it had been attacked by a bucket of white paint. I wanted texture. I wanted warmth. I wanted the fireplace to look intentional, not like I panicked on a Saturday afternoon with a roller brush.
Why I Chose a Schmear Instead of Paint, Whitewash, or Limewash
Before committing to the project, I compared several popular brick fireplace makeover options. Paint gives the most complete coverage and can look beautiful in modern rooms, but it also hides the natural variation of brick. Whitewash is lighter and more translucent, usually made with diluted paint, but it does not add the same rustic texture. Limewash has a soft, mineral finish and can be a great breathable option for masonry, but I wanted a more dimensional, hand-applied look.
The fireplace schmear landed right in the sweet spot. It brightened the room, kept the character of the brick, and made the fireplace feel updated without erasing its history. It also worked well with my existing decor: a neutral sofa, warm wood accents, woven baskets, and a coffee table that collects books, candles, and the occasional snack wrapper I pretend not to see.
The Big Visual Payoff: A Brighter Living Room
The most satisfying part of this easy fireplace schmear was how quickly it changed the entire mood of the room. Dark brick can be handsome, but in a small or shaded living room, it can visually weigh everything down. Once the mortar wash dried to a soft, chalky white, the fireplace started bouncing light around the room instead of swallowing it whole.
The walls looked fresher. The mantel looked cleaner. Even my plants looked happier, although to be fair, plants are dramatic and will accept credit for anything. The fireplace still had texture, shadow, and depth, but it no longer dominated the room like a giant brick rectangle with opinions.
Tools and Materials I Used
You do not need a professional masonry setup for a basic interior fireplace schmear, but you do need to prepare properly. The project is simple, not magical. Mortar has a way of finding floors, clothing, hair, and places you did not know existed.
Basic Supplies
- White or light-colored mortar mix
- Bucket for mixing
- Water
- Margin trowel, putty knife, or masonry trowel
- Large grout sponge
- Stiff brush or scrub brush
- Drop cloths or plastic sheeting
- Painter’s tape
- Gloves
- Safety glasses
- Old towels or rags
I also kept a spray bottle nearby to lightly mist areas that dried too quickly. That little bottle became my project sidekick. Every DIY project needs a sidekick, preferably one that does not ask why there is mortar on your elbow.
Step 1: Clean the Brick Like You Mean It
Good prep makes the difference between a finish that looks charming and one that looks like a craft project lost a fight. Before applying mortar, I cleaned the brick thoroughly with a brush and a mild cleaner. Dust, soot, grease, and loose debris can interfere with adhesion, so this is not the step to skip.
If your fireplace has years of soot stains, spend extra time around the firebox and hearth. Let the brick dry before moving on. The surface does not have to look brand-new, but it should be clean, stable, and free of anything crumbly.
Step 2: Protect the Surrounding Area
Mortar is not shy. It will splatter. It will drop. It will attempt to join your flooring permanently. I taped around the walls, mantel, and fireplace insert, then covered the floor with a heavy drop cloth. If you have carpet, protect it like it owes you money.
I also removed decor from the mantel and nearby shelves. This is partly practical and partly emotional. Watching a clump of mortar land on a favorite framed photo is not the character-building experience anyone needs.
Step 3: Mix the Mortar to the Right Texture
For an easy fireplace schmear, the mortar should be spreadable but not soupy. I aimed for a thick pancake batter or soft peanut butter texture. Too thick, and it becomes difficult to push into the mortar joints. Too thin, and it runs down the brick like a sad milkshake.
I mixed small batches because mortar begins to set as you work. Small batches gave me more control and less panic. If you are new to this technique, do not mix the entire bag at once. Future you, the one not wrestling a bucket of drying mortar, will be grateful.
Step 4: Test a Small Hidden Area First
Before covering the fireplace, I tested the mixture on a low corner. This helped me see how the mortar color looked against the brick, how quickly it dried, and how much pressure I needed to wipe it back. A test patch also gives you confidence, which is helpful when your brain starts whispering, “Congratulations, you have ruined the living room.”
The good news is that a schmear is wonderfully forgiving while it is wet. If an area looks too heavy, wipe more off. If it looks too bare, add more. The goal is not perfection. The goal is balance.
Step 5: Apply the Schmear
I started by pushing mortar into the joints, then spreading it across the brick faces with a trowel and sponge. Working in small sections made the process manageable. I covered a few bricks, stepped back, adjusted, and moved on.
For a brighter fireplace, I applied medium coverage: enough mortar to soften the brick color, but not so much that every brick disappeared. I left some edges exposed and allowed darker tones to peek through in random places. That randomness is what makes the finish look natural. If every brick has the same amount of coverage, the effect can look too controlled.
Step 6: Wipe Back the Mortar
This is where the fireplace schmear gets its personality. Using a damp sponge and old rags, I wiped away mortar from selected brick faces while leaving more in the joints and corners. The more you wipe, the more original brick shows. The less you wipe, the brighter and more opaque the fireplace becomes.
I found that standing back often was essential. Up close, you notice every smear, line, and blob. From across the room, you see the overall balance. That is the view that matters most, unless your guests plan to inspect your fireplace with a jeweler’s loupe, in which case you may need different guests.
Step 7: Let It Dry Before Judging the Color
Wet mortar usually looks darker than dry mortar. At first, I worried that my fireplace was not bright enough. Then it dried, and the color softened into a warm, chalky white. The entire fireplace looked lighter the next day.
Give the project time before making changes. Once the mortar cures, the final look becomes much clearer. If you want more coverage after it dries, you can add another light layer to selected areas.
Design Tips for a Natural-Looking Fireplace Schmear
Do Not Cover Every Brick the Same Way
The best fireplace schmear finishes look varied. Leave some brick more exposed, especially around corners and edges. Let the mortar build up in a few places and fade in others. This creates the aged, collected-over-time look that makes the technique so appealing.
Choose the Right Mortar Color
White mortar creates a brighter farmhouse or cottage look. Gray mortar feels moodier and more rustic. Off-white or ivory mortar can be ideal if your room has warm undertones. Since mortar dries lighter, test first if you are between colors.
Balance the Fireplace With the Rest of the Room
After the schmear dried, I updated the mantel styling with lighter decor: a simple mirror, ceramic vases, greenery, and stacked books. The fireplace became a focal point without shouting. It looked cozy, not chaotic.
Common Mistakes to Avoid
Skipping Surface Prep
Dirty brick can keep mortar from bonding well. Clean first, even if you are eager to get to the fun part. DIY excitement is powerful, but dust is sneakier.
Using Too Much Water
A watery mix is harder to control and may drip into areas you do not want covered. Add water slowly until the mortar reaches a spreadable consistency.
Trying to Make It Perfect
A fireplace schmear should look handmade. If you chase perfect symmetry, you may end up with a finish that feels stiff. Embrace variation. It is not a spreadsheet; it is brick.
Forgetting That This Finish Is Hard to Reverse
Mortar wash is more permanent than paint techniques like whitewash. Make sure you like the look before committing to the whole fireplace. Test patches and inspiration photos are your friends.
Is a Fireplace Schmear Right for Your Home?
An easy fireplace schmear works best if you like rustic, cottage, farmhouse, European, or relaxed traditional interiors. It is especially helpful for fireplaces with brick that feels too dark, too red, too orange, or too visually heavy.
However, it may not be the right choice for every surface. Painted brick, sealed brick, glossy brick, fragile historic brick, or brick in poor condition may need a different approach. When in doubt, test carefully or ask a masonry professional before applying mortar.
How Long Did the Project Take?
For my average-size living room fireplace, the project took most of a day, including cleaning, taping, mixing, applying, wiping, and cleaning again. The active schmearing part was the most fun. The cleanup was less glamorous, but that is true of nearly every good home project and most attempts at making lasagna.
The fireplace continued to lighten as it dried, and the room looked noticeably brighter by the next morning. It was one of those DIY projects where the result felt bigger than the effort.
How Much Does an Easy Fireplace Schmear Cost?
The cost depends on your fireplace size and what supplies you already own. If you have basic tools, you may only need mortar, sponges, tape, and drop cloths. Compared with refacing a fireplace, installing tile, or hiring out a full remodel, a DIY schmear can be a budget-friendly way to create a major visual change.
That low cost is one reason I loved this project. It gave my living room the kind of before-and-after impact usually associated with bigger renovations, but without making my wallet hide under the sofa.
My 500-Word Experience: What I Learned While Brightening My Fireplace
The biggest thing I learned from doing an easy fireplace schmear is that the project is less about technical perfection and more about trusting your eye. At the beginning, I wanted instructions that would tell me exactly how much mortar to put on each brick. After about 20 minutes, I realized that approach was impossible. Bricks are uneven. Mortar joints vary. Lighting changes from one side of the fireplace to the other. The best method was to work slowly, step back often, and let the fireplace tell me what it needed.
My first few bricks looked too heavy. I had packed on the mortar like I was frosting a birthday cake for a brick-loving giant. Instead of panicking, I grabbed a damp sponge and wiped the surface back until more color showed through. That moment changed the whole project for me. I realized I could adjust as I went. The schmear was not a one-shot performance; it was more like sculpting, editing, and negotiating with a wall.
I also learned that lighting matters. The fireplace looked different in morning light, afternoon light, and lamplight. While I was working, I turned on the living room lamps so I could see how the finish would look at night. That helped me avoid leaving one side too dark. If your fireplace sits near a window, check it from multiple angles before deciding you are done.
Another experience worth sharing: wear gloves. I started with gloves, took them off for “just a second,” and immediately got mortar under my nails. Mortar is not a manicure product. It has no respect for cuticles. Keep gloves on, keep a damp rag nearby, and clean tools before the mortar hardens.
The most surprising part was how much the fireplace changed the rest of the room. I expected the brick to look better. I did not expect the sofa, rug, curtains, and wall color to look better too. The lighter fireplace made the whole room feel more open. It also gave me permission to simplify the mantel. Before, I kept adding decor to distract from the dark brick. After the schmear, I needed less. A mirror, two vases, and a little greenery were enough.
If I did it again, I would still choose the same finish, but I would prepare more rags and mix even smaller batches of mortar. I would also take more progress photos because the transformation is incredibly satisfying. There is something wonderful about standing in your living room at the end of the day, slightly dusty, mildly tired, and wildly proud because your fireplace finally looks like it belongs in the home you imagined.
Conclusion: A Small Mess, a Big Difference
Brightening my living room with an easy fireplace schmear was one of the most rewarding DIY updates I have tried. It was affordable, creative, and surprisingly beginner-friendly. The finish softened the old brick, added texture, reflected more light, and gave the entire room a warmer, fresher personality.
If your brick fireplace feels dark, dated, or too visually heavy, a German schmear fireplace makeover may be the perfect middle ground between painting and a full renovation. With a little prep, a manageable amount of mess, and a willingness to trust the process, you can turn a tired fireplace into a charming focal point that looks custom, cozy, and full of character.
And yes, you may spend the next week casually walking past it just to admire your work. That is not vanity. That is quality control.










