
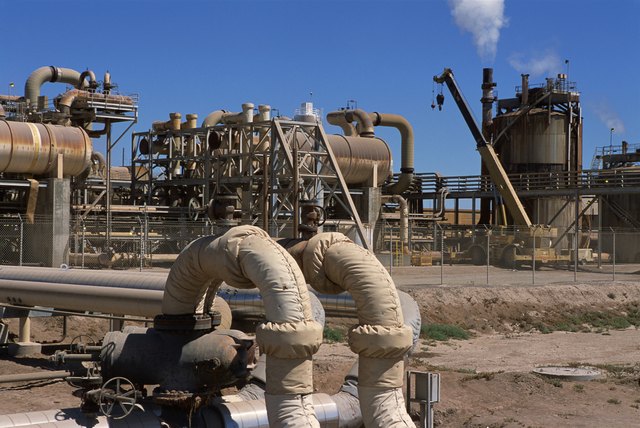
Steam pipes are a lot like the friend who insists on leaving the front door open in January: technically useful, but wildly inefficient when not managed properly. If you have a steam heating system in your home, apartment building, workshop, or small commercial space, exposed steam pipes can quietly waste heat, overheat basements, slow heat delivery to radiators, and create surfaces hot enough to make your hand regret all its life choices.
The good news is that insulating steam pipes is one of the most practical energy-efficiency upgrades around. It is not glamorous. Nobody throws a party because the basement pipes got a fresh fiberglass jacket. But your boiler, your fuel bill, and anyone walking near those hot lines may appreciate it. Proper steam pipe insulation helps keep heat inside the pipe until it reaches the radiators or equipment that actually needs it.
This guide explains how to insulate steam pipes safely, what materials to use, where to start, what to avoid, and when to call a professional. Whether you are dealing with a few bare pipes in a basement or planning a larger steam-system tune-up, the goal is simple: keep the steam hot, the basement safer, and the energy waste as low as possible.
Why Insulate Steam Pipes?
Steam carries a large amount of heat. That is the whole point. But when steam travels through bare metal pipe, heat radiates into the surrounding space before it reaches its destination. In a basement, crawl space, utility room, or mechanical room, that heat may feel “free,” but it is not free at all. Your boiler paid for it with fuel, and the rooms upstairs may still be waiting for warmth.
Steam Pipe Insulation Saves Energy
Insulated steam pipes lose far less heat than bare pipes. In practical terms, that means the boiler does not need to work as hard to deliver usable heat. Steam arrives hotter and more reliably, condensate returns more efficiently, and the system wastes less energy warming areas that were never supposed to be heated like a sauna.
In older buildings, especially homes with one-pipe or two-pipe steam heat, missing pipe insulation is common. Sometimes the original insulation was removed because it contained asbestos. Sometimes it was damaged during repairs and never replaced. Sometimes a previous owner looked at a bare 200-degree pipe and said, “Looks fine to me,” which is how many home improvement stories begin with regret.
It Improves Comfort and Heat Delivery
Uninsulated steam mains can dump heat into the basement before radiators receive enough steam. This can make the basement too warm while living spaces stay chilly. Insulating the mains helps steam travel farther with less temperature loss, which can improve radiator performance and reduce uneven heating.
Pipe insulation will not magically fix every steam-heating problem. Bad air vents, failed steam traps, incorrect boiler pressure, dirty water, and poor near-boiler piping can still cause trouble. But insulation is often one of the simplest steps toward a better-balanced steam system.
It Reduces Burn Risk
Steam pipes can become dangerously hot. Insulation provides a protective layer that lowers exposed surface temperature and reduces the chance of accidental contact burns. This is especially important in basements, laundry rooms, storage areas, apartment mechanical rooms, schools, workshops, and any space where people may pass close to piping.
Before You Touch Anything: Safety First
Before learning how to insulate steam pipes, pause and inspect what is already there. Steam systems are old in many buildings, and older pipe insulation deserves respect. Not fear, not panic, but definitely respect.
Check for Possible Asbestos
If your home or building is older, especially if it was built before the 1980s, old pipe wrap may contain asbestos. Asbestos was commonly used on steam pipes, boilers, elbows, fittings, and heating equipment because it resists heat. Unfortunately, damaged or disturbed asbestos-containing material can release fibers into the air.
Do not cut, scrape, sand, tear, remove, or “just peel a little bit” of old pipe insulation if you suspect it could contain asbestos. You cannot reliably identify asbestos by sight. If the old wrap is white, gray, chalky, corrugated, plaster-like, crumbly, or located on old steam piping, treat it as suspect until a qualified professional says otherwise.
If the material is intact and undisturbed, leave it alone until you receive professional advice. If it is damaged, falling apart, or must be removed for work, contact a licensed asbestos inspector or abatement contractor. This is not the moment for heroic DIY energy. Asbestos is one of those home projects where “I watched a video” is not a safety plan.
Turn Off the System and Let Pipes Cool
Never install insulation on active steam pipes unless you are trained and equipped for that kind of work. For homeowners, the sensible approach is to turn off the boiler and let the system cool completely. Steam pipes can remain hot after the boiler shuts down, so give them time. If you cannot comfortably touch the pipe, it is not ready for installation.
Look for Leaks, Wet Areas, and Corrosion
Insulation should not be used to hide problems. Before covering steam pipes, inspect for leaking fittings, wet insulation, rust, pinholes, failed valves, and dripping condensate lines. Wet insulation loses performance and can contribute to corrosion under insulation. If a pipe is leaking, fix the leak first. Insulating a leak is like putting a sweater on a sprinkler.
Best Insulation for Steam Pipes
The most common material for residential and light commercial steam pipe insulation is preformed fiberglass pipe insulation with an all-service jacket, often called ASJ. It usually comes in rigid half-round sections that fit around the pipe and close with a self-sealing lap, tape, or jacket system.
Fiberglass Pipe Insulation
Fiberglass pipe insulation is widely used because it handles high temperatures, is available in common pipe sizes, and is relatively easy to install on straight pipe runs. For steam heating pipes, choose insulation rated for the operating temperature of the system. Many fiberglass pipe insulation products are rated for high-temperature service, but always check the manufacturer’s specifications.
Do not use cheap foam pipe insulation made for domestic water lines. Foam sleeves are typically meant for lower-temperature plumbing, not steam. Steam pipes can exceed the safe temperature range of foam insulation. If the insulation melts, shrinks, smells strange, or behaves like a marshmallow near a campfire, you selected the wrong material.
Mineral Wool and Calcium Silicate
Mineral wool and calcium silicate insulation are also used for high-temperature mechanical systems. These materials are more common in commercial, institutional, and industrial settings. They can be excellent choices where temperatures are higher, durability requirements are greater, or specifications call for a particular system.
Removable Insulation Covers
Valves, flanges, unions, strainers, steam traps, and control components often need future access. For those areas, removable insulation covers or reusable insulation blankets can be a smart choice. They reduce heat loss while still allowing technicians to inspect or service the component without destroying the insulation every time.
For a typical home steam system, you may use rigid fiberglass insulation on straight pipe and compatible fitting covers or removable wraps on elbows and valves. In larger buildings, custom removable covers can deliver better long-term results because maintenance crews are more likely to put them back after service.
What Thickness Should Steam Pipe Insulation Be?
Insulation thickness depends on pipe size, steam temperature, location, energy goals, safety needs, and local code requirements. For many residential steam heating systems, 1-inch-thick fiberglass pipe insulation is common, especially on smaller basement mains. However, thicker insulation may improve energy savings and surface temperature control, particularly on larger pipes or higher-temperature systems.
Commercial energy standards often require thicker insulation as fluid temperature and pipe diameter increase. The practical takeaway is simple: do not choose insulation only by what fits in your shopping cart. Choose it by pipe size, temperature rating, and performance need.
If you are insulating a residential steam main, check the pipe’s outside diameter or nominal pipe size, then buy preformed insulation made for that size. Pipe insulation is labeled by nominal pipe size, not always by the actual outside measurement. When in doubt, bring accurate measurements to a plumbing or mechanical supply house. The staff there have seen every kind of pipe confusion, and yours will not be the weirdest one of the week.
Tools and Materials You May Need
For a straightforward steam pipe insulation project, you may need preformed fiberglass pipe insulation, matching elbow covers, high-temperature tape or ASJ tape, utility knife, measuring tape, gloves, long sleeves, eye protection, dust mask or respirator appropriate for nuisance dust, and wire or bands if required by the insulation system.
For larger systems, you may also need removable insulation blankets, stainless steel bands, aluminum jacketing, PVC fitting covers rated for the application, vapor barrier materials if specified, and professional-grade cutting tools. Outdoor steam piping requires weather protection, because fiberglass pipe insulation is not meant to drink rainwater like a houseplant with poor boundaries.
How Do I Insulate Steam Pipes? Step-by-Step
The following process is written for standard bare steam pipes that do not have asbestos-containing material. If old insulation is present and asbestos is possible, stop and arrange professional testing before proceeding.
Step 1: Identify the Pipes to Insulate
Start with steam supply mains and near-boiler distribution piping. These are usually the hottest and most important pipes to insulate. Condensate return lines may also benefit from insulation, especially if they are hot, run through cold spaces, or contribute to heat loss before water returns to the boiler.
Prioritize pipes in unconditioned spaces such as basements, crawl spaces, garages, mechanical rooms, and utility tunnels. If the pipe is carrying steam or hot condensate and the heat is not useful where it is being released, insulation belongs on the shortlist.
Step 2: Measure Pipe Diameter and Length
Measure the length of each straight run and count elbows, tees, valves, unions, and other fittings. Pipe insulation usually comes in three-foot sections, so divide the total length by three and add a little extra for cuts and mistakes. Mistakes happen. Even professionals occasionally cut something too short and then stare at it like it betrayed them.
Measure pipe size carefully. If you are unsure, use a pipe sizing chart or ask a supplier. Buying the wrong size insulation leads to gaps, crushed material, ugly seams, and language that should not be printed in a family-friendly guide.
Step 3: Choose the Correct Temperature Rating
Select insulation rated for steam service. Low-pressure residential steam still operates above the boiling point of water, and the pipe surface can be very hot. High-temperature fiberglass pipe insulation, mineral wool, or another approved mechanical insulation product is the correct category.
Avoid polyethylene foam, rubber foam not rated for steam, pool noodles, towels, duct insulation, or mystery material from the back of the garage. Steam systems deserve materials designed for the job.
Step 4: Clean and Inspect the Pipe
Once the system is off and cool, wipe dust from the pipe surface. Look for rust flakes, dampness, active leaks, cracked fittings, or evidence of water hammer. Insulation performs best over sound piping. If you discover serious corrosion or leaks, call a qualified heating technician or plumber before continuing.
Step 5: Fit the Insulation Around Straight Runs
Open the preformed fiberglass section along its slit and place it around the pipe. The insulation should fit snugly without being crushed. Close the jacket lap according to the manufacturer’s instructions. If it includes a self-sealing strip, press it firmly along the seam.
Butt the ends of insulation sections tightly together. Gaps allow heat to escape and make the finished job look like a half-buttoned shirt. Seal joints with compatible ASJ tape or approved insulation tape. Do not compress the insulation excessively, because trapped air is part of what makes insulation work.
Step 6: Insulate Elbows and Fittings
Elbows, tees, valves, flanges, and fittings have more surface area than many people realize. Leaving them bare can waste significant heat. Use molded fitting covers, mitered insulation sections, or removable insulation blankets designed for high-temperature service.
For homeowners, elbows are often the trickiest part. You can buy preformed elbow covers or carefully cut small insulation pieces to wrap the bend, then seal the seams. The result does not need to win an art prize, but it should be continuous, secure, and appropriate for the temperature.
Step 7: Keep Service Points Accessible
Do not permanently bury components that require inspection, adjustment, or replacement. Steam traps, pressure-reducing valves, main vents, unions, and shutoff valves may need service later. Use removable covers where access matters.
Also avoid blocking nameplates, inspection ports, pressure gauges, safety valves, or boiler service panels. Insulation is supposed to improve the system, not turn maintenance into a basement treasure hunt.
Step 8: Seal Joints and Protect the Jacket
After installing the insulation, check every seam and joint. Tape loose edges, close gaps, and secure sections that might sag or rotate. In areas with traffic or storage, consider protective jacketing to prevent dents and tears.
For outdoor or damp locations, use a weatherproof insulation system. Standard paper-faced fiberglass pipe insulation is not enough outdoors unless it is protected by suitable jacketing. Moisture ruins performance and can invite corrosion.
Step 9: Restart the System and Observe
When the heating system is restarted, observe the insulated areas from a safe distance. Watch for unusual odors, smoke, leaks, dripping water, loose tape, or sections that shift as pipes expand. Some high-temperature insulation materials may have a mild odor during initial heat-up, but strong smells, melting, or smoke from the wrong material are warning signs.
After a few heating cycles, inspect the installation again. Steam pipes expand and contract. A second look often reveals a seam that needs more tape or a fitting cover that needs adjustment.
Common Mistakes to Avoid
Using the Wrong Insulation
The biggest mistake is using pipe insulation made for cold water or domestic hot water lines. Foam sleeves are easy to find, but most are not suitable for steam temperatures. Use high-temperature pipe insulation designed for steam or mechanical heating systems.
Ignoring Asbestos Risk
Old steam pipe insulation may contain asbestos, especially in older homes, schools, apartment buildings, and commercial properties. If there is old wrap, damaged material, chalky residue, or unknown insulation, do not disturb it. Professional testing is cheaper than creating a hazardous mess.
Leaving Fittings Bare
Many people insulate straight pipe runs and skip elbows, valves, and flanges. That is like wearing a winter coat with no sleeves. Heat still escapes through the exposed parts. Fittings matter, especially in boiler rooms where there may be many of them.
Covering Leaks
Insulation should never be used as a disguise for leaking steam or condensate piping. Fix leaks first. Covering wet or leaking pipe can trap moisture and accelerate corrosion.
Compressing the Insulation
Do not squeeze insulation tightly to force it behind obstacles. Compressed insulation loses effectiveness. If clearance is tight, choose a product designed for limited space or ask a mechanical insulation professional for options.
Should You Insulate Condensate Return Pipes?
In many steam systems, condensate return pipes carry hot water back to the boiler. Whether to insulate them depends on system design, pipe temperature, location, and energy goals. Hot condensate contains useful heat. Keeping it warm can improve overall system efficiency because the boiler needs less energy to bring the water back to steaming temperature.
However, some return lines are cooler, and certain parts of a system may need to lose heat for proper operation. In homes, insulating hot returns in cold basements or garages often makes sense, but it is wise to understand the system before covering every inch. If the return piping includes steam traps, vents, or components that require access, plan the insulation so those parts remain serviceable.
How Much Money Can Steam Pipe Insulation Save?
The savings depend on pipe diameter, steam pressure, operating hours, fuel cost, boiler efficiency, insulation thickness, and how much bare piping you have. A large commercial facility with hundreds of feet of bare steam line can save a substantial amount. A single-family home may see smaller dollar savings, but the improvement can still be worthwhile because insulation is relatively affordable and long-lasting.
For homeowners, the benefits are not only about direct fuel savings. Better heat delivery, reduced basement overheating, improved comfort, and lower burn risk also matter. If your basement currently feels like a tropical greenhouse every time the boiler runs, your steam pipes are probably donating heat to the wrong room.
When to Call a Professional
Call a professional if you suspect asbestos, see leaking steam, hear violent banging, find severe corrosion, need to insulate a large boiler room, or are dealing with commercial or multifamily steam equipment. Also get help if the system has pressure issues, failed steam traps, unusual venting, or repeated water loss.
A qualified steam heating technician can inspect the entire system, not just the insulation. Sometimes insulating pipes reveals other problems because steam now reaches radiators faster. Main vents may need adjustment, radiator vents may need balancing, and boiler pressure may need correction. That is normal. Steam systems are wonderfully simple in theory and wonderfully fussy in real life.
Real-World Experiences: What People Learn When Insulating Steam Pipes
One of the most common experiences after insulating steam pipes is surprise. Many people expect a small improvement and instead notice that the basement temperature drops noticeably while radiators heat more quickly. In older homes, bare steam mains often act like accidental basement radiators. Once those pipes are insulated, the heat moves closer to where it was originally intended to go.
A typical homeowner story goes something like this: the boiler room used to feel hot enough to raise bread dough, but the second-floor bedrooms lagged behind. After insulating the basement steam mains with rigid fiberglass pipe insulation, the basement became more comfortable and the upstairs radiators started receiving steam sooner. The system did not become brand-new, but it stopped wasting so much of its effort in the wrong place.
Another lesson is that elbows and valves are not minor details. Many first-time installers cover long straight runs and leave fittings bare because fittings are awkward. Then they stand back and see shiny metal elbows glowing with heat like tiny energy leaks wearing chrome hats. Once those fittings are covered with proper high-temperature insulation or removable blankets, the job feels more complete and performs better.
People also learn that measuring matters. Pipe insulation is not one-size-fits-all. A pipe that “looks about two inches” may not match the insulation labeled for a two-inch nominal pipe. Successful projects usually begin with careful measurements, a simple sketch of the piping layout, and a count of elbows, tees, valves, and unions. The sketch does not need to be beautiful. It just needs to prevent three separate trips to the supply house, although those trips do build character.
Another real-world experience involves old insulation. In many older buildings, a homeowner discovers half-removed pipe wrap, dusty elbows, or suspicious white material around fittings. The best experience in that situation is the boring one: stop, do not disturb it, and call a qualified asbestos professional. The worst experience is turning a small insulation project into a contamination problem. A careful pause can save money, stress, and health risk.
Installers also notice that working space is often the real challenge. Steam pipes may run tight against joists, behind shelves, above laundry machines, or through cramped corners where hands suddenly seem three sizes too large. In these spots, preformed insulation may need careful trimming. The trick is to preserve thickness as much as possible and avoid crushing the material just to make it fit.
After installation, many people become more aware of the whole steam system. They notice main vents, radiator vents, pressure settings, water level, near-boiler piping, and return lines. Insulation often becomes the gateway project that leads to better steam maintenance overall. That is a good thing. Steam heat can be quiet, even, and efficient when the system is respected.
The final experience is satisfaction. Steam pipe insulation is not flashy, but it is visible progress. You can see the before and after. Bare, heat-radiating pipes become neat, jacketed runs. The basement feels less punishing. The boiler has a better chance to do its job. And unlike some home upgrades, this one does not require choosing between twelve shades of decorative gray. It is practical, measurable, and refreshingly unpretentious.
Conclusion: A Small Upgrade With Big Steam-System Benefits
Insulating steam pipes is one of the smartest upgrades you can make to an older steam heating system. It reduces wasted heat, improves comfort, helps steam reach radiators more efficiently, and lowers the risk of accidental burns from hot pipe surfaces. The key is choosing high-temperature insulation, sizing it correctly, covering fittings, keeping service components accessible, and never disturbing old insulation that may contain asbestos.
If your steam pipes are bare, start with a careful inspection. Measure the piping, choose the right material, seal joints well, and protect the insulation from moisture and damage. For simple bare pipes in good condition, this can be a manageable project. For asbestos, leaks, commercial systems, or complex boiler rooms, bring in the professionals. Steam is powerful, old buildings are full of surprises, and the best insulation job is the one that saves energy without creating new problems.














