
Cleaning an oven is one of those chores people treat like a mysterious basement noise: ignore it long enough and maybe it will go away. Unfortunately, baked-on cheese, splattered grease, and mystery crumbs from “that one pizza night” do not respect wishful thinking. The good news? You do not need an entire Saturday, a hazmat suit, or the emotional stamina of a superhero to make your oven look, smell, and work better.
This guide explains how to clean an oven quickly and easily using practical methods that fit different mess levels. Whether you want a fast wipe-down before dinner guests arrive, a natural baking soda and vinegar oven cleaning method, or a deeper clean for a self-cleaning oven, you will find clear steps, safety tips, and realistic examples. The goal is simple: remove grease, loosen burnt food, clean oven racks, brighten oven glass, and get your appliance back to doing what it does bestturning ingredients into happiness.
Why Cleaning Your Oven Matters More Than You Think
A dirty oven is not just a cosmetic problem. Baked-on food residue can smoke, smell, affect flavor, and make your kitchen feel less fresh. Grease buildup may also create unpleasant fumes when heated. If you have ever preheated your oven and suddenly wondered whether you accidentally invited a campfire into your kitchen, old spills were probably the culprit.
Regular oven cleaning also saves effort. A small sauce drip is easy to wipe once the oven cools. That same drip, baked through six lasagnas and a tray of sweet potatoes, becomes a stubborn archaeological layer. Cleaning your oven every few monthsor sooner if you cook oftenhelps prevent heavy buildup and makes each future cleaning session faster.
Before You Start: Quick Safety Rules
Before grabbing a sponge like a kitchen warrior, take a moment to set yourself up safely. Make sure the oven is completely cool unless you are using a manufacturer-approved steam or self-clean cycle. Remove cookware, baking sheets, foil, pizza stones, and thermometers. If your oven has removable racks, take them out unless your specific oven manual says they can stay in during a steam-clean cycle.
Wear cleaning gloves, especially if you use a commercial oven cleaner. Keep the kitchen ventilated by turning on the range hood or opening a window. Avoid spraying cleaner directly on heating elements, fans, vents, control panels, or the oven door gasket. That soft gasket around the door helps seal in heat, so do not scrub, pull, soak, or bully it. It has one job, and it is doing its best.
Choose the Right Oven Cleaning Method
The fastest way to clean an oven depends on the mess. A light splatter needs a very different approach than a caramelized casserole overflow that looks like it signed a long-term lease.
For Light Messes: Steam and Wipe
If your oven has small spills or fresh grease, steam is usually the quickest and easiest option. Place an oven-safe dish with water inside the oven, heat it according to your appliance instructions, and let steam soften the grime. Some ovens have a built-in steam-clean function that uses water and lower heat to loosen food soil. After the cycle ends and the oven cools enough to touch safely, wipe the interior with a damp microfiber cloth or non-scratch sponge.
For Moderate Grease: Baking Soda Paste
Baking soda is a gentle abrasive and deodorizer, making it useful for cleaning oven interiors without harsh fumes. Mix baking soda with a little water until it forms a spreadable paste. Apply it to greasy areas while avoiding heating elements and vents. Let it sit for at least 20 to 60 minutes, then wipe with a damp cloth. For tougher spots, let the paste sit longer.
For Heavy Buildup: Deep Clean or Self-Clean
If your oven has serious baked-on food, you may need a longer soak, a commercial cleaner approved for your oven type, or the self-cleaning cycle. Always check your owner’s manual first. Self-cleaning ovens use very high heat to turn residue into ash, but the cycle can produce smoke and odors. Remove racks and loose debris first, ventilate well, and keep children and pets away from the kitchen during the cycle.
Supplies You Need to Clean an Oven Quickly
You do not need a cabinet full of specialty products. For a simple oven cleaning session, gather these basics:
- Baking soda
- Distilled white vinegar or lemon juice
- Dish soap
- Warm water
- Microfiber cloths
- Non-scratch sponge or scrub pad
- Plastic scraper or silicone spatula
- Old towel to protect the floor
- Gloves
- Spray bottle
A plastic scraper is especially helpful for lifting softened food without scratching the oven surface. Avoid metal scrapers unless your oven manual specifically allows them. The goal is to remove grime, not give your appliance a regrettable tattoo.
How to Clean an Oven Quickly and Easily: Step-by-Step
Step 1: Empty the Oven
Remove everything from the oven, including racks, pans, foil liners, and loose accessories. Check the back corners, where crumbs often hide like tiny kitchen fugitives. Place an old towel under the oven door to catch drips and loosened debris.
Step 2: Remove Loose Crumbs and Burnt Bits
Use a dry cloth, handheld vacuum, or soft brush to remove crumbs and loose pieces of burnt food. This one-minute step makes the rest of the job easier. If you skip it, you may end up pushing wet crumbs around like a very disappointing soup.
Step 3: Steam the Oven to Loosen Grease
For a quick natural clean, place an oven-safe bowl or baking dish filled with water inside the oven. Add a few tablespoons of vinegar or lemon juice if you want extra deodorizing power. Heat the oven until steam forms, then turn it off and let it sit with the door closed. Once the oven is warm but safe to touch, wipe the interior with a damp cloth.
If your oven has a steam-clean setting, follow the manufacturer’s instructions exactly. Many steam-clean cycles are designed for light spills and may take about 20 to 30 minutes. They are not magic, but they are excellent for maintenance cleaning.
Step 4: Apply Baking Soda Paste to Stubborn Spots
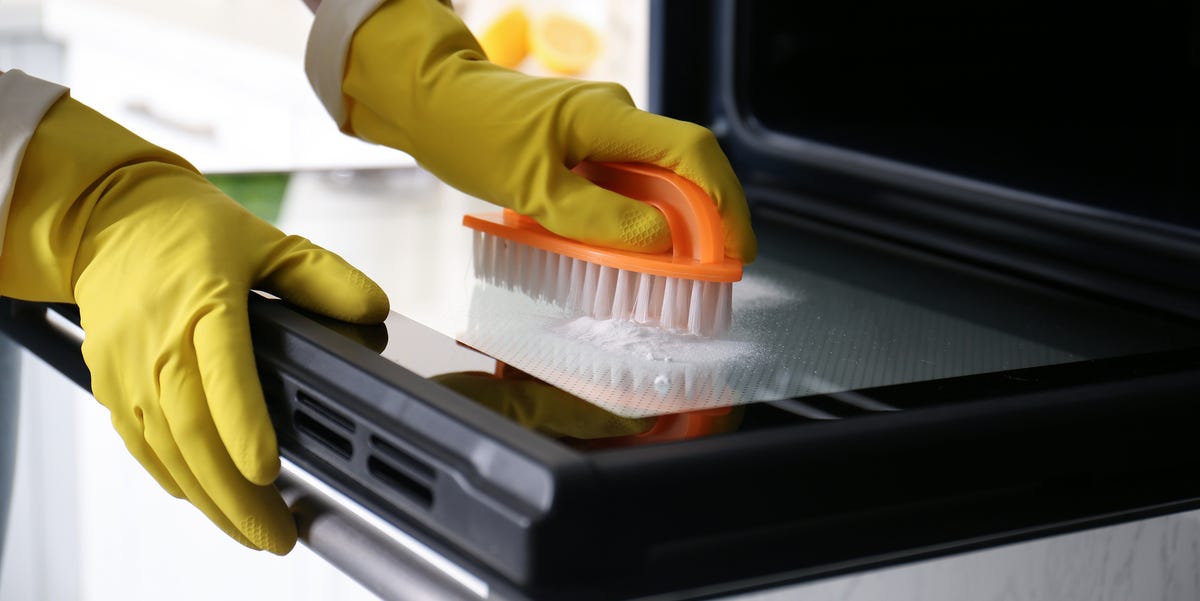
Mix about 1/2 cup baking soda with 2 to 3 tablespoons of water. Add water slowly until the mixture becomes a paste. Spread it over greasy or stained areas, especially the oven floor and inside door glass. Avoid heating elements, gas openings, vents, fans, and the door gasket.
Let the paste sit for 20 minutes for light buildup, one hour for moderate grime, or overnight for heavy baked-on residue. Time does a lot of the scrubbing for you, which is exactly the kind of teamwork we like in a cleaning product.
Step 5: Wipe, Scrub, and Rinse
Use a damp microfiber cloth or non-scratch sponge to wipe away the baking soda paste. For stubborn patches, use a plastic scraper or silicone spatula. Spray a small amount of vinegar onto leftover baking soda residue. It will fizz, which is satisfying, but the real cleaning work comes from loosening residue and wiping thoroughly.
Repeat with clean water until no gritty baking soda remains. This step matters because leftover baking soda can leave a white film. If your oven looks clean but feels powdery, keep wiping. Your future cookies deserve a clean stage.
How to Clean Oven Racks Without Losing Patience
Oven racks often collect grease, crumbs, and sticky drips. Cleaning them separately is easier than trying to scrub them inside the oven. Place the racks in a sink, utility tub, or bathtub lined with an old towel to prevent scratches. Fill with hot water and add dish soap. Let the racks soak for at least two hours, or overnight if they are heavily coated.
After soaking, scrub with a non-scratch pad or brush, rinse well, and dry completely before returning them to the oven. For extra greasy racks, sprinkle baking soda over the racks before soaking or add a small amount of degreasing dish soap. Do not use harsh abrasives that may damage the rack finish. If your racks are porcelain-coated, follow your oven manual because some coatings require gentler care.
How to Clean Oven Glass
Oven door glass is where splatters go to become modern art. To clean it, spread a thin layer of baking soda paste over the glass and let it sit for 15 to 30 minutes. Wipe with a damp cloth, then polish with a clean microfiber towel. For greasy film, a drop of dish soap in warm water can help cut through residue.
Avoid spraying liquid directly near the door vents or edges because moisture can seep between glass panels. If food or streaks are trapped between the glass layers, check your manual before attempting to remove the door or panels. Some doors are designed for careful disassembly, while others are best left to a technician or a very patient person with the correct instructions.
Should You Use the Self-Cleaning Oven Feature?
The self-cleaning feature can be useful, but it is not always the fastest or best choice. A high-heat self-clean cycle may take several hours, lock the oven door, and produce smoke or strong odors as it burns off residue. It is best reserved for heavy buildup, not small everyday spills.
Before running self-clean, remove racks, pans, cookware, foil, and large food pieces. Wipe up loose grease to reduce smoke. Do not use commercial oven cleaners before or during a self-clean cycle unless your manual specifically says it is safe. Chemical residue and extreme heat are not a friendly combination.
After the cycle finishes and the oven cools completely, wipe away the ash with a damp cloth. Keep the kitchen ventilated, and do not leave the oven completely unattended for long periods. If you have birds, sensitive pets, asthma, or respiratory concerns in the home, take extra care with ventilation and consider a manual cleaning method instead.
Commercial Oven Cleaners: When They Make Sense
Commercial oven cleaners can work quickly on stubborn grease, but they must be used carefully. Choose a product suitable for your oven type and read the label fully. Wear gloves, ventilate the kitchen, and protect nearby floors and cabinets. Never mix cleaning products, especially bleach and ammonia-based cleaners.
Do not use commercial oven cleaner on self-cleaning oven interiors unless the manufacturer allows it. Some oven coatings can be damaged by harsh chemicals. If you are unsure, choose the slower but safer baking soda method or consult your appliance manual. A clean oven is nice; a damaged oven is an expensive plot twist.
Fast Oven Cleaning Schedule
For easy maintenance, use a simple schedule. Wipe fresh spills after the oven cools. Do a quick steam clean once a month if you use the oven often. Deep clean every three to six months, depending on how frequently you roast, broil, bake, or reheat saucy foods. If your oven starts smoking during preheating, smells greasy, or has visible buildup, it is time to clean.
Common Oven Cleaning Mistakes to Avoid
Using Too Much Water
A damp cloth is helpful; a flooded oven is not. Avoid pouring water into vents, fans, heating elements, or electrical areas. Use moisture carefully and wipe dry when finished.
Scrubbing the Door Gasket
The gasket is delicate and important for heat retention. Wipe nearby areas gently, but do not scrub, pull, or soak the gasket.
Leaving Cleaner Residue Behind
Whether you use baking soda, dish soap, or a commercial cleaner, residue can smoke or smell when the oven heats again. Always rinse and wipe thoroughly.
Cleaning While the Oven Is Too Hot
Warm surfaces can soften grease, but hot surfaces can burn your hands or cause cleaners to evaporate too quickly. Let the oven cool to a safe temperature before wiping.
How to Keep Your Oven Cleaner for Longer
The easiest oven to clean is the one that never gets wildly dirty. Place casseroles, pies, and saucy dishes on a rimmed baking sheet to catch overflow. Use lids or foil tents on splatter-prone foods, but do not line the bottom of the oven with foil unless your manual says it is safe. Foil can block heat, damage oven surfaces, or interfere with airflow in some models.
Clean small spills promptly after the oven cools. If something bubbles over during baking, wait until it is safe, then remove loose debris. A quick wipe now prevents a dramatic scrub later. Think of it as sending future-you a gift, except the gift is not spending two hours fighting burnt cheese.
Real-Life Experiences: What Actually Makes Oven Cleaning Easier
One of the biggest lessons from real oven cleaning is that speed comes from preparation, not force. People often attack a dirty oven with a sponge immediately, then wonder why nothing moves. The smarter approach is to soften the mess first. Steam, baking soda paste, warm water, and soaking time all reduce scrubbing. In practice, a 30-minute wait can save your wrist from a 30-minute battle.
For example, a lightly dirty oven after roasting chicken usually does not need a full deep clean. A bowl of hot water or a steam-clean cycle can loosen splatter enough for a quick wipe. Add a drop of dish soap to a damp cloth, clean the walls and floor, then rinse with another cloth. The whole job may take less time than scrolling through recipes you have no intention of making.
Another practical experience: oven racks are almost always easier to clean outside the oven. Trying to scrub racks in place is awkward, messy, and strangely humbling. Soaking them in hot, soapy water while you clean the oven interior is efficient. By the time the inside is wiped down, the rack grime has softened. A brush or sponge can then remove most residue without heroic effort.
Oven glass also teaches patience. If you scrub it dry, greasy stains smear. If you let baking soda paste sit for a short time, the residue lifts more evenly. A microfiber cloth at the end makes a big difference because it polishes without leaving lint. The glass may not look brand-new every time, especially if stains are old, but it will look clearer and cleaner.
The most frustrating oven cleaning experiences usually come from waiting too long. A few drops of pie filling can turn into black, smoky spots after repeated baking. Cleaning small spills once the oven cools is the real shortcut. It takes two minutes and prevents the dreaded “why does my oven smell like burnt sugar and regret?” moment.
Another useful habit is keeping a small oven-cleaning kit nearby: baking soda, a spray bottle, gloves, microfiber cloths, and a plastic scraper. When the supplies are easy to find, cleaning feels less like a major project. You are more likely to handle messes early instead of mentally moving the chore to “next weekend,” where all neglected chores go to form a committee.
Finally, the best method depends on your oven and your tolerance for fumes. Some people love the convenience of self-cleaning cycles; others prefer baking soda because it feels gentler. Some choose commercial cleaners for speed when grease is severe. The winning method is the one that cleans effectively without damaging your oven, irritating your lungs, or ruining your afternoon. Start with the mildest method that fits the mess, increase cleaning power only when needed, and always follow the manufacturer’s instructions.
Conclusion
Cleaning an oven quickly and easily is not about scrubbing harder; it is about using the right method for the mess. For light spills, steam and a damp cloth may be enough. For greasy buildup, baking soda paste gives you a low-fume, budget-friendly solution. For racks, soaking beats scrubbing in place every time. For heavy residue, a self-clean cycle or approved oven cleaner may help, as long as you follow safety instructions.
The secret is consistency. Wipe spills after the oven cools, protect the oven from overflow, and deep clean before the grime becomes a permanent resident. Your oven will smell better, look better, and perform betterand your next batch of cookies will not come with a mysterious smoky side note.














