
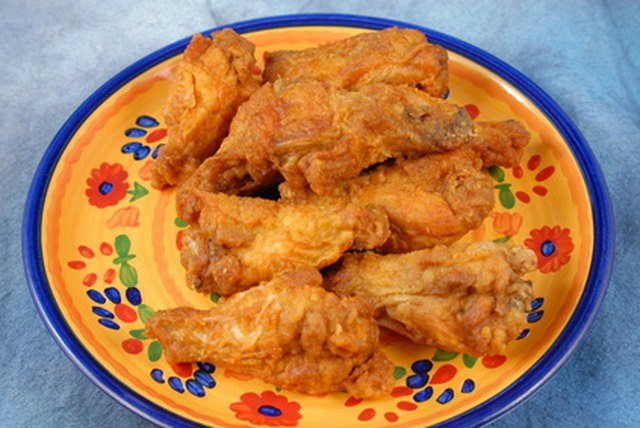
Buffalo wings are one of those foods that can make a room full of people suddenly act like football commentators, food critics, and sauce scientists at the same time. One person wants extra crispy wings. Another wants more heat. Someone else wants the breading to cling like it signed a long-term lease. And then there is always one brave soul asking, “Can we make them in the oven?” Yes, friend. Yes, we can.
This guide is all about how to make Buffalo wing breading that turns ordinary chicken wings into crunchy, saucy, spicy little legends. Whether you are frying, baking, or air frying, the breading matters. It decides whether your wings stay crisp after saucing or become sad, floppy napkin weights. The good news is that great Buffalo wing breading does not require restaurant magic, a culinary degree, or a secret handshake from a wing bar in upstate New York. It requires the right flour-to-starch balance, smart seasoning, dry chicken skin, and a little patience.
Below, you will learn what goes into the best Buffalo wing breading, how to mix it, how to apply it, and how to keep it crispy after that glorious orange Buffalo sauce hits the bowl.
What Is Buffalo Wing Breading?
Buffalo wing breading is a seasoned coating used to create a crisp outer layer on chicken wings before they are cooked and tossed in Buffalo sauce. Traditional Buffalo wings are often not breaded at all; they are usually fried until crisp and then coated with hot sauce and butter. But breaded Buffalo wings have become popular because they deliver extra crunch, hold seasoning beautifully, and give the sauce more texture to cling to.
A good breading should do three things: season the wing, absorb surface moisture, and form a crisp shell during cooking. The best versions use a mix of all-purpose flour and cornstarch, plus spices like garlic powder, onion powder, paprika, cayenne, black pepper, and salt. Some recipes also use baking powder for baked or air-fried wings because it helps dry the surface and encourages browning.
The Best Ingredients for Buffalo Wing Breading
Great breading starts with simple pantry ingredients. You do not need anything fancy, unless you consider paprika fancy, in which case your spice cabinet may need a motivational speech.
All-Purpose Flour
Flour gives the breading structure. It creates that familiar fried-chicken-style coating and helps spices stick evenly to the wings. However, flour alone can sometimes create a heavier crust, especially if the wings are tossed in sauce immediately after frying. That is why flour works best when paired with a lighter starch.
Cornstarch
Cornstarch is the crispiness booster. It helps create a lighter, cracklier coating than flour by itself. If you have ever wondered why some restaurant wings stay crisp even after a sauce bath, cornstarch is often part of the answer. It reduces the density of the breading and helps moisture escape quickly during cooking.
Baking Powder
Baking powder is especially useful for baked and air-fried Buffalo wings. It raises the pH on the surface of the chicken, which helps the skin brown and crisp more efficiently. Use aluminum-free baking powder if possible, and do not confuse it with baking soda. Baking soda can leave a strong, unpleasant taste if used too heavily. Wings should taste like Buffalo wings, not like they got into a fight with a box of laundry powder.
Salt
Salt seasons the meat and helps draw out surface moisture. For best results, salt the wings before breading and let them rest uncovered in the refrigerator. Even 30 minutes helps, but several hours is better if you have time.
Spices
Buffalo wing breading should support the sauce, not compete with it. Garlic powder, onion powder, smoked paprika, cayenne, black pepper, and a little white pepper are excellent choices. Paprika adds color and mild sweetness, cayenne brings heat, and garlic powder makes everything taste like it belongs at a party.
Classic Buffalo Wing Breading Recipe
This breading mix works well for fried wings, baked wings, and air-fried wings. You can adjust the heat level depending on your sauce and your personal relationship with spicy food.
Ingredients
- 2 pounds chicken wings, split into flats and drumettes
- 1/2 cup all-purpose flour
- 1/2 cup cornstarch
- 1 tablespoon aluminum-free baking powder
- 1 1/2 teaspoons kosher salt
- 1 teaspoon garlic powder
- 1 teaspoon onion powder
- 1 teaspoon smoked paprika or sweet paprika
- 1/2 teaspoon cayenne pepper
- 1/2 teaspoon black pepper
- Optional: 1/4 teaspoon white pepper for extra wing-shop flavor
Simple Buffalo Sauce
- 1/2 cup cayenne-style hot sauce
- 4 tablespoons unsalted butter, melted
- 1 teaspoon honey or brown sugar, optional
- 1/2 teaspoon garlic powder
- 1 teaspoon white vinegar, optional for extra tang
Step-by-Step: How to Make Buffalo Wing Breading
Step 1: Dry the Wings Thoroughly
Moisture is the enemy of crisp breading. Before seasoning, pat the wings very dry with paper towels. If you have time, place them on a wire rack over a baking sheet and refrigerate them uncovered for at least 30 minutes. For even crispier wings, let them dry for several hours or overnight.
This step may sound boring, but it is the difference between crispy wings and wings that steam inside their coating. Steam is great for vegetables. It is not invited to the Buffalo wing party.
Step 2: Mix the Dry Breading
In a large bowl, whisk together the flour, cornstarch, baking powder, salt, garlic powder, onion powder, paprika, cayenne, and black pepper. Whisking matters because baking powder and spices can clump. A smooth, even breading mix gives every wing the same flavor and texture.
Step 3: Coat the Wings Lightly
Add the wings to the bowl and toss until each piece is evenly coated. The goal is a thin, dusty coating, not a thick snowstorm of flour. Shake off excess breading before cooking. Too much dry mix can create a pasty layer once the sauce is added.
Step 4: Rest the Coated Wings
After coating, let the wings rest on a wire rack for 10 to 20 minutes. This gives the breading time to hydrate slightly and cling to the chicken. If the breading looks patchy, that is normal. Once it hits hot oil or hot circulating air, the coating will crisp and set.
Step 5: Cook Until Crisp and Safe
Chicken wings should be cooked to an internal temperature of 165°F. Use a food thermometer and check the thickest part of the wing without touching bone. Many cooks prefer wings cooked a little beyond 165°F for better texture because wings contain connective tissue and skin that benefit from extra rendering.
Cooking Method 1: Fried Buffalo Wings
Frying gives the most classic breaded Buffalo wing texture. Heat neutral oil, such as canola, vegetable, or peanut oil, to 350°F. Fry the wings in batches for 8 to 10 minutes, depending on size, until golden brown and cooked through. Avoid crowding the pot because too many wings will drop the oil temperature and make the coating greasy.
Once fried, transfer the wings to a wire rack instead of a paper towel-lined plate. Paper towels trap steam under the wings, which softens the crust. A wire rack lets air circulate, keeping the breading crisp while you finish the remaining batches.
Cooking Method 2: Baked Buffalo Wings
For baked wings, preheat the oven to 425°F. Arrange the breaded wings on a wire rack set over a rimmed baking sheet. Bake for 45 to 55 minutes, flipping halfway through, until the wings are deeply golden and crisp. The wire rack is important because it lifts the wings away from moisture and allows hot air to circulate.
Baked breaded Buffalo wings can be excellent, but they need space. Do not let the wings touch each other on the rack. If they are crowded, they will steam instead of crisp. Give them room like tiny chicken celebrities walking a red carpet.
Cooking Method 3: Air Fryer Buffalo Wings
Air frying is a great middle ground between deep frying and baking. Preheat the air fryer to 380°F. Arrange wings in a single layer and cook for 20 to 25 minutes, flipping halfway through. Increase the heat to 400°F for the final 5 minutes to help crisp the coating.
Air fryers vary, so check early and use a thermometer. Lightly spraying the wings with oil can help the breading brown more evenly. Do not overload the basket; air needs to move around the wings to create that crunchy exterior.
How to Sauce Breaded Buffalo Wings Without Making Them Soggy
The biggest mistake people make is drowning wings in sauce too early. Buffalo sauce is delicious, but it is also wet. If the breading is not fully crisp before saucing, the coating will soften quickly.
For best results, let cooked wings rest on a rack for 3 to 5 minutes. Then toss them quickly in warm Buffalo sauce. Use just enough sauce to coat, not enough to create a soup situation. If you like extra sauce, serve it on the side for dipping. This keeps the coating crisp while still delivering that buttery, spicy Buffalo flavor.
Best Ratio for Crispy Buffalo Wing Breading
A reliable starting ratio is equal parts flour and cornstarch. For 2 pounds of wings, use 1/2 cup flour and 1/2 cup cornstarch. Add 1 tablespoon baking powder if baking or air frying. For deep frying, you can reduce the baking powder to 1 teaspoon or skip it entirely if you prefer a more traditional fried coating.
If you want a lighter crust, use more cornstarch than flour. Try 3/4 cup cornstarch and 1/4 cup flour. If you want a heartier fried-chicken-style crust, use 3/4 cup flour and 1/4 cup cornstarch. The perfect breading depends on whether you want delicate crispiness or a thicker crunch.
Flavor Variations for Buffalo Wing Breading
Extra Spicy Buffalo Breading
Add 1 teaspoon cayenne pepper and 1/2 teaspoon chili powder to the basic mix. This version is great for people who believe mild wings are just chicken wearing a costume.
Garlic Buffalo Breading
Increase garlic powder to 2 teaspoons and add 1/2 teaspoon dried parsley. Toss the finished wings in garlic Buffalo sauce for an extra punch.
Smoky Buffalo Breading
Use smoked paprika and add 1/2 teaspoon ground chipotle powder. This gives the wings a deeper, barbecue-like flavor without turning them into barbecue wings.
Gluten-Free Buffalo Wing Breading
Replace the all-purpose flour with rice flour or a gluten-free flour blend. Cornstarch already contains no gluten, and rice flour creates a very light, crispy coating. Always check labels to make sure your ingredients are certified gluten-free if cooking for someone with celiac disease or serious sensitivity.
Common Buffalo Wing Breading Mistakes
Using Wet Wings
If the wings are wet, the breading becomes gummy. Dry the wings thoroughly before coating. This one step solves many texture problems.
Adding Too Much Breading
More breading does not always mean more crunch. A heavy coating can turn thick, pasty, or greasy. Keep the layer thin and even.
Skipping the Wire Rack
Whether you are baking, cooling, or resting fried wings, a wire rack is your best friend. It prevents steam from softening the bottom of the wings.
Saucing Too Early
Let wings finish crisping before tossing them in sauce. Warm sauce coats better and helps avoid shocking the crust with cold liquid.
Using Baking Soda Instead of Baking Powder
Baking soda is much stronger than baking powder and can leave a bitter, metallic taste. Use aluminum-free baking powder for the best flavor.
Food Safety Tips for Breaded Buffalo Wings
Because Buffalo wing breading often contains raw flour and touches raw chicken, handle it carefully. Do not taste raw breading after it has contacted chicken. Discard leftover breading that touched raw poultry. Wash hands, bowls, utensils, and surfaces after preparation.
Cook wings to 165°F and use a thermometer instead of guessing by color. Crispy breading can make wings look finished before the meat is fully cooked. A thermometer is not unglamorous; it is the tiny kitchen truth-teller that keeps dinner safe.
What to Serve with Breaded Buffalo Wings
Breaded Buffalo wings are bold, salty, spicy, and rich, so they pair best with cool, crisp, or creamy sides. Classic celery sticks and carrot sticks are popular because they add crunch and freshness. Blue cheese dressing is traditional, while ranch dressing is the crowd-pleasing favorite in many homes.
For a fuller meal, serve wings with coleslaw, potato wedges, mac and cheese, corn on the cob, or a simple green salad. If you are hosting game day, add extra napkins. Then add more napkins. Then accept that someone will still wipe sauce on their jeans and call it “team spirit.”
Experience Notes: Lessons from Making Buffalo Wing Breading at Home
After making breaded Buffalo wings many times, one lesson stands above all the others: dryness equals crispiness. The first time many home cooks try breaded wings, they pat the chicken once, toss it in flour, and hope for restaurant magic. The result is usually decent, but not unforgettable. The wings may brown, but the coating can soften quickly after sauce. Once you start drying the wings properly, the whole recipe changes.
The best routine is simple. Open the package of wings, separate any pieces if needed, pat them dry, salt them lightly, and let them sit uncovered on a rack in the refrigerator. Even one hour makes a noticeable difference. Overnight is even better. The skin becomes tacky and dry, which helps the breading cling instead of sliding around like it is trying to escape.
Another useful lesson is to keep the breading thin. When people hear “breaded wings,” they sometimes imagine a thick fried chicken crust. That can taste great, but Buffalo sauce changes the equation. A thick coating absorbs more sauce and can become heavy. A thin flour-and-cornstarch coating gives you the crunch you want without turning the wing into a spicy biscuit. Delicious? Maybe. Balanced? Not quite.
Cornstarch is the quiet hero. Flour brings structure, but cornstarch brings that delicate crunch that survives saucing better. A half-and-half mix is dependable, but when extra crispiness is the goal, increasing the cornstarch slightly can make the wings feel lighter. Rice flour works beautifully too, especially for gluten-free versions. It creates a dry, crisp shell that feels almost restaurant-style.
Seasoning the breading is also more important than it seems. Buffalo sauce is powerful, but the wing itself still needs flavor. Garlic powder, onion powder, paprika, and pepper make the crust taste complete before sauce ever touches it. This matters because every bite includes some areas with more sauce and some with less. Well-seasoned breading keeps every bite interesting.
The final lesson is to sauce with confidence but not chaos. Use a large bowl, add warm sauce, toss quickly, and serve right away. Do not let the wings sit in a puddle. If you are cooking for a group, keep the wings crisp on a rack and sauce them in smaller batches. That way the last plate tastes as good as the first one, and nobody gets stuck with the soggy “we forgot these existed” wings at the bottom of the bowl.
Homemade Buffalo wing breading is not complicated, but it rewards small details. Dry the wings. Balance flour with cornstarch. Use baking powder carefully. Rest the coating. Cook hot. Sauce fast. Serve immediately. Follow those steps and you will have wings that crunch first, burn pleasantly second, and disappear from the plate third.
Conclusion
Learning how to make Buffalo wing breading is really about learning how to control moisture, texture, and flavor. A great breading mix uses flour for structure, cornstarch for crispiness, baking powder for better browning, and spices for that bold Buffalo-style personality. Whether you fry, bake, or air fry, the secret is to dry the wings well, coat them lightly, cook them until crisp, and toss them in warm Buffalo sauce right before serving.
The result is everything a Buffalo wing should be: crunchy, saucy, spicy, buttery, and just messy enough to make napkins feel important. Once you master the breading, you can adjust the heat, change the spices, or experiment with gluten-free options. Your kitchen may not become a sports bar overnight, but it will smell like victory with a side of cayenne.













