
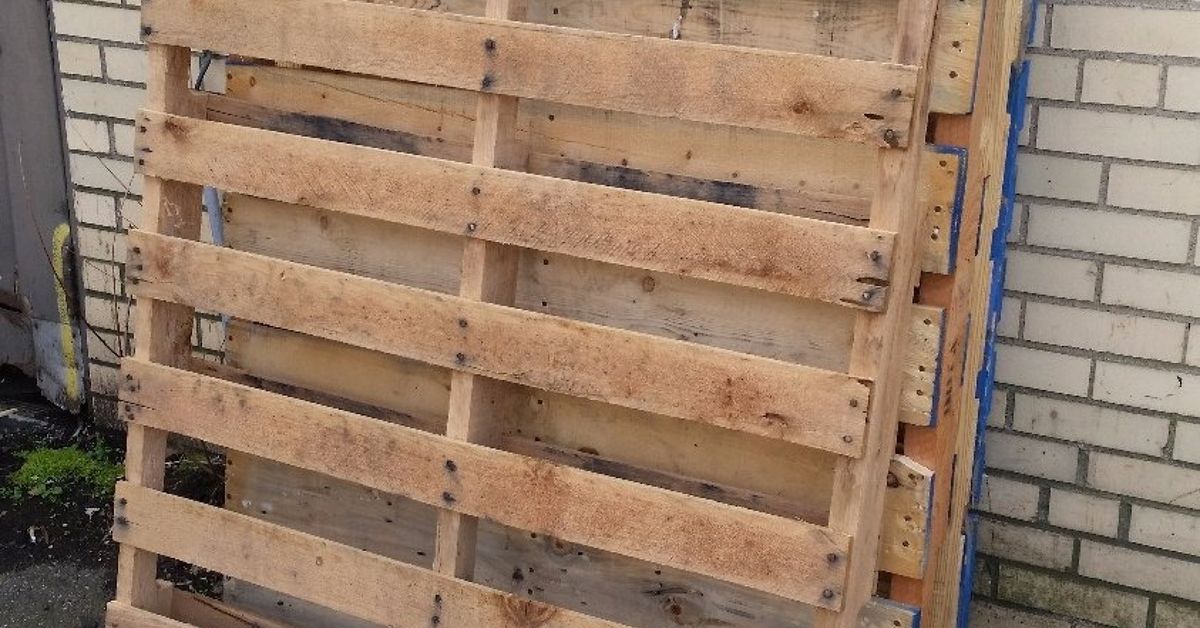
Building a chicken coop from repurposed pallets is the kind of backyard project that makes you feel resourceful, practical, and slightly heroic. You are not just building a home for chickens. You are rescuing wood from the waste stream, saving money, and giving your hens a place to cluck judgmentally at your carpentry skills.
The best part? A pallet chicken coop does not need to look like a roadside science experiment. With smart planning, safe materials, solid predator protection, good ventilation, and a roof that does not leak like a pasta strainer, you can build a sturdy, attractive coop for a small backyard flock.
This guide walks you through how to build a chicken coop from repurposed pallets, from choosing safe pallet wood to framing walls, adding nest boxes, designing roosts, weatherproofing, and avoiding the common mistakes that turn a budget coop into a raccoon buffet.
Why Build a Chicken Coop From Repurposed Pallets?
Wooden pallets are popular for DIY chicken coop projects because they are often inexpensive or free, widely available, and already built with strong structural pieces. A standard pallet can become part of a wall, floor platform, siding layer, door frame, or run support. Instead of buying every board new, you reuse what already exists.
A pallet coop is especially appealing for backyard chicken keepers who want a low-cost chicken coop without sacrificing function. Chickens do not need marble countertops, designer wallpaper, or a chandelier over the feeder. They need dry shelter, fresh air, protection from predators, enough room to move, clean bedding, nesting space, roosting space, and easy access for you to clean the coop without needing a chiropractor afterward.
Repurposed pallets also give the coop a rustic farmhouse look. Done well, the result feels charming and intentional. Done poorly, it looks like a pile of lumber got into a disagreement with gravity. The difference is planning.
Before You Build: Plan the Coop Size
Start with your flock size. A good rule for standard laying hens is to provide about 3 to 4 square feet of indoor coop space per chicken when they also have access to an outdoor run. If chickens will spend most of their time inside, increase the space generously. For the run, many backyard keepers aim for roughly 8 to 10 square feet per bird, though more is always better.
For example, a 4-by-6-foot pallet chicken coop gives you 24 square feet of interior space. That is comfortable for about six standard hens if they also have a secure outdoor run. A 4-by-8-foot coop gives you 32 square feet, which works well for about eight hens. Do not cram twelve chickens into a tiny coop just because the internet once said it was “technically possible.” Technically, you can wear jeans three sizes too small, too. Nobody wins.
Basic Coop Layout for a Small Flock
For a simple pallet chicken coop, plan for these core zones:
- Sleeping area: Dry, enclosed, predator-proof, and draft-free.
- Nest boxes: One box for every four to five hens.
- Roost bars: Higher than the nesting boxes, with enough room for each bird.
- Ventilation openings: Near the roofline, covered with hardware cloth.
- Human access door: Big enough for cleaning tools and your shoulders.
- Chicken pop door: A small door leading to the run.
- Outdoor run: Fenced, covered if possible, and protected from digging predators.
Choose Safe Pallets First
Not all pallets are safe for animal housing. Before you load a truck with every abandoned pallet behind a store, inspect them carefully. Look for clean, dry pallets with no chemical spills, oil stains, strange odors, mold, rot, or mystery crust. If a pallet smells like an industrial accident, leave it alone.
Check for a treatment stamp. Pallets marked HT are heat-treated, which is generally the safer option for DIY reuse. Avoid pallets marked MB, which indicates methyl bromide fumigation. Methyl bromide is a toxic fumigant and not something you want in a coop where birds scratch, peck, breathe, and live every day.
Also avoid unmarked pallets unless you know exactly where they came from and what they carried. Pallets used for paper goods, textiles, or clean dry materials from a trusted local business are usually better candidates than pallets from chemical suppliers, food spills, or unknown loading docks.
Tools and Materials You Will Need
Your exact material list depends on the size of your chicken coop, but a basic pallet coop usually requires the following:
- 8 to 15 clean heat-treated pallets, depending on coop size
- Pressure-treated 4x4s or concrete blocks for the foundation
- 2×4 lumber for extra framing and roof support
- Exterior-grade plywood or pallet boards for walls and flooring
- Corrugated metal, shingles, or polycarbonate panels for roofing
- Half-inch hardware cloth for vents, windows, and predator protection
- Deck screws, galvanized nails, washers, hinges, and latches
- Exterior paint or non-toxic wood sealant
- Roost boards, usually 2×2 or 2×4 lumber with softened edges
- Nesting box materials, such as plywood, crates, or framed pallet wood
- Drill, circular saw, pry bar, hammer, level, tape measure, and safety gear
Use screws for major structural connections whenever possible. Pallet wood is often dry and can split, so pre-drilling holes saves frustration. It also saves you from saying things in the backyard that make the chickens widen their eyes.
Step 1: Build a Strong Foundation
A chicken coop should sit above wet ground. Moisture is the enemy of wood, bedding, chicken health, and your future cleaning mood. Set the coop on concrete blocks, skids, or pressure-treated 4×4 runners. Raising the coop at least 12 inches off the ground improves airflow, slows rot, and discourages some pests from nesting underneath.
Level the foundation before framing. A coop that starts crooked tends to get more crooked as you build. Use gravel under blocks if your soil stays wet. If you live in an area with heavy predators, consider adding hardware cloth under the floor or building a buried predator skirt around the coop perimeter.
Step 2: Frame the Floor
Pallets can form the base of the coop, but they need reinforcement. Lay two or three pallets together on your foundation and screw them into supporting 2x4s or 4×4 runners. Cover the top with exterior-grade plywood so bedding does not fall through the pallet gaps.
For easier cleaning, add a sheet of vinyl flooring, linoleum, or painted plywood over the floor. Seal the edges to keep droppings and moisture from getting trapped underneath. A smooth floor makes deep cleaning faster and helps prevent the coop from developing that unforgettable “barnyard locker room” aroma.
Step 3: Build the Walls With Pallets
You can use whole pallets as wall panels or dismantle pallets and use the boards as siding. Whole pallets are faster, but they create gaps that need covering. Dismantled boards offer a cleaner look but take more time.
For a beginner-friendly build, use full pallets as the wall skeleton. Stand them upright along the floor frame and fasten them securely with deck screws. Add 2×4 studs at corners and between pallet sections for strength. Once the frame is square, cover the outside with pallet boards, plywood, or reclaimed siding.
Leave framed openings for windows, vents, the chicken pop door, and the human access door. Do not skip the human door. Crawling into a tiny coop with a feed scoop in one hand and regret in the other gets old very quickly.
Step 4: Add Ventilation Without Drafts
Good ventilation is one of the most important parts of chicken coop design. Chickens produce moisture through breathing and manure, and damp air can contribute to ammonia buildup, frostbite in cold weather, and respiratory stress. A coop should allow stale, moist air to escape while avoiding direct drafts on roosting birds.
Place vents high on the walls, under the eaves, or in the gable ends. Cover every opening with half-inch hardware cloth, not chicken wire. Chicken wire keeps chickens in, but determined predators can often tear or bend it. Hardware cloth is much stronger and better for windows, vents, and run protection.
In warm climates, include more screened openings and shade. In cold climates, keep high vents open year-round while blocking wind at bird level. If you smell ammonia when you enter the coop, the coop needs more airflow or more frequent cleaning.
Step 5: Install a Weatherproof Roof
The roof must shed rain and snow away from the walls. A sloped roof is easier to build than a fancy roof and works beautifully. Use 2×4 rafters, then attach corrugated metal panels, asphalt shingles, or polycarbonate roofing. Extend the roof beyond the walls by several inches to reduce water splash.
Do not rely on pallet boards alone for roofing. They leave gaps, absorb moisture, and eventually leak. Chickens can tolerate cold much better than damp conditions. A dry coop is a healthy coop, and a leaky roof is just a slow-motion bedding disaster.
Step 6: Build Nest Boxes
Nest boxes give hens a quiet, clean place to lay eggs. A common size is 12 by 12 inches for average laying hens, with larger breeds benefiting from slightly bigger boxes. Plan for one nest box for every four to five hens.
Place nest boxes lower than the roost bars. Chickens prefer to sleep on the highest comfortable perch, and if the nest boxes are the highest spot, they may sleep there. That leads to dirty eggs, dirty bedding, and a daily egg hunt that feels more like a crime scene investigation.
Add a lip to the front of each nest box to keep straw or pine shavings inside. If possible, build exterior egg access with a hinged lid. This lets you collect eggs without entering the coop, which is especially nice during rain, snow, or mornings when you are still negotiating with your coffee.
Step 7: Add Roost Bars
Roosts are where chickens sleep. Use wood, not metal or plastic, because wood is easier for birds to grip and does not become dangerously cold in winter. A 2×4 with the wide side facing up works well in colder climates because chickens can settle over their feet.
Allow about 8 to 12 inches of roost space per chicken. Place roosts above the nest boxes but not so high that heavy breeds injure themselves jumping down. Keep enough space between roosts and walls so feathers do not rub constantly. Round or soften sharp edges to make the perch comfortable.
Step 8: Predator-Proof the Coop and Run
Predators are clever, patient, and annoyingly athletic. Raccoons can manipulate weak latches. Rats can squeeze through small gaps. Dogs can dig. Hawks can strike from above. Snakes can enter through holes you did not even know counted as holes.
Use half-inch hardware cloth over vents, windows, and run openings. Bury hardware cloth at least 6 to 12 inches underground around the run, or lay it outward as an apron along the ground and secure it with landscape staples. Use two-step latches or carabiners on doors to stop raccoons from opening them.
Walk around the finished coop at dusk and look for gaps. If you can push two fingers through an opening, assume a predator can make plans. Patch gaps with hardware cloth, wood blocking, or metal flashing.
Step 9: Paint, Seal, and Finish the Coop
Pallet wood lasts longer when protected from moisture. Use exterior paint or a low-VOC outdoor wood sealant on the outside surfaces. Avoid strong-smelling treatments inside the coop, especially before birds move in. Let paint and sealants cure fully according to the product label.
Inside the coop, focus on cleanability. Smooth rough splinters, cover sharp nails, and remove loose boards. Add 4 to 6 inches of pine shavings, chopped straw, or another absorbent bedding. Keep feed in a sealed, rodent-resistant container and place waterers where chickens cannot easily kick bedding into them.
Step 10: Add the Outdoor Run
A coop is only half the story. Chickens need outdoor space to scratch, dust bathe, explore, and hold important committee meetings about bugs. Build the run with sturdy posts, hardware cloth or welded wire, and a secure gate.
If hawks are common in your area, cover the run with netting, wire, or roofing panels. Add shade, a dust bath area, and places to hide. Chickens feel safer when they have cover, and safer chickens are calmer chickens.
Common Mistakes to Avoid
Using Unsafe Pallets
Never use pallets with chemical stains, mold, strong odors, or MB markings. Pallets are cheap, but veterinary bills and sick birds are not.
Skipping Ventilation
A sealed-up coop may seem cozy, but trapped moisture and ammonia are far worse than cold fresh air moving safely above the birds.
Depending on Chicken Wire for Security
Chicken wire is fine for keeping chickens in a daytime area, but it is not strong predator protection. Use hardware cloth for serious security.
Making the Coop Hard to Clean
If cleaning requires crawling, twisting, or removing six screws every weekend, you will eventually avoid it. Build access doors, removable trays, and smooth surfaces from the start.
Building Too Small
Overcrowding can cause stress, pecking, dirty bedding, and poor air quality. Give your flock more room than the bare minimum whenever possible.
Practical Experience: Lessons From Building a Pallet Chicken Coop
The first lesson of building a chicken coop from repurposed pallets is that “free wood” is not exactly free. It costs time, patience, drill bits, and at least one afternoon of wrestling nails that seem personally committed to staying in place. Still, once you understand the rhythm of working with pallets, the project becomes surprisingly satisfying.
The best experience comes from sorting pallets before construction day. Lay them out by size and condition. Choose the straightest pallets for walls and the strongest ones for the floor. Save cracked boards for trim, blocking, or kindling only if you know the wood is safe to burn, which many pallet boards are not. A little sorting prevents a lot of mid-project muttering.
Another useful lesson is to overbuild the frame slightly. Pallet boards vary in thickness and quality, so extra 2×4 bracing makes the coop feel solid instead of wobbly. Add vertical supports at corners, around doors, and where wall sections meet. A coop may look small, but wind, rain, snow load, and daily door use will test it over time.
When installing siding from pallet boards, expect imperfections. Some boards will bow. Some will split. Some will look like they were chewed by a nervous beaver. That rustic look is part of the charm, but overlap boards or add battens over seams to block drafts and rain. A pallet coop does not need to be perfect, but it does need to be dry.
Cleaning access is the feature many first-time builders underestimate. A wide door, removable roost bar, and smooth floor covering make maintenance much easier. If you can stand inside the coop, even better. If not, build a large clean-out door on one side. Chickens are adorable, but they are also tiny feathered manure factories. Design accordingly.
Predator-proofing deserves more attention than decoration. Cute paint is nice. A raccoon-proof latch is nicer. Use hardware cloth on every opening, check the roofline, reinforce the pop door, and secure the run perimeter. The most beautiful chicken coop in the neighborhood is still a failure if predators can enter at night.
Finally, let the coop sit open for a few days after painting or sealing so odors can dissipate. Add bedding, test doors and latches, spray the roof with a hose to check for leaks, and watch how water drains around the foundation. Move chickens in only after the coop is dry, sturdy, and safe. Your hens may not write thank-you notes, but they will reward you with calmer behavior, cleaner eggs, and that deeply entertaining backyard soundtrack known as “contented chicken gossip.”
Conclusion
Learning how to build a chicken coop from repurposed pallets is a smart way to save money, reduce waste, and create a custom home for your backyard flock. The key is to treat pallets as raw building material, not magic. Choose safe heat-treated wood, build a strong foundation, add reliable roofing, provide proper ventilation, include comfortable roosts and nest boxes, and make predator protection a top priority.
A pallet chicken coop can be simple, sturdy, attractive, and highly functional when you plan carefully. Your chickens do not care whether the boards came from a lumberyard or a shipping pallet. They care that the coop is dry, safe, roomy, breathable, and easy to live in. Build that, and you will have happy hens, easier chores, and possibly the proudest DIY story in your backyard.













