
Note: This is body-only HTML, ready to paste into your CMS.
Minecraft is a game where people build castles, tame wolves, fight dragons, and somehow still get overly excited about fungi. Fair enough. Mushrooms are surprisingly useful. They help you make mushroom stew, suspicious stew, fermented spider eyes, and they can even become giant mushrooms that look like nature decided to cosplay as a lamp.
If you want a steady supply, the good news is that mushroom farming in Minecraft is not complicated once you understand the rules. The better news is that you do not need an engineering degree, a 900-item sorting system, or a redstone machine that sounds like a microwave having a breakdown. You just need the right setup.
In this guide, you will learn three easy methods to farm mushrooms in Minecraft, plus when to use each one, what blocks work best, how to avoid the most common mistakes, and which method is actually worth your time. Whether you are playing survival casually or optimizing your food and potion ingredients like a blocky efficiency goblin, this guide has you covered.
Why Farm Mushrooms in Minecraft?
Before we start building a mushroom farm, let’s answer the obvious question: why bother? Mushrooms are not the flashiest resource in the game, but they are practical.
- Mushroom stew needs one red mushroom, one brown mushroom, and a bowl.
- Suspicious stew also uses mushrooms, which makes them useful for specialty food effects.
- Fermented spider eyes require brown mushrooms, so potion-makers should absolutely care.
- Huge mushrooms can provide lots of mushroom-related materials fast.
- Mushroom Fields biomes are peaceful, which makes mushroom farming extra relaxed.
In other words, mushroom farming is one of those Minecraft projects that starts as “I just need a few” and ends with “well, now I own a fungal empire.”
What You Need to Know Before You Start
To grow mushrooms well, you need to understand a few basic mushroom mechanics. This is the part that saves you from planting twenty mushrooms, staring at them for five minutes, and accusing them of laziness.
1. Mushrooms like the right lighting
Regular mushrooms spread best in low-light conditions unless they are planted on special blocks such as podzol, mycelium, or nylium. Those blocks make life much easier because they let you place and grow mushrooms more flexibly.
2. Space matters
If you cram mushrooms together like commuters on a subway car, spread rates suffer. A classic mushroom spread farm works better when mushrooms have room around them.
3. Huge mushrooms need clearance
If you want to use bone meal to grow a mushroom into a giant one, you need enough vertical and horizontal space. If the mushroom does not have room, the growth fails and your bone meal plan starts feeling personal.
4. Brown and red mushrooms both matter
Brown mushrooms are especially useful because they are part of several crafting chains, but a balanced farm should usually produce both colors. If your goal is stew, you need one of each.
Method 1: Build a Simple Dark-Room Mushroom Farm
This is the classic Minecraft mushroom farm. It is cheap, beginner-friendly, and works well when you want passive mushroom spreading without spending bone meal every few seconds.
How it works
You create a low-light room, place mushrooms with enough spacing, and let them slowly spread to nearby valid blocks. It is not the fastest system in the game, but it is easy and reliable.
What you need
- Dirt, podzol, mycelium, or another suitable floor setup
- Red mushrooms and brown mushrooms
- A room with low light or a farm using podzol/mycelium for easier placement
- A little patience, which is the rarest resource in Minecraft
How to build it
- Dig out a room underground or make a covered farm above ground.
- Make it at least 2 blocks tall, though 3 blocks tall feels more comfortable to move around in.
- Use a floor that supports mushroom placement well. Podzol and mycelium are especially convenient.
- Keep the room dim if you are using a standard spread setup.
- Place mushrooms with space between them instead of packing them in tightly.
- Wait for mushrooms to spread, then harvest the new ones and leave your originals in place.
Best use case
This method is great for players who want a low-cost farm early in survival. It is also useful if you do not have a strong bone meal supply yet.
Pros
- Very easy to build
- Cheap materials
- Good for beginners
- Can run passively while you do other things
Cons
- Slow compared to huge mushroom farming
- Needs careful spacing
- Can feel underwhelming if you expect instant results
Pro tip: If you want a farm that is easier to manage on the surface, use podzol or mycelium in a controlled space. That removes a lot of the “why won’t this thing place here?” frustration.
Method 2: Farm Huge Mushrooms with Bone Meal
If you want the fastest practical way to get lots of mushrooms in Minecraft, this is usually the winner. Instead of waiting for small mushrooms to spread naturally, you use bone meal to grow them into huge mushrooms and then harvest the structure.
Why this method is so popular
Because it is fast. Very fast. You plant one mushroom, use bone meal, and suddenly you have a giant fungus tower standing where a tiny cap used to be. It is like agricultural magic, but with more axe swings.
What you need
- Red or brown mushrooms
- Bone meal
- Podzol, mycelium, or another valid block
- Axe for fast harvesting
- Enough open space for the mushroom to grow
How to build it
- Create a growing area with plenty of clearance.
- Plant a red or brown mushroom on podzol or mycelium for easier setup.
- Use bone meal until it grows into a huge mushroom.
- Harvest the stem and cap blocks.
- Repeat the process for rapid production.
Which color is better?
Brown huge mushrooms often feel easier to harvest efficiently because their caps are broad and flat. Red huge mushrooms have a more rounded dome shape. Neither one is “wrong,” but many players prefer brown when they want a cleaner manual farming routine.
Best use case
This method is ideal when you already have a skeleton farm, compost setup, or another good source of bone meal. It is also the best option if you need a lot of mushrooms quickly for food, potions, or decorative builds.
Pros
- Much faster than passive spreading
- Great for bulk harvesting
- Satisfying and simple
- Works well in compact dedicated farm areas
Cons
- Consumes bone meal
- Needs room to grow properly
- Can be annoying if your build has low ceilings
Pro tip: Build your huge mushroom farm in a space with generous headroom. You can technically get by with less, but “technically” is not always the mood when you just burned bone meal and got nothing but disappointment.
Method 3: Use a Mushroom Fields or Mooshroom-Based Farm
If you are lucky enough to find a Mushroom Fields biome, Minecraft basically hands you a themed vacation resort with bonus fungi. This biome is one of the easiest places to collect mushrooms naturally and build a relaxed farm setup.
Why Mushroom Fields are amazing
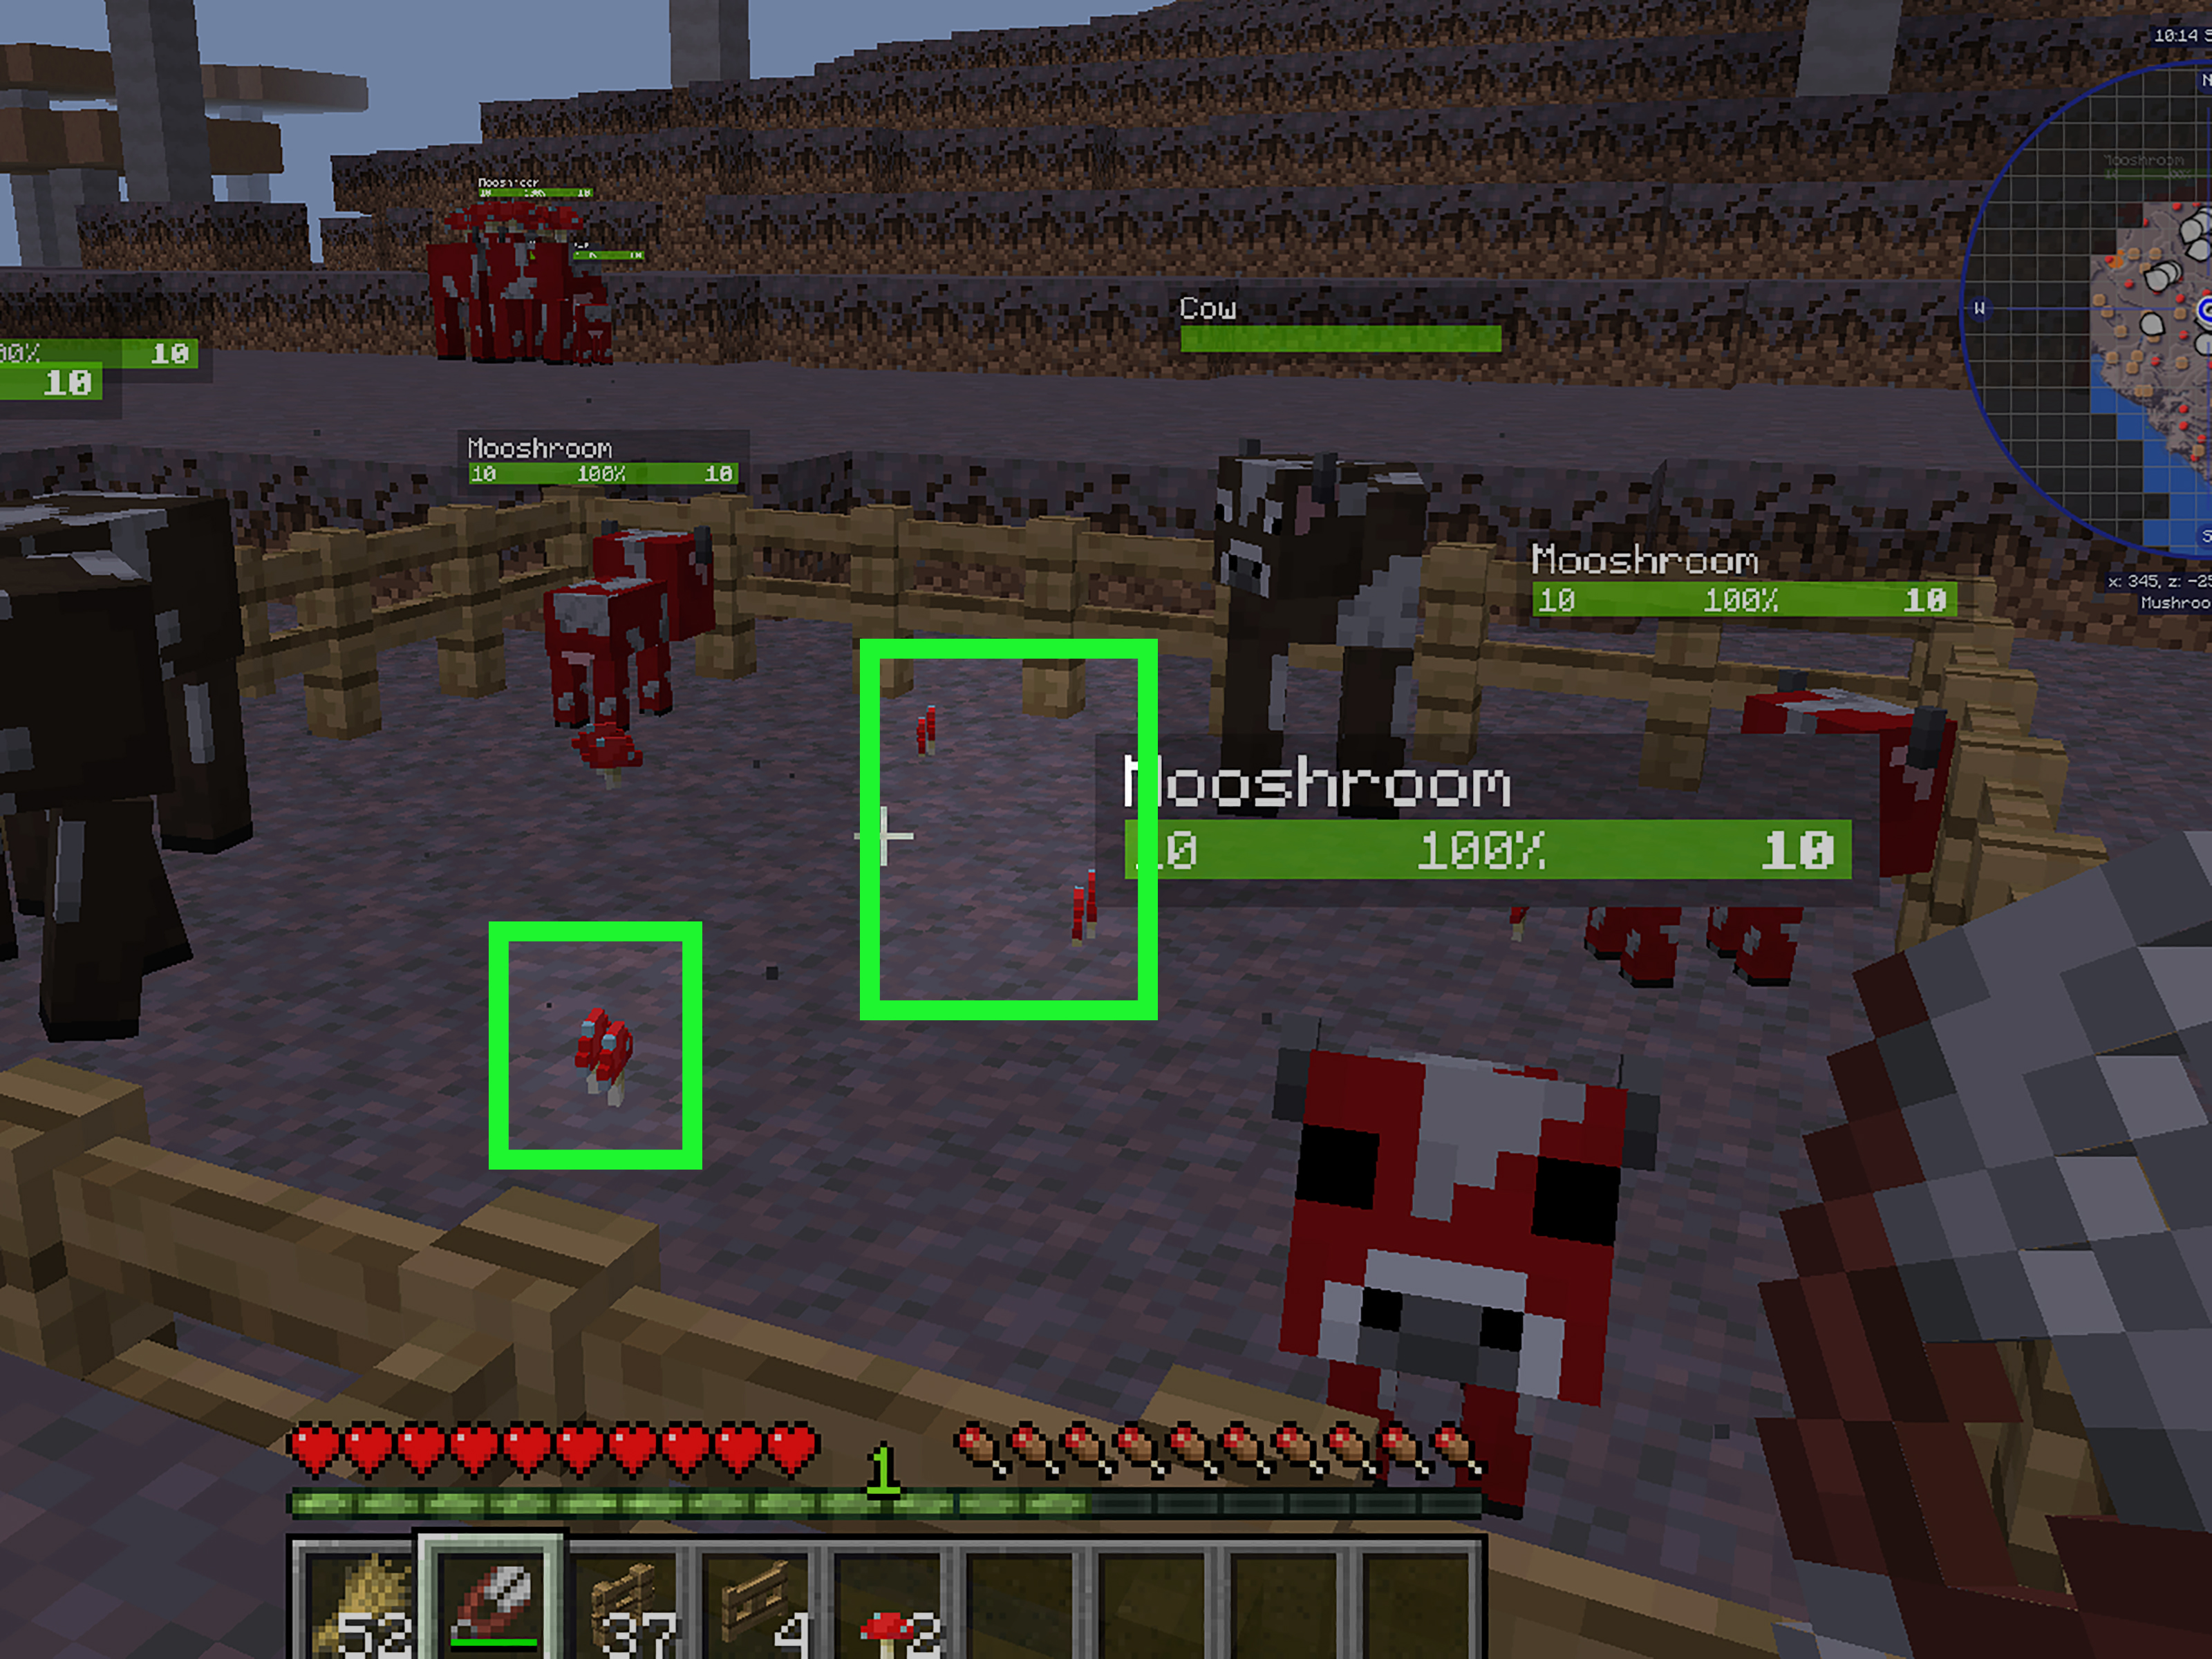
Mushroom Fields are famous because they are peaceful on the surface and packed with mushroom-related resources. You get natural mushroom growth, huge mushrooms, and mooshrooms, which are basically cows that joined a mushroom startup.
What you can do here
- Harvest naturally generated mushrooms
- Collect huge mushrooms already in the biome
- Use bowls on mooshrooms to get mushroom stew
- Set up a farm with mycelium for convenient mushroom growth
How to turn it into a farm
- Find a Mushroom Fields biome.
- Establish a safe base and storage area.
- Collect red and brown mushrooms from the biome.
- Use the mycelium-rich terrain for easier mushroom growing.
- Bring bowls if you want quick mushroom stew from mooshrooms.
Best use case
This method is best for exploration-heavy players, long-term survival worlds, and anyone who wants a low-stress farming zone. It is less of a tiny “farm room” and more of a whole mushroom ecosystem.
Pros
- Natural access to mushroom resources
- Mooshrooms provide extra food convenience
- Peaceful surface conditions are great for building
- Excellent for long-term survival bases
Cons
- You must find the biome first
- It may be far from spawn
- Not as immediately practical in the earliest game
Pro tip: If you discover a Mushroom Fields biome, mark it immediately. Do not tell yourself, “I’ll remember where this is.” You will not. Future-you will sail in circles like a confused pirate with a bowl.
Which Mushroom Farming Method Is Best?
The answer depends on your stage of the game and what you want.
| Method | Best For | Speed | Difficulty |
|---|---|---|---|
| Dark-Room Spread Farm | Beginners and passive farming | Slow | Easy |
| Huge Mushroom Bone Meal Farm | Fast bulk harvesting | Fast | Easy to Moderate |
| Mushroom Fields / Mooshroom Farm | Long-term survival bases | Moderate | Easy once found |
If you want the short version, here it is: bone meal farming is usually the fastest, dark-room spreading is the cheapest, and Mushroom Fields farming is the chillest.
Common Mushroom Farming Mistakes
Planting mushrooms too close together
This is one of the biggest reasons spread farms feel broken. Give them room.
Forgetting about light
If you are not using podzol, mycelium, or similar helpful blocks, lighting can ruin your setup.
Using huge mushroom farms in cramped spaces
Huge mushrooms need room. Low ceilings turn a good idea into a bone-meal donation program.
Harvesting everything at once in a spread farm
Leave a few original mushrooms behind so the farm keeps reproducing.
Ignoring bone meal supply
If you love huge mushroom farming, make sure your skeleton or composter setup can support your habit.
Extra Tips for Better Results
- Use podzol or mycelium when possible for easier mushroom placement.
- Keep separate spots for red and brown mushrooms if you want easier harvesting.
- Use an axe to cut huge mushrooms faster.
- Bring bowls to a mooshroom biome if your goal is quick food.
- Consider pairing mushroom farming with a bone meal farm for better efficiency.
- If you want decorative mushroom blocks instead of normal drops, plan your harvesting tools carefully.
Final Thoughts
Mushroom farming in Minecraft is one of those projects that looks weirdly niche until you actually build one. Then suddenly you are making stew, stocking potion ingredients, farming huge mushrooms for fun, and wondering why your base now looks like it was designed by an enchanted forest with opinions.
If you want the easiest start, build a simple dark-room mushroom farm. If you want speed, use bone meal to grow huge mushrooms. If you find a Mushroom Fields biome, take advantage of it and build a long-term fungal paradise. All three methods work. The best one is the one that fits your world, your resources, and your tolerance for waiting around while tiny mushrooms think about life.
In short: mushrooms may be humble, but in Minecraft, humble things often become wildly useful. Also, sometimes they become enormous and take over your ceiling. That is farming, baby.
Player Experiences and Practical Lessons From Farming Mushrooms in Minecraft
One of the funniest things about learning how to farm mushrooms in Minecraft is that almost every player starts the same way: they place a couple of mushrooms, wait ten seconds, and immediately assume the game is broken. It is not broken. It is just being very Minecraft about the whole thing.
In early survival worlds, many players try mushroom farming because food is limited, caves are nearby, and mushrooms seem easy to grab. At first, the idea sounds simple: find some mushrooms, put them in a room, and wait. Then comes the realization that mushroom farming has rules. Suddenly you are adjusting light levels, spacing out red and brown mushrooms, and muttering things like, “Why do you need more personal space than my villagers?” It is a rite of passage.
A lot of players also discover that their opinion of mushroom farming changes dramatically once they unlock a reliable source of bone meal. Before that point, mushroom spread farms feel fine but slow. After that point, huge mushroom farming feels like switching from a bicycle to a rocket. You stop checking a dim little room for two new mushrooms and start growing giant caps on demand. It is one of those upgrades that makes you feel smarter than you were five minutes ago, even though the real hero is the skeletons who donated the materials.
Another common experience is realizing that Mushroom Fields biomes are more than a novelty. At first glance, they feel like a weird sightseeing destination. Then you build a small base there and suddenly understand the appeal. The atmosphere is calm, the mooshrooms are useful, and the whole place feels like Minecraft decided to take a spa day. For players who like relaxed survival gameplay, farming mushrooms in that biome is less about maximum efficiency and more about convenience. You do not always need the fastest farm. Sometimes you just want a place where the vibe is “peaceful fungus ranch.”
Players who enjoy building also tend to love mushroom farms because they can be disguised in creative ways. A dark-room spread farm can hide under a cottage, a huge mushroom farm can sit inside a greenhouse, and a Mushroom Fields setup can become an entire fantasy village. Mushroom farming is practical, but it also fits nicely into aesthetic base design. There is something delightful about creating an efficient food-and-potion resource system that also looks like it belongs in a fairy tale.
Perhaps the biggest lesson players learn is that mushroom farming rewards understanding, not brute force. If you ignore the mechanics, the farm feels annoying. If you work with them, it feels surprisingly elegant. That is part of what makes Minecraft so satisfying. Even a humble mushroom becomes a miniature systems puzzle, and once you solve it, the process feels smooth, useful, and oddly charming.














