
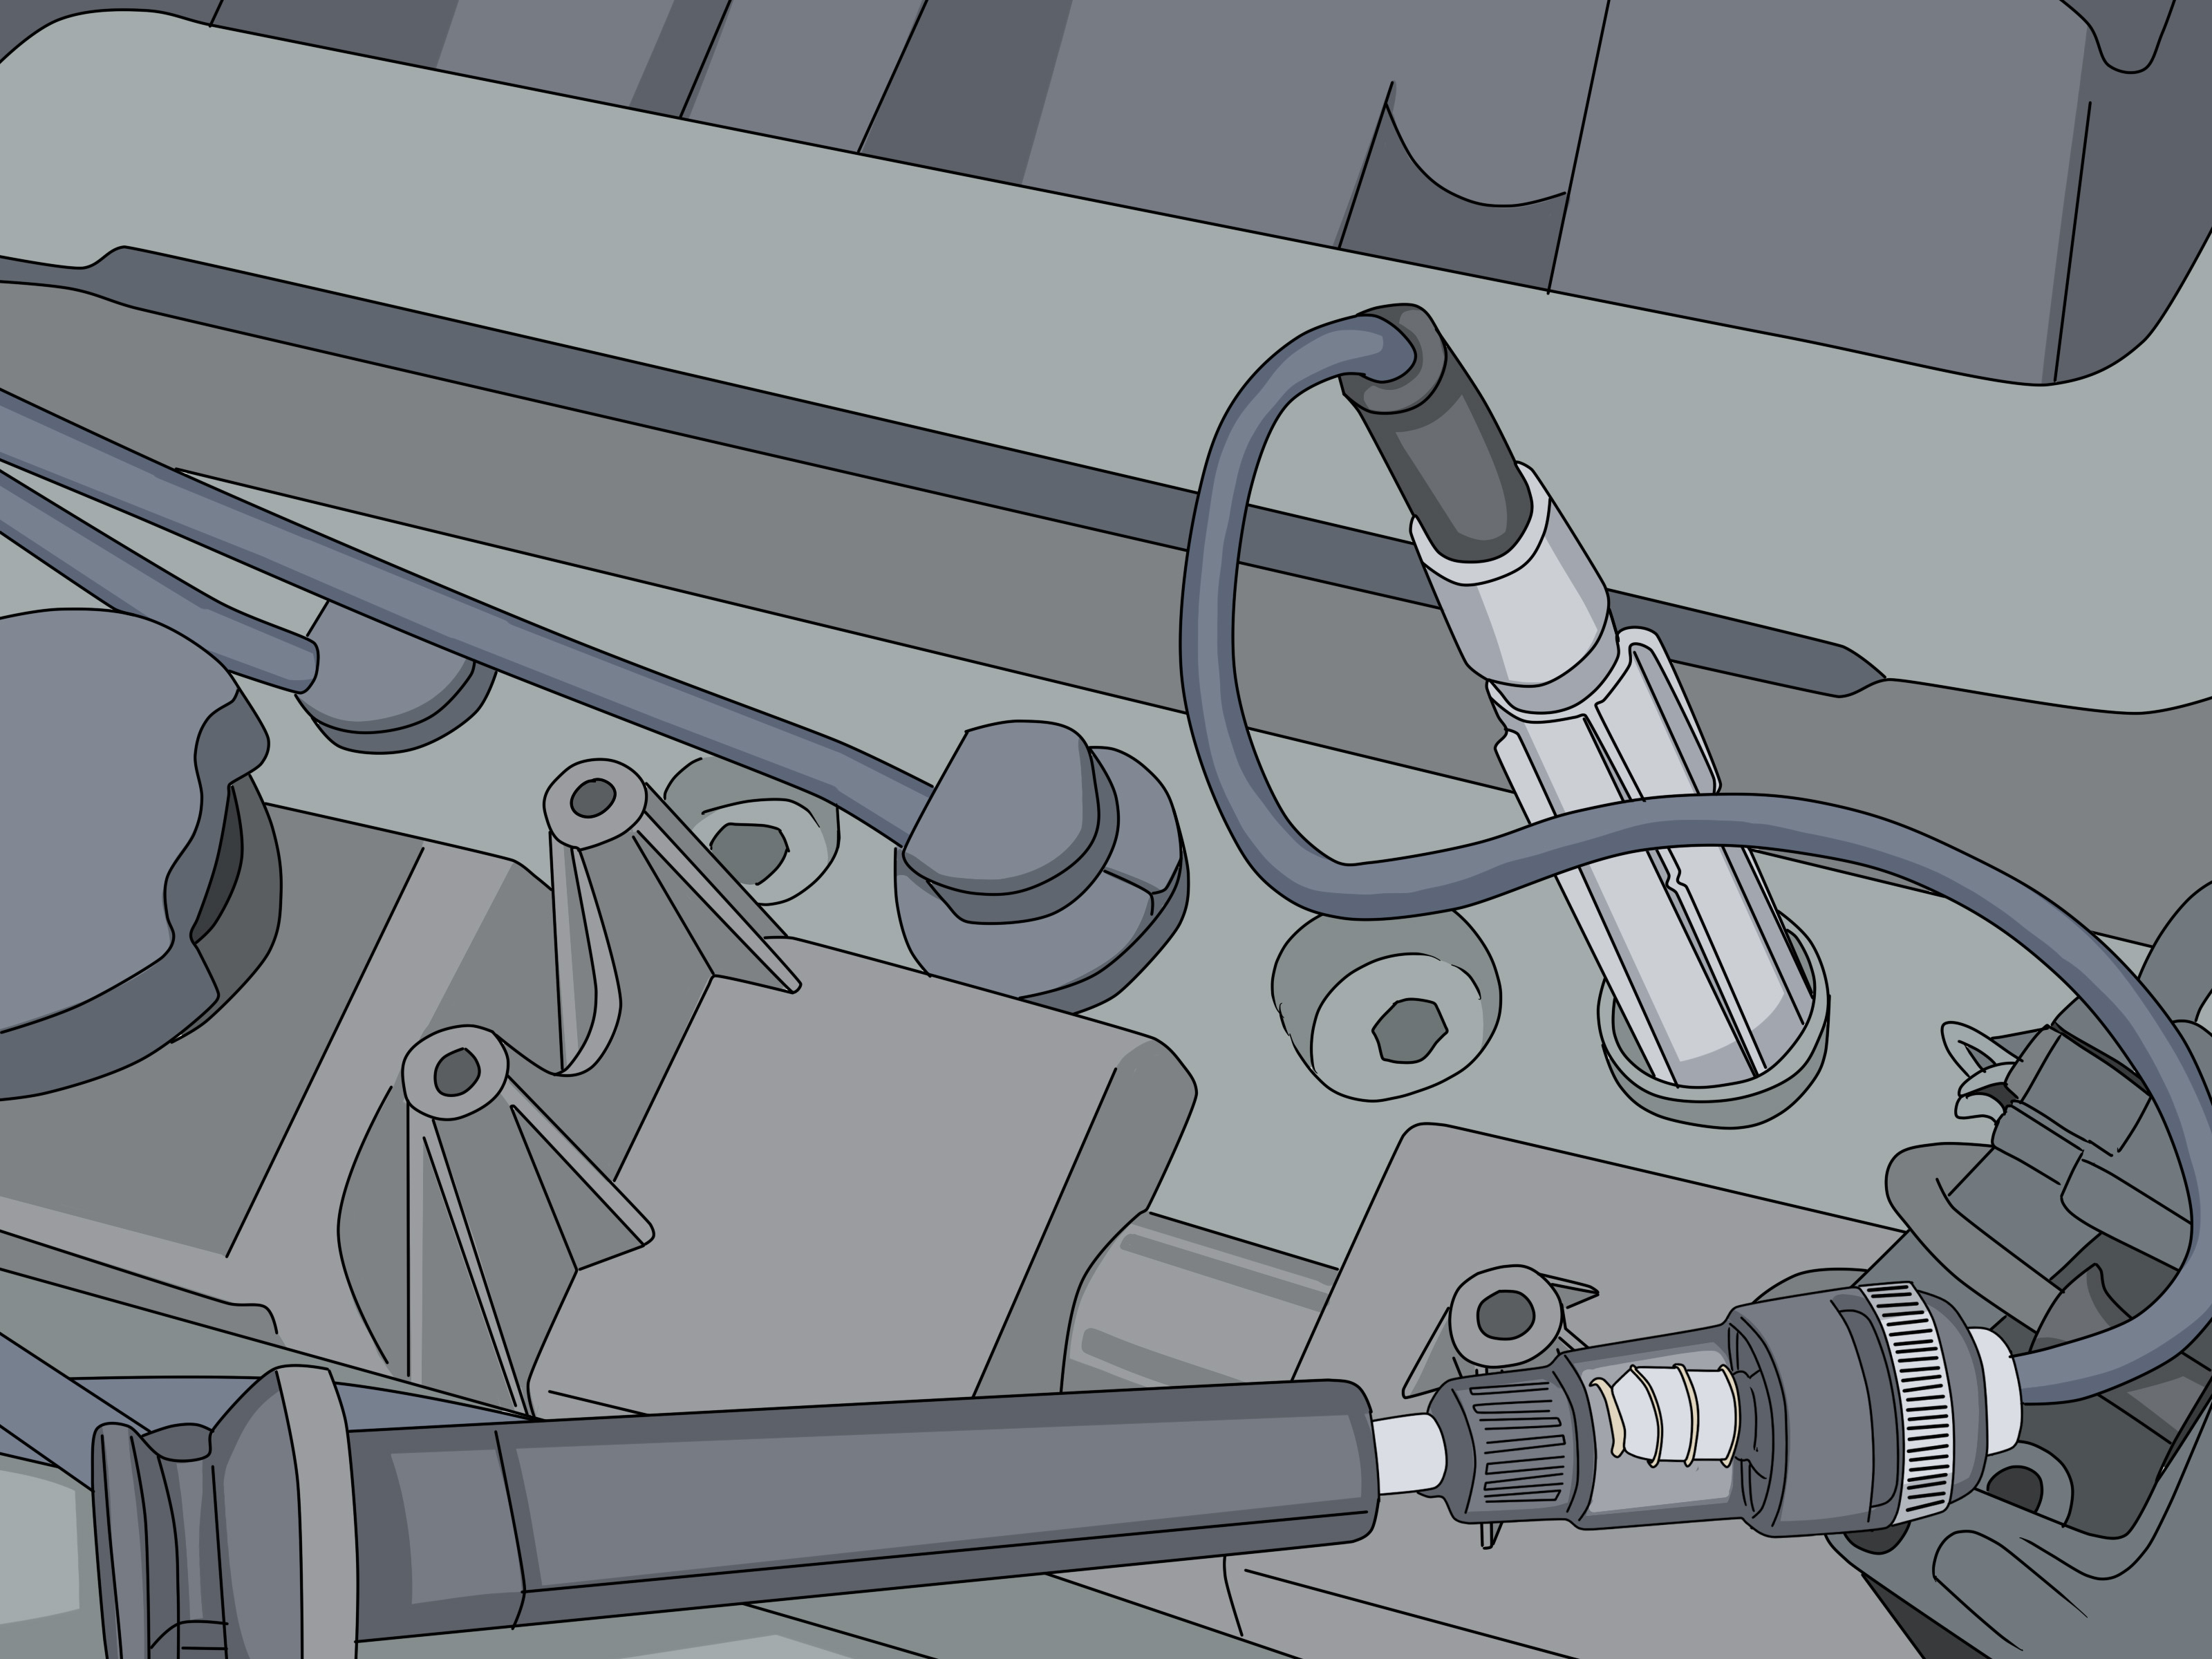
If your engine cranks like it means business but refuses to start, you may have a spark problem. That is where an ignition spark tester earns its keep. This small tool helps you confirm whether electricity is actually making it to the spark plug instead of leaving you to play the world’s least fun guessing game with coils, wires, plugs, and your patience.
Using an ignition spark tester is one of the simplest ways to diagnose a no-start, rough idle, misfire, hesitation, or mystery stumble under load. It is safer and smarter than pulling a spark plug, waving it near metal, and hoping you do not accidentally audition for a static electricity stunt show. A proper tester lets you check for spark in a controlled way, which is exactly what you want when you are working around high voltage.
In this guide, you will learn simple ways to use an ignition spark tester in 15 clear steps. You will also learn what the results mean, what mistakes to avoid, and how to turn a quick spark check into a more confident ignition-system diagnosis.
What Is an Ignition Spark Tester?
An ignition spark tester is a diagnostic tool used to verify whether the ignition system is sending enough voltage to create a spark. In gasoline engines, that spark ignites the air-fuel mixture inside the cylinder. No spark means no combustion. And no combustion means your engine is basically a very expensive paperweight for the moment.
There are a few common types of spark testers:
- Inline spark testers, which connect between the spark plug and the plug wire or coil boot.
- Adjustable-gap spark testers, which let you simulate a wider spark gap and test spark strength more aggressively.
- Coil-on-plug testers, which are designed for modern ignition systems that place a coil directly on each spark plug.
No matter the style, the goal is the same: confirm whether the ignition system is producing a consistent, visible spark.
When Should You Use an Ignition Spark Tester?
A spark tester is useful when your vehicle or small engine shows symptoms like:
- Cranking but not starting
- Rough idle
- Engine misfire
- Jerking or hesitation during acceleration
- Loss of power
- Intermittent stalling
- Check engine light with ignition-related trouble codes
It is also handy after replacing spark plugs, ignition coils, or plug wires. If you touched the ignition system and the engine suddenly runs like it is offended, a spark tester helps you verify whether the problem is spark-related or whether something else is going on.
Simple Ways to Use an Ignition Spark Tester: 15 Steps
Step 1: Park in a Safe, Ventilated Area
Start with the basics. Park the vehicle on a flat surface, set the parking brake, and make sure the area is well ventilated. If you are working on a mower, generator, or motorcycle, place it on a stable surface where it cannot roll or tip. You want plenty of room, good visibility, and zero chaos.
Step 2: Let the Engine Cool Down if Needed
Ignition testing often puts your hands near the cylinder head, exhaust manifold, and other hot components. If the engine has been running, give it time to cool. Diagnosing a misfire is useful. Branding your forearm with an exhaust shield is not.
Step 3: Gather the Right Tools
At minimum, you will need your ignition spark tester. It also helps to have gloves, safety glasses, basic hand tools, a flashlight, and your vehicle repair manual. On some vehicles, you may need to remove an engine cover before you can access the coil or plug wire.
Step 4: Identify Your Ignition Setup
Before connecting anything, figure out what type of ignition system you are dealing with. Older vehicles may use spark plug wires connected to a coil pack or distributor. Newer vehicles often use a coil-on-plug ignition system, where each spark plug has its own ignition coil. Small engines may have a simple ignition lead and kill wire setup. Knowing the layout helps you choose the right tester and connect it correctly.
Step 5: Turn the Engine Off and Remove the Key
This sounds obvious, but it matters. Shut the engine off completely before disconnecting any coil boot or spark plug wire. Remove the key and keep loose clothing, jewelry, and hair away from moving parts. Spark testers are simple tools, but ignition systems deal in serious voltage.
Step 6: Inspect the Area Before Testing
Do a quick visual inspection. Look for cracked coil housings, loose connectors, damaged boots, carbon tracking, oil contamination, burned wires, or obviously worn plugs. A spark tester can confirm spark, but your eyes can often find the reason the spark went on vacation.
Step 7: Disconnect One Spark Plug Wire or Coil Boot
Work on one cylinder at a time. If your engine uses spark plug wires, pull one wire off the plug carefully by the boot, not the wire itself. If it uses coil-on-plug ignition, unplug and remove the coil from the spark plug well as needed. Staying organized prevents mix-ups later, especially on engines with multiple identical coils.
Step 8: Connect the Spark Tester Properly
Now attach the tester. With an inline spark tester, one end connects to the spark plug and the other end connects to the plug wire or coil boot. With some testers, especially adjustable-gap models, you may connect the ignition lead to the tester and clip the tester to a good engine ground. The exact hookup depends on the tester design, so follow the tester’s instructions and your service information.
Step 9: Make Sure the Ground Is Solid
If your tester requires a ground clip, attach it to clean, bare metal on the engine. Rusty brackets, painted surfaces, and greasy mystery bolts are not your friends here. A weak or poor ground can fool you into thinking the ignition system is weak when the real problem is your setup.
Step 10: Keep Hands Clear and Have Someone Crank the Engine
Position yourself where you can clearly see the tester window or spark gap. Then have a helper crank the engine. If you are alone and can do so safely, use the starter from the driver’s seat while keeping the tester secure and visible. Keep fingers clear of belts, fans, and pulleys. This is diagnosis, not a trust fall.
Step 11: Watch for the Spark Quality
Look for a strong, regular spark. A healthy ignition spark is usually bright, crisp, and blue-white. A weak orange spark, an inconsistent flash, or no spark at all suggests a problem in the ignition path. That could mean a worn spark plug, weak ignition coil, damaged wire, poor ground, bad connector, or a deeper control issue.
Step 12: Compare Multiple Cylinders
If one cylinder looks weak, test another cylinder the same way. This comparison is incredibly helpful. If one cylinder shows strong spark and another does not, you may be dealing with a bad coil, bad plug wire, or cylinder-specific fault. If none of the cylinders show spark, think bigger: power supply, ignition module, crank sensor, kill wire, or another system-wide issue.
Step 13: Test Spark Strength if Your Tool Allows It
An adjustable-gap spark tester can tell you more than a yes-or-no answer. If the spark jumps a wider gap consistently, your ignition system is probably producing decent voltage. If it struggles at a modest gap, the spark may be too weak under real engine load. This can help explain why an engine starts poorly, misfires under acceleration, or acts fine at idle but falls flat on the road.
Step 14: Reconnect Everything Before Moving On
Once you finish testing that cylinder, reconnect the wire or coil securely before testing the next one. This keeps your work neat and reduces the chance of creating a new problem while chasing the old one. Loose boots and half-seated connectors are classic “well, it ran fine before I helped” moments.
Step 15: Use the Results to Narrow the Diagnosis
A spark test tells you whether ignition is present, but it is only one part of diagnosis. If spark is strong, the no-start or misfire could be caused by fuel delivery, injector issues, compression loss, air leaks, timing problems, or sensor faults. If spark is weak or missing, focus on the spark plug, ignition coil, coil connector, plug wire, ground path, and related wiring. In other words, let the tester point you in the right direction instead of replacing parts because your cousin’s neighbor once had the same symptom on a totally different truck.
How to Read Your Spark Tester Results
Here is the quick version:
- Strong blue-white spark: The ignition side is likely working on that cylinder.
- Weak orange spark: Spark may be present but not strong enough under load.
- No spark: The cylinder is not receiving usable ignition voltage.
- Intermittent spark: You may have a failing coil, damaged connector, worn plug, or wiring issue that acts up under vibration or heat.
If your tester shows spark but the engine still will not start, broaden the diagnosis. Spark is necessary, but it is not the entire recipe. Engines also need the right amount of fuel, proper compression, and correct timing.
Common Mistakes to Avoid
Many DIYers make the same few mistakes when using an ignition spark tester. Avoid these and you will get more reliable results:
- Using the wrong tester for the ignition system
- Testing on a dirty or weak ground point
- Touching the tester or ignition lead while cranking
- Removing multiple coils or wires at once and mixing them up
- Assuming “some spark” always means “good spark”
- Ignoring obvious plug, wire, or connector damage
- Skipping the service manual for system-specific cautions
Also, resist the temptation to check for spark by holding a loose plug against metal with your bare hand nearby. Yes, people still do this. No, it is not a badge of honor.
What to Check Next If the Spark Is Weak or Missing
Once your ignition spark tester tells you something is wrong, the next steps usually include:
- Inspecting or replacing the spark plug
- Swapping the ignition coil with another cylinder to see whether the fault follows the coil
- Checking plug wires for damage or high resistance on older systems
- Inspecting connectors for corrosion, looseness, or broken locks
- Looking for oil or coolant contamination in the plug well
- Checking for power and ground at the coil during cranking
- Scanning for misfire or ignition-related trouble codes
This is where the spark tester becomes more than a simple yes-or-no gadget. It becomes the first clue in a smarter diagnostic process.
Real-World Experience: What Using a Spark Tester Actually Feels Like
The first time most people use an ignition spark tester, they expect some dramatic movie scene. Maybe lightning. Maybe a shower of sparks. Maybe a soundtrack. In real life, it is much less theatrical and much more useful.
A common experience goes like this: the engine cranks normally, the battery seems fine, and the fuel tank is not empty, yet the vehicle will not start. You replace nothing at first. You hook up the tester, crank the engine, and see nothing. That moment is weirdly satisfying because even though the engine is still dead, the mystery gets smaller. You now know the problem lives in the ignition side of the world.
Another very normal experience is finding spark on some cylinders but not all. That usually changes the mood from “everything is broken” to “okay, this is manageable.” On many engines, that points you toward a bad ignition coil, a damaged coil connector, a worn spark plug, or a single wire with a problem. Suddenly, you are no longer guessing at fuel pumps, computers, starter motors, and other wallet-threatening possibilities.
People also learn quickly that spark quality matters. A weak, lazy orange flash may look close enough to spark, but engines can be picky. Under compression, what looked acceptable in the driveway may not be enough inside the cylinder. That is why a proper tester is so useful. It helps you stop treating ignition diagnosis like a coin toss.
On small engines, the experience can be even more revealing. A mower that ran yesterday but refuses today often sends people straight into carburetor panic. Then the spark tester shows no spark at all, and the problem turns out to be an ignition coil, a kill wire issue, or a fouled plug. The tester saves time, saves parts, and saves you from cleaning a carburetor that was innocent the whole time.
There is also a confidence factor that comes with using the tool more than once. The first test feels technical. By the third or fourth, it feels logical. Disconnect one cylinder, connect the tester, crank, observe, compare, reconnect. It becomes a routine, and routines are how good diagnostics happen.
Experienced DIYers also learn that the spark tester is best used with patience. If the tester shows good spark, that does not mean the engine has no problem. It just means the problem is probably elsewhere. If it shows weak or no spark, that does not automatically mean the coil is bad. You still need to check the plug, wire, connector, power, ground, and related components. The tool narrows the field, but it does not write the final diagnosis on the hood in permanent marker.
Still, for such a simple device, the ignition spark tester punches above its weight. It turns confusion into clues. It turns guesswork into process. And when an engine refuses to cooperate, that little flash in the tester window can feel like the first honest answer you have gotten all day.
Conclusion
Learning simple ways to use an ignition spark tester is one of the smartest DIY diagnostic skills you can build. The tool is inexpensive, easy to use, and genuinely helpful when an engine cranks but will not start, misfires under load, or runs rough for no obvious reason. In 15 steps, you can safely check for spark, compare cylinders, and decide whether the trouble is likely in the ignition system or somewhere else entirely.
The best part is not just saving money on random parts replacement. It is the confidence that comes from knowing what the engine is telling you. And in the world of automotive troubleshooting, confidence is worth almost as much as a fully charged battery.














