
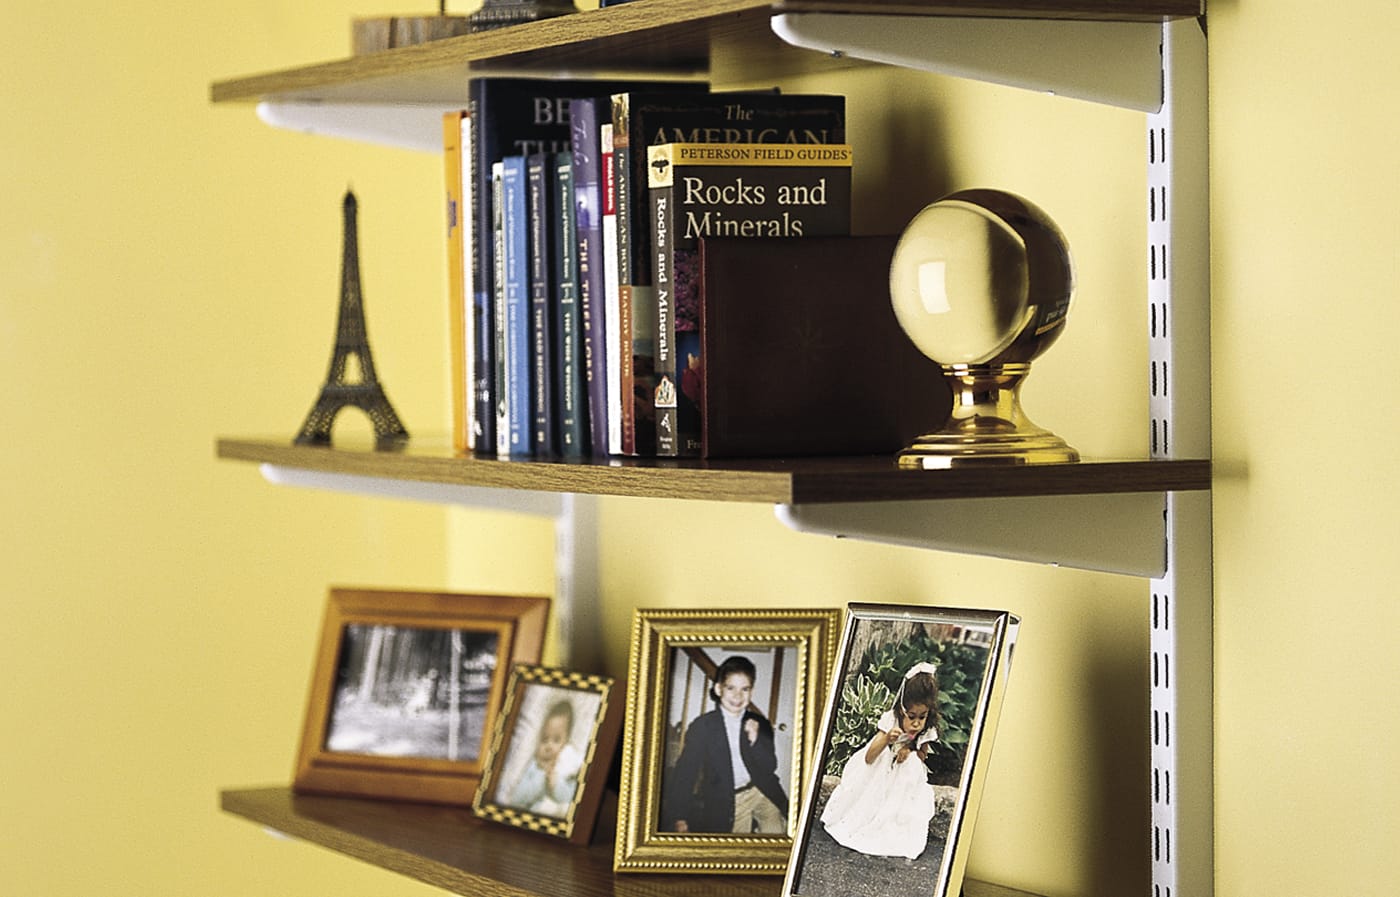
Wall-mounted shelves are the quiet superheroes of home organization. They lift clutter off the floor, give your favorite books a place to look important, and turn blank walls into useful storage without demanding a full weekend, a contractor, or a dramatic home-renovation montage. Whether you want floating shelves in the living room, bracket shelves in the kitchen, or sturdy storage shelves in a laundry room, learning how to install wall-mounted shelves correctly makes the difference between “beautiful and secure” and “why is my shelf slowly becoming a ramp?”
The good news: installing shelves is a very manageable DIY project. The slightly less glamorous news: you do need to respect gravity. A shelf is only as strong as its mounting points, hardware, wall material, and the weight you place on it. This guide walks you through the tools, planning steps, installation process, safety tips, and real-world lessons that help wall shelves stay level, strong, and attractive.
Before You Start: Know What Kind of Shelf You’re Installing
Not all wall-mounted shelves are built the same way. The installation method depends on the shelf style, wall type, and intended use. A small decorative shelf for candles does not need the same support as a kitchen shelf holding dishes or a garage shelf holding paint cans.
Floating Shelves
Floating shelves hide their support bracket inside or behind the shelf, creating a clean, modern look. They are great for living rooms, bedrooms, offices, and bathrooms. However, they must be installed carefully because the hidden bracket carries the entire load. Whenever possible, attach the bracket directly into wall studs.
Bracket Shelves
Bracket shelves use visible supports underneath the shelf board. They are usually easier to install, easier to adjust, and often stronger than floating shelves. The brackets may be simple metal L-brackets, decorative wood supports, or heavy-duty steel brackets.
Adjustable Track Shelving
Adjustable shelving systems use vertical wall standards and removable brackets. These are popular in closets, pantries, laundry rooms, workshops, and garages because you can change shelf height later. If your storage needs change often, adjustable wall-mounted shelves are wonderfully forgiving.
Tools and Materials You’ll Need
Gathering everything before you begin prevents the classic DIY shuffle: measure, search for pencil, climb down, find drill bit, climb back up, forget screws, question life choices. Here is what you will typically need:
- Wall-mounted shelf or shelf board
- Shelf brackets, floating shelf bracket, or wall standards
- Stud finder
- Tape measure
- Level or laser level
- Pencil
- Power drill
- Drill bits
- Screwdriver or driver bit
- Appropriate screws
- Drywall anchors, toggle bolts, or masonry anchors if needed
- Safety glasses
- Painter’s tape, optional but helpful
For masonry walls, such as brick, concrete, or block, you may also need a hammer drill and masonry bit. For tile walls, use a tile bit and work slowly to avoid cracking the surface. For plaster walls, choose anchors carefully and avoid aggressive drilling that can crumble old material.
Step 1: Decide Where the Shelf Should Go
Start with placement. A shelf should be useful, proportional, and reachable. In a living room, wall shelves often look best when centered above a sofa, console table, desk, or cabinet. In a kitchen, they should be high enough to keep counters usable but low enough that you can reach plates and mugs without performing a small athletic event.
Think about what the shelf will hold. Lightweight decor can go almost anywhere with proper anchors, but books, dishes, plants, tools, and storage bins need stronger support. If the shelf will carry heavy items, plan the layout around wall studs instead of forcing the shelf into a weak location.
Helpful Placement Tips
- Leave enough space above the shelf for the objects you plan to display.
- Keep shelves away from doors that swing open, tall furniture, and traffic paths.
- For multiple shelves, measure equal spacing between them for a clean look.
- Use painter’s tape on the wall to preview shelf length and height before drilling.
Step 2: Find the Wall Studs
Studs are the vertical framing members behind drywall. They are the strongest place to fasten shelves because screws driven into studs grip solid wood or metal framing instead of relying only on drywall. In many homes, studs are commonly spaced 16 inches apart on center, though 24-inch spacing also appears in some walls. Older homes, remodeled spaces, and areas near doors or windows can be less predictable.
Use a stud finder and mark both edges of each stud, then mark the center. Do not trust a single beep from the stud finder like it is a royal decree. Confirm the stud by scanning the area again, measuring to nearby studs, or using clues such as outlet boxes, trim nails, or a small magnet that detects drywall screws.
What If the Studs Don’t Line Up?
This happens often. Shelves, unfortunately, do not consult your wall framing before becoming stylish. If the bracket holes do not align with studs, you have several options:
- Move the shelf slightly so at least one or two mounting points hit studs.
- Use heavy-duty drywall anchors or toggle bolts for non-stud holes.
- Install a wood backer board into studs, then mount the shelf to the board.
- Choose a different shelf style with bracket spacing that fits your wall framing.
For heavy shelves, anchoring at least part of the shelf system into studs is the safest approach. Drywall anchors are useful, but studs are the gold standard.
Step 3: Choose the Right Anchors and Screws
The hardware matters more than many people realize. A beautiful shelf installed with weak anchors is basically a decorative countdown timer. Always check the weight rating of your anchors, brackets, and shelf. Remember that the total load includes the shelf itself plus everything you put on it.
Common Anchor Types
- Plastic expansion anchors: Best for light-duty shelves and small decor.
- Self-drilling drywall anchors: Useful for medium-light loads and quick installation.
- Molly bolts: Good for hollow walls and moderate loads when installed correctly.
- Toggle bolts: Stronger option for hollow drywall because the wings spread behind the wall.
- Masonry anchors: Designed for brick, concrete, stone, or block walls.
Do not use adhesive hooks or stick-on strips for shelves that will hold meaningful weight. Adhesive products can be helpful for lightweight temporary items, but shelves experience downward weight and outward pull. Temperature changes, humidity, wall texture, and time can weaken adhesive. If a shelf will hold books, ceramics, plants, or anything breakable, use mechanical fasteners.
Step 4: Mark a Level Line
Once you know the shelf height, use a level to draw a light pencil line where the bracket or shelf will sit. This line is your visual guide. For a floating shelf, mark the bracket position. For bracket shelves, mark where each bracket should go. For adjustable standards, mark a plumb vertical line for each standard.
A level line is not optional. Your eyes can lie, especially near ceilings, trim, and floors that are not perfectly straight. A shelf that is slightly tilted may not seem noticeable at first, but once you add books or picture frames, the lean becomes the star of the room.
Painter’s Tape Trick
Place painter’s tape on the wall and mark drill holes on the tape. This makes marks easier to see and can reduce minor surface chipping. You can also use tape on the shelf bracket itself, mark the hole locations, peel the tape off, and transfer it to the wall as a simple drilling template.
Step 5: Hold the Bracket in Place and Mark Holes
Position the bracket along your level line. If you have a helper, this is where they earn eternal household glory. Hold the bracket firmly and mark the screw holes with a pencil. If you are installing floating shelves, make sure the bracket is oriented correctly and centered where you want the shelf.
For bracket shelves, place brackets far enough apart to support the shelf evenly. A short shelf may need two brackets. A longer shelf may need three or more to prevent sagging. Heavy items should sit close to brackets rather than at the unsupported center of a long board.
Step 6: Drill Pilot Holes
Drill pilot holes at your marks. Pilot holes help screws drive straight and reduce the chance of splitting wood studs. If drilling into drywall for anchors, use the drill bit size recommended by the anchor manufacturer. Too small, and the anchor may not fit. Too large, and the anchor may spin uselessly in the wall like it has given up on responsibility.
Before drilling, consider what may be inside the wall. Avoid drilling directly above or below outlets, switches, plumbing fixtures, or known pipe routes unless you are confident the area is clear. Use caution in kitchens, bathrooms, and laundry rooms where plumbing and wiring are more likely to be present.
Step 7: Install Anchors If Needed
If a screw will go into a stud, you usually do not need a drywall anchor. Drill a pilot hole and drive the screw directly into the stud. If a screw will go into hollow drywall, install the correct anchor first.
For self-drilling anchors, drive the anchor into the drywall until it is flush with the surface, then insert the screw through the bracket. For toggle bolts, insert the bolt through the bracket, thread on the toggle wings, fold them, push them through the wall, and tighten after the wings open behind the drywall. For molly bolts, follow the package instructions so the sleeve expands properly behind the wall.
Step 8: Attach the Bracket or Standards
Line up the bracket with your pilot holes or anchors and drive the screws. Start all screws loosely before tightening them fully. This gives you a little room for adjustment. Check level again before the final tightening. If the bracket shifts while you tighten it, loosen the screw, correct the position, and try again.
For adjustable shelving standards, make sure each vertical rail is plumb. A rail that leans slightly may cause the entire shelf system to look crooked. Once the first rail is secure, use the shelf brackets and a level to position the next rail at the same height.
Step 9: Install the Shelf Board
Place the shelf board on the brackets or slide the floating shelf onto its support bracket. Some shelves use set screws underneath to lock the shelf onto the bracket. Tighten these according to the manufacturer’s instructions. Do not skip them; they help prevent the shelf from sliding forward.
If you are using wood boards on visible brackets, attach the board to the brackets from underneath with short screws. Make sure the screws are long enough to secure the shelf but not so long that they poke through the top. Surprise screw tips are not a design feature.
Step 10: Test the Shelf Carefully
Before decorating, press gently downward near each bracket and watch for movement. The shelf should feel stable, level, and firmly attached. Add weight gradually instead of loading everything at once. If the shelf shifts, sags, creaks, or pulls from the wall, remove the items and inspect the installation.
Never exceed the shelf or hardware weight rating. For books, dishes, and heavy decor, distribute weight evenly and keep heavier objects near supports. If you are unsure whether a shelf can handle a load, choose stronger hardware or add another bracket.
Best Wall-Mounted Shelf Ideas by Room
Living Room Shelves
Use wall-mounted shelves to display framed photos, small plants, books, candles, and art. Floating shelves look especially polished above a sofa or media console. Keep the arrangement balanced by mixing tall, short, wide, and narrow objects.
Kitchen Shelves
Kitchen shelves must be strong because dishes, jars, and cookware add weight quickly. Use studs whenever possible, choose durable brackets, and avoid overloading long unsupported spans. Open shelves look beautiful, but they are not the place for every mug you have owned since college.
Bathroom Shelves
Bathroom shelves are perfect for towels, toiletries, candles, and small storage baskets. Because bathrooms are humid, choose moisture-resistant materials and hardware. If installing into tile, drill slowly with the proper bit and avoid placing anchors in grout lines unless the product instructions allow it.
Bedroom Shelves
Wall shelves can replace nightstands in small bedrooms or create storage above a desk or dresser. If installing above a bed, be extra careful with anchors and weight limits. Keep heavy objects elsewhere. Nobody wants to wake up to a hardcover book performing a surprise trust fall.
Garage and Laundry Room Shelves
Utility shelves should prioritize strength over style. Use heavy-duty brackets or track systems, fasten into studs, and choose shelves rated for storage bins, tools, detergents, and supplies. In these spaces, practical installation matters more than invisible brackets.
Common Mistakes to Avoid
Skipping the Studs
Drywall anchors can work well, but studs provide better support. For heavy shelves, skipping studs is one of the biggest installation mistakes.
Using the Wrong Anchor
Not all anchors are equal. A tiny plastic anchor may be fine for a lightweight picture frame but wrong for a shelf holding books. Match the anchor to the wall material and expected load.
Forgetting the Shelf’s Own Weight
The shelf itself counts toward the total load. A thick wood shelf may be heavy before you place anything on it.
Trusting Your Eyes Instead of a Level
Always use a level. Walls, trim, and ceilings can create optical illusions. Your shelf should obey the level, not your suspiciously confident eyeballs.
Overtightening Screws
Overtightening can strip holes, crush drywall, or damage anchors. Tighten until secure, then stop.
How Much Weight Can Wall-Mounted Shelves Hold?
The weight capacity depends on the shelf material, bracket design, screw size, wall type, anchor rating, and whether the fasteners are driven into studs. A small decorative floating shelf may only hold a few lightweight objects. A heavy-duty bracket shelf installed into studs can hold much more. Always follow the shelf manufacturer’s stated weight limit and choose hardware rated above the load you expect.
As a practical rule, use studs for heavy shelves, use toggle bolts or strong hollow-wall anchors when studs are unavailable, and avoid placing heavy items far from the supports. If you want to store books, cookware, tools, or large plants, build in extra strength from the beginning.
Maintenance Tips After Installation
After a few days, check the shelf again. New installations can settle slightly, especially when anchors are used. Tighten set screws if needed and look for early warning signs such as gaps behind brackets, sagging, loose screws, or cracks around anchors.
Dust shelves regularly and avoid water damage, especially on wood or MDF shelves. In bathrooms and kitchens, wipe moisture quickly. If the shelf begins to sag, remove weight immediately and reinforce the installation before using it again.
Extra Experience: Real-World Lessons from Installing Wall-Mounted Shelves
After installing wall-mounted shelves in different rooms, one lesson becomes very clear: the measuring stage feels slow, but it saves the most time. The fastest way to make a shelf installation take three times longer is to drill first and think second. A few minutes spent marking studs, checking level lines, and confirming shelf height can prevent patched holes, crooked brackets, and language that should not be repeated near children.
One practical experience is to mock up the shelf before drilling. Painter’s tape is surprisingly powerful here. Tape the shelf outline on the wall, step back, and look at it from different angles. Check it while standing, sitting, and walking into the room. A shelf that looks perfect up close may feel too high once you see the whole wall. This is especially true above sofas, desks, toilets, and kitchen counters.
Another lesson: stud finders are helpful, but confirmation matters. In many homes, especially older houses, wall framing can be irregular. A stud finder may react to pipes, metal corner bead, wiring, or dense plaster. Marking several points vertically helps confirm that you have found a real stud. If your marks form a straight vertical line and the spacing to the next stud makes sense, you can proceed with more confidence.
For floating shelves, patience is everything. Because the brackets are hidden, even a small tilt can become obvious once the shelf is installed. Tighten screws gradually, check the level repeatedly, and do not force the shelf onto a misaligned bracket. If the bracket is wrong, the shelf will not magically fix it. It will simply look annoyed on your wall.
For bracket shelves, choose brackets that match the job, not just the style. Decorative brackets can be beautiful, but some are designed mainly for light display shelves. If the shelf will hold cookbooks, dishes, or storage containers, use sturdy brackets with a proper depth. As a general design habit, the bracket arm should support a meaningful portion of the shelf depth so the front edge does not sag over time.
A backer board can solve many layout problems. If studs do not line up with the desired shelf placement, fastening a finished wood board across two or more studs creates a strong mounting surface. Paint or stain it to match the wall or shelf, then attach brackets to the board. This method is especially useful in laundry rooms, garages, kids’ rooms, and pantries where strength matters more than a completely invisible installation.
Finally, load shelves like a thoughtful human, not like someone testing a medieval bridge. Put heavier items near brackets or studs, spread weight evenly, and avoid stacking dense objects at the front edge. A shelf can be installed perfectly and still fail if overloaded. Good installation and good use work together. When done correctly, wall-mounted shelves make a room feel cleaner, smarter, and more intentionallike your wall finally got a promotion.
Conclusion
Installing wall-mounted shelves is one of the most rewarding DIY upgrades because it combines storage, style, and practical problem-solving in a single project. The key is to plan before drilling, locate studs whenever possible, choose the right anchors for your wall type, keep every bracket level, and respect weight limits. Whether you are adding floating shelves to a living room, sturdy brackets in a kitchen, or adjustable storage in a garage, careful installation will help your shelves stay secure and look great for years.
A successful shelf is not just a board on a wall. It is a small architectural decision that makes your home easier to use. Measure twice, drill once, and let your newly organized wall enjoy its moment.














