
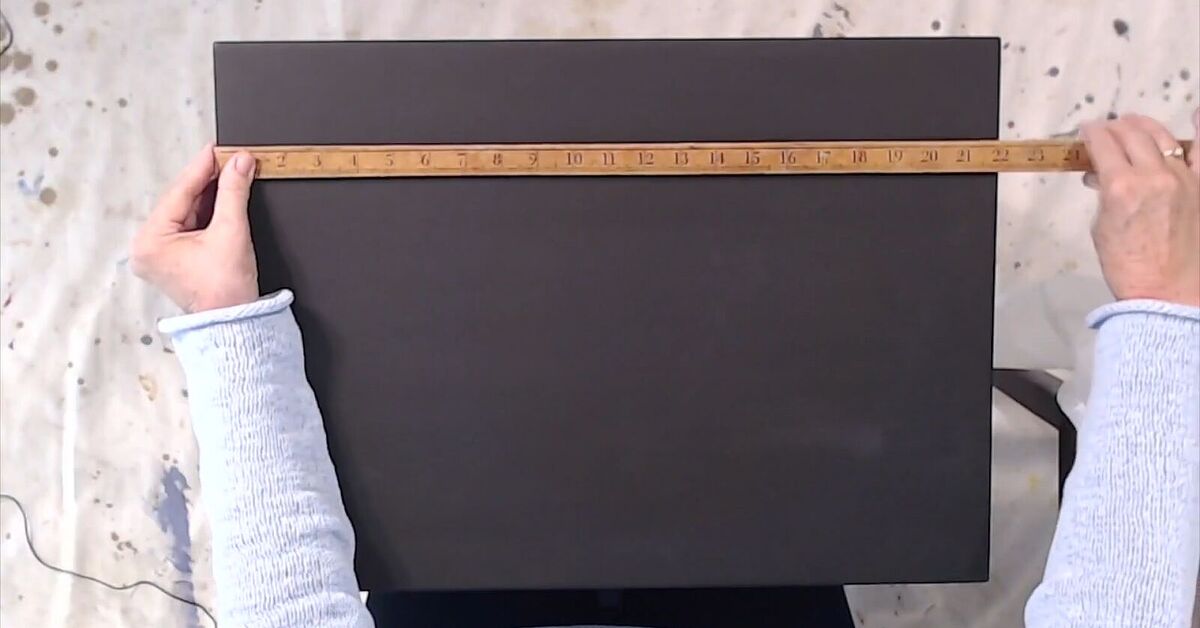
Some tables age gracefully. Others collect water rings, scratches, mystery dents, and that one glitter spot from a craft project nobody wants to admit happened. If your tabletop has entered its “please do not look directly at me” era, this easy faux leather technique can give it a rich, textured makeover without buying real leather, expensive veneers, or a brand-new table.
The trick is surprisingly humble: brown paper bags or kraft paper, decoupage medium, stain or glaze, and a protective topcoat. When torn, crumpled, glued, tinted, and sealed, the paper develops a warm, wrinkled surface that resembles aged leather. Think library desk, vintage trunk, cozy study, and “I definitely paid more for this than I did” energy.
This DIY faux leather tabletop works especially well on side tables, coffee tables, entry tables, nightstands, tray tables, and decorative accent furniture. It can also rescue laminate pieces that lack personality. The finished look is textured, forgiving, and wonderfully imperfect, which is excellent news for anyone whose crafting style includes both ambition and snacks.
What Is the Faux Leather Paper Technique?
The faux leather paper technique is a decoupage furniture method that uses torn paper to mimic the look of leather grain. Brown paper bags, contractor paper, or kraft wrapping paper are torn into irregular pieces, crumpled tightly, flattened, and attached to the table with decoupage medium or a diluted white glue mixture. After drying, the surface is tinted with stain, glaze, or watered-down acrylic paint, then sealed with polyurethane or another durable clear finish.
The magic comes from texture. Crumpling the paper creates wrinkles and soft ridges. Tearing instead of cutting creates feathered edges that blend more naturally. Stain settles into the creases, making the tabletop look aged and dimensional. Once sealed, the surface has the moody charm of worn leather without the cost, animal hide, or upholstery skills.
This is not a perfect imitation of real leather, and that is part of its appeal. It is more like a handcrafted faux leather finish: rustic, warm, and full of character. If your goal is a perfectly smooth designer showroom table, this may not be your project. If your goal is a table that looks expensive, artistic, and ready to hold coffee like a champion, keep reading.
Why This DIY Table Makeover Works So Well
A faux leather tabletop is popular because it solves several decorating problems at once. First, it hides flaws. Small scratches, faded finishes, and uneven surfaces become less noticeable under the layered texture. Second, it adds visual warmth. Brown tones pair beautifully with black, cream, white, brass, wood, green, navy, and almost every cozy interior style currently fighting for attention on your mood board.
Third, it is budget-friendly. You can use paper bags from groceries, kraft paper from the craft store, or leftover packing paper. The other supplies are common DIY staples: glue, a brush, stain, rags, sandpaper, and sealer. Finally, the technique is beginner-friendly. The wrinkles are not a mistake. They are the point. This is one of the rare home projects where “I accidentally made it crinkly” becomes “Ah yes, artisanal texture.”
Best Tables for a Faux Leather Finish
This technique is ideal for tables that need a decorative refresh rather than heavy structural repair. Good candidates include:
- Small wood side tables with worn tops
- Laminate tables that need more personality
- Nightstands, plant stands, or accent tables
- Tray tables and lightweight occasional tables
- Old coffee tables used for books, decor, and casual drinks
Avoid using this technique on surfaces that will be exposed to standing water, outdoor rain, high heat, or daily knife-and-fork abuse. A dining table can be done, but it needs extra care: a very tough topcoat, plenty of curing time, placemats, coasters, and realistic expectations. Faux leather paper is decorative and durable when sealed correctly, but it is still paper under finish, not granite wearing a leather jacket.
Supplies You Will Need
Gather everything before you start. Decoupage rewards preparation and punishes mid-project supply hunting, especially when your fingers are sticky and your paper pieces are trying to bond permanently with your elbow.
Materials
- Brown paper bags, kraft paper, or brown contractor paper
- Decoupage medium, Mod Podge, or white craft glue diluted slightly with water
- Foam brush, chip brush, or small paintbrush
- Water-based stain, gel stain, glaze, or watered-down acrylic paint
- Soft lint-free rags
- Fine-grit sandpaper, such as 220 grit
- Clear polyurethane, polycrylic, or another durable clear topcoat
- Drop cloth or newspaper
- Disposable gloves
- Plastic scraper, brayer, old gift card, or smoothing tool
Optional Extras
- Black or dark brown glaze for deeper antique effects
- Metallic wax for subtle highlights
- Painter’s tape to protect table edges
- Craft knife for trimming edges
- Clear furniture wax after curing for a softer sheen
Step-by-Step: How to Create a Faux Leather Tabletop
Step 1: Clean the Table Thoroughly
Start with a clean surface. Wipe the tabletop with mild soap and water to remove dust, grease, furniture polish, and snack evidence. Let it dry completely. Adhesive does not love oily surfaces, and it will show its displeasure by peeling later, usually right when you are proudly showing the table to someone.
Step 2: Sand or Scuff the Surface
Lightly sand the tabletop with 150- to 220-grit sandpaper. You are not trying to remove every bit of old finish unless it is peeling. The goal is to dull shiny surfaces so the glue has something to grip. Laminate tables especially need this step because slick surfaces can resist adhesive. After sanding, vacuum or wipe away all dust with a slightly damp cloth.
Step 3: Tear and Crumple the Paper
Tear the brown paper into irregular pieces. Avoid perfect squares unless you want the table to look like it is wearing a paper-tile sweater. Pieces between three and six inches wide are easy to manage, but mix sizes for a more natural pattern.
Next, crumple each piece tightly in your hand, then open it back up and smooth it lightly. The paper should stay wrinkled but flat enough to glue down. This crumpling creates the leather-like grain. The more wrinkles, the more dramatic the effect. For a subtler finish, crumple less aggressively. For a rugged old-world look, crumple like the paper owes you money.
Step 4: Plan the Layout
Dry-fit a few paper pieces before gluing. Overlap edges slightly and rotate pieces so the wrinkles run in different directions. This helps avoid obvious lines. Save some smaller scraps for corners, curves, and gaps. If your table has a raised lip or decorative edge, decide whether you want the faux leather finish only on the top or wrapped slightly over the edge.
Step 5: Apply Decoupage Medium
Brush a thin, even layer of decoupage medium onto a small section of the table. Coat the back of one paper piece as well, then press it onto the tabletop. Smooth from the center outward with your fingers, a brayer, or an old plastic card. Do not panic if bubbles appear. Many small bubbles settle as the paper dries, and some texture is welcome.
Continue adding pieces, overlapping the edges. Brush more medium over the top of each piece as you go. Work in small areas so the adhesive does not dry before you place the paper. Keep your top layer smooth but not drenched. Too much glue can make the paper fragile, slippery, and dramatic in a way nobody invited.
Step 6: Let the Surface Dry Completely
Once the tabletop is covered, let it dry fully. Overnight is a smart minimum for most projects, though humidity, paper thickness, and adhesive type can change drying time. The surface should feel dry, firm, and not cool or tacky. Rushing this step can trap moisture under the stain or sealer, which may cause cloudiness later.
Step 7: Add Stain or Glaze for Leather-Like Depth
Now comes the transformation. Apply stain, glaze, or watered-down acrylic paint with a rag or brush, then wipe back the excess. Darker color will settle into the wrinkles, making the surface look richer and more leather-like. Brown, espresso, black coffee, walnut, cognac, and mahogany tones all work well.
For a classic faux leather table, use a medium brown stain first. If you want more drama, add a second pass with a darker glaze around the edges and in random patches. This creates the aged look of leather that has lived a little. You can also dry-brush a tiny amount of metallic wax on the highest wrinkles for a vintage trunk effect, but use restraint. A little glow is charming. Too much shimmer and your table may start auditioning for a pirate musical.
Step 8: Seal With Thin Protective Coats
After the stain or glaze dries, seal the surface. A tabletop needs protection from cups, books, elbows, and life in general. Use several thin coats of clear polyurethane, polycrylic, or another furniture-safe topcoat. Brush with long, even strokes and avoid heavy coats, which can run, wrinkle, or dry unevenly.
Lightly sand between coats with fine-grit sandpaper once each coat is dry, then remove all dust before applying the next layer. Two coats may be enough for a decorative side table, but three to five thin coats are better for a coffee table or frequently used surface. Follow the manufacturer’s instructions for drying and curing times. Dry to the touch does not mean fully cured. The finish may need days or even weeks to reach maximum hardness.
Design Ideas for Different Home Styles
Rustic Farmhouse
Use warm brown paper, walnut stain, and a satin topcoat. Pair the finished tabletop with painted white or black legs. Add a woven basket underneath and suddenly the table looks like it belongs in a kitchen where biscuits happen regularly.
Industrial Loft
Choose darker stain, black glaze, and matte or satin sealer. Combine the faux leather top with metal legs, pipe-style bases, or black hardware. The result feels sturdy, urban, and cool without trying too hard.
Vintage Library
Use reddish-brown or mahogany tones, then darken the edges. A semi-gloss finish gives the piece a polished antique look. Add brass accents nearby, stack a few books on top, and pretend you are the mysterious owner of a private archive.
Modern Organic
Keep the stain light, use a matte finish, and pair the table with natural textures like linen, rattan, stoneware, and wood. This version looks less “old leather club chair” and more “calm designer home where nobody loses the remote.”
Common Mistakes to Avoid
Using Pieces That Are Too Large
Large pieces of paper are harder to smooth and more likely to bubble. Smaller torn pieces are easier to control and create a more convincing leather-like texture.
Skipping Surface Prep
If the tabletop is dusty, greasy, glossy, or peeling, the paper may not stick well. Clean first, scuff shiny surfaces, and remove loose finish before applying adhesive.
Applying Thick Topcoats
Thick polyurethane coats can drip, sag, wrinkle, or stay soft longer than expected. Thin coats are smoother, stronger, and easier to control.
Not Letting the Finish Cure
A sealed table may feel dry before it is ready for daily use. Give it extra curing time before placing heavy decor, hot mugs, or damp items on top. Coasters are your friends. Treat them well.
Expecting a Perfectly Flat Surface
This technique creates texture. That is the beauty of it. If you need a glass-smooth writing surface, add a glass top after curing or choose another refinishing method.
How Durable Is a Faux Leather Paper Tabletop?
Durability depends on prep, adhesive coverage, topcoat quality, and how the table is used. A well-sealed faux leather tabletop can hold up nicely on accent furniture, nightstands, and coffee tables. It can handle books, lamps, trays, and normal decorative use. However, it should be protected from standing water, hot pans, sharp objects, and aggressive scrubbing.
For best results, use coasters under drinks, wipe spills quickly, and clean with a soft damp cloth. Avoid soaking the surface. If the topcoat becomes scratched over time, lightly sand and add another coat of clear finish. One advantage of this technique is that touch-ups blend in better than they do on many smooth painted surfaces. The texture is already irregular, so small repairs do not shout for attention.
Experience Notes: What This Project Feels Like in Real Life
The first thing you notice when trying this faux leather table technique is how relaxing the tearing stage can be. There is something deeply satisfying about ripping brown paper into random shapes without measuring anything. It feels rebellious, but in a responsible adult way. You are not destroying paper; you are creating texture. Very sophisticated.
The crumpling step is where the project starts to make sense. A flat piece of kraft paper looks ordinary, but once it is wrinkled and softened, it begins to behave differently. It bends around corners more easily, absorbs stain more interestingly, and starts to resemble worn leather grain. If you are working with grocery bags, remove printed sections or keep them underneath where they will not show. Plain paper gives the most consistent finish.
During application, the tabletop may look messy before it looks beautiful. This is normal. Wet paper darkens unevenly, glue can appear cloudy, and overlapping pieces may seem obvious. Do not judge the project too early. Many DIY makeovers have an awkward teenage phase, and this one is no exception. Once the paper dries and the stain hits those wrinkles, the whole surface suddenly gains depth.
One useful lesson is to keep your hands clean as you go. Adhesive builds up quickly on fingertips, and sticky fingers can lift delicate paper edges. Keep a damp rag nearby and wipe your hands often. Another practical tip is to start at the most visible corner only after you have practiced on a less obvious area. The first few pieces teach you how much glue you need, how firmly to smooth, and how much overlap looks natural.
Staining is the most exciting stage because it delivers instant drama. A pale brown surface can turn into a rich faux leather tabletop in minutes. The key is wiping back the color before it becomes too dark or blotchy. Work in sections and step back often. If one area looks too light, add more glaze later. If an area looks too dark, soften it with a damp rag before it dries completely.
The sealing stage requires the most patience. After all that creative fun, nobody wants to apply thin coat after thin coat and then wait for curing. Unfortunately, this is where durability is born. A rushed topcoat can ruin a beautiful finish. A carefully sealed tabletop, on the other hand, feels smoother, resists everyday wear better, and makes the whole project look intentional instead of crafty in the dangerous “summer camp tray” sense.
In daily use, a faux leather paper table brings a cozy, handmade character to a room. It looks especially good under a lamp because light catches the wrinkles and shows off the layered color. Guests often assume it is a specialty finish, not humble paper. That is the quiet joy of this project: it turns ordinary materials into something with presence. Also, it gives you permission to say, “Oh, I made that,” which remains one of the best sentences in the DIY universe.
Final Thoughts
Sprucing up your table with this easy faux leather technique is one of the most satisfying ways to rescue tired furniture. It is affordable, creative, and forgiving. You do not need advanced tools, professional refinishing experience, or a workshop worthy of a television makeover show. You need paper, glue, color, sealer, and enough patience to let each layer dry.
The finished tabletop has warmth, texture, and personality. It can lean rustic, vintage, industrial, or modern depending on your stain and styling choices. Best of all, the method celebrates imperfection. Every wrinkle, overlap, and subtle color shift adds to the leather-like effect. In a world full of flat-pack sameness, that kind of character is worth making by hand.
Note: Always test your adhesive, stain, and sealer on a scrap piece or hidden area before refinishing the full table. Work in a well-ventilated space, follow product labels, and allow the final topcoat to cure fully before regular use.













