
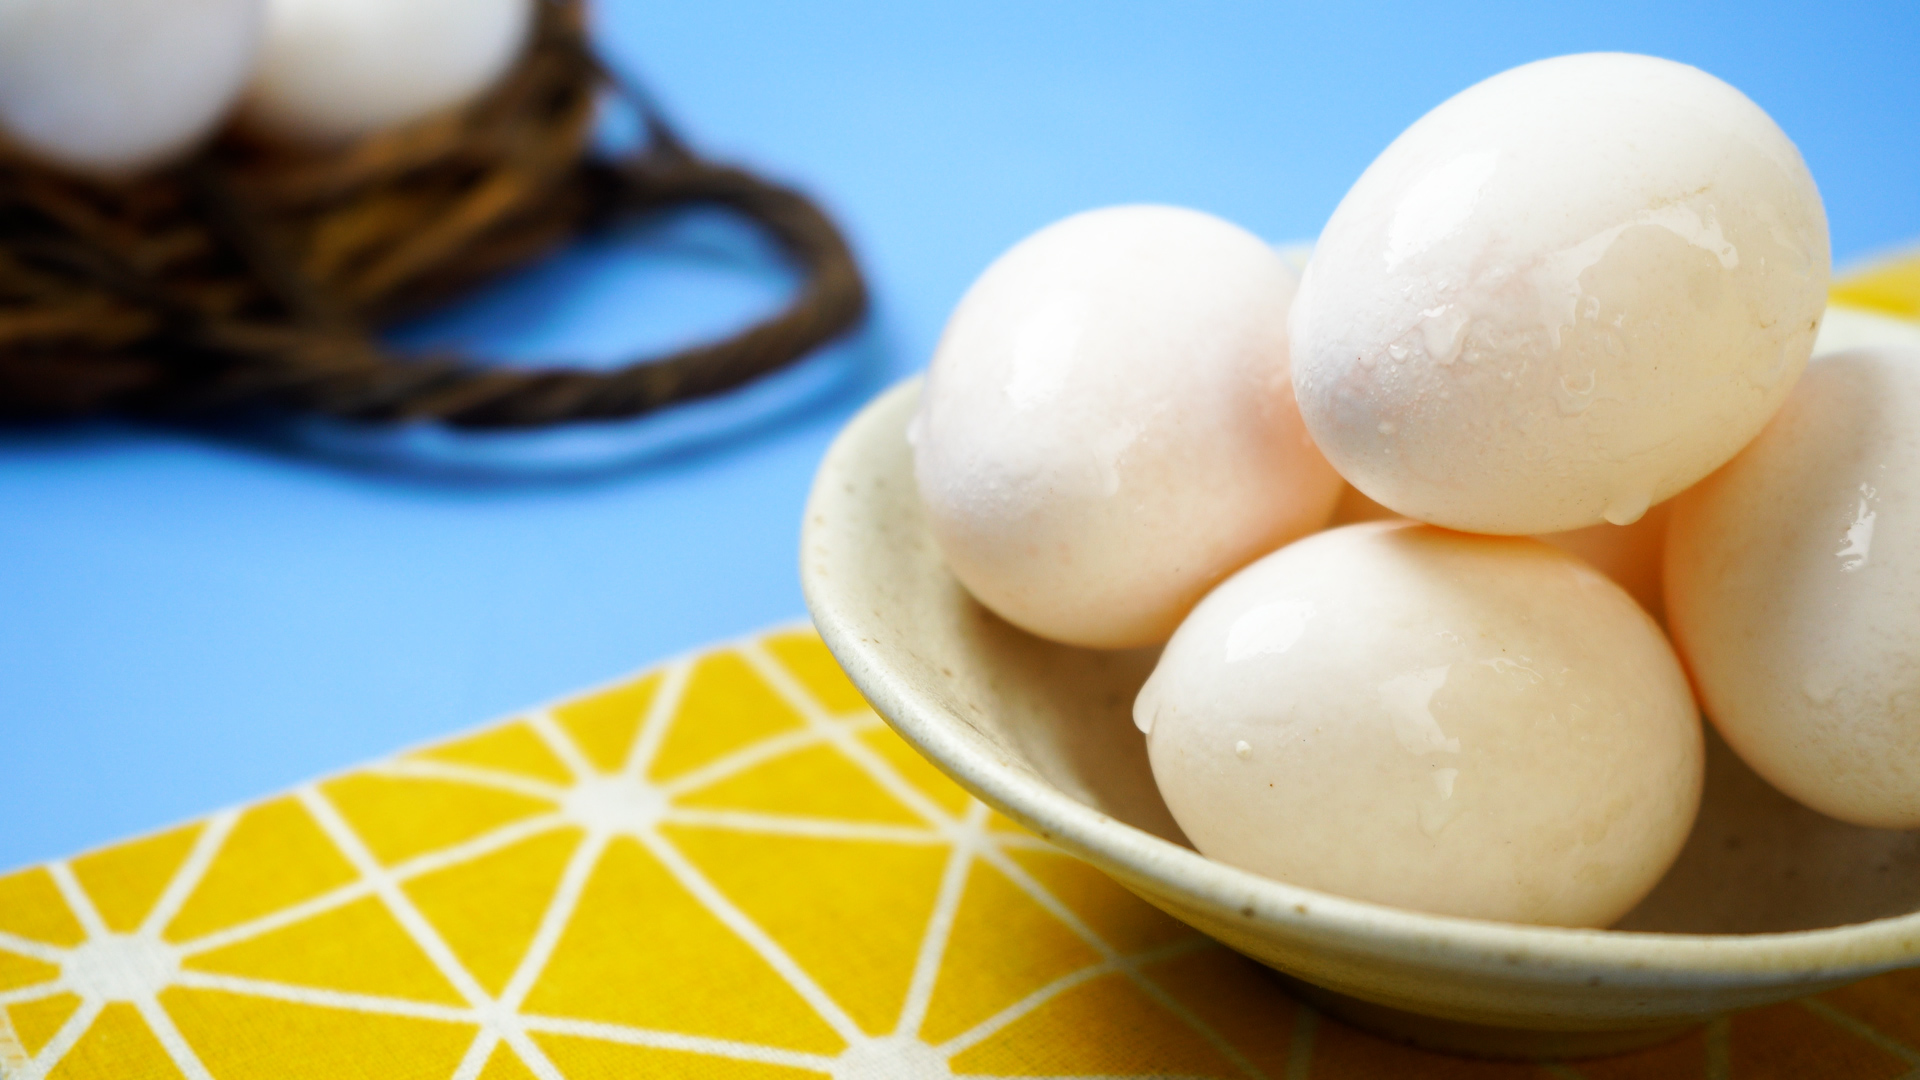
Preparing eggs for incubation sounds simple: collect egg, place egg in incubator, wait for adorable fluff nuggets. If only chickens read manuals. In real life, eggs arrive with different shapes, questionable nesting-box souvenirs, mysterious smudges, and the occasional “did this hen lay it or drop-kick it?” situation. That is why learning how to clean and prepare eggs for incubation matters before you ever press the incubator’s power button.
The most important rule is also the least glamorous: the best hatching egg is not the one you scrub until it shines like a kitchen countertop. It is the egg that was laid in a clean nest, collected promptly, handled gently, stored correctly, and set before quality begins to decline. Eggshells are porous, and the shell is covered by a natural protective coating called the bloom or cuticle. Over-cleaning can damage that coating and invite bacteria to move through the pores. In other words, the egg is not a dinner plate. Do not attack it with enthusiasm and a sponge.
This guide explains how to select, clean, store, warm, mark, and set fertile eggs for incubation using practical backyard poultry methods. Whether you are hatching chicken eggs, duck eggs, quail eggs, or another poultry species, the same basic principles apply: start clean, stay gentle, avoid unnecessary washing, control storage conditions, and give the embryo the calm, stable environment it needs.
Why Egg Preparation Matters Before Incubation
A fertile egg is a living package. Inside the shell is a tiny embryo waiting for the right temperature and humidity to begin developing. Outside the shell is the world: dust, bedding, manure, moisture, bacteria, and your hands. Good preparation reduces contamination, improves hatchability, and helps prevent weak chicks or late embryo losses.
Many incubation failures are blamed on the incubator, but the story often begins days earlier. Eggs may have been left too long in a dirty nest, stored in a refrigerator that was too cold, washed in cold water, handled with dirty hands, or set after sitting for two weeks. The incubator gets the blame, but the crime scene started in the coop.
Start With Clean Nests, Not Aggressive Cleaning
The easiest egg to clean is the one that never gets dirty. Clean nesting boxes are the first step in preparing eggs for incubation. Replace soiled bedding regularly, keep nests dry, and make sure hens have enough nesting space. If birds crowd into one favorite box like it is the only luxury apartment in town, eggs are more likely to be cracked, trampled, or smeared.
Use clean straw, shavings, or other dry nesting material. Remove broken eggs immediately because they attract pecking, insects, and bacteria. If hens are sleeping in nest boxes, discourage the habit by providing proper roosting space. A hen that sleeps in a nest box turns it into a tiny poultry restroom, which is not exactly the maternity suite your future chicks deserve.
Collect Hatching Eggs Frequently
Frequent collection keeps eggs cleaner and protects them from temperature swings. In normal weather, collect eggs at least two or three times a day. During hot weather, collect more often. Eggs left in a hot nest can begin early embryo development, then stop when cooled, which can harm hatchability. Eggs left in cold weather may chill too much or crack.
Carry eggs in a clean basket, tray, or carton. Do not stack them loosely in a bucket where they can bump together like marbles in a coffee can. Every hairline crack is an open door for bacteria and moisture loss. Handle eggs as though they are fragile because, scientifically and emotionally, they are.
Select the Best Eggs for Incubation
Not every fertile egg deserves a place in the incubator. Select eggs that are clean, normal in shape, medium to large for the breed, and free of cracks. Avoid eggs that are very small, unusually large, round like ping-pong balls, long and narrow, wrinkled, thin-shelled, rough, or heavily stained.
Good hatching eggs should have:
- A normal oval shape with one rounded end and one pointed end
- A strong, smooth shell
- No cracks, leaks, or soft spots
- Minimal dirt or stains
- A known fertile source, ideally from healthy breeding stock
Double-yolk eggs may look impressive in the frying pan, but they are poor candidates for incubation. Two embryos rarely have enough room to develop and hatch successfully. Save those eggs for breakfast, not the incubator.
Should You Wash Eggs Before Incubation?
In most cases, no. Clean hatching eggs should not be washed. The shell’s bloom helps reduce bacterial entry and moisture loss. Washing can remove that protection, especially if the water is too cold, the egg is soaked, or the shell is rubbed too hard.
This is where many beginners get tripped up. A shiny egg is not automatically a safer egg. For incubation, the goal is not beauty-pageant cleanliness. The goal is biological protection. A slightly dusty egg may be safer than an egg that has been scrubbed with water and forced to absorb bacteria through its pores.
How to Dry Clean Lightly Soiled Hatching Eggs
If an egg has a small amount of dry dirt, bedding dust, or a light smudge, dry cleaning is usually the safest approach. Use a clean, dry paper towel, soft cloth, fine sanding sponge, or egg-cleaning pad. Rub only the dirty spot, not the entire shell. Use gentle pressure. You are not refinishing furniture.
After dry cleaning, inspect the shell again. If the egg still has heavy manure, wet mud, or deep staining, it is better to reject it than risk contaminating the incubator. Dirty eggs can spread bacteria to neighboring eggs, trays, and the humid incubator environment. One nasty egg can turn the incubator into a microbial theme park.
When Wet Cleaning Is a Last Resort
Wet cleaning hatching eggs is controversial because it can increase contamination risk when done poorly. For backyard incubation, the safest rule is simple: do not wet wash eggs unless the egg is valuable, only lightly to moderately soiled, and you understand the risks. Heavily soiled eggs should usually be discarded from the hatching batch.
If you must wet clean, use water warmer than the egg, not cold water. Warm water causes the contents of the egg to expand slightly, helping push material away from the pores. Cold water can cause the egg contents to contract, drawing dirty water inward. That is the poultry version of opening the front door during a mosquito convention.
Basic wet-cleaning guidelines:
- Use clean water that is warmer than the egg, commonly around 90°F to 120°F.
- Do not soak eggs in a bowl or sink.
- Clean one egg at a time.
- Use minimal rubbing and avoid abrasive scrubbing.
- Dry the egg immediately with a clean disposable towel.
- Do not use strong household cleaners, scented soaps, or harsh chemicals.
Some commercial operations use approved sanitizers, controlled spray systems, and strict temperature procedures. That is not the same as swirling eggs in a kitchen bowl and hoping for the best. If you are a small-flock keeper, prevention beats washing almost every time.
Do Not Incubate Very Dirty or Cracked Eggs
It can feel wasteful to reject an egg, especially if it came from your best hen. But incubation is not a rescue mission for every shell that rolls out of the coop. Cracked eggs lose moisture too quickly and allow bacteria to enter. Eggs with manure stuck to the shell may contaminate clean eggs. Eggs with thin or rough shells may fail before hatch.
When in doubt, do not set it. A smaller hatch of healthy chicks is better than a full incubator with exploding eggs, bad odors, and disappointing results. Anyone who has smelled a rotten incubated egg knows this lesson does not need repeating. It files itself permanently in your memory.
Store Eggs Correctly Before Incubation
Most backyard hatchers collect eggs over several days before setting a full batch. During that waiting period, storage conditions matter. Fertile eggs should be stored cool, but not refrigerator-cold. A common target range is about 50°F to 65°F with moderate to high humidity, often around 70% to 80%. The purpose is to pause development without damaging the embryo or drying the egg too much.
Store eggs with the pointed end down and the large end up. The air cell sits at the large end, and this position helps keep it stable. Use clean cartons or trays. Label the carton with the collection date so you do not accidentally set mystery eggs from the ancient era of last Tuesday.
For best results, set eggs within 7 days when possible. Many eggs can still hatch if stored up to 10 days, but hatchability declines as storage time increases. After two weeks, success usually drops sharply. Long-stored eggs may also hatch later and produce weaker chicks.
Turn Stored Eggs Before Setting
If eggs are stored for more than a day or two, tilt or turn them once or twice daily. This helps prevent the yolk from sticking to the shell membrane. A simple method is to place one side of the carton on a book or block, then switch sides morning and evening. You do not need to spin eggs like a game-show wheel. Gentle tilting is enough.
Always move eggs slowly. Sudden shaking can damage internal structures. Remember, the future chick is not asking for a roller-coaster experience.
Bring Eggs to Room Temperature Before Incubation
Before placing stored eggs into a warm incubator, let them come gradually to room temperature. This usually takes several hours. If cold eggs go directly into a hot, humid incubator, condensation can form on the shell. Moisture on the shell encourages bacteria and may interfere with normal gas exchange.
Set the eggs on a clean surface or in a clean carton while they warm. Keep them away from pets, kitchen splashes, and curious children who want to “just check something.” The eggs are warming, not hosting a meet-and-greet.
Prepare the Incubator Before Eggs Go In
Never prepare the incubator after the eggs are already waiting. Clean and disinfect the incubator before each hatch. Wash removable trays and water channels, remove old shell debris, and allow all parts to dry completely. Run the incubator empty for at least 24 hours to confirm that temperature and humidity are stable.
For chicken eggs, many forced-air incubators are commonly run around 99.5°F. Still-air incubators may require a slightly different temperature measured at the top of the eggs, so always follow the manufacturer’s instructions. Humidity targets vary by incubator, local climate, and species, but consistency matters more than constant fiddling. During the final hatch period, humidity is usually raised to help chicks hatch without drying membranes.
Place the incubator in a room with steady temperature, away from direct sun, drafts, heaters, and air-conditioning vents. An incubator sitting in a sunny window will behave like a moody toaster.
Mark Eggs the Right Way
If your incubator does not have an automatic turner, mark eggs so you can track turning. Use a pencil, not a permanent marker. Many hatchers write an “X” on one side and an “O” on the other. This makes it easy to see whether every egg has been turned.
Turn eggs at least three times daily if turning by hand, and always turn an odd number of times per day so the eggs do not rest on the same side every night. Stop turning during the lockdown period, usually the last three days for chicken eggs, when chicks position themselves for hatch.
Place Eggs Carefully in the Incubator
Set eggs with the pointed end slightly down if using an upright turner. If laying eggs on their sides, position them naturally and leave enough space for air movement. Do not overcrowd trays. Good airflow helps maintain even temperature and humidity.
Close the incubator and avoid unnecessary opening. Every time the lid opens, temperature and humidity drop. Yes, staring at eggs is tempting. No, they do not hatch faster when supervised by a nervous human face pressed against the plastic window.
Common Mistakes to Avoid
Washing every egg because clean looks better
Over-washing can remove the bloom and increase contamination risk. Incubation eggs are not grocery-store display eggs.
Using cold water
Cold water may draw bacteria through shell pores. If wet cleaning is absolutely necessary, use water warmer than the egg.
Setting old eggs
Eggs stored longer than 7 to 10 days usually hatch less successfully. Plan your collection schedule before incubation day.
Ignoring dirty nests
If most eggs are dirty, the solution is not better scrubbing. The solution is better coop and nest management.
Skipping incubator sanitation
A clean egg placed into a dirty incubator is like taking a shower and then rolling in a compost pile. Clean the equipment first.
Quick Checklist: Cleaning and Preparing Eggs for Incubation
- Keep nesting boxes clean, dry, and well-bedded.
- Collect eggs several times daily.
- Select normal, clean, uncracked eggs.
- Reject heavily soiled, cracked, thin-shelled, or misshapen eggs.
- Dry clean only lightly soiled spots.
- Avoid wet washing unless absolutely necessary.
- Store eggs pointed end down at about 50°F to 65°F.
- Maintain moderate to high humidity during storage.
- Set eggs within 7 days when possible, and preferably before 10 days.
- Let eggs warm to room temperature before incubation.
- Clean and stabilize the incubator before setting eggs.
- Mark eggs with pencil if turning by hand.
Conclusion
Learning how to clean and prepare eggs for incubation is really learning how to protect the embryo before incubation begins. The best hatching eggs are clean from the nest, not scrubbed into submission. Focus on clean bedding, frequent collection, careful selection, gentle dry cleaning, proper storage, and a stable incubator. Reject eggs that are cracked, very dirty, misshapen, or old. It may feel strict, but good hatching is a game of small details, and the eggs notice everything.
When you treat hatching eggs like living cargo, your results improve. You reduce bacterial risk, protect the natural bloom, prevent moisture problems, and give each embryo the best possible start. The reward is worth it: healthy chicks, fewer disappointments, and far fewer moments where you sniff the incubator and immediately regret having a nose.
Real-World Experience: What Backyard Hatchers Learn the Hard Way
One of the most useful lessons in hatching is that the cleanest-looking process is not always the safest process. Many beginners, trying to do everything perfectly, wash every egg before incubation. It feels responsible. It looks professional. It also sometimes lowers hatch rates because the natural bloom gets damaged. Experienced hatchers usually become less dramatic over time. They stop trying to polish eggs and start improving the nest boxes instead.
A practical routine often works better than complicated equipment. In a small backyard flock, the day might start with checking nest boxes early, removing any wet bedding, collecting eggs before they sit too long, and setting aside only the best ones. The keeper writes the date on the carton, stores the eggs pointed end down in a cool room, and tilts the carton morning and evening. Nothing fancy. No laboratory coat. Just consistency, which chickens rarely provide but humans can at least attempt.
Another common experience is learning that “slightly dirty” and “too dirty” are not the same. A tiny dry shaving stuck to the shell can often be brushed away. A wet manure smear is a different story. Many hatchers need one bad hatch to understand why dirty eggs are risky. A contaminated egg can smell terrible, leak, or even burst under incubation conditions. After that, rejecting questionable eggs becomes much easier. The heart says, “Maybe it will be fine.” The nose says, “Please do not gamble.”
Storage habits also make a major difference. Beginners sometimes save eggs for two or three weeks because they want a full incubator. Then hatch day arrives with poor results, late chicks, or many clears. Experienced hatchers learn to set smaller batches of fresher eggs. A half-full incubator of fresh, well-handled eggs usually beats a packed incubator of tired eggs that have been waiting around like forgotten leftovers.
Temperature shock is another quiet problem. Moving cool stored eggs directly into a warm incubator can create condensation on the shells. The first time a hatcher sees eggs “sweating,” it may seem harmless, but that moisture can help bacteria move and multiply. Letting eggs warm gradually before setting is a simple habit that prevents trouble.
Finally, every hatch teaches humility. Even with perfect preparation, not every fertile egg hatches. Breeder age, nutrition, fertility, shell quality, storage time, incubator accuracy, and turning all play a part. Good egg preparation does not guarantee 100% success, but it removes many preventable failures. Think of it as giving the chicks a clean runway. They still have to do the hatching, but you have cleared the mud, checked the lights, and stopped anyone from parking a tractor in the way.
Note: This article is based on practical poultry incubation guidance from U.S. university extension resources, poultry science materials, hatchery management references, and small-flock egg-handling recommendations. Always follow local animal health rules and the instructions for your specific incubator model.













