
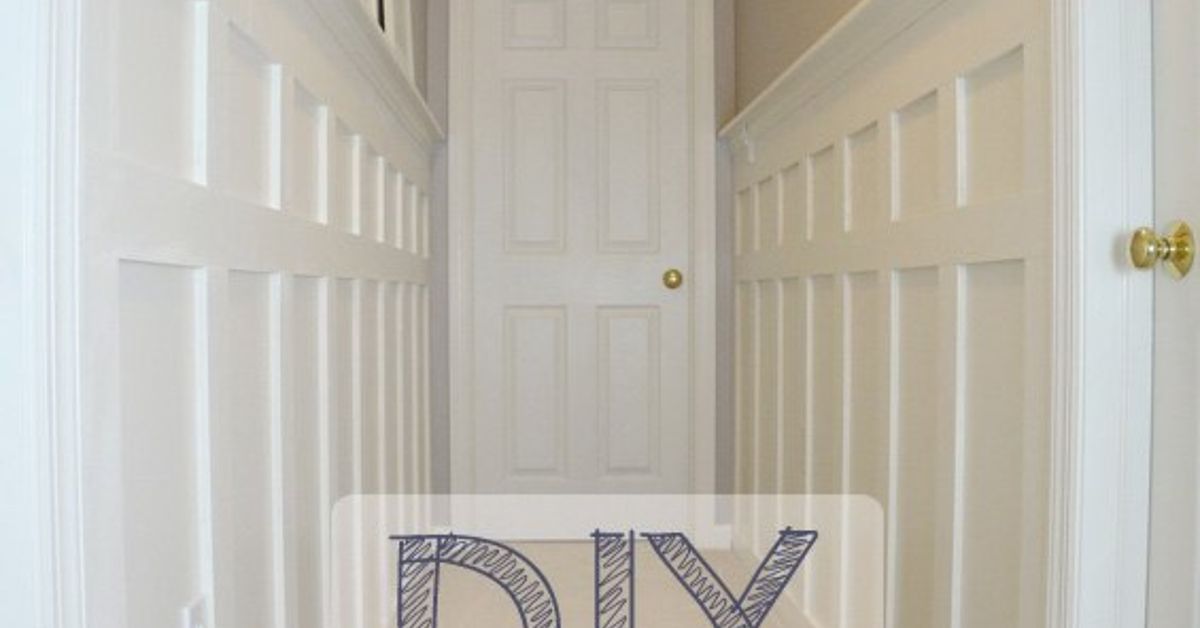
A blank wall is not technically a problem. It holds up the ceiling, hides electrical wiring, and performs several other respectable wall duties. Still, sometimes it looks as though it has given up on life.
A DIY board and batten wall is one of the simplest ways to give that boring surface architectural character without paying a carpenter, buying expensive paneling, or accidentally turning your home into a six-month renovation documentary. With inexpensive MDF strips, basic supplies, careful planning, and paint, you can complete a polished board and batten accent wall for less than $150.
The budget works best for one wall measuring approximately 8 to 12 feet wide, assuming you already own or can borrow common tools. Material prices vary by region, so consider the numbers below a practical planning model rather than a legally binding promise from the lumber aisle.
What Is Board and Batten?
Traditional board and batten construction consists of wide vertical boards with narrower strips, called battens, covering the seams. It was originally used as exterior siding on barns, cottages, and other practical buildings where keeping out wind and rain mattered more than collecting interior-design compliments.
Modern interior board and batten is usually a decorative wall treatment. Instead of covering an entire wall with solid boards, many DIYers use the existing drywall as the flat background and attach strips of MDF or wood directly to it. Once the wall, battens, rails, and baseboard are painted the same color, everything appears to be one built-in architectural feature.
This faux board and batten method uses fewer materials, costs less, and is easier for beginners. It works especially well in bedrooms, dining rooms, entryways, hallways, home offices, nurseries, and powder rooms.
Can You Really Build Board and Batten for Under $150?
Yes, but the phrase “under $150” needs a few sensible boundaries. The budget assumes you are improving a single accent wall, using the existing drywall as the board, and choosing affordable trim such as primed MDF or lattice molding. It also assumes you already have access to a tape measure, level, saw, hammer, drill, or brad nailer.
Buying a new cordless nail gun, laser level, premium miter saw, and enough coffee to operate all three would quickly launch the project beyond $150. Borrowing tools from a friend, using a tool-lending library, or renting equipment keeps the actual wall treatment affordable.
Sample Budget for a 10-Foot-Wide Wall
| Material | Estimated Cost |
|---|---|
| Eight primed MDF or lattice strips | $45–$60 |
| One wider top rail | $10–$15 |
| Paint and primer | $30–$40 |
| Paintable caulk | $5–$8 |
| Wood filler or lightweight spackle | $5–$8 |
| Brad nails or finish nails | $5–$10 |
| Sandpaper, tape, and miscellaneous supplies | $10–$15 |
| Estimated total | $110–$156 |
To stay safely under budget, use leftover paint, choose pre-primed trim, compare molding prices, and limit the design to one horizontal rail with evenly spaced vertical battens. Decorative ledges and extra horizontal rows look attractive, but each architectural flourish has a small financial appetite.
Materials and Tools You Will Need
Materials
- Primed MDF strips, lattice molding, or straight wood boards
- One wider board for the top rail
- Paintable acrylic-latex caulk
- Wood filler or lightweight spackle
- Construction adhesive, optional
- Brad nails or finish nails
- Primer, if the boards are not pre-primed
- Interior wall and trim paint
- Medium- and fine-grit sandpaper
- Painter’s tape and a drop cloth
Tools
- Tape measure
- Pencil
- Four-foot level or laser level
- Stud finder
- Miter saw, circular saw, or hand saw with a miter box
- Brad nailer, finish nailer, or hammer
- Caulk gun
- Putty knife
- Paintbrush and roller
A brad nailer is convenient because it leaves small holes and speeds up installation, but it is not mandatory. Thin trim can be installed with finish nails and a hammer. Work carefully to avoid damaging the face of the molding or teaching the neighbors new vocabulary.
Choose the Right Material
Primed MDF
Medium-density fiberboard is often the most budget-friendly choice for painted interior board and batten. It is smooth, consistent, easy to paint, and generally straighter than inexpensive solid lumber. Pre-primed MDF also eliminates a preparation step.
Its main weakness is moisture. MDF can swell if water reaches an unfinished edge, so it is not the best material for shower walls, damp basements, or areas that receive regular splashes. Seal cut edges carefully and use moisture-resistant materials in humid rooms.
Wood Boards
Pine, poplar, and finger-jointed wood are more resistant to occasional moisture and can provide crisp, durable edges. However, wood typically costs more and may contain knots, bows, or surface defects. Inspect every board before buying it. Place one end on the floor and look down its length; if it resembles a ski jump, return it to the rack.
Lattice Molding
Thin lattice molding is useful when the existing baseboard is narrow. A conventional one-by-three board may project beyond the baseboard and create an awkward joint. Lattice strips are thinner, lighter, and often less expensive, making them a practical solution for faux board and batten.
Plan the Board and Batten Layout
Good board and batten begins with arithmetic, not a nail gun. Measure the total width and height of the wall, including any corners, windows, doors, outlets, and vents. Decide whether the treatment will cover the lower third, lower half, lower two-thirds, or full height of the wall.
Traditional wainscoting often reaches roughly one-third of the wall height, but this is a guideline rather than a building code. A 48- to 60-inch treatment works well in many dining rooms and hallways. Taller board and batten can make a bedroom feel more dramatic, while a floor-to-ceiling installation emphasizes height.
Use Painter’s Tape Before Cutting
Apply painter’s tape where the battens and top rail will go. Step back, photograph the wall, and look at it from nearby doorways. Tape makes it easy to test different heights and spacing without cutting a single board.
Pay special attention to outlets. A vertical batten that crashes directly into an outlet cover can make an otherwise polished project look poorly planned. Shift the entire layout slightly or adjust the number of battens so electrical devices fall neatly inside open panels.
Calculate Even Batten Spacing
For a design with battens at both ends of the wall, use this basic formula:
Open space between battens = (wall width − total width of all battens) ÷ number of open spaces
For example, suppose a wall is 120 inches wide and you plan to install seven battens that are each 2.5 inches wide. The battens occupy 17.5 inches. Six spaces remain between the seven battens:
(120 − 17.5) ÷ 6 = approximately 17.1 inches
Measure the open space from the edge of one batten to the edge of the next. Do not simply mark every 17.1 inches from the wall, or small measuring errors may accumulate like unwashed dishes.
How to Install DIY Board and Batten
Step 1: Prepare the Wall
Remove artwork, outlet covers, switch plates, nails, and hooks. Clean dust and grease from the surface. Fill noticeable dents and sand rough areas. Board and batten can disguise minor imperfections, but it does not make crumbs, cobwebs, or mysterious sticky spots disappear.
Determine whether the existing wall texture is suitable. Light orange-peel texture often looks fine after painting. Heavy knockdown or pronounced texture may remain visible between the battens. For a completely smooth result, install thin hardboard or plywood panels first, although doing so increases the budget.
Step 2: Deal With the Baseboard
Check how far the baseboard projects from the wall. If the battens are thinner than or equal to the baseboard thickness, they can usually terminate neatly on top of it. If the battens are thicker, consider replacing the baseboard with a square-edged board, adding a small cap, or cutting a beveled angle at the bottom of each batten.
Replacing the baseboard creates the cleanest professional profile but adds labor and material expense. For a strict under-$150 project, thin lattice battens installed above the existing baseboard are often the smartest compromise.
Step 3: Mark the Studs and Rail Height
Use a stud finder to locate framing and mark each stud lightly with a pencil. Turn off power before working around outlets, and avoid driving nails where wiring or plumbing may run.
Mark the intended height of the top rail. Use a level to draw a horizontal reference line across the wall. Never assume the floor, ceiling, or baseboard is perfectly level. Houses enjoy keeping small secrets.
Step 4: Cut and Install the Top Rail
Measure the wall at the exact installation height and cut the top rail accordingly. Dry-fit it before fastening. Apply a thin bead of construction adhesive if desired, position the board on the level line, and nail it into several studs.
Adhesive can reduce movement and help boards sit flat against uneven drywall, but it also makes future removal more destructive. Nails alone may be sufficient when you can fasten into studs or when using lightweight molding.
Step 5: Measure Every Vertical Batten Separately
Measure from the top of the baseboard to the bottom of the rail at each batten location. Floors and trim are rarely perfectly parallel, so cutting every batten to one identical length can produce visible gaps.
Label the back of each piece according to its position. Cut it, dry-fit it, and confirm that it is plumb before installation. A slightly imperfect cut is usually repairable with caulk, but caulk should finish carpentry rather than perform emergency structural negotiations.
Step 6: Attach the Battens
Begin with the center batten or one outside edge, depending on your layout. Check each strip with a level before nailing. If a batten does not align with a stud, angle two brad nails in opposite directions to improve grip, or use a modest amount of construction adhesive.
Continue installing battens while checking the open spacing rather than relying exclusively on center marks. A spacer block cut to the desired gap can make repetitive positioning faster and more accurate.
Step 7: Fill Nail Holes and Gaps
Fill nail holes and surface dents with wood filler or lightweight spackle. Allow the filler to dry, then sand it until smooth. Use paintable caulk along the seams where trim meets drywall and at small corner gaps.
Apply caulk sparingly. Run a small bead, smooth it immediately with a damp finger or caulk-finishing tool, and wipe away the excess before it dries. A giant caulk bead does not look more professional; it simply looks like the wall is wearing frosting.
Step 8: Prime and Paint
Prime raw wood, exposed MDF edges, filled holes, and heavily patched areas. Even pre-primed boards may need spot priming where they were cut or sanded.
Use a brush for corners, seams, and trim edges, then roll the flat wall sections with a small roller. Satin or eggshell paint is popular because it is easier to clean than flat paint while avoiding the intense shine of high-gloss finishes. A quality enamel formulated for trim can provide additional durability in entryways and dining rooms.
Two thin coats generally produce a smoother finish than one thick coat. Let the first coat dry according to the manufacturer’s instructions before applying the second.
Ways to Keep the Project Under Budget
- Use the drywall as the board. Full plywood backing is unnecessary when the wall texture is relatively smooth.
- Choose primed MDF or lattice. Decorative hardwood trim can consume the budget quickly.
- Borrow cutting and fastening tools. Tool purchases should not be charged to the wall unless you intend to use them again.
- Check the discount lumber section. Short pieces and slightly damaged boards may work for half-height installations.
- Use leftover paint. A coordinated color from another room can reduce the total by $30 or more.
- Keep the pattern simple. One top rail and evenly spaced vertical battens use fewer materials than a grid design.
- Measure before shopping. An accurate cut list prevents both shortages and a garage full of expensive leftovers.
Common Board and Batten Mistakes
Spacing the Battens Without Considering the Entire Wall
Starting at one corner and placing a batten every 16 inches may leave a narrow, awkward panel at the opposite end. Calculate the full layout first and center it visually.
Following a Crooked Baseboard
If the baseboard is not level, measuring every batten to the same length will expose uneven gaps. Measure each location and use a level for the top rail.
Skipping Caulk
Paint alone will not conceal dark seams between trim and drywall. Careful caulking is what turns separate pieces of molding into a convincing built-in wall treatment.
Using Non-Paintable Silicone
Standard silicone resists paint and can leave shiny, obvious seams. Choose a product specifically labeled paintable for interior trim.
Installing Thick Battens Over Thin Baseboards
This creates an overhanging edge at the bottom of every strip. Check trim thickness before purchasing material and choose thinner lattice when necessary.
Experience-Based Lessons: What the Project Really Feels Like
The following experience-based scenario reflects the practical challenges many first-time DIYers encounter during an affordable board and batten project.
The Planning Takes Longer Than Expected
The most surprising part of the project is often how much time is spent staring at painter’s tape. At first, six battens may look perfect on paper. On the wall, however, one strip may land beside a light switch while another creates a comically narrow panel near the corner. Moving every taped line two inches can suddenly make the entire design feel intentional.
This is not wasted time. Twenty extra minutes spent testing the layout can prevent hours of removing boards, patching nail holes, and pretending the asymmetry was an artistic decision.
The Walls Are Almost Never Square
A beginner may cut all the battens to 47 inches because the first measurement was 47 inches. Then the second opening measures 46 7/8 inches, the third is 47 1/8 inches, and the final section appears to belong to a different house.
Measuring each batten individually feels slower, but it produces tighter joints. Numbering the pieces on the back also prevents a perfectly cut board from being installed in the one location where it does not fit.
Caulk Creates the Transformation
Before caulking, the wall can look disappointingly homemade. Small shadows appear beside the battens, nail holes catch the light, and every imperfect cut announces itself. After filling, sanding, and caulking, the individual parts begin to read as one architectural feature.
The temptation is to apply too much caulk. A smaller bead is easier to control and produces a sharper seam. Keeping a damp cloth nearby saves repeated trips to the sink and prevents dried smears from becoming permanent wall decorations.
Painting Is More Detailed Than It Looks
Rolling the open panels is fast. Painting the inside edges around every batten is not. A two-inch angled brush makes the job easier, while a small microfiber roller helps maintain a consistent texture across the wall.
The first coat may look uneven, particularly over filler, raw cut edges, and dark wall colors. That does not mean the project has failed. Spot primer and a second finish coat usually create the uniform result everyone expected from the first coat.
The Budget Depends on Small Decisions
The trim itself is only part of the total. Caulk, filler, sandpaper, nails, brushes, tape, and paint can quietly add $50 or more. Creating a complete shopping list before visiting the store prevents impulse purchases and helps identify supplies already hiding in a closet.
Using thin primed MDF, keeping the existing baseboard, borrowing a nailer, and using leftover paint can bring a medium accent wall comfortably below $150. Adding plywood backing, premium hardwood, a display ledge, and brand-new tools can double the total.
The Finished Wall Looks More Expensive Than It Is
The reward arrives when the second coat dries and the painter’s tape comes off. A wall made from inexpensive strips suddenly looks custom-built. Furniture appears more grounded, artwork looks more deliberate, and the room gains depth without losing floor space.
The most useful lesson is that precision matters more than expensive material. Straight battens, balanced spacing, smooth filler, tidy caulk, and patient painting make budget MDF look polished. The project does not require master-carpenter skills. It requires measuring twice, checking the level repeatedly, and accepting that one board will probably need to be recut because every DIY project demands a small sacrifice.
Conclusion
A DIY board and batten wall is proof that architectural character does not have to arrive with a contractor-sized invoice. By using the existing drywall as the background, selecting affordable primed trim, planning the layout carefully, and borrowing tools when possible, you can transform a plain accent wall for under $150.
The installation is approachable for beginners, but the best results come from patient preparation. Test the pattern with painter’s tape, measure every vertical piece, check each board for level, fill the nail holes, caulk the seams, and apply two controlled coats of paint. None of these steps is glamorous, but together they create the expensive-looking finish that makes the project worthwhile.
Note: The sample budget is intended for one medium-sized interior wall and assumes access to basic tools. Local material prices, taxes, wall dimensions, paint selection, and trim type may change the final cost.














