
A fire bowl is one of those backyard projects that looks expensive, feels fancy, and secretly does not require you to own a contractor’s truck or speak fluent masonry. With the right materials, a safe location, and a little patience, you can create a beautiful DIY fire bowl for your patio, garden, or outdoor seating area. It adds warmth, atmosphere, and that irresistible “let’s sit outside five more minutes” energy.
This guide explains how to make a fire bowl using practical, beginner-friendly methods. We will focus on two smart approaches: a tabletop concrete fire bowl that uses gel fuel, and a larger outdoor fire bowl that uses a metal insert, gravel, lava rock, or fire-safe stones. You will learn how to choose materials, build the bowl, finish it safely, and avoid common mistakes that turn a cozy project into a backyard drama starring smoke, cracks, and one very nervous neighbor.
What Is a Fire Bowl?
A fire bowl is a rounded fire feature designed to contain a small flame. Unlike a full-size fire pit, it is usually more compact, sculptural, and portable. Some fire bowls sit on tabletops and burn small cans of gel fuel. Others are larger outdoor features made from concrete, metal, stone, or ceramic and burn wood, charcoal, or gas.
For most DIYers, the safest and simplest fire bowl is a concrete bowl with gel fuel or a concrete surround paired with a metal fire bowl insert. Concrete looks modern, costs less than many store-bought fire features, and can be molded into a clean, custom shape. The trick is understanding that concrete alone should not directly hold a large, hot wood fire unless it is properly protected. Extreme heat can crack ordinary concrete faster than a dropped phone screen.
Before You Start: Fire Bowl Safety Comes First
Yes, fire is charming. It is also fire. Before choosing a mold or shopping for decorative stones, choose a safe outdoor location. Place your fire bowl on a level, nonflammable surface such as stone, gravel, pavers, concrete, or bare dirt. Avoid wooden decks, dry grass, composite decking, vinyl surfaces, and anything that can melt, scorch, or catch fire.
Keep the fire bowl at least 10 feet away from your home, fences, sheds, trees, patio covers, furniture, and anything else that can burn. More distance is better, especially in dry or windy areas. Do not use a fire bowl under a covered patio, inside a garage, near low-hanging branches, or anywhere smoke and sparks can collect. Also check your local fire rules, HOA policies, and burn-ban notices before lighting anything. Nobody wants their peaceful patio project to end with a fine and a lecture from a firefighter.
Keep These Safety Items Nearby
- A garden hose, bucket of water, or fire extinguisher
- Heat-resistant gloves
- Long lighter or fireplace matches
- Metal tongs or fire tools
- A spark screen for wood-burning fire bowls
- A metal ash container with a tight-fitting lid
Never leave a lit fire bowl unattended. Keep children and pets well supervised. Avoid lighting a fire during strong wind. When finished, make sure the flame is completely out before walking away. Wood ash can stay hot for a surprisingly long time, so place cooled ashes in a covered metal container kept away from buildings and combustible materials.
Choose Your Fire Bowl Style
Before you mix concrete or buy lava rock, decide what kind of fire bowl fits your space and comfort level.
Option 1: Tabletop Concrete Fire Bowl
This is the easiest version for beginners. It uses two bowls as molds, quick-setting concrete, decorative fire-safe stones, and small cans of gel fuel. It is great for patios, small yards, apartment balconies where allowed, and decorative outdoor tables. The flame is smaller, cleaner, and easier to control than a wood fire.
Option 2: Outdoor Wood-Burning Fire Bowl
This version is larger and better for backyard gatherings. Instead of relying on concrete alone, you use a metal fire bowl insert or metal liner to protect the surrounding structure from direct heat. The bowl can sit inside a gravel-filled base or concrete form. This design gives you a classic campfire feel without building a full fire pit.
Option 3: Gas Fire Bowl
Gas fire bowls look sleek and convenient, but they are not the best first DIY project unless you are using a certified, manufacturer-approved kit exactly as instructed. Natural gas and propane connections should be handled by qualified professionals. A gas leak is not a “learn as you go” kind of lesson.
Materials for a DIY Tabletop Concrete Fire Bowl
For a simple tabletop fire bowl, gather the following materials:
- Quick-mix concrete or high-strength concrete mix
- Two nesting bowls for molds, one larger and one smaller
- Cooking spray, vegetable oil, or mold release
- Plastic drop cloth or tarp
- Bucket for mixing concrete
- Stir stick, trowel, or small shovel
- Sandpaper or sanding block
- Fire-safe decorative stones, lava rock, or fire glass
- Gel fuel cans designed for fire features
- Protective gloves and safety glasses
Choose smooth plastic, metal, or melamine bowls for the molds. Avoid fragile glass bowls because removing cured concrete from glass can become a home-improvement thriller with a very crunchy ending.
How to Make a Tabletop Concrete Fire Bowl
Step 1: Prepare Your Work Area
Work outdoors or in a well-ventilated garage. Lay down a tarp or plastic sheet because concrete is enthusiastic about sticking to places it was never invited. Put on gloves and safety glasses. Spray or wipe the inside of the larger bowl with oil or mold release. Coat the outside of the smaller bowl as well. This will help the molds release after the concrete cures.
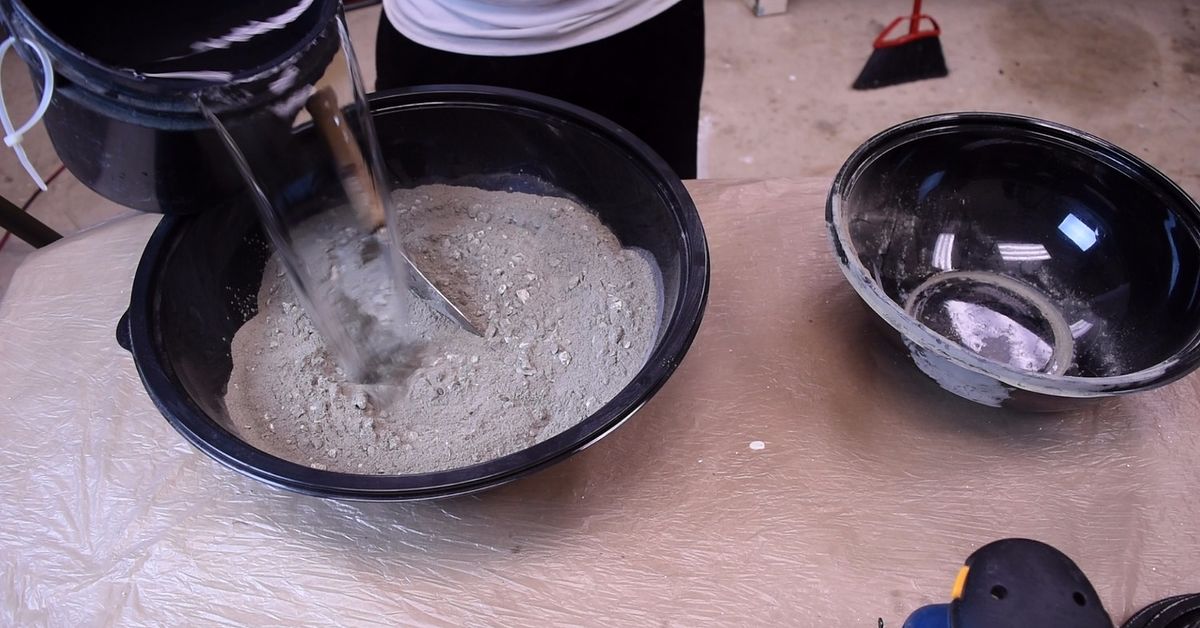
Step 2: Mix the Concrete
Follow the instructions on your concrete package. Add water slowly and stir until the mix reaches a thick, oatmeal-like consistency. It should be pourable but not soupy. If the mix is too wet, the bowl may cure weaker and take longer to set. If it is too dry, it may not settle smoothly into the mold.
Step 3: Pour the First Layer
Scoop concrete into the larger bowl until the bottom layer is about 1.5 to 2 inches thick. Tap the sides of the bowl gently to release trapped air bubbles. This small step makes the finished fire bowl smoother and stronger. Think of it as burping the concrete, which is strange but useful.
Step 4: Press in the Smaller Bowl
Place the smaller bowl in the center of the concrete and press it down carefully. The concrete will rise up around the sides. Add more concrete around the edges if needed, leaving enough space at the top for a clean rim. Weight the smaller bowl with rocks, sand, or a heavy object so it does not float upward while the concrete sets.
Step 5: Let the Concrete Cure
Allow the bowl to cure according to the concrete manufacturer’s directions. Many quick-setting mixes become firm within hours, but a stronger cure usually takes longer. Waiting at least 24 to 48 hours before unmolding is a smart move. Concrete rewards patience. It punishes rushing with cracks.
Step 6: Remove the Molds
Once cured, gently twist and pull out the smaller bowl. Then turn the larger bowl over and release the concrete fire bowl. If it resists, tap the mold lightly. Do not hammer aggressively unless your design goal is “ancient ruin chic.”
Step 7: Sand and Smooth
Use sandpaper to smooth rough edges and soften the rim. You do not need perfection. Small pits and air bubbles give concrete character. However, remove sharp spots that could scratch hands or furniture.
Step 8: Add Fire-Safe Stones and Gel Fuel
Place one or more gel fuel cans inside the bowl, then arrange lava rock, fire glass, or fire-safe decorative stones around them. Do not cover the fuel can opening. Use only stones labeled safe for fire features. Ordinary river rocks can trap moisture and may crack or pop when heated.
Step 9: Light and Enjoy Safely
Move the fire bowl to a stable, heat-resistant outdoor surface. Open the gel fuel can according to the label instructions and light it with a long lighter. Keep food away from gel fuel flames unless the product clearly says it is safe for cooking. For marshmallows, a wood fire is usually the better choice. For mood lighting and hand-warming, gel fuel works beautifully.
How to Make a Larger Outdoor Fire Bowl
If you want a fire bowl that feels more like a backyard centerpiece, build around a metal insert. This method gives you the beauty of a custom fire feature while keeping the hottest part of the fire inside a material designed to handle it.
Materials You Will Need
- Metal fire bowl insert or steel fire pit bowl
- Concrete blocks, pavers, or a large heat-resistant planter base
- Gravel or paver base
- Lava rock or fire-safe stones
- Fire bricks or metal ring if building a masonry surround
- Level
- Tamper
- Shovel
- Wood fuel, preferably dry seasoned hardwood
- Spark screen
Step 1: Pick a Safe Location
Choose a flat area away from structures, trees, fences, and overhangs. A gravel patio or paver pad works well because it is stable and nonflammable. Make sure guests have room to move around the fire bowl without tripping over chairs, planters, or the family dog, who will absolutely choose the least convenient place to nap.
Step 2: Prepare the Base
Clear the area of grass, leaves, mulch, and debris. Dig down a few inches if needed, add paver base or gravel, and tamp it flat. Use a level to check the surface. A wobbly fire bowl is not rustic. It is just stressful.
Step 3: Build or Place the Support
You can set a metal fire bowl on a sturdy stand, place it into a concrete surround, or nest it inside a ring of pavers. If using masonry blocks or pavers, dry-fit everything first before adding adhesive or mortar. Leave room for airflow and make sure the metal bowl sits securely.
Step 4: Add a Heat Barrier
For wood-burning designs, use a metal insert, fire ring, or fire bricks to protect surrounding materials from intense heat. Ordinary concrete pavers can crack when exposed to direct flame over time. A liner helps prevent heat damage and extends the life of your DIY fire bowl.
Step 5: Add Lava Rock or Gravel
Add lava rock or fire-safe stone to the bottom of the metal bowl if the insert instructions allow it. Lava rock helps distribute heat and gives the bowl a finished look. Do not overload the bowl. You still need proper airflow for a clean, steady burn.
Step 6: Use the Right Firewood
Burn dry, seasoned hardwood when possible. Oak, hickory, maple, and ash are popular choices because they burn hotter and cleaner than wet or green wood. Avoid treated lumber, painted wood, plywood, trash, cardboard, and yard waste. These can produce toxic smoke, excessive sparks, and odors that make your guests suddenly remember they have “an early morning.”
Design Ideas for a Better-Looking Fire Bowl Area
A fire bowl does not have to sit alone like a lonely soup tureen. Style the area around it so the whole space feels intentional.
Create a Gravel Lounge Zone
Pea gravel is affordable, drains well, and looks relaxed. Add a border with metal edging, bricks, or stone to keep the gravel contained. Place weather-resistant chairs around the fire bowl, leaving enough space for people to move safely.
Use Matching Materials
Match the bowl or base to your home’s exterior. Concrete looks great with modern homes, black metal works with industrial spaces, and natural stone blends beautifully into cottage or rustic gardens.
Add Low Lighting
String lights, solar lanterns, and path lights make the space easier to navigate after dark. Keep lighting cords and fixtures away from the flame zone. The goal is ambience, not electrical suspense.
Choose Comfortable Seating
Outdoor chairs should be stable, weather-resistant, and positioned far enough from heat. Add side tables for drinks and snacks so nobody has to balance a mug of hot chocolate on their knee while pretending everything is fine.
Common Mistakes to Avoid
Using the Wrong Rocks
Do not use random stones from a river, beach, or garden bed inside a fire bowl. Moisture trapped inside certain stones can expand when heated, causing cracking or popping. Use lava rock, fire glass, or stones specifically sold for fire features.
Placing the Bowl on a Wood Surface
Even small fire bowls get hot underneath. Protect tables and patios with nonflammable surfaces. If you use a tabletop fire bowl, place it on stone, tile, metal, or another heat-resistant base.
Skipping Local Rules
Some cities restrict open burning, wood smoke, or outdoor fire features during dry weather. Check local rules before building or lighting your fire bowl. Regulations are not glamorous, but neither is explaining smoke complaints to an annoyed neighbor in slippers.
Making the Fire Too Large
A fire bowl is not a bonfire bowl. Keep flames modest and contained. Overloading the bowl with fuel can cause excessive heat, smoke, sparks, and damage.
Fire Bowl Maintenance Tips
After each use, let the fire bowl cool completely. For wood-burning bowls, remove ash and store it safely in a covered metal container. Clean out debris, leaves, and moisture before the next use. If your fire bowl stays outside, cover it when not in use to protect it from rain and weather.
Concrete bowls may develop small hairline cracks over time, especially if exposed to moisture, freeze-thaw cycles, or intense heat. Keep tabletop concrete fire bowls dry when stored. For larger fire bowls, inspect the liner, base, and surrounding materials regularly. Replace cracked fire bricks, damaged metal inserts, or unstable stones before lighting another fire.
My Practical Experience Making and Using a Fire Bowl
The first thing I learned from making a fire bowl is that the project looks more intimidating online than it feels in real life. The materials are simple, the steps are manageable, and the finished result has a satisfying “I made that” glow before you even light the flame. But the second thing I learned is that small details matter. A slightly uneven base, the wrong stones, or concrete that was mixed too wet can make the difference between a sleek backyard feature and a heavy gray bowl that looks like it lost a fight with gravity.
When making a tabletop concrete fire bowl, the mold choice matters more than most beginners expect. Smooth plastic bowls release much better than textured bowls. A little oil on the molds helps a lot. If you forget this step, unmolding becomes a wrestling match, and the concrete usually wins. I also prefer mixing concrete slowly and adding water in small amounts. The ideal texture is thick enough to hold shape but wet enough to settle into the mold. If it pours like soup, stop and add more mix. Concrete soup is not a design style.
Another lesson is to embrace minor imperfections. Tiny bubbles and subtle texture make concrete look handmade in a good way. Trying to sand every mark away can make the bowl look overworked. I usually smooth the rim, check for sharp edges, and leave the rest alone. Once you add lava rock or fire glass, the bowl looks polished and intentional.
For larger outdoor fire bowls, placement is the real secret. A fire bowl in the wrong spot feels awkward no matter how beautiful it is. Put it too close to the house and nobody relaxes. Put it too far away and guests treat it like a scenic landmark. The sweet spot is a flat, open area with enough room for chairs, conversation, and safe movement. I like gravel or pavers under the bowl because they feel finished and practical. Grass looks nice at first, but heat, ash, and foot traffic quickly turn it into a sad little crop circle.
Fuel also affects the experience. Gel fuel is easy, clean, and best for ambience. It is perfect when you want a flickering centerpiece without smoke. Wood is better when you want sound, smell, warmth, and the full campfire mood. However, dry seasoned wood is worth buying. Wet wood smokes heavily, annoys neighbors, and makes everyone shift their chairs like they are playing musical furniture.
The best fire bowl nights are simple: a few chairs, a safe flame, a drink, and enough space for people to relax without hovering over the heat. A DIY fire bowl does not need to be huge or expensive to change how a backyard feels. It just needs to be safe, stable, and thoughtfully placed. Build it well, treat the flame with respect, and your outdoor space suddenly has a new favorite gathering spot.
Conclusion
Learning how to make a fire bowl is a rewarding DIY project because it combines useful outdoor design with real atmosphere. A tabletop concrete fire bowl is ideal for beginners who want a stylish, compact flame feature. A larger wood-burning fire bowl with a metal liner works better for backyard gatherings and classic fireside evenings. Either way, safety should guide every decision: choose a nonflammable surface, keep proper clearance, use fire-safe materials, and never leave the flame unattended.
With a few basic tools, the right fuel, and a little patience, you can build a fire bowl that makes your patio feel warmer, more inviting, and just a little more impressive. Add comfortable seating, simple lighting, and a safe cleanup routine, and you will have an outdoor feature that earns its keep all year long.













