
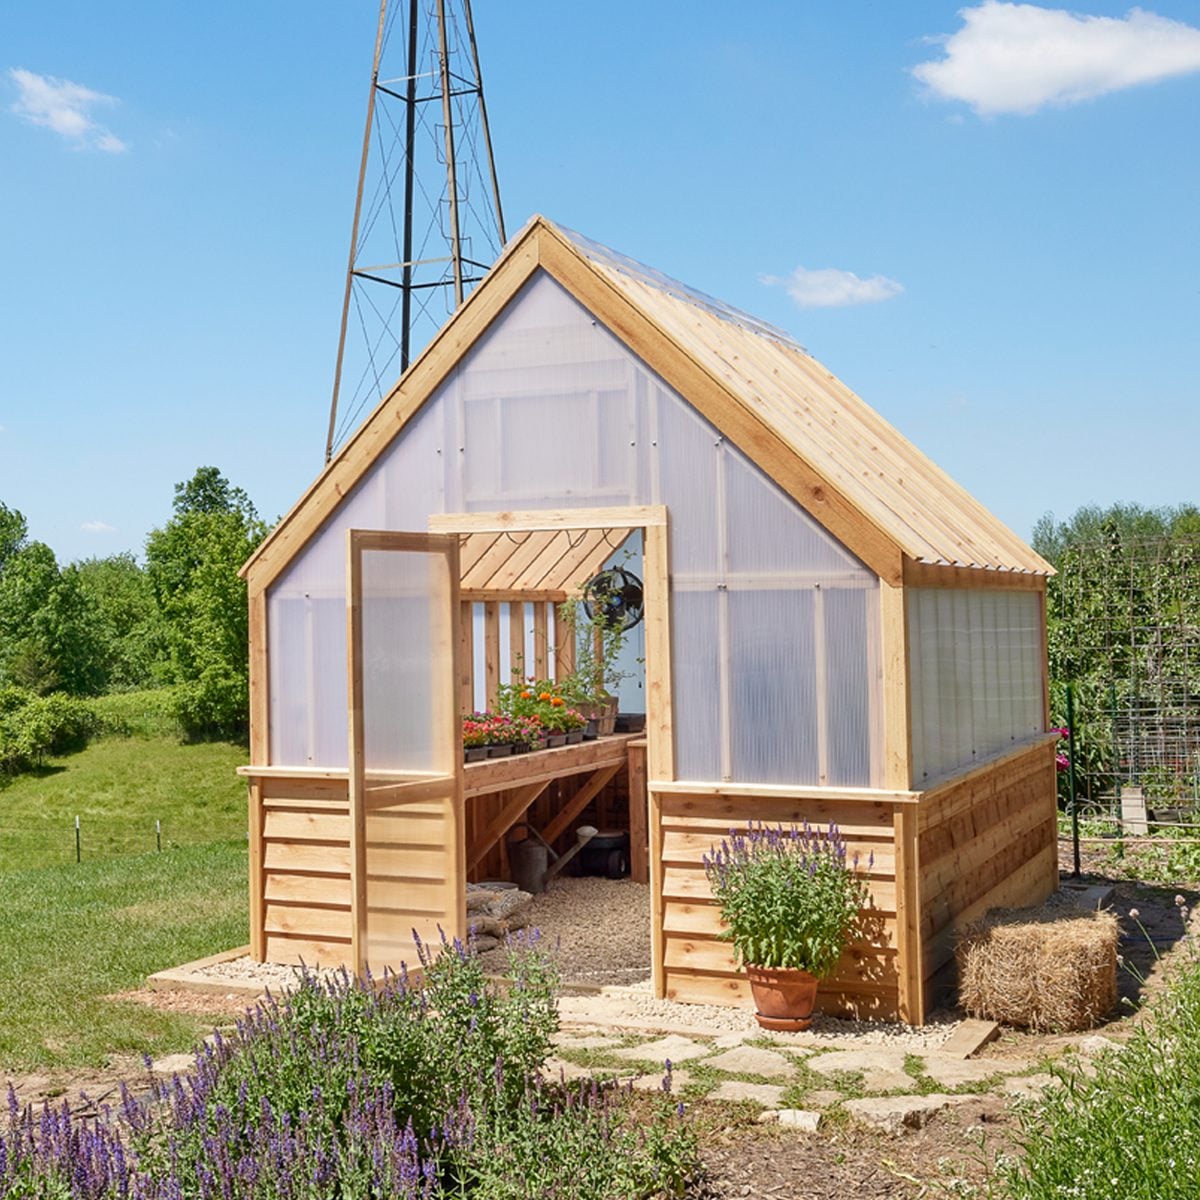
Building a greenhouse is one of those backyard projects that sounds fancy until you realize the basic idea is beautifully simple: make a strong frame, cover it with clear material, control the air, and try not to turn your tomatoes into steamed vegetables. A DIY greenhouse can extend your growing season, protect seedlings from surprise cold snaps, and give you a dedicated place to grow herbs, greens, flowers, and warm-season crops before the outdoor garden is ready.
The trick is not just building a transparent box. A good greenhouse is a small climate machine. It needs sunlight, drainage, airflow, access to water, enough structural strength for wind and weather, and a layout that does not require you to crawl over seed trays like a raccoon in yoga class. This guide walks you through how to build a greenhouse from planning to finishing touches, using practical, gardener-friendly steps.
Before You Build: Decide What Kind of Greenhouse You Need
Start with your goal. Are you starting vegetable seedlings in spring? Growing lettuce through winter? Protecting citrus in containers? Creating a year-round plant retreat? Your answer affects the size, materials, insulation, ventilation, and budget.
Common DIY Greenhouse Styles
Freestanding greenhouse: This is the classic backyard structure. It gets light from all sides, gives you flexible placement, and works well for serious gardeners.
Lean-to greenhouse: This attaches to a house, garage, or shed. It saves space and can be easier to access in winter, but it may receive less sunlight depending on the wall direction.
Hoop house or high tunnel: This uses curved hoops covered with greenhouse plastic. It is affordable, practical, and excellent for season extension, though usually less insulated than a framed polycarbonate greenhouse.
Small cabinet or mini greenhouse: This works for patios, balconies, herbs, and seed starting. It is not a full backyard greenhouse, but it is a great starter project.
Step 1: Choose the Best Greenhouse Location
The best greenhouse location receives strong sunlight, drains well, and is easy to reach. A greenhouse hidden behind the shed may look mysterious, but if it is dark, soggy, and far from the hose, your plants will file a complaint.
Look for a level or gently sloped area with at least six hours of direct sun per day. In many U.S. climates, a spot with maximum winter sunlight is ideal because winter is when plants need every photon they can get. Avoid placing the greenhouse under large trees, beside buildings that cast long shadows, or in low areas where cold air and water collect.
Orientation Matters
For many backyard greenhouses, orienting the long side east to west helps capture more winter sun. In hot climates, you may need to balance sun exposure with shade cloth and ventilation. The goal is not “as hot as possible.” The goal is “warm enough for plants and not a botanical sauna.”
Think About Utilities
Place the greenhouse near water if possible. If you plan to use fans, heat mats, lights, or a small heater, think about safe electrical access. Outdoor-rated wiring and ground-fault circuit interrupter protection are important. When in doubt, hire a licensed electrician rather than trusting an orange extension cord to become your greenhouse’s nervous system.
Step 2: Pick a Practical Size
A common beginner mistake is building too small. A greenhouse fills up fast. One tray of tomato seedlings becomes three trays, then basil joins the party, then suddenly you are negotiating floor space with a pepper plant named Dennis.
For most home gardeners, an 8-by-10-foot greenhouse is a useful starting size. A 6-by-8-foot greenhouse can work for small gardens, while a 10-by-12-foot or larger structure gives more room for benches, containers, and comfortable walkways.
Plan the Interior Before Building
Sketch the layout before buying materials. Include benches, shelves, walkways, watering space, and room for tall plants. Walkways of about 24 to 30 inches are more comfortable if you want to carry trays or use a small cart. Benches around 24 to 30 inches deep are easy to reach from one side; wider benches should be accessible from both sides.
Step 3: Choose Greenhouse Materials
Your greenhouse materials affect cost, durability, heat retention, and maintenance. You do not need the most expensive option, but you do need materials that fit your climate.
Frame Options
Wood: Easy to cut, attractive, and beginner-friendly. Use rot-resistant lumber such as cedar, redwood, or pressure-treated wood rated for ground contact where appropriate.
Metal: Galvanized steel or aluminum is durable and often used for kits and hoop houses. It resists rot but may require special hardware.
PVC: Cheap and easy for temporary hoop houses, but it is not as strong or long-lasting as metal or wood. In windy or snowy areas, PVC can be a heartbreak waiting for weather.
Glazing Options
Polycarbonate panels: A popular choice for DIY greenhouses. Twin-wall polycarbonate is lightweight, durable, and provides better insulation than single-layer plastic film.
Greenhouse plastic film: Affordable and excellent for hoop houses. Use UV-resistant greenhouse-grade plastic, not random painter’s plastic from the garage.
Glass: Beautiful and long-lasting, but heavier, more expensive, and less forgiving during installation.
Reclaimed windows: Charming and budget-friendly if you can find matching sizes. Just inspect old paint, cracked panes, and frame condition before building around them.
Step 4: Build a Strong Foundation
A greenhouse foundation should be level, square, and anchored. This is the part nobody brags about on social media, but it decides whether your greenhouse stands proudly or leans like it heard bad news.
For small DIY greenhouses, common foundation choices include pressure-treated lumber on compacted gravel, concrete blocks, pavers, ground screws, or a poured concrete footing. Gravel is useful because it improves drainage and creates a clean working surface. Concrete is more permanent and may be required for larger or attached structures.
Basic Foundation Steps
- Mark the greenhouse footprint with stakes and string.
- Measure diagonally from corner to corner. Equal diagonal measurements mean the layout is square.
- Remove grass and soft soil.
- Add landscape fabric if desired to reduce weeds.
- Spread and compact a gravel base.
- Install the wood, block, or concrete foundation.
- Anchor the frame securely to resist wind.
Step 5: Frame the Greenhouse
For a simple rectangular wood greenhouse, build the base first, then wall frames, then roof rafters. Use exterior-rated screws, galvanized hardware, and diagonal bracing to reduce wobble. If you are using a kit, follow the manufacturer’s sequence exactly. Greenhouse kits are like furniture instructions with weather consequences.
Framing Tips for Beginners
Work on a flat surface when assembling walls. Pre-drill near board ends to prevent splitting. Check for square often. Add blocking around doors, vents, and panel edges. If your area gets snow, design the roof steep enough to shed accumulation, and use framing strong enough for local loads. Local building codes or extension offices can help you understand requirements.
Step 6: Install Glazing or Greenhouse Covering
Once the frame is solid, install the clear covering. For polycarbonate panels, follow the panel direction recommended by the manufacturer. Twin-wall panels usually have channels that should run vertically so condensation can drain. Use screws with washers, avoid overtightening, and seal exposed panel ends with appropriate tape or trim.
For plastic film, stretch it evenly over the frame on a calm day. Wind plus greenhouse plastic can turn your project into a neighborhood kite festival. Secure the plastic with wiggle wire, batten strips, greenhouse clips, or other fastening systems designed for outdoor use.
Seal Without Suffocating
Seal gaps that create unwanted drafts, but remember that a greenhouse still needs planned ventilation. Random leaks are not ventilation; they are just your heating budget escaping dramatically.
Step 7: Add Doors, Vents, and Airflow
Ventilation is not optional. Greenhouses can overheat quickly on sunny days, even when outdoor temperatures feel cool. Poor airflow also encourages fungal disease, weak plant growth, and excess humidity.
Include a door that opens wide enough for trays, bags of potting mix, and your future self carrying too many things. Add roof vents, side vents, louvered vents, or roll-up sides depending on your greenhouse style. Automatic vent openers are a smart upgrade because they open when temperatures rise, even if you are not home.
Fans and Air Circulation
Passive vents release hot air, while circulation fans keep air moving inside. A small greenhouse may only need one fan, but larger structures need more thoughtful airflow. The goal is gentle movement, not a wind tunnel that makes basil look emotionally distressed.
Step 8: Plan Heating, Cooling, and Shade
Not every greenhouse needs heat. If your goal is spring seed starting and season extension, passive solar warmth may be enough. If you want year-round production in a cold climate, you may need supplemental heat.
Heating Options
Seedling heat mats are efficient because they warm the root zone instead of the entire greenhouse. For larger heating needs, use equipment rated for greenhouse or outdoor use. Electric heaters, gas heaters, or professionally installed systems must be used with proper ventilation and safety controls.
Cooling and Shade
Summer cooling is just as important as winter warmth. Use shade cloth when sunlight becomes too intense. In many climates, 30% to 50% shade cloth is useful for reducing heat stress while still letting in enough light. Combine shade with open vents, fans, and regular watering.
Step 9: Build Benches, Shelves, and Growing Zones
Greenhouse benches keep plants off the ground, improve airflow, and save your back. Wood, metal, and plastic shelving can all work. Use materials that handle moisture well. Slatted bench tops are helpful because they allow drainage and air movement.
Group plants by temperature and watering needs. Seedlings, tropical plants, herbs, and fruiting vegetables do not always want the same conditions. A greenhouse is easier to manage when plant roommates are compatible.
Step 10: Add Watering and Drainage
Watering cans work for small greenhouses, but drip irrigation or a simple hose setup saves time. Make sure water drains away from the structure. Standing water invites algae, pests, slippery floors, and regret.
A gravel floor is affordable, drains well, and looks tidy. Pavers create a cleaner walkway. Concrete is durable but more expensive and permanent. Whatever floor you choose, make sure it supports safe footing and easy cleanup.
Step 11: Test the Greenhouse Before Filling It
Before moving in every plant you own, test the greenhouse for a few days. Place a thermometer and humidity gauge inside. Check morning lows, afternoon highs, condensation, drafts, and water flow during rain.
This testing period is where you learn whether the vent opens enough, the door latch works, the floor drains properly, and the afternoon sun is stronger than expected. It is much easier to fix problems before your seedlings are depending on you like tiny green interns.
DIY Greenhouse Cost: What to Expect
The cost to build a greenhouse depends on size, materials, foundation, and climate-control features. A small hoop house may cost only a few hundred dollars if you use simple materials. A sturdy wood-framed polycarbonate greenhouse can cost much more, especially if you add automatic vents, benches, electricity, irrigation, or heating.
Spend money first on structure, anchoring, glazing, and ventilation. Decorative extras are fun, but plants care more about airflow than whether your potting bench has cottagecore vibes.
Common Greenhouse Building Mistakes
Building Too Small
Plants grow. Gardeners collect plants. Therefore, greenhouses shrink. Build slightly larger than you think you need if budget and space allow.
Ignoring Ventilation
A sealed greenhouse can become dangerously hot. Always include vents, doors, and airflow options.
Choosing a Poor Site
Shade, puddles, and inconvenient access will frustrate you all season. Pick the site carefully before construction starts.
Skipping Anchors
A greenhouse is lightweight for its size. Wind can move it if it is not anchored. Secure the frame to the foundation and the foundation to the ground.
Using Weak Covering
Cheap plastic may fail quickly in sun and weather. Use greenhouse-grade materials designed for outdoor exposure.
Maintenance After Your Greenhouse Is Built
Wash glazing when it gets dusty or algae-covered so light can enter. Clean benches and trays between growing cycles. Watch for pests, especially aphids, whiteflies, fungus gnats, and spider mites. Remove dead leaves quickly. Check screws, panels, hinges, and anchors after storms.
Seasonal adjustment is normal. In spring, you may focus on seedling warmth. In summer, shade and ventilation take priority. In fall, the greenhouse becomes a transition zone for herbs and tender plants. In winter, insulation, heat retention, and careful watering matter most.
Real-World DIY Greenhouse Experience: Lessons From the Backyard
The first thing most DIY greenhouse builders learn is that the structure is only half the project. The other half is learning how it behaves. A greenhouse has moods. On a sunny March morning, it may feel like a cozy plant spa. By 2 p.m., it can become a tropical courtroom where every seedling is judging your ventilation choices.
One practical experience is to keep the first season simple. Instead of filling every shelf with rare plants, start with forgiving crops: lettuce, kale, basil, parsley, tomatoes, peppers, marigolds, and a few seed trays. These plants teach you how temperatures swing, how fast pots dry out, and where light is strongest. Put thermometers at bench height, near the roof, and close to the floor. You may be surprised by the difference.
Another lesson is that water management matters more than expected. In a greenhouse, rain does not water your plants. That sounds obvious until the first busy week when the garden outside looks fine but the greenhouse seedlings are waving tiny crispy flags of surrender. A simple watering routine helps. So does grouping plants by container size. Small cells dry out fast, while large pots stay wet longer.
Airflow is the quiet hero. In many DIY builds, the door is treated like the main vent. That works only until the weather gets hot or humid. Roof vents, side vents, roll-up sides, or a small circulation fan can make the difference between sturdy plants and fungal drama. If condensation drips from the ceiling every morning, increase airflow and avoid overcrowding.
Expect to adjust shade. A greenhouse that is perfect in April may be too bright in July. Shade cloth is not a sign of failure; it is sunscreen for plants. Install it before leaves scorch, not after your tomatoes look like they vacationed on Mercury.
The most satisfying part of building a greenhouse is how quickly it changes your gardening rhythm. You can start seeds earlier, protect transplants, overwinter herbs, and experiment with varieties that once seemed too fussy. You also gain a quiet workspace that smells like soil and possibility. Yes, you will drop screws in gravel. Yes, a vent latch may annoy you. Yes, you may talk to seedlings. That is normal greenhouse culture.
The best advice is to build sturdy, observe carefully, and improve gradually. Add automatic vents later. Upgrade benches when you know your layout. Install irrigation after you understand watering patterns. A DIY greenhouse does not need to be perfect on day one. It needs to be safe, square, ventilated, and useful. The plants will help you fine-tune the rest.
Conclusion
Building a DIY greenhouse is a rewarding project for gardeners who want more control over the growing season. Start with a sunny, well-drained site. Choose a size that gives you room to work. Build a level foundation, frame it securely, use durable glazing, and make ventilation a top priority. Add benches, water access, shade, and heating only as your climate and crops require.
A greenhouse will not magically make every plant thrive, but it gives you a powerful growing environment. With smart planning and a little trial and error, your backyard greenhouse can become the most productive square footage in your garden.














