
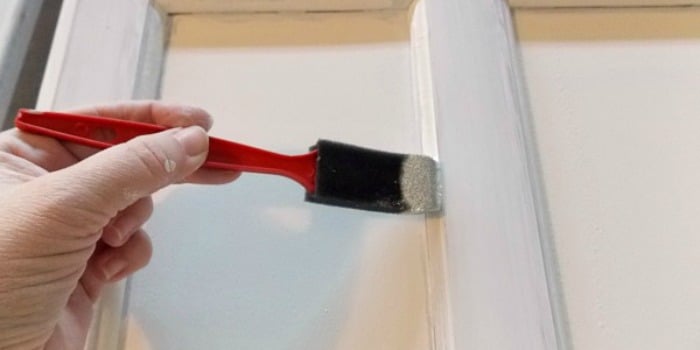
Painting cabinet doors is one of those home projects that looks simple until you are standing in the kitchen at midnight, holding a sticky door, wondering why the “quick refresh” has become a full-blown relationship test. The good news? You absolutely can get a smooth, durable, professional-looking finish without replacing your cabinets or selling a kidney to fund a remodel. The secret is not magic. It is preparation, patience, and resisting the urge to slap paint over grease and call it “rustic texture.”
This guide explains how to paint cabinet doors the right way, from removing hardware and cleaning the surface to sanding, priming, painting, curing, and reinstalling. Whether you are updating kitchen cabinet doors, bathroom vanity doors, laundry room cabinets, or built-ins, the process is mostly the same: clean thoroughly, scuff the surface, use the right primer, apply thin coats, and allow enough drying and curing time. Do that, and your cabinets can look fresh for years instead of peeling by next Tuesday.
Why Painting Cabinet Doors Is Worth It
Cabinet doors take up a huge amount of visual space. Change their color, and the whole room changes with them. White cabinet doors can make a small kitchen feel brighter. Deep green or navy can add custom-cabinet drama. Warm beige, mushroom, greige, or soft gray can calm down a busy kitchen without making it feel cold. Painting cabinet doors is also far less expensive than replacing cabinets, especially if the cabinet boxes are solid and the layout still works.
But cabinet doors are not the same as bedroom walls. They are touched constantly, splashed with water, exposed to cooking grease, bumped by pots, and attacked by mysterious sticky fingerprints. That means cabinet door paint needs excellent adhesion, a hard finish, and a washable surface. A lazy paint job may look fine for a week, but cabinets are very honest furniture. They will reveal every skipped step like a tiny wooden detective.
Tools and Materials You Will Need
Before you start painting, gather your supplies. This prevents the classic DIY sprint to the store while your primer is drying and your dog is considering stepping in it.
- Screwdriver or drill for removing cabinet doors and hinges
- Painter’s tape and marker for labeling doors
- Drop cloths or plastic sheeting
- Degreasing cleaner or mild dish soap and warm water
- Clean rags, sponge, and tack cloth
- Wood filler or spackle for dents and old hardware holes
- Putty knife
- Sandpaper or sanding sponges, usually 120- to 220-grit
- Bonding primer or stain-blocking primer
- Cabinet, door, and trim enamel or durable acrylic/alkyd paint
- High-quality angled brush
- Mini foam or microfiber roller
- Paint tray and liners
- Paint pyramids, blocks, or a drying rack
- Optional: paint sprayer for an ultra-smooth finish
Step 1: Remove Cabinet Doors and Hardware
Yes, you should remove the cabinet doors. Painting them while they hang in place sounds efficient, but it usually leads to drips, missed edges, painted hinges, and a finish that says, “I gave up somewhere around lunch.” Removing the doors lets you paint flat surfaces evenly and reach every edge.
Use painter’s tape to label each door and its matching opening. A simple system works well: write “upper left,” “sink left,” or use numbers. Place the matching hardware in labeled bags. Cabinet doors often look identical until reinstallation, when suddenly one door refuses to line up and another seems to have developed a personality disorder.
Step 2: Set Up a Safe Painting Area
Choose a dust-free, well-ventilated area where the cabinet doors can dry undisturbed. A garage, basement, spare room, or covered workspace can work well. Lay down drop cloths and create a system for drying both sides. Paint pyramids, scrap wood strips, or a door rack can help keep doors elevated. If you are spraying, protect surrounding surfaces carefully because overspray travels with the enthusiasm of glitter.
Temperature and humidity matter. Paint levels and cures better in moderate conditions. If the room is too hot, paint can dry too quickly and leave brush marks. If it is too cold or humid, drying can drag on and the finish may stay tacky. Always check the paint label for the recommended application temperature and recoat time.
Step 3: Clean the Doors Like You Mean It
Cleaning is the most underrated step in cabinet painting. Kitchen cabinet doors collect grease, steam residue, dust, food splatter, hand oils, and whatever that tiny brown dot near the handle is. Paint does not bond well to grease. It bonds to clean, dull, stable surfaces.
Use a degreasing cleaner or warm water with a few drops of dish soap. Scrub gently but thoroughly, especially around handles, edges, raised panels, and grooves. Rinse with clean water so no cleaner residue remains. Then let the doors dry completely. Do not rush this step. Painting damp wood or damp MDF is a shortcut to regret.
Step 4: Repair Dents, Scratches, and Hardware Holes
If your cabinet doors have dents, chips, gouges, or old knob holes, fill them before painting. Use wood filler for solid wood or paintable filler for small defects. Press filler slightly proud of the surface because it may shrink as it dries. Once dry, sand it smooth.
This is also the time to decide whether you are changing hardware. If your new pulls have different screw spacing, fill the old holes and drill new ones later using a hardware template. Nothing ruins a freshly painted cabinet door faster than eyeballing the handle placement and discovering your “straight line” has a sense of humor.
Step 5: Sand for Better Adhesion
Sanding cabinet doors does not mean stripping them to bare wood. In most cases, your goal is to scuff the glossy finish so primer has something to grip. Use medium-grit sandpaper, such as 120- to 150-grit, for glossy or slick finishes. Follow with 180- to 220-grit for a smoother surface. Sand with the grain when working on wood doors.
For laminate cabinet doors, sanding is still useful, but be gentle. Laminate needs a bonding primer because it is nonporous and slick. If the surface is peeling, bubbling, or separating, painting may not be the best long-term solution unless the damaged material is repaired first.
After sanding, remove dust with a vacuum, tack cloth, or slightly damp microfiber cloth. Dust left behind becomes tiny bumps in your paint finish. Those bumps will catch the light and whisper, “You skipped a step.”
Step 6: Choose the Right Primer
Primer is not optional for most cabinet doors. It improves adhesion, helps block stains, evens out the surface, and gives the paint a better foundation. For previously painted or glossy surfaces, use a high-quality bonding primer. For bare wood, stained wood, knotty wood, or doors that may bleed tannins, use a stain-blocking primer. For laminate, choose a primer specifically made for slick surfaces.
Apply primer in a thin, even coat. Use an angled brush for grooves, inside corners, raised panels, and decorative profiles. Use a mini roller for flat sections. Avoid heavy coats because thick primer can drip, pool in corners, and create ridges. Once the primer dries, lightly sand it with fine-grit sandpaper to remove texture and dust nibs. Wipe clean before painting.
Step 7: Choose the Best Paint for Cabinet Doors
The best paint for cabinet doors is usually a cabinet, door, and trim enamel or a durable acrylic-alkyd hybrid paint. These paints are designed to level better, dry harder, and resist blocking, which is when painted surfaces stick together. Standard wall paint is usually too soft for cabinet doors and may chip or feel tacky under frequent use.
Satin and semi-gloss finishes are popular choices. Satin has a smooth, modern look and hides minor imperfections better. Semi-gloss is shinier and easier to wipe clean, making it useful for busy kitchens and bathroom cabinets. High-gloss can look dramatic, but it highlights flaws like a spotlight at a talent show.
Step 8: Paint the Cabinet Door Fronts
Lay the cabinet doors flat. Start with the back side if you want the most visible front side to be painted last. Use an angled brush to paint detailed areas first: inside profiles, grooves, panel edges, and corners. Then use a mini roller on flat areas while the brushed paint is still wet. This helps blend brush marks and roller texture.
Apply thin coats. Thin coats level better, dry more evenly, and cure harder. Thick coats may look satisfying at first, but they often sag, wrinkle, or stay soft. Think of cabinet paint like pancakes: more thin layers usually beat one giant blob.
Step 9: Paint the Edges Carefully
Cabinet door edges are easy to overload with paint. Too much paint on the edge can drip onto the face or form a raised ridge. Use a brush or roller lightly, then check for runs. If a drip forms, smooth it immediately before it starts drying.
Pay attention to the top and bottom edges of the doors. These areas may not be visible when the doors are closed, but sealing them with paint helps create a consistent finish and protects the material from moisture and grime.
Step 10: Let the First Coat Dry, Then Sand Lightly
Follow the paint manufacturer’s recoat time. Dry-to-touch does not always mean ready-to-recoat. If you paint too soon, the new coat can pull at the previous one and create texture. Once the first coat is dry enough, lightly sand with fine-grit sandpaper, usually 220-grit or higher. You are not trying to remove the paint. You are simply smoothing tiny bumps and improving the next coat.
After sanding, wipe away every bit of dust. This small step makes a big difference in the final feel of the cabinet doors. Smooth cabinet doors do not happen by accident. They are built one careful layer at a time.
Step 11: Apply the Second Coat
Most cabinet doors need at least two coats of paint after primer. Dark colors, bright colors, or major color changes may need a third thin coat. Use the same method: brush details first, roll flat areas second, inspect edges, and correct drips quickly.
Keep a wet edge as you work. Avoid repeatedly brushing or rolling over paint that has already started to set. Overworking paint can leave streaks, drag marks, or patchy sheen. Load your brush or roller lightly, move with confidence, and then leave the paint alone. Cabinet paint appreciates personal space.
Brush, Roller, or Sprayer: Which Is Best?
Brush and Roller
A brush and mini roller are the best choice for many DIYers. This method is affordable, easy to control, and does not require masking the entire universe. Use a high-quality angled brush for detail work and a smooth mini roller for flat panels. Foam rollers can leave a very smooth finish with some paints, while microfiber rollers may hold more paint and cover faster.
Paint Sprayer
A paint sprayer can produce the smoothest cabinet door finish, especially on flat slab doors. However, it requires more setup, more masking, careful thinning in some cases, and practice. Spray too close or too slowly, and you get runs. Spray too far away, and the finish can feel rough. If you use a sprayer, practice on cardboard first and follow the sprayer and paint instructions.
How Long Should Cabinet Doors Dry and Cure?
Drying and curing are different. Paint may feel dry within hours, but curing can take days or even weeks depending on the product, temperature, humidity, and coat thickness. During curing, the finish hardens and becomes more resistant to scratches, cleaning, and daily use.
Wait as long as possible before reinstalling doors. If you must reinstall after a day or two, handle them gently and avoid slamming. Do not scrub freshly painted cabinet doors. Avoid hanging damp towels over them or pressing bumpers into soft paint too early. Your future self will thank you, probably while admiring the cabinets with a snack in hand.
Step 12: Reinstall Doors and Hardware
Once the paint has dried well enough to handle, reinstall hinges and hardware. Work slowly to avoid scratching the new finish. If you are adding new knobs or pulls, use a template so the holes line up consistently. Add cabinet door bumpers after the paint has cured enough that they will not stick permanently or leave marks.
Adjust hinges so the gaps look even. Painted cabinet doors can make old alignment issues more obvious because the fresh color draws attention to the whole cabinet face. A few hinge adjustments can make the finished project look much more professional.
Common Mistakes to Avoid
Skipping Cleaning
If grease remains on the surface, primer and paint may not bond. Clean first, even if the doors look clean.
Using Wall Paint
Wall paint is not designed for high-touch cabinet doors. Use cabinet enamel, trim enamel, or another durable product made for furniture, doors, or cabinetry.
Painting Too Thickly
Thick coats cause drips, soft paint, and uneven sheen. Thin coats are slower but better.
Reinstalling Too Soon
Fresh paint may dent, stick, or peel if the doors are handled roughly before curing.
Forgetting to Label Doors
Cabinet doors are not always interchangeable. Label everything before removal.
Special Tips for Different Cabinet Door Materials
Solid Wood Cabinet Doors
Solid wood is usually the most forgiving material to paint. Clean, sand, prime, and paint. Watch for tannin bleed, especially with oak, cherry, mahogany, and knotty woods. A stain-blocking primer may be necessary.
MDF Cabinet Doors
MDF paints well, but raw edges can absorb paint heavily. Prime carefully and avoid soaking the surface with water. If edges are fuzzy after sanding, prime, sand lightly, and prime again if needed.
Laminate Cabinet Doors
Laminate needs extra attention because paint does not naturally grip it well. Clean thoroughly, scuff sand lightly, and use a bonding primer. Avoid painting laminate that is peeling or lifting unless it is repaired first.
Previously Painted Cabinet Doors
If the old paint is sound, clean and sand it before priming. If it is peeling, scraping or stripping may be necessary. New paint is only as strong as the surface underneath.
Troubleshooting: Fixing Cabinet Door Paint Problems
Brush Marks
Use better paint, avoid overworking it, and apply thinner coats. A light sanding between coats can reduce visible brush marks.
Drips and Runs
Catch them while wet and smooth them out. If they dry, sand them flat before the next coat.
Sticky Doors
Paint may not be cured, coats may be too thick, or the wrong paint may have been used. Give it more time and improve airflow.
Chipping Paint
Chipping usually means poor adhesion. Common causes include grease, glossy surfaces, skipped primer, or insufficient sanding.
Real-World Experience: What Painting Cabinet Doors Actually Teaches You
The first thing you learn when painting cabinet doors is that “just paint them” is a phrase spoken by someone who has not painted cabinet doors. The actual painting is only one slice of the project. The bigger job is organizing the doors, cleaning them, sanding them, finding enough horizontal space, waiting for coats to dry, and protecting the finish from dust, pets, children, and your own impatience.
One practical experience that helps is creating an assembly line. Remove only as many doors as you can comfortably paint and dry at one time. In a small home, trying to paint twenty doors at once can turn every room into a cabinet-door obstacle course. A better approach is to work in batches. Clean all the doors first, then repair all defects, then sand, prime, and paint in a consistent order. This keeps the project from feeling chaotic.
Another lesson is that lighting matters. A cabinet door may look perfect in a dim garage, then reveal roller lines, missed edges, or dust bumps once it is back in the kitchen under bright lighting. Use a work light held at a low angle to inspect each coat. This little trick makes flaws easier to spot before they become permanent guests.
It also helps to paint the backs first. The backs are less visible, so they are a good place to learn how the paint behaves. You can test how much paint the roller holds, how quickly it levels, and how easily it drips on edges. By the time you paint the fronts, your hand will be steadier and your technique cleaner.
Hardware decisions can also make or break the final look. Freshly painted cabinet doors with old, scratched, greasy handles can feel like wearing a new suit with muddy shoes. If the budget allows, update the pulls or knobs. If not, clean the existing hardware thoroughly. Even simple black, brass, nickel, or bronze hardware can change the style of the cabinets dramatically.
The hardest experience-related lesson is waiting. Fresh cabinet paint can look finished before it is ready for real life. Do not treat newly painted doors like fully cured factory cabinets. Avoid aggressive cleaning, do not slam them, and be gentle around handles for the first couple of weeks. Think of the paint as a cake cooling on the counter. It may look delicious, but if you attack too early, things get messy.
Finally, accept that perfection is not the goal. A professional-looking DIY cabinet paint job can still have tiny imperfections. Most people will never notice them once the doors are reinstalled. They will notice the brighter kitchen, the cleaner style, and the fact that you transformed the room without ripping out perfectly usable cabinets. That is the real win.
Conclusion
Learning how to paint cabinet doors is really learning how to respect the process. Remove the doors, label everything, clean off grease, sand the surface, choose the correct primer, use durable cabinet paint, apply thin coats, and allow plenty of drying and curing time. The steps are not complicated, but they do reward patience. Skip the prep, and your cabinets may chip. Follow the process, and you can give your kitchen, bathroom, or built-in storage a fresh new look without a full renovation.
The best cabinet door painting results come from small details: a clean surface, a smooth primer coat, careful sanding between coats, and a finish designed for daily use. Whether you choose classic white, modern black, soft sage, warm greige, navy blue, or a bold color that makes your kitchen feel like it has opinions, the right method will help the paint last. Cabinet doors work hard. Paint them like they deserve a promotion.










