
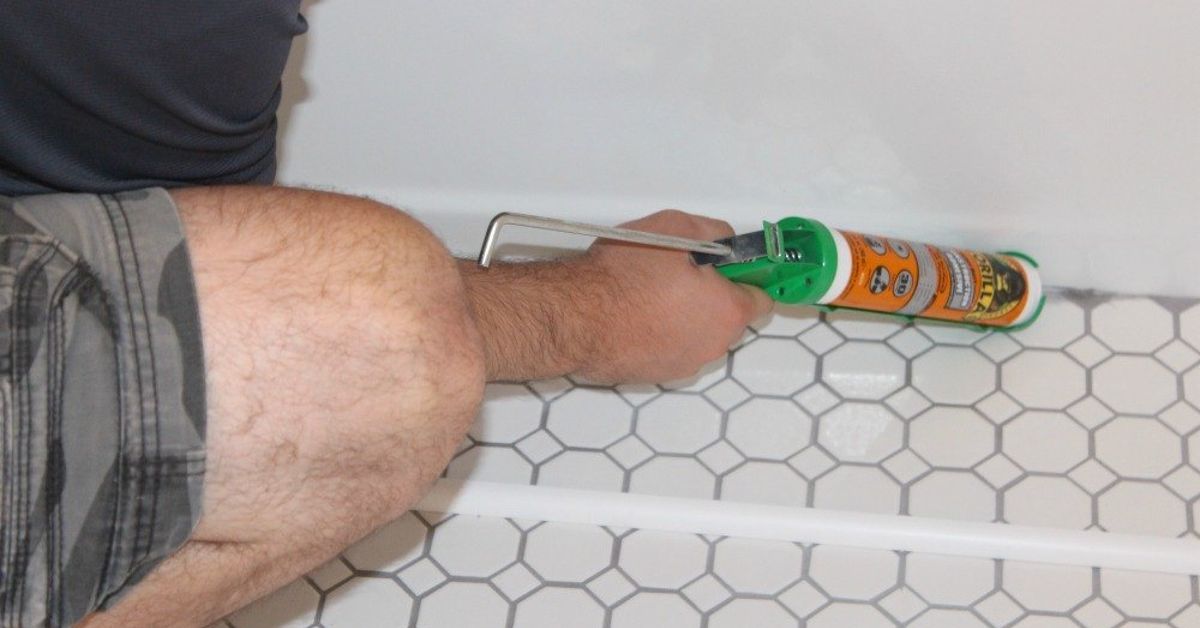
Hexagon tile has a special talent: it can make an ordinary bathroom look like a carefully styled boutique hotel while making the person installing it question every life decision that led to owning a wet saw. The honeycomb pattern is timeless, graphic, and surprisingly versatile. Unfortunately, those six-sided pieces can become awkward when the tile field reaches a bathtub apron, doorway, cabinet, wall corner, or other exposed edge.
Trying to cut tiny hexagons into a perfectly straight border often produces chipped corners, narrow fragments, uneven grout joints, and language that should not be repeated near children. The simple hexagon tile hack is to stop fighting the geometry. Instead of forcing delicate mosaic pieces into a flawless edge, cover that edge with a slim piece of moisture-resistant trim, secure it with a compatible construction adhesive, and seal the perimeter with bathroom-grade silicone.
This trim-and-caulk solution can hide imperfect cuts, protect exposed tile edges, and create a clean visual ending. It is especially useful when the tile has already been installed and an embedded metal profile or bullnose border can no longer be added without demolition.
What Is the Simple Hexagon Tile Hack?
The hack uses a narrow finishing strip as a surface-mounted border over an exposed or irregular hexagon tile edge. Depending on the project, the trim might be PVC molding, composite trim, solid-surface material, corrosion-resistant metal, or another product approved for humid locations.
The strip is cut to length, dry-fitted over the rough edge, bonded in place, and sealed along its seams. From normal viewing distance, the eye sees a deliberate frame rather than a row of tiny hexagons that appear to have lost an argument with the tile saw.
This method works well around:
- The front edge of a tiled bathtub apron
- The exposed side of a bathroom backsplash
- A vanity wall where mosaic tile ends in open space
- A decorative tile panel or accent strip
- A backsplash without matching bullnose pieces
- A previously installed tile edge with minor cosmetic irregularities
The trim does more than hide cuts. It also shields vulnerable tile corners from impact and makes the transition easier to wipe clean.
When This Tile Hack Is Appropriate
A surface-applied border is a finishing technique, not a structural repair. Before reaching for adhesive, confirm that the tile is firmly bonded, the supporting surface is sound, and any required waterproofing already exists behind or beneath the installation.
The hack is appropriate when the problem is cosmetic: uneven cuts, exposed mesh, a rough transition, or an unfinished-looking edge. It is not appropriate for loose tiles, moving substrates, leaking tub surrounds, cracked backer board, failed grout, or water damage.
It also should not be used to bridge a functional movement joint with a rigid strip. Tile assemblies expand and contract, and transition points generally need a flexible sealant rather than hard grout. Covering active movement with a rigid material may simply relocate the crack to a more creative and inconvenient location.
Materials and Tools
Choose products according to the tile material, trim material, moisture exposure, and adhesive manufacturer’s instructions. A typical project requires:
- A narrow moisture-resistant trim strip
- Construction adhesive approved for tile and the selected trim
- Kitchen-and-bath silicone sealant
- Tape measure and pencil
- Miter saw, fine-tooth hand saw, or manufacturer-approved cutter
- Painter’s tape
- Utility knife or plastic scraper
- Clean rags and an approved surface cleaner
- Caulk gun
- Gloves and eye protection
Choosing the Best Trim
The trim should be wide enough to cover the rough tile edge without looking bulky. A slim rounded molding creates a traditional appearance, while square-edged trim feels more modern. Metal can complement faucets and cabinet hardware, but it must be suitable for the environment. Bare steel is not an inspired choice beside a frequently splashed bathtub unless rust is the design theme.
PVC and composite trim are easy to cut and resist moisture, making them practical for many bathroom applications. Natural wood is less forgiving. Even painted wood can swell when exposed to repeated moisture, so use it only in dry locations or where the manufacturer specifically approves the application.
How to Complete the Hexagon Tile Edge Hack
1. Inspect the Existing Tile
Press gently on the tiles near the exposed edge. Nothing should shift, click, or sound hollow in a way that suggests poor bonding. Check for cracked grout, damp drywall, staining, or deteriorated caulk. Repair installation problems before adding decorative trim.
If the edge is dangerously sharp, remove loose fragments and smooth only the obvious high points with an appropriate abrasive or diamond tool. Wear eye protection, control dust, and avoid grinding deeply into the tile assembly.
2. Clean the Bonding Surfaces
Adhesive cannot perform well on soap film, dust, oil, sealer residue, or yesterday’s enthusiastic application of bathroom cleaner. Wash the tile and adjacent surface with a cleaner appropriate for the material. Rinse if required and allow everything to dry completely.
Some adhesives benefit from lightly scuffing glossy surfaces, while others do not require it. Follow the product instructions rather than improvising with sandpaper and optimism. Test any preparation method in a hidden area, especially on polished marble, glass, or coated metal.
3. Measure and Dry-Fit the Trim
Measure the full edge at least twice. Cut the trim slightly long, test it, and refine the fit gradually. It is much easier to remove another sixteenth of an inch than to convince a short piece of molding to become longer through motivational speaking.
For an outside corner, decide whether the pieces will be mitered or joined with a simple butt joint. Mitered corners can look elegant, but they require precise cutting. Butt joints are easier and may be less noticeable when the trim color matches the silicone.
Dry-fit the entire assembly before applying adhesive. Check that it sits flat, covers the cut hexagons, and does not interfere with access panels, cabinet doors, tub components, or drainage paths.
4. Protect the Surrounding Finish
Apply painter’s tape along both sides of the intended trim position. The tape creates alignment guides and protects the tile from adhesive squeeze-out. Keep several clean rags nearby. Construction adhesive is cooperative while wet and considerably less interested in negotiation after curing.
5. Apply a Controlled Amount of Adhesive
Apply the adhesive according to its label. For narrow trim, a modest bead or several small dabs may provide enough contact without creating excessive squeeze-out. More adhesive does not automatically produce a stronger installation; it often produces a larger cleanup project.
Press the trim firmly into position. Move it slightly, when the adhesive instructions permit, to spread the material and establish contact. Verify alignment with a level or straightedge.
Use painter’s tape to hold the trim while the adhesive cures. Long pieces may need several tape bridges, temporary bracing, or another manufacturer-approved clamping method. Do not depend on one heroic strip of tape at the top while gravity spends the afternoon conducting experiments.
6. Remove Adhesive Squeeze-Out Immediately
Clean uncured adhesive using the method recommended by its manufacturer. Avoid solvents that could discolor stone, soften plastic, damage a tub finish, or remove paint. A plastic scraper is often safer than a metal blade near finished surfaces.
Remove and replace masking tape if it becomes contaminated. Otherwise, adhesive can travel underneath it and create a strangely permanent abstract border.
7. Allow the Adhesive to Cure
Respect the stated cure time. Humidity, temperature, adhesive thickness, and nonporous materials can affect drying. Avoid splashing, cleaning, or leaning objects against the trim until the bond has developed adequately.
8. Seal the Perimeter With Flexible Caulk
Once the adhesive has cured, apply bathroom-grade silicone where the trim meets tile, the tub, the wall, or another dissimilar surface. These junctions may experience slight movement, so flexible sealant is generally more suitable than rigid grout.
Mask both sides of the joint for a crisp line. Apply a narrow, continuous bead, smooth it, and pull the tape before the sealant skins over. Follow the sealant manufacturer’s curing instructions before exposing the area to water.
Improving the Hexagon Tile Installation Before Trim Is Needed
The trim hack can rescue an existing edge, but thoughtful installation reduces the amount of rescuing required. Begin with a flat, clean substrate. Small mosaics follow every bump and depression, so an uneven wall can turn a honeycomb pattern into something resembling a beehive during an earthquake.
Dry-fit several sheets before spreading mortar. Confirm the tile orientation, locate the most visible boundaries, and adjust the layout to avoid tiny cuts. When installing mesh-backed mosaics, compare the spacing between sheets with the spacing between individual tiles. Factory-mounted sheets are convenient, but they are not always perfectly aligned.
Staggering sheets or interlocking their irregular edges can reduce visible grid lines. Individual pieces can be removed from the mesh and repositioned when needed. A rubber grout float helps press the sheets evenly into the mortar without creating waves.
Use the trowel size and mortar recommended for the tile. Excess mortar can squeeze into the numerous joints, leaving less room for grout and creating hours of tedious scraping. Spread only an area that can be covered before the mortar begins to skin over.
Grout, Caulk, and Sealer: Three Different Jobs
Grout fills joints between tiles within the field. Caulk seals transitions and changes of plane where movement is expected. Sealer may help protect porous cement-based grout or natural stone, depending on the products used.
Do not assume every grout or tile needs the same treatment. Traditional guidance often pairs unsanded grout with very narrow joints and sanded grout with wider joints, but modern high-performance and epoxy products may cover broader joint ranges. Always follow the grout manufacturer’s specifications and confirm compatibility with polished stone or scratch-sensitive tile.
Marble and other porous natural stones may need a penetrating sealer before or after grouting. Test the sealer first because some products can deepen or alter the stone’s appearance. Glass tile may require white setting material so the adhesive color does not show through translucent pieces.
Common Mistakes to Avoid
Using the Trim to Hide Water Damage
A decorative strip can conceal an ugly edge, but it cannot correct a leaking tub surround. Soft drywall, recurring mildew, loose tile, or persistent dampness calls for investigation, not camouflage.
Selecting an Incompatible Adhesive
Some adhesives can stain natural stone, attack certain plastics, or bond poorly to sealed tile. Verify that the product is approved for both surfaces and for the expected moisture level.
Applying Too Much Adhesive
A thick bead can keep the trim from sitting flat and may ooze into visible areas. The objective is consistent contact, not recreating a frosting-filled sandwich.
Grouting the Flexible Transition
Grout placed between tile and a bathtub, countertop, or dissimilar trim may crack as the materials move independently. Use an appropriate flexible sealant at transition joints.
Skipping the Dry Fit
Dry fitting reveals crooked walls, bowed trim, troublesome corners, and measurement errors before adhesive turns those discoveries into permanent features.
Alternatives to the Surface-Mounted Trim Hack
For a new installation, consider an embedded metal edge profile, matching bullnose tile, pencil liner, stone threshold, or carefully planned factory-edge termination. These options are installed with the tile and usually provide a more integrated finish.
Surface-mounted trim is most valuable as a retrofit. It lets you improve an existing edge without removing an entire row of fragile mosaic tile. The result may not satisfy a purist who dreams in ANSI standards, but it can be durable, attractive, and far more sensible than unnecessary demolition.
Experience Notes: What This Project Teaches in the Real World
Across DIY hexagon tile projects, the first major lesson is that the most visible problem is not always the most important one. An uneven border immediately catches the eye, but the condition of the tile behind it matters more. Successful projects begin by checking adhesion, moisture exposure, and the supporting surface. A trim strip attached over solid tile can remain neat for years. The same strip placed over loose mosaics merely becomes a stylish passenger on a failing installation.
The second lesson is that tiny differences become surprisingly obvious in geometric patterns. A rectangular tile can tolerate a slight spacing adjustment without announcing it to the room. Hexagon mosaics are less discreet. One sheet placed a little too far from the next can create a vertical or horizontal seam that remains visible after grouting. Dry fitting, stepping back frequently, and comparing the sheet-to-sheet gap with the factory joints prevents the finished floor or wall from looking like it was assembled from separate placemats.
Another common experience involves cutting. New installers often try to create perfect half-hexagons along every boundary. That works in theory, where every wall is straight and every tile behaves politely. In an actual bathroom, walls wander, tubs curve slightly, mesh stretches, and small pieces chip. A planned trim border reduces the number of delicate cuts and gives the installer a forgiving termination point. The best-looking cut is sometimes the one nobody can see.
Material selection also matters more than expected. A flexible plastic trim may follow a slightly uneven tub apron better than rigid metal, but some plastics scratch easily or react poorly with certain adhesives. Metal offers a crisp line, although its finish should coordinate with the room and resist corrosion. Natural wood may look warm for the first week and then begin auditioning for the role of a warped canoe. In wet areas, moisture-resistant materials are usually worth the modest additional cost.
The adhesive stage teaches restraint. First-time users often apply a giant bead because the project feels important and giant beads feel reassuring. The trim is pressed into place, adhesive escapes from every edge, and the next hour is devoted to wiping, scraping, and reconsidering the meaning of “simple hack.” Small, controlled applications are easier to position and clean. Painter’s tape is equally valuable as both an alignment guide and a temporary clamp.
Caulking provides the final lesson: finishing work controls how professional the entire project appears. A clean, narrow bead can make inexpensive trim look intentional. A lumpy bead can make premium materials look hurried. Masking the joint, cutting a small nozzle opening, applying steady pressure, and smoothing the sealant before it skins over produce a much sharper result.
Perhaps the most useful experience is knowing when to stop. Perfectionism can turn a one-hour edge repair into a three-day reconstruction. If the tile is sound, the trim fits cleanly, the adhesive is compatible, and the joints are properly sealed, the project has succeeded. Step back, admire the honeycomb pattern, and allow yourself the rare luxury of finishing a bathroom task without discovering another bathroom task underneath it.
Conclusion
A simple hexagon tile hack can transform a chipped, uneven, or unfinished mosaic edge into a polished transition. The method is straightforward: inspect the installation, choose moisture-resistant trim, dry-fit it carefully, secure it with a compatible adhesive, and finish the seams with flexible bathroom sealant.
The key is understanding what the hack can and cannot do. It can hide awkward cuts, protect exposed edges, simplify cleaning, and rescue an otherwise attractive installation. It cannot replace waterproofing, stabilize loose tile, or repair a damaged substrate. Used in the right situation, however, it is an efficient solution to one of hexagon tile’s most irritating little puzzlesand no advanced degree in bee architecture is required.
Note: This trim method is a cosmetic edge-finishing technique, not a substitute for correct tile bonding, substrate preparation, waterproofing, drainage, or movement accommodation. Confirm that every adhesive, trim, grout, sealer, and caulk product is compatible with the specific materials and location before installation.













