
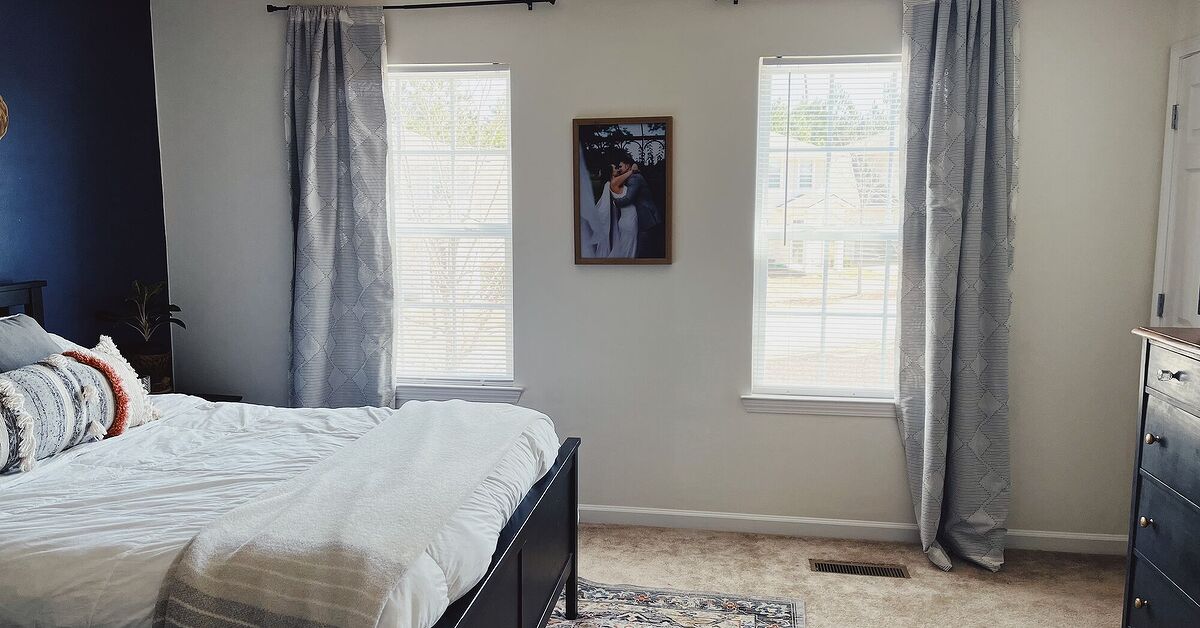
There is a special kind of frustration reserved for people who bought “blackout curtains,” hung them proudly, turned off the lamp, and discovered that their bedroom still looks like it is hosting a low-budget sunrise festival. The fabric may be dark, but light sneaks around the sides, above the rod, and through that tiny center gap like it pays rent.
The good news: getting a darker room does not require custom drapery, a degree in interior design, or a dramatic battle with a power drill at 11 p.m. The easiest blackout curtain setup is usually a pair of ready-made panels, an adjustable rod mounted high and wide outside the window frame, and a few simple tricks to reduce light leaks.
This guide walks through how to choose, measure, hang, and improve blackout curtains for bedrooms, nurseries, media rooms, guest rooms, and any place where sunlight has become a little too enthusiastic.
What Makes Blackout Curtains the Easy Choice?
Blackout curtains are thicker window panels designed to reduce incoming light more effectively than standard curtains or sheers. Many use a tightly woven fabric, a foam backing, or a layered lining to create a darker room. They can also add privacy, soften the appearance of a window, and provide a modest extra barrier between your room and outdoor heat or drafts.
The easiest blackout curtains are not necessarily the most expensive ones. They are the ones that match your window size, hang from simple hardware, and cover more than just the glass. A curtain that is technically “100% blackout” but too narrow is like bringing an umbrella with one missing panel: admirable effort, disappointing result.
Blackout Curtains vs. Room-Darkening Curtains
Before buying anything, check the product label carefully. Room-darkening curtains reduce brightness but may still let visible daylight through the fabric. Blackout curtains are intended to block much more light. The exact performance varies by fabric color, lining, weave, and installation.
For a bedroom used by a shift worker, a baby’s nursery, or anyone who wakes up when the sun merely thinks about appearing, choose true blackout panels. For a living room where you want fewer screen reflections but still enjoy daytime light, room-darkening curtains may be enough.
The Simplest Setup for Most Homes
For most windows, the easiest effective combination is:
- Ready-made blackout curtain panels with grommets or back tabs
- An adjustable metal curtain rod
- Wall brackets mounted outside the window frame
- Panels wide enough to overlap in the middle and cover both sides
- A wraparound rod or side-return brackets for better edge coverage
Grommet-top panels are especially beginner-friendly because they slide directly onto the rod. No rings, hooks, mysterious clips, or tiny hardware pieces that disappear into the carpet five minutes after opening the package.
What You Need Before You Start
Gather your supplies before you start drilling, measuring, or making confident declarations such as, “This will only take ten minutes.” Curtain projects usually go smoothly, but they do reward preparation.
- Blackout curtain panels
- Adjustable curtain rod and brackets
- Tape measure
- Pencil
- Level
- Screwdriver or drill
- Screws and wall anchors, if you are not drilling into studs
- Step stool or small ladder
- Optional: Velcro strips, magnetic curtain closures, or a blackout liner
Check the package before leaving the store or opening every box in your living room. Some curtains are sold as a pair, while others are sold as a single panel. Buying one panel when you need two is a classic home-decor ambush.
Step-by-Step: How to Install the Easiest Blackout Curtains
Step 1: Decide What You Want the Curtains to Do
Start by identifying your main goal. Do you need a darker bedroom for sleep? Less glare on a television? More privacy from a nearby building? A cooler-feeling room during bright afternoons? Your goal affects how much coverage you need.
For maximum darkness, use floor-length panels mounted outside the frame. For a small kitchen or bathroom, a shorter blackout shade or curtain may make more sense. Do not force a dramatic floor-length curtain into a space where it will sit in the sink. Curtains are not supposed to take a bath.
Step 2: Measure the Window Width
Measure the entire window from the outside edge of the trim on one side to the outside edge on the other. Do not measure only the glass. Blackout curtains work best when they cover the trim and extend past it.
For an easy outside-mount setup, plan for the curtain rod to extend roughly 8 to 10 inches beyond the window width on each side when space allows. This gives the panels room to cover the edges and lets you open them without blocking much of the window.
For example, if your window is 48 inches wide, a rod in the 64- to 68-inch range usually gives you generous side coverage. Measure your available wall space before buying the rod, especially if the window sits close to a corner, bookshelf, or suspiciously placed air vent.
Step 3: Choose Enough Curtain Width
The combined width of your curtain panels should usually be at least 1.5 to 2 times the width of the window area they need to cover. More fullness helps the curtains close properly and reduces the chance of a center gap.
If your rod spans 66 inches, two 52-inch-wide panels provide a total width of 104 inches. That gives you enough fabric to overlap the center and still create a full appearance. Thin, stretched-out panels may technically cover the window, but they often leave the room looking like the curtains are holding their breath.
Step 4: Measure for Curtain Length
Measure from the place where the curtain rod will sit down to the floor. For a polished look, most floor-length blackout curtains should lightly touch the floor or hover just above it. Avoid panels that stop several inches above the floor unless you are intentionally choosing a short-curtain style.
Mounting the rod 4 to 6 inches above the window frame is an easy starting point. In rooms with higher ceilings, you can mount it closer to the ceiling or below crown molding to create a taller-looking window and improve top coverage.
Step 5: Pick the Right Curtain Rod
Choose a rod that is sturdy enough for your curtain weight. Blackout panels are often heavier than sheer curtains, especially when they have thermal lining or layered fabric. A lightweight tension rod may work for a small temporary window, but it can sag or fall with heavy panels.
For the easiest long-term setup, use an adjustable metal rod with wall brackets. A wraparound rod is even better for a bedroom because the ends curve toward the wall, reducing side light leaks. Think of it as giving the sunlight fewer escape routes.
Step 6: Mark the Bracket Locations
Use your tape measure and pencil to mark the bracket locations. Keep the marks level with each other. If one side is even slightly higher, your curtains may look like they are slowly trying to leave the room.
Place the brackets outside the window frame, usually about 4 to 6 inches beyond each edge. Make sure the brackets extend far enough from the wall to clear the window trim, blinds, or shades behind the curtains.
Step 7: Install the Brackets Securely
Drill pilot holes where needed, then install the brackets using screws. If you are mounting into drywall and cannot hit a stud, use wall anchors rated for the weight of your rod and curtains. Heavy blackout drapes need reliable support; this is not the moment to rely on optimism alone.
Use a level before tightening everything completely. Then place the rod on the brackets and check it one more time. Small corrections now are much easier than rehanging an entire curtain setup after dinner.
Step 8: Hang the Blackout Curtain Panels
Thread grommet-top panels onto the rod, slide the rod into the brackets, and secure the ends with finials. For back-tab or rod-pocket curtains, feed the rod through the fabric header before placing it on the brackets.
Place the outermost grommet or tab between the bracket and the finial when possible. This helps keep the curtain edge closer to the wall, which reduces the bright vertical stripe that often appears at the sides.
Step 9: Overlap the Center Panels
When closing the curtains, make sure the two panels overlap slightly in the middle. A center gap can let in a surprisingly strong beam of light, especially in east-facing rooms during early mornings.
For better coverage, attach small magnetic closures or sew-on snaps to the inner edges. Another easy option is to use a fabric tie or discreet clip behind the panels to keep them gently overlapped at night.
Step 10: Test the Room in Daylight
Close the curtains during the brightest part of the day and stand inside the room. Look for light leaks at the top, sides, bottom, and center. This test tells you whether you need a simple adjustment or an extra layer.
Common fixes include widening the rod, raising it slightly, pulling the outer panel edge closer to the wall, adding Velcro strips along the side edges, or using a blackout liner behind decorative curtains. A dark room is usually created through good coverage, not magic fabric alone.
The Easiest No-Drill Blackout Curtain Option for Renters
Renters have several low-commitment choices. The easiest route is often a no-drill bracket that attaches to the window casing, existing blinds, or a sturdy trim edge. Another option is adhesive curtain hardware, but always check the stated weight limit before hanging heavy blackout panels.
Tension rods can work inside a deep window frame, but they are not ideal for thick blackout curtains over large windows. They tend to provide less side coverage, and a heavy panel can turn a peaceful bedtime routine into a surprise curtain avalanche.
A practical renter-friendly setup is a lightweight blackout liner placed behind existing curtains. Some liners attach with clips or hooks, while others use adhesive strips around the window frame. This can darken a room without replacing your favorite decorative curtains or drilling into the wall.
Common Blackout Curtain Problems and Easy Fixes
Problem: Light Leaks Around the Sides
Fix: Extend the rod farther beyond the window frame, use wider panels, or choose a wraparound rod. You can also use small Velcro strips to secure the outer curtain edges to the wall at night.
Problem: A Bright Strip Appears Above the Curtains
Fix: Mount the rod higher, use taller panels, or add a simple fabric valance above the rod. Ceiling-mounted tracks can also reduce top gaps in rooms where complete darkness matters.
Problem: Curtains Look Too Flat
Fix: Add more panel width. The fabric should have room to gather when closed. Fullness improves appearance and often helps block light at the center.
Problem: The Rod Bows in the Middle
Fix: Add a center support bracket or upgrade to a heavier-duty rod. Wide windows and thick blackout panels place more weight on the hardware than many people expect.
Problem: Curtains Are Too Long
Fix: Hem them with iron-on hem tape, have them professionally altered, or use curtain rings to raise the panels slightly. Do not let excess fabric pile up in a high-traffic area unless you enjoy collecting dust and stepping on fabric in the dark.
A Quick Blackout Curtain Checklist
- Choose true blackout panels for bedrooms and daytime sleeping spaces.
- Measure outside the window trim, not just the glass.
- Use a rod that extends past both sides of the window.
- Mount the rod high enough to cover the top of the frame.
- Use two panels with enough total width for overlap and fullness.
- Secure heavy rods with proper anchors or wall studs.
- Test for light leaks during the day before calling the project finished.
Real-World Experiences: What the Easiest Blackout Curtain Setup Teaches You
The first lesson people often learn is that blackout curtains are less about buying the darkest fabric and more about defeating the sneaky little gaps. A person may order excellent panels online, hang them directly above the window, and still wake up at sunrise because the curtain rod sits too close to the frame. The fabric does its job perfectly, while the uncovered side edges throw a tiny light party. Once the rod is mounted higher and wider, the room can feel dramatically darker without replacing the curtains at all.
Another common experience comes from small bedrooms. People often worry that wider, longer curtains will make a room feel crowded. In practice, mounting blackout curtains higher than the window frame can make a short wall feel taller. The curtains create a vertical line that draws the eye upward, especially when the panels lightly touch the floor. A compact bedroom can go from “temporary storage room with a bed” to “calm place where actual adults sleep” with one careful installation.
Parents and shift workers often notice the biggest difference. A nursery with streetlights outside may look bright enough for a book club at 2 a.m., while a daytime sleeper may be fighting full sunlight at noon. In those situations, a basic blackout setup can make the room feel more predictable. The key is to keep expectations realistic: curtains can reduce outside light, but they do not silence traffic, erase barking dogs, or explain to a neighbor why their porch light resembles an airport runway. Pairing blackout curtains with a fan, white noise, or a sleep mask can make the overall room more comfortable.
Renters tend to discover that temporary solutions are useful but require common sense. Adhesive hooks and no-drill brackets can be convenient, but heavyweight thermal curtains may exceed what the hardware can safely hold. The easiest renter setup is often lighter blackout panels, a sturdy no-drill bracket system, or a blackout liner behind existing curtains. Testing the setup slowly before trusting it overnight is wise. Nobody wants a curtain rod falling at 3 a.m. and convincing the household that the living room is haunted.
Finally, there is the experience of realizing that curtains need occasional care. Blackout panels can collect dust, pet hair, and the mysterious fuzz that appears in every home despite no one admitting responsibility. Many ready-made panels are machine washable, but some lined or coated fabrics need gentler care. Always check the label before washing. A quick vacuum with an upholstery attachment, occasional steaming, and careful laundering can keep the curtains looking good and operating smoothly. The best blackout curtains are not the fanciest ones. They are the ones you can install easily, close every night, clean without panic, and forget about until you wake up later than usual in a room that finally feels calm and dark.
Conclusion
The easiest blackout curtains are built on a simple formula: choose panels that are truly wide enough, mount the rod high and beyond the window frame, secure the hardware properly, and close the gaps where light loves to sneak in. You do not need custom treatments to make a bedroom darker, more private, and more comfortable. A little measuring, a sturdy rod, and a willingness to outsmart the morning sun can go a very long way.














