
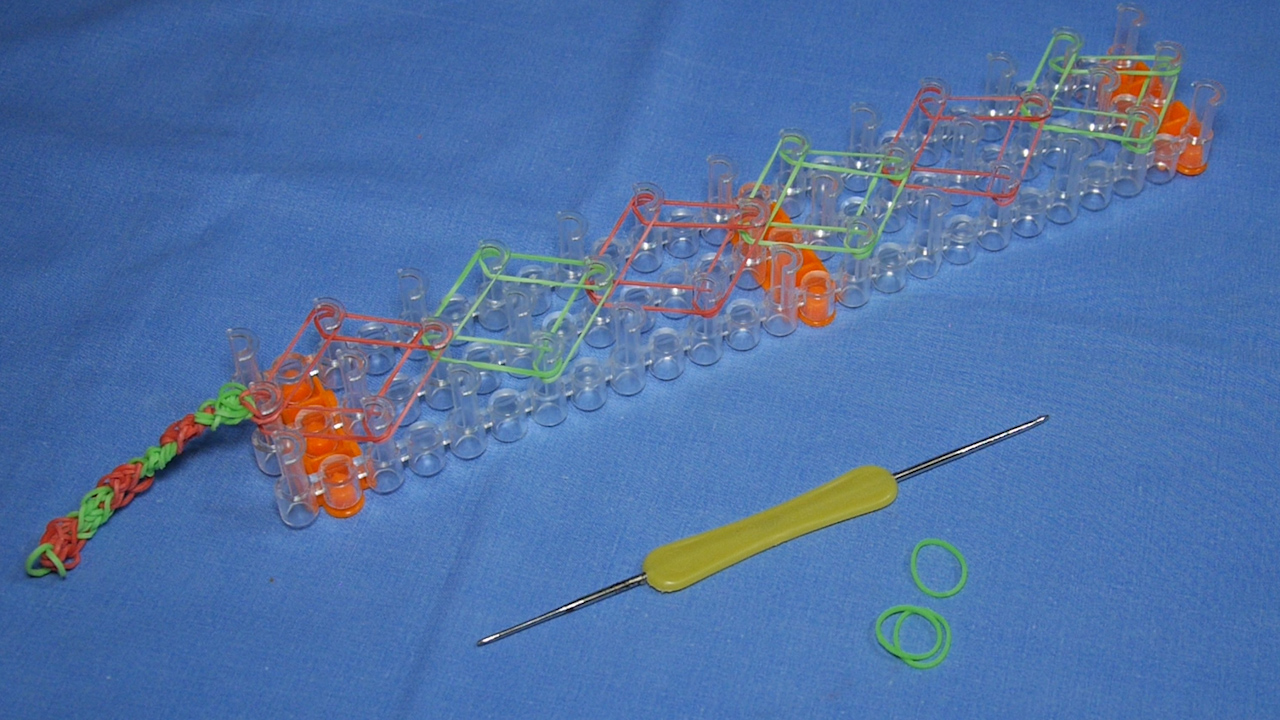
If you have a pile of colorful bands, a tiny hook, and the sudden confidence of someone who has watched exactly one craft video, welcome. You are officially ready to learn how to make loom bracelets. The good news is that loom bracelets are easy to start, inexpensive to customize, and just addictive enough to make you say, “I’ll stop after one,” right before making seven more and naming them by color palette.
This guide walks you through the basics in plain English, not mysterious craft goblin language. You will learn what supplies you need, how to make a simple beginner bracelet, how to finish it neatly, and how to avoid the classic mistakes that turn a cute rubber band bracelet into a tiny, stretchy noodle of regret.
Whether you are making bracelets for yourself, your kids, your classmates, your best friend, or that one cousin who still loves neon everything, this tutorial will help you get started the right way.
What Are Loom Bracelets?
Loom bracelets are bracelets made by looping small rubber bands together on a tool such as a full loom board, mini loom, finger loom, or two-peg setup. Some designs are very simple and perfect for beginners. Others get fancy fast, with patterns that look like they were designed by a caffeinated rainbow.
The best part is that the core technique stays pretty simple: place bands, hook the lower band over the top, repeat, and secure the ends with a clip. Once you understand that rhythm, you can move from basic bracelets to fishtails, triples, ladders, charms, and more.
Supplies You Need to Make Loom Bracelets
Before you begin, gather your materials. You do not need a craft store the size of a football field. A small starter kit is enough.
- Rubber loom bands in your favorite colors
- A loom, mini loom, finger loom, or any two-peg loom tool
- A small hook tool
- C-clips or S-clips to close the bracelet
- Optional beads or charms for decoration
- A container or tray to keep bands from escaping into another dimension
If you are shopping for a kit, look for one that includes bands, a loom, a hook, and clips. That is the starter pack. If anyone in the household has sensitive skin or latex concerns, check the packaging carefully before buying bands. Not all products are labeled the same, and it is smart to confirm material details instead of guessing.
Best Beginner Project: The Simple Fishtail Loom Bracelet
If you are brand new, start with a fishtail loom bracelet. It is one of the easiest loom bracelet patterns to learn, and it teaches you the basic hand movements you will use again and again. Even better, you can make it on a mini loom, finger loom, or a full loom board using just two pegs.
This design looks polished, but the process is simple enough for beginners. That is the crafting equivalent of finding jeans with real pockets.
How to Make a Loom Bracelet Step by Step
Step 1: Choose Your Colors
Pick one, two, or three colors to start. If this is your first bracelet, resist the urge to use twelve colors, glitter, charms, and a grand artistic vision inspired by a sunset. Start simple. Alternating two colors is the easiest way to create a pattern that looks intentional.
Lay out about 40 to 60 bands depending on wrist size and how loose you want the bracelet to fit. Smaller wrists need fewer bands. Larger wrists or looser fits need more.
Step 2: Set Up Two Pegs
Use a mini loom, finger loom, or two pegs on a larger loom board. You only need two pegs for this bracelet. Place the loom so it feels comfortable in your hand. The exact position matters less than keeping your motion steady.
Step 3: Add the First Band in a Figure Eight
Take your first band and stretch it across the two pegs in a figure-eight shape. In other words, twist it once in the middle before placing it on the second peg. This creates the base tension that helps the bracelet start properly.
If you skip this twist on the first band, the bracelet may not hold its shape. Crafting is fun, but it is also a little dramatic.
Step 4: Add Two More Bands Without Twisting
Place a second band over the two pegs without twisting it. Then place a third band on top the same way. You should now have three bands stacked on the pegs, with the bottom one twisted and the top two flat.
Step 5: Hook the Bottom Band Over the Top
Use your hook to lift the bottom band on one side up and over the peg so it falls into the center. Repeat on the other side. The bottom band should now be looped over the two top bands and sitting in the middle.
This is the key motion in loom bracelet making. Once you get this part, the rest becomes a satisfying loop-and-repeat process.
Step 6: Add One New Band
Place one new band across the two pegs without twisting it. You should again have three bands on the loom.
Step 7: Repeat the Pattern
Lift the bottom band over the peg on one side, then the other, dropping both loops into the center. Add one new band. Repeat.
The rhythm looks like this:
- Add one band
- Lift the bottom band over both pegs
- Add one band
- Lift the bottom band over both pegs
Keep going until the bracelet is long enough to wrap around your wrist comfortably. Stretch it gently every now and then to check the length, but do not pull it like you are testing bungee cords for a stunt show.
Step 8: Finish the Bracelet
When the bracelet is long enough, stop adding new bands. You should have two loops left on each peg.
Lift the bottom loop over the top loop on each peg one last time. This leaves one loop on each peg. Move one remaining loop onto the other peg so both loops sit together. Remove both loops carefully and attach them to one side of a C-clip or S-clip.
Then connect the clip to the starting end of the bracelet. That closes the bracelet and gives you a neat finish.
How to Make Your Loom Bracelet Look Better
Once you have made one bracelet successfully, you will probably want the next one to look even cleaner. Here are a few easy upgrades.
Use Consistent Tension
Try not to stretch some bands tightly and leave others loose. Even tension makes the bracelet look neat and helps it sit comfortably on the wrist.
Plan a Simple Pattern
Try alternating colors every band or every two bands. Popular beginner combinations include:
- Pink and white
- Blue and green
- Rainbow order
- Black with neon accents
- School colors or team colors
Add Charms After You Learn the Basics
Charms, alphabet beads, and decorative clips are fun, but add them after you feel comfortable with the bracelet-making process. Learn the road before installing neon underglow.
Common Loom Bracelet Mistakes to Avoid
Using Too Few Bands
If the bracelet is too short, it will either not close or it will fit like a rubber band on a watermelon. Count your bands loosely and check the fit before finishing.
Forgetting the First Twist
The first band in a fishtail bracelet needs that figure-eight twist. Without it, the base can slip apart.
Dropping a Loop
If a loop slips off a peg, do not panic. Pause, use the hook, and place it back carefully. Panicking rarely improves bracelet architecture.
Pulling Too Hard
Rubber bands are stretchy, but they are not invincible. Gentle tension works better than aggressive yanking.
Using Poorly Organized Colors
When all your colors are mixed together in one pile, you spend more time searching than crafting. Sort bands into small groups before you begin.
Can You Make Loom Bracelets Without a Full Loom?
Yes. That is one reason loom bracelet crafts are so popular. You can make simple designs with a finger loom, a mini loom, or any two-peg tool included in many beginner kits. Some people even practice the basic motions with their fingers, though a loom tool usually makes the process easier and more consistent.
If you already own a full loom board, that is great. If not, do not let that stop you. Many beginner-friendly loom bracelet tutorials use smaller tools for the first project.
Easy Loom Bracelet Ideas to Try Next
Once you master the basic fishtail bracelet, try branching out. Here are a few ideas that keep the same fun but add variety.
- Single-color bracelet: clean, simple, fast
- Rainbow bracelet: bright and classic
- Ombre bracelet: shades of one color from light to dark
- Name bracelet: add letter beads
- Charm bracelet: clip on one or two small decorations
- Holiday bracelet: use seasonal colors like red and green or orange and black
The more bracelets you make, the more you start noticing pattern balance, color rhythm, and tension control. Without realizing it, you go from beginner to “please admire my bracelet collection” in about a weekend.
Why Loom Bracelets Are Still So Fun
Loom bracelets are one of those crafts that hit the sweet spot. They are simple enough for beginners, creative enough to keep older kids and adults interested, and practical enough that you actually end up with something wearable. They also make easy handmade gifts, party activities, classroom crafts, or rainy-afternoon boredom busters.
And unlike some ambitious DIY projects, a loom bracelet does not require power tools, a backyard workshop, or emotional recovery afterward. Just a few bands, a little patience, and maybe a snack break.
Extra Experience Section: What Making Loom Bracelets Is Really Like
Making loom bracelets sounds like a tiny craft project, but the experience is bigger than people expect. At first, it feels almost ridiculously simple. You sit down with a handful of bands and think, “This will take five minutes.” Then twenty minutes later you are deeply invested in whether coral pink works better with mint green or whether this bracelet should be “summer beach vibes” or “glow-stick chaos.” It sneaks up on you in the best way.
One of the most enjoyable parts of making loom bracelets is how quickly you get a small win. A lot of crafts demand a long setup, a big mess, or a personality type that enjoys reading twelve pages of instructions. Loom bracelets are friendlier than that. Within the first few minutes, you can see the pattern forming. That early success makes people want to keep going, especially beginners and kids who might get discouraged with more complicated projects.
There is also something oddly relaxing about the repeated motion. Add a band. Hook the bottom loop over. Add another band. Repeat. After a while, the process becomes rhythmic, almost meditative. It is the kind of craft that gives your brain something to focus on without making it work too hard. That is probably why loom bracelets are so popular at sleepovers, family craft tables, and lazy afternoons when everyone wants to do something with their hands but no one wants a giant project.
Another fun part is the social side. People rarely make just one bracelet and quietly move on with their lives. They start trading them, gifting them, stacking them, and comparing patterns. One person makes a simple two-color design, someone else adds beads, and suddenly there is a full bracelet economy happening in the living room. Loom bracelets are surprisingly good at getting people to talk, collaborate, and show off their style without needing expensive supplies.
Of course, the experience is not always perfectly smooth. Every bracelet maker eventually drops a loop, miscounts a color pattern, or clips the wrong end together and creates a wearable geometry problem. But that is part of the charm. Loom bracelets are forgiving. If you mess up, you can usually backtrack a little, fix the loop, and keep going. That low-stakes feeling makes the craft less intimidating and more fun.
Over time, many people notice that loom bracelets become more than a quick activity. They turn into keepsakes. A bracelet made in school colors might remind you of a game day. A rainbow bracelet might remind you of summer break. A bracelet made with a friend becomes a tiny memory you can wear. That is what makes this craft stick around. It is colorful, yes. It is trendy, sure. But it is also personal. And honestly, anything that turns a pile of rubber bands into a memory deserves some respect.
Final Thoughts
If you want a craft that is affordable, beginner-friendly, and genuinely fun, loom bracelets are hard to beat. Start with a simple fishtail bracelet, get comfortable with the basic motion, and then experiment with colors, patterns, and accessories. You do not need to be an expert. You just need a few bands, a clip, and the willingness to make one bracelet that accidentally becomes twelve.
That is how it begins. One bracelet. Then a matching set. Then a box of sorted colors. Then, somehow, you are the bracelet person now. Honestly, there are worse reputations to have.










