
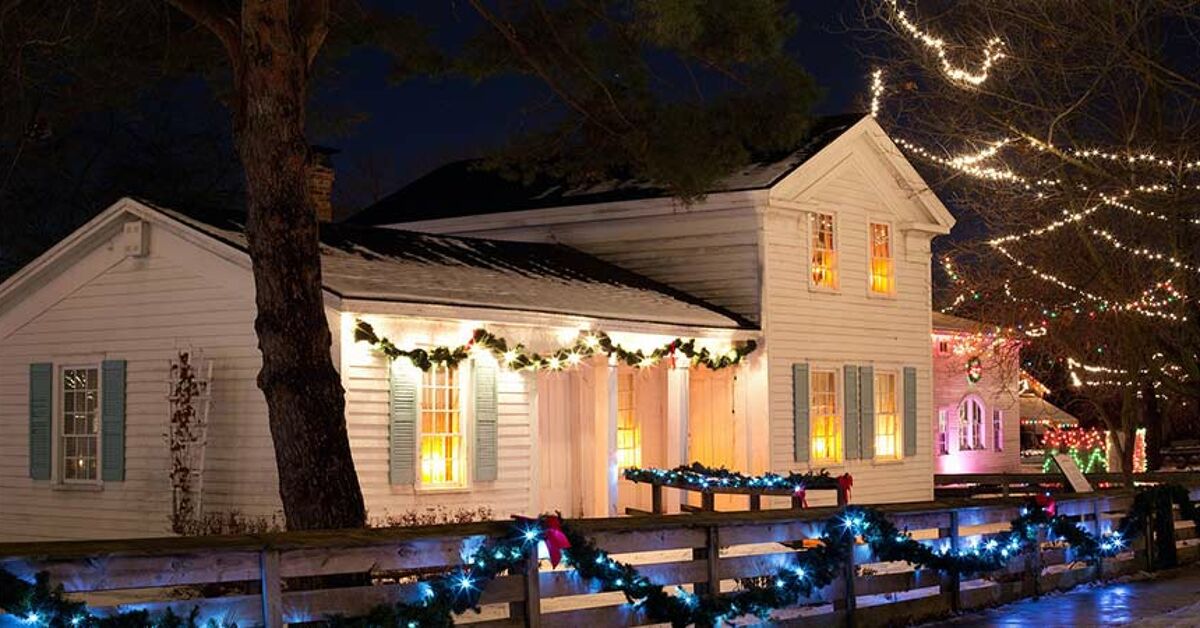
Note: This article is written for homeowners who want a beautiful outdoor Christmas light display without turning the job into a slapstick holiday movie involving tangled cords, a wobbly ladder, and one mysteriously blinking strand that worked perfectly five minutes ago.
Outdoor Christmas lights can make a home feel warm, cheerful, and delightfully festive. They frame the roofline, brighten the porch, sparkle through shrubs, and announce to the neighborhood that yes, the holiday spirit has officially arrived. But hanging Christmas lights outside is not just about grabbing a ladder and hoping gravity is in a good mood. A great display starts with planning, safe materials, smart power use, and a storage system that does not punish you next December.
Whether you want a simple row of warm white lights along the gutters or a full “Santa can see this from cruising altitude” masterpiece, the same basics apply. Measure first. Test everything. Use outdoor-rated lights and extension cords. Secure strands with proper clips, not nails or staples. Protect connections from weather. Then, when the season ends, store your lights in a way that future-you will not resent.
Below are five practical tips for hanging Christmas lights outside, followed by smart storage ideas and real-world experience notes that make the entire process easier, safer, and much less likely to involve muttering under your breath in the driveway.
Why Outdoor Christmas Light Planning Matters
Planning may not sound as exciting as plugging in the final strand and watching your house glow, but it is the secret ingredient behind every clean-looking outdoor light display. Without a plan, you end up with uneven roofline lights, cords stretched across walkways, overloaded outlets, and that one dark patch above the garage that quietly mocks you all season.
Start by walking around your home during daylight. Look at your roofline, gutters, porch columns, railings, windows, shrubs, trees, fence sections, and pathways. Decide what you want to highlight. You do not have to light everything. In fact, a focused display often looks more polished than a yard packed with every strand you own. Think of it like decorating a cake: frosting is wonderful, but there is a difference between festive and “the gingerbread house exploded.”
Choose a color theme before buying or hanging lights. Warm white gives a classic, cozy look. Cool white feels crisp and modern. Multicolor lights bring nostalgia and cheerful energy. Red and green can work beautifully on porch columns or shrubs. The key is consistency. Mixing too many bulb sizes and tones can make the display look accidental instead of intentional.
Tip 1: Measure First and Make a Simple Lighting Map
The first handy tip is also the one most people skip: measure before you decorate. A measuring tape can save you from three emergency hardware-store trips and one dramatic realization that your “extra” box of lights is actually from 2009 and only half alive.
Measure Rooflines, Windows, Doors, and Railings
Measure the length of each area you want to decorate. For rooflines and gutters, measure straight sections first, then add extra length for corners, peaks, and the distance from the outlet to the starting point. For windows and doors, measure around the full frame. For porch columns, measure the height and circumference if you plan to spiral-wrap lights around them.
As a general rule, add a little extra length to your estimate. Outdoor Christmas lights need some slack so they are not pulled tight across clips or corners. A strand stretched like a guitar string is more likely to pop loose, strain the wiring, or look awkward once wind and winter weather show up.
Sketch Your Display
You do not need architectural software. A quick sketch on paper is enough. Mark where the outlets are, where each light strand will begin and end, and where extension cords will run. This also helps you avoid dangling cords across stairs, driveways, or walkways. The goal is to create a display that looks magical without creating a holiday obstacle course for delivery drivers, guests, or your own half-awake self taking out the trash.
Tip 2: Choose Outdoor-Rated Lights, Cords, and Clips
Outdoor lights live a tougher life than indoor lights. They deal with moisture, wind, temperature changes, sun exposure, and sometimes snow or freezing rain. That is why outdoor-rated Christmas lights and outdoor-rated extension cords are essential. Indoor products are not designed for those conditions, even if they look similar on the shelf.
Check the Label Before You Hang
Before installing anything outside, read the product label or packaging. Look for wording that clearly says the lights are suitable for outdoor use. The same goes for extension cords, timers, power stakes, and decorations. If a cord or light set is marked for indoor use only, keep it inside. Your living room garland will appreciate the company.
Also inspect every strand before it goes up. Check for frayed wires, cracked sockets, loose bulbs, exposed copper, broken plugs, or brittle insulation. If a set looks damaged, do not use it. A bargain box of old lights is not a bargain if it creates an electrical hazard.
Use Clips Instead of Nails or Staples
Plastic light clips are one of the best tools for hanging Christmas lights outside. They attach to gutters, shingles, siding trim, railings, or roof edges, depending on the clip style. They hold lights more evenly than improvised methods and are much easier to remove after the holidays.
Avoid nails, screws, and staples. They can puncture wire insulation, damage gutters or shingles, and make removal a miserable little treasure hunt. If you want straight roofline lights, choose gutter clips or shingle clips sized for your bulb type. For windows and doors, use outdoor-rated adhesive hooks or clips made for trim. For railings, twist ties, reusable cable ties, or hook-and-loop straps can secure strands without scarring the surface.
Tip 3: Test Lights on the Ground Before the Ladder Comes Out
There is a very specific kind of disappointment that happens when you finish clipping lights along the roof, climb down, plug them in, and discover the middle section is dark. Avoid this emotional journey. Test every strand while it is still on the ground.
Plug In Each Strand
Lay the lights out in the driveway, garage, or living room. Plug in each strand and check every bulb. Replace missing or burned-out bulbs if the strand allows it. Confirm that the color and brightness match your plan. If you are using multiple sets from different years, compare them side by side. Warm white from one brand can look golden, while another looks almost icy. Both can be beautiful, but together they may look like your house could not decide on a personality.
Check Connections and Bulb Direction
When using C7 or C9 bulbs along a roofline, make sure the bulbs point the same direction. Many clips allow bulbs to face outward, upward, or downward. Pick one direction and stay consistent. For mini lights or LED strings, untwist the strand before hanging so it lays naturally. A few minutes of prep on the ground makes installation faster and cleaner.
Tip 4: Practice Ladder Safety and Work in Good Weather
Ladders and holiday excitement are not always a wise combination. Add cold fingers, wet pavement, and a strand of lights wrapped around your shoulder, and suddenly your cheerful decorating afternoon becomes a physics lesson. Use a sturdy ladder, place it on level ground, and avoid decorating in rain, ice, snow, or strong wind.
Use the Right Ladder for the Job
For lower areas such as porch railings and first-floor windows, a stable step ladder may be enough. For rooflines, use an extension ladder rated for your weight plus tools and materials. Keep the ladder on firm, flat ground. Do not stand on the top step. Do not lean far to the side. If you cannot reach the next section comfortably, climb down and move the ladder. Yes, it takes longer. It is still faster than recovering from a fall.
If possible, decorate with a helper. One person can steady the ladder, hand up clips, and gently remind you that “just one more reach” is how holiday blooper reels are born. Keep three points of contact with the ladder when climbing, and carry supplies in a tool belt or bucket rather than trying to juggle lights in both hands.
Use a Light-Hanging Pole for Hard-to-Reach Areas
A light-hanging pole can reduce ladder work, especially for gutters, tree branches, and tall shrubs. These poles often work with compatible clips and let you hang lights from the ground or from a lower ladder position. They are especially helpful if your display includes second-story gutters but you would prefer not to spend December negotiating with your fear of heights.
Tip 5: Manage Power, Weather, and Timers Like a Pro
A beautiful display still needs safe power management. Outdoor Christmas lights should be plugged into GFCI-protected outlets. A GFCI helps reduce shock risk by shutting off power when it detects a ground fault. Many modern outdoor outlets already include GFCI protection, but if yours do not, consider using a portable outdoor GFCI adapter or asking a qualified electrician about upgrades.
Avoid Overloading Outlets
Check the manufacturer’s instructions for how many strands can be connected end to end. LED Christmas lights generally use less electricity than older incandescent lights, which makes them popular for larger displays. Still, every product has limits. Do not guess. Read the label, follow the rated connection limits, and spread larger displays across appropriate outdoor circuits.
Keep Connections Off the Ground
Outdoor plugs and connections should be protected from puddles, snowmelt, and direct runoff. Use weather-resistant cord covers where appropriate, and place connections above ground when possible. Do not run cords through doors or windows where they can be pinched. Do not hide cords under rugs, mats, or mulch. If cords cross a walkway, rethink the layout so nobody trips while carrying pie.
Use Timers for Convenience and Safety
Outdoor-rated timers make Christmas lights easier to manage and can help reduce energy use. Set lights to turn on after dusk and shut off before bedtime. This keeps the house festive during prime viewing hours without leaving everything running all night. Smart plugs rated for outdoor use can also work well, especially if you want app control or voice control.
Smart Storage Ideas for Christmas Lights
Taking lights down is not as glamorous as putting them up, but good storage is the difference between a smooth next season and a December wrestling match with a glowing spaghetti monster. The best storage systems prevent tangles, protect bulbs, label each zone, and keep moisture away.
Wrap Lights Around Cardboard
One of the easiest storage ideas is also one of the cheapest. Cut sturdy cardboard into rectangles, make a small notch at each end, and wrap one strand around each piece. Tuck the plug into a notch so it stays put. Label the cardboard with the location, such as “front porch railing,” “garage roofline,” or “left maple tree.” Next year, you will know exactly where each strand belongs.
Use Cord Reels or Light Reels
For longer strands, a cord reel or dedicated Christmas light reel is a great upgrade. Reels keep lights evenly wound and make installation faster because the strand can unwind as you work. They are especially helpful for C7, C9, icicle lights, and long roofline runs. Store reels in clear bins so you can see what is inside without opening every container like a holiday detective.
Try Hangers, Velcro Straps, or Resealable Bags
For smaller strands, wrap lights around a hanger and secure them with hook-and-loop straps. You can also coil a strand carefully, secure it in two or three places with reusable straps, and place it inside a large resealable bag. Write the location on the bag with a permanent marker. This is especially useful for window lights, mini lights, and battery-powered decorative strands.
Store Lights in a Cool, Dry Place
Moisture is the enemy of holiday storage. Let lights dry completely before packing them away. Store them in latching plastic bins, sturdy boxes, or dedicated storage bags in a dry location. Avoid crushing delicate bulbs under heavy decorations. If you keep holiday décor in a garage, basement, attic, or shed, use containers that protect against dust, pests, and seasonal temperature swings.
Common Outdoor Christmas Light Mistakes to Avoid
Even experienced decorators make mistakes. The good news is most are easy to avoid with a little patience and a few better habits.
Skipping the Test Run
Always test lights before hanging them and again before final cleanup. A strand that flickers on the ground should not be promoted to roof duty. Keep spare bulbs, fuses, and clips handy so minor problems do not derail the whole project.
Mixing Too Many Styles
Outdoor displays look cleaner when bulb size, spacing, and color temperature are consistent. If you love variety, create zones. Use warm white C9 bulbs on the roofline, mini lights in shrubs, and multicolor lights around a playhouse or fence. Intentional variety looks festive. Random variety looks like the decoration bin sneezed.
Ignoring Removal Day
Think about takedown while you install. If something is hard to reach, fragile, or overly complicated in November, it will not magically become easier in January when it is colder and everyone is tired of peppermint. Use clips you can remove safely, label zones as you take lights down, and repair or discard problem strands before storage.
Outdoor Christmas Light Ideas That Look Polished
If you want a big visual impact without covering every inch of your yard, focus on architectural lines. Roof edges, window frames, porch columns, and railings create structure. Once those areas are lit, add depth with shrubs, trees, or pathway lights.
Classic Roofline Glow
A single clean line of warm white C9 bulbs along the gutter and roof peaks creates a timeless look. This is ideal for colonial, craftsman, farmhouse, ranch, and traditional homes. Keep spacing even and bulbs facing the same direction for the most professional effect.
Cozy Porch Display
Wrap porch columns with mini lights or garland lights, outline the front door, and add a lit wreath. This creates a welcoming focal point without needing to climb onto high rooflines. It is also one of the best options for renters or anyone who wants a festive display with minimal equipment.
Tree and Shrub Lighting
Net lights work well on shrubs because they create even coverage quickly. For trees, wrap the trunk first, then move into main branches. Avoid wrapping too tightly; trees move in wind, and a little slack helps protect both the lights and the bark.
Personal Experience: What Actually Makes Outdoor Christmas Lights Easier
After helping with outdoor Christmas lights more times than I can count, one lesson stands above the rest: the job is easiest when you treat it like a small project, not a festive impulse. The impulse version starts with someone saying, “Let’s just throw up a few lights,” and ends three hours later with a missing extension cord, cold coffee, and a family debate about whether the roofline is “charmingly uneven” or simply crooked.
The best experience starts in daylight with everything laid out. Put the lights, clips, cords, timer, spare bulbs, labels, and storage notes in one place. Test each strand before it goes outside. Then group the lights by location. Roofline lights in one pile. Porch lights in another. Shrub lights in another. This sounds fussy until you realize it prevents the classic mistake of using your longest strand on a tiny railing and leaving a short strand for the garage.
Another helpful habit is to install from the outlet outward. Many people start at the prettiest visual point, such as the front peak of the roof, then realize the plug is on the wrong end. Starting from the power source makes cord management much easier. It also helps you hide extension cords along edges, behind columns, or near landscaping instead of dragging them across open space.
Clips are worth buying in bulk. They are inexpensive, easy to lose, and somehow vanish between seasons like socks in a dryer. Keep extra clips in a labeled bag inside your light storage bin. When you remove the lights, pull the clips off carefully and store them with the exact strand they belong to. If a clip breaks, toss it immediately. Broken clips have one job: falling off at the worst possible moment.
For storage, labeling is the habit that pays you back the most. A bin labeled “Christmas lights” is better than nothing, but a strand labeled “garage roofline, starts at right side” is pure next-year luxury. You can use masking tape, painter’s tape, luggage tags, or resealable bags with marker labels. Add notes like “needs two replacement bulbs” or “use with outdoor timer.” These tiny messages feel like a gift from past-you, who apparently had their life together for at least twelve minutes.
It also helps to take photos before and after installation. Snap a picture of the display when it looks good, then photograph outlet locations and cord routes. Next year, you can recreate the same setup without reinventing the entire holiday operation. This is especially useful if multiple people help decorate, because “the lights went somewhere over there” is not a reliable project plan.
Finally, do not wait for the worst weather to take lights down. Choose a dry, mild day if possible. Let strands dry fully before packing. Wind them neatly, label them, and store them in a bin that is not crushed under heavy décor. The goal is simple: next Christmas, opening your light storage should feel like preparation, not punishment.
Conclusion
Hanging Christmas lights outside can be simple, safe, and genuinely fun when you approach it with a plan. Measure your space, choose outdoor-rated lights and cords, test everything on the ground, use proper clips, protect your power connections, and rely on timers to keep the display convenient. When the season ends, store each strand neatly with labels, reels, cardboard wraps, or hook-and-loop straps so next year starts with sparkle instead of snarls.
The prettiest outdoor Christmas light displays are not always the biggest. They are the ones that look intentional, glow reliably, and do not require risky shortcuts. With these five handy tips and smart storage ideas, your home can shine brightly all seasonand your future self can open the decoration bins without immediately needing a cocoa break.














