
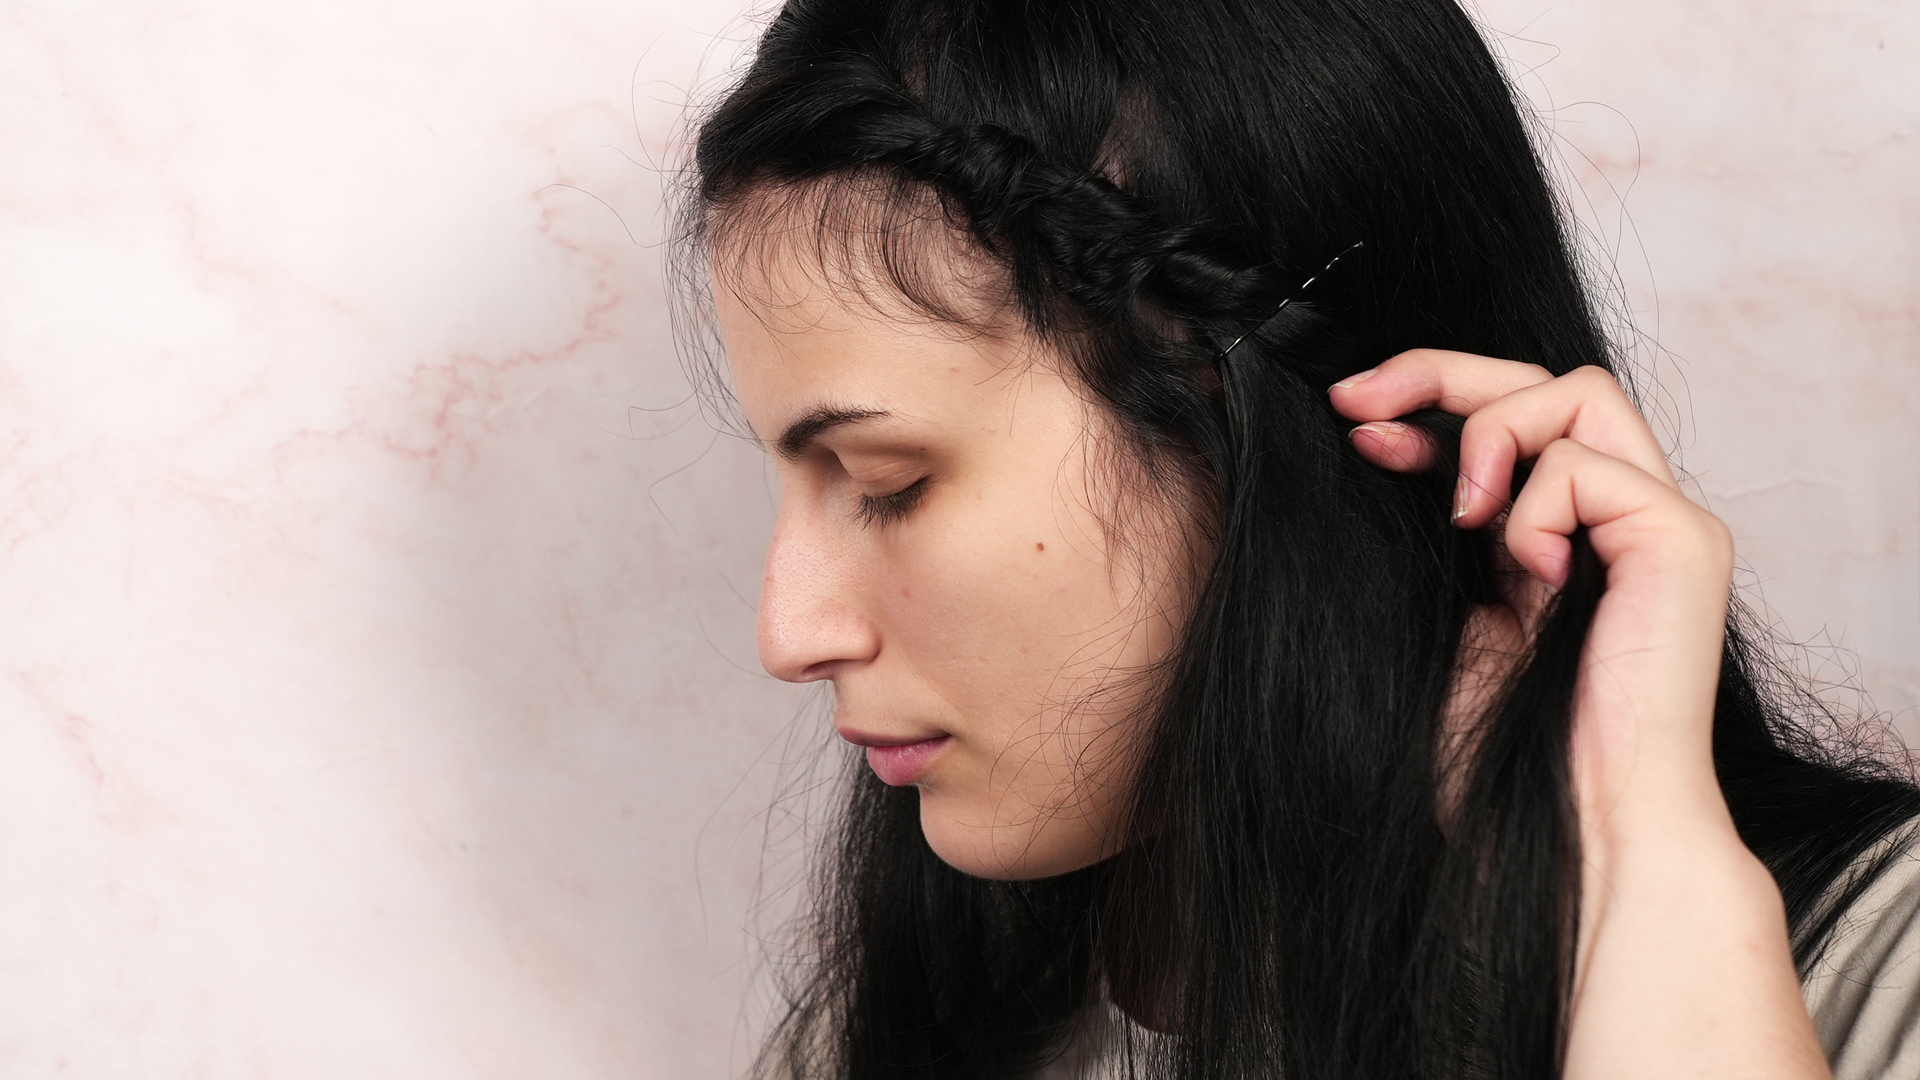
Bang braids are the tiny hairstyle trick that can save your morning, your mood, and possibly your forehead from a full day of hair tickles. Whether your bangs are too long, too short, growing out, freshly cut, side-swept, curtain-style, wispy, blunt, or simply having an attitude problem, learning how to braid your bangs gives you an easy way to keep your hair out of your face while still looking cute.
The best part? You do not need professional stylist hands, a Hollywood glam squad, or seventeen mysterious products from a bathroom drawer. You need a comb, a few bobby pins, a small elastic, maybe a little texture spray, and the willingness to try again when your first braid looks like a sleepy shoelace. That is normal. Braiding bangs is a beginner-friendly skill, but it gets smoother with practice.
In this guide, you will learn how to braid your bangs using four easy hairstyles: a classic side bang braid, a French braided bang, a Dutch braided headband, and a no-stress rope twist braid. Each style works for different hair lengths, textures, and occasions, from casual school mornings to brunch, workouts, beach days, video calls, and those “I should have washed my bangs yesterday” emergencies.
Before You Start: What You Need to Braid Bangs
Bang braids are small, so preparation matters. A full-length braid can forgive a little mess. Bangs? Bangs report every mistake directly to the mirror. Start by gathering a few simple tools:
- A rat-tail comb or fine-tooth comb for clean parting
- Small clear elastics or mini hair ties
- Bobby pins that match your hair color
- Texturizing spray, dry shampoo, or light mousse for grip
- Light-hold hairspray for flyaways
- A small brush or edge brush for smoothing
If your hair is freshly washed and slippery, add dry shampoo or texture spray before braiding. Clean hair can be gorgeous, but it sometimes behaves like it signed a contract to escape every braid. Second-day hair often holds bang braids better because it has natural grip.
Basic Bang Braiding Tips for Beginners
Start Small
When learning how to braid bangs, do not grab a huge chunk of hair from the front. Start with a small triangular or rectangular section near your part. You can always add more hair as you braid. Too much hair too soon makes the braid bulky and harder to control.
Keep Your Hands Close to Your Head
The closer your fingers stay to your scalp, the neater the braid will look. Pulling the braid outward creates bumps and loose loops. Imagine you are stitching the braid directly along your hairline.
Use Tiny Sections
For bang braids, small sections are your best friend. They create a tighter, more secure braid and help short pieces blend in. This is especially helpful if you are growing out bangs and have random layers that love popping out like they paid rent.
Do Not Chase Perfection
A slightly messy bang braid can look soft, romantic, and intentional. A too-perfect braid can sometimes look stiff. If a few wispy pieces fall out, call them face-framing strands and continue with confidence.
Hairstyle 1: The Classic Side Bang Braid
The classic side bang braid is the easiest place to start. It works well for side-swept bangs, curtain bangs, medium-length bangs, and long face-framing layers. If you can make a basic three-strand braid, you can do this style.
Best For
This hairstyle is best for beginners, casual days, school, work, short-to-medium bangs, and anyone who wants bangs out of the way without looking overly styled.
Steps
- Create a side part. Choose the side where your bangs naturally fall.
- Separate a small section of bangs near the part and divide it into three equal strands.
- Cross the right strand over the middle, then the left strand over the middle.
- Continue braiding downward and slightly back toward your temple.
- When you reach the end of the bang section, secure the braid with a small clear elastic.
- Tuck the end behind your ear or pin it under a loose section of hair.
- Gently tug the braid edges to make it look fuller, but do not pull too hard.
This is the “I tried, but not too hard” braid. It gives your bangs shape, keeps them off your forehead, and pairs well with loose waves, a ponytail, a messy bun, or straight hair.
Beginner Tip
If your bang braid keeps falling forward, angle it backward from the beginning. Your braid should travel diagonally from your part toward your temple, not straight down your face. Unless you are trying to braid a tiny curtain over one eye, which is bold but not very practical.
Hairstyle 2: The French Braided Bang
A French braided bang looks more polished than a basic side braid because it gathers hair along the hairline as it moves. Instead of braiding only the original three strands, you add tiny new pieces of hair into the braid. This makes the style more secure and perfect for growing out bangs.
Best For
This style is great for medium to long bangs, layered bangs, workout hair, humid days, and anyone who wants a braid that stays put longer.
Steps
- Part your hair slightly to one side or down the middle, depending on how you want the braid to sit.
- Pick up a small section near the part and divide it into three strands.
- Begin a basic braid by crossing the right strand over the middle, then the left strand over the middle.
- Before each new cross, add a tiny piece of hair from your hairline into the strand you are moving.
- Keep adding small sections as you braid across the front of your hairline.
- Once you reach your temple, finish with a regular three-strand braid.
- Secure with a mini elastic, then pin the braid behind your ear or blend it into the rest of your hair.
The trick is to add very small pieces. Large pieces can make the braid lumpy. Small pieces create a smooth, controlled braid that hugs the scalp and looks neat from the front.
Beginner Tip
If French braiding feels confusing, say the pattern out loud: “Cross, add, cross, add.” Yes, you may sound like a motivational speaker for your own forehead, but it helps.
Hairstyle 3: The Dutch Braided Bang Headband
A Dutch braid is similar to a French braid, but instead of crossing hair over the middle strand, you cross it under. This creates a raised braid that sits on top of the hair. When done across the front, it looks like a cute braided headband.
Best For
This hairstyle is ideal for longer bangs, thick hair, wavy hair, curly hair, festivals, casual events, and days when you want your braid to be visible and decorative.
Steps
- Create a deep side part for a dramatic headband effect.
- Section off the bang area from the rest of your hair, clipping the back hair away.
- Take a small section near the part and divide it into three strands.
- Cross the right strand under the middle strand.
- Cross the left strand under the middle strand.
- Add a small piece of hair to the outside strand before crossing it under.
- Continue braiding along the hairline toward the opposite temple or ear.
- Secure the end with an elastic and hide it under loose hair with bobby pins.
The Dutch braided bang is a little more advanced than the French version, but it is still beginner-friendly once your fingers understand the “under, not over” rule. The raised texture makes this braid look fuller, which is helpful for fine hair.
Beginner Tip
Use a little styling cream or pomade if your shorter bangs keep slipping out. Apply only a tiny amount. Too much product can make the braid look greasy instead of sleek, and nobody wants a hairstyle that says “deep fryer but make it fashion.”
Hairstyle 4: The Rope Twist Bang Braid
The rope twist is the easiest bang braid alternative because it uses only two sections instead of three. Technically, it is a twist, not a traditional braid, but it gives a braided effect and is perfect for beginners who keep losing track of which strand goes where.
Best For
This style is best for very short bangs, blunt bangs, curtain bangs, fine hair, rushed mornings, and people who have attempted French braiding once and needed emotional recovery time.
Steps
- Part your bangs where you want the twist to begin.
- Take a small front section and divide it into two pieces.
- Twist both pieces away from your face.
- Cross the front piece over the back piece.
- Add a tiny new section of hair to the front piece.
- Twist again, cross again, and continue along the hairline.
- When you reach your temple, pin the twist under a section of hair.
- Finish with light hairspray.
This hairstyle is quick, forgiving, and perfect when your bangs are too short for a full braid. It also works beautifully with curly or wavy textures because the twist blends into natural movement.
Beginner Tip
Cross the twist firmly but do not yank. If you pull too tightly, the front can look flat or uncomfortable. Aim for secure, not “my eyebrows have been relocated.”
How to Braid Bangs by Hair Type
Fine Hair
Fine hair can slip out of braids, so texture is essential. Use dry shampoo, texturizing spray, or a light mousse before braiding. Dutch braids and rope twists often make fine bangs appear fuller. After braiding, gently tug the outer loops to widen the braid.
Thick Hair
Thick bangs may need smaller sections so the braid does not become bulky. Clip away the rest of your hair before starting. A French braided bang works well because it distributes the hair evenly along the hairline.
Curly Hair
Curly bangs look beautiful in rope twists and loose Dutch braids. Work with your curl pattern instead of brushing it flat. Use a curl cream or leave-in conditioner for definition, and avoid over-tightening the braid.
Coily Hair
For coily textures, moisturize first and detangle gently with fingers or a wide-tooth comb. Small flat twists along the bang area can create a braided look while protecting the hairline. Avoid tight tension near the edges.
Short Hair
If your bangs are short, use the rope twist or a mini French braid. Add hair only from the front hairline and pin as you go. Tiny bobby pins are your secret weapon.
Common Mistakes When Braiding Bangs
Using Too Much Hair
Bang braids should be small and controlled. If the braid looks bulky, start over with a thinner section.
Starting Too Far Back
If you begin too far from the hairline, the braid will not catch your bangs. Start near the front where the shortest pieces live.
Skipping Product
Very smooth hair needs grip. A tiny amount of texture spray can make the difference between a braid that lasts and a braid that gives up before lunch.
Pulling Too Hard
A tight braid may stay better, but it can also cause discomfort and stress the hairline. Keep tension even and gentle.
Using Large Elastics
Big elastics overwhelm small bang braids. Use clear mini elastics or pin the braid invisibly behind your ear.
How to Make Braided Bangs Last Longer
To help your braided bangs last all day, start with dry hair. Damp bangs can shrink or shift as they dry. Add texture at the roots, braid with steady tension, and secure the end with both an elastic and a bobby pin if needed. Finish with light hairspray, focusing on flyaways near the hairline.
If your braid loosens, do not panic. Slide a bobby pin upward through the braid to lock it in place. For layered bangs, tuck loose pieces back into the braid and mist lightly with hairspray. You can also embrace a softer, messier finish. Sometimes the braid you get at 3 p.m. is better than the braid you created at 8 a.m.
When to Wear Braided Bangs
Braided bangs are useful for more than cute photos. Wear them during workouts to keep sweat-prone fringe off your face. Try them on humid days when bangs refuse to behave. Use them while growing out bangs to hide awkward lengths. Dress them up with waves, a low bun, or a half-up hairstyle for weddings, parties, and dates.
For everyday styling, a side bang braid looks effortless. For a polished look, choose a French braided bang. For something bold and visible, try the Dutch braided headband. For five-minute mornings, the rope twist is your best friend.
Extra Experience: Real-Life Lessons from Braiding Bangs
The first time you braid your bangs, expect your hands to feel like they belong to someone else. This is normal. Braiding the front of your own hair is tricky because you are working in a mirror, and mirrors enjoy making left and right feel like a logic puzzle. The best solution is to practice when you are not rushing. Try it in the evening while watching TV, not three minutes before leaving the house with one shoe on.
One of the most helpful experiences beginners discover is that bangs behave better when they are not too clean. Freshly washed bangs can be soft, shiny, and completely rebellious. If your braid falls apart, try again the next day with a little dry shampoo. The difference can be dramatic. Suddenly, the hair has grip, the braid holds shape, and you feel like you have unlocked a secret level.
Another lesson: bobby pins matter. Many people pin the braid straight down, then wonder why it slides out. Instead, insert the bobby pin in the opposite direction of the braid, then push it back into the hair. This creates a stronger anchor. For extra hold, lightly spray the bobby pin with hairspray before using it. It sounds small, but it helps.
If your bangs are layered, do not fight every tiny piece. Some short strands will escape, especially around the temple. Instead of restarting the braid ten times, smooth the pieces with a little styling cream or let them frame your face. A soft, imperfect bang braid often looks more natural than one that has been attacked into submission.
People with curtain bangs may find that two mini braids work better than one. Part the hair down the center, braid or twist each side away from the face, and pin them under loose hair. This creates a balanced style that looks intentional and keeps both sides controlled. It is also a great option for oily bang days because the braid hides the roots while still looking stylish.
For blunt bangs, a full French braid may be difficult if the hair is too short. In that case, the rope twist is usually easier. Twist small sections away from the face, add more hair as you move sideways, and pin near the temple. The result gives the feeling of a braid without requiring enough length for a traditional plait.
Curly and wavy bangs often look best when the braid is not too tight. Let the texture show. A loose twist or Dutch braid can blend beautifully with curls, especially when a few tendrils are left out. Use a lightweight curl cream instead of heavy gel so the front stays touchable.
The biggest experience-based tip is simple: take a photo of the braid when it works. Seriously. If you create a bang braid you love, photograph it from the front and side. Next time, you can copy your parting, braid direction, and pin placement. Hairstyling is partly technique and partly memory. Your camera roll can become your own tiny hair manual.
Finally, remember that braided bangs are supposed to make life easier, not turn your bathroom into a stress arena. If the braid is cute but not perfect, wear it anyway. Add earrings, fluff the rest of your hair, and leave the house. Confidence is the finishing spray no one can bottle.
Conclusion
Learning how to braid your bangs gives you more control over your hairstyle without needing heat tools, complicated products, or salon-level skills. Start with the classic side bang braid if you are brand new. Move on to the French braided bang when you want more hold. Try the Dutch braided headband when you want volume and texture. Use the rope twist when your bangs are short, slippery, or refusing to cooperate like a tiny hair rebellion.
The key is practice, small sections, gentle tension, and the right finishing tools. Once you learn these four easy bang braid hairstyles, you can mix them with ponytails, buns, waves, curls, and half-up styles. Your bangs may still have opinions, but now you have a plan.













