
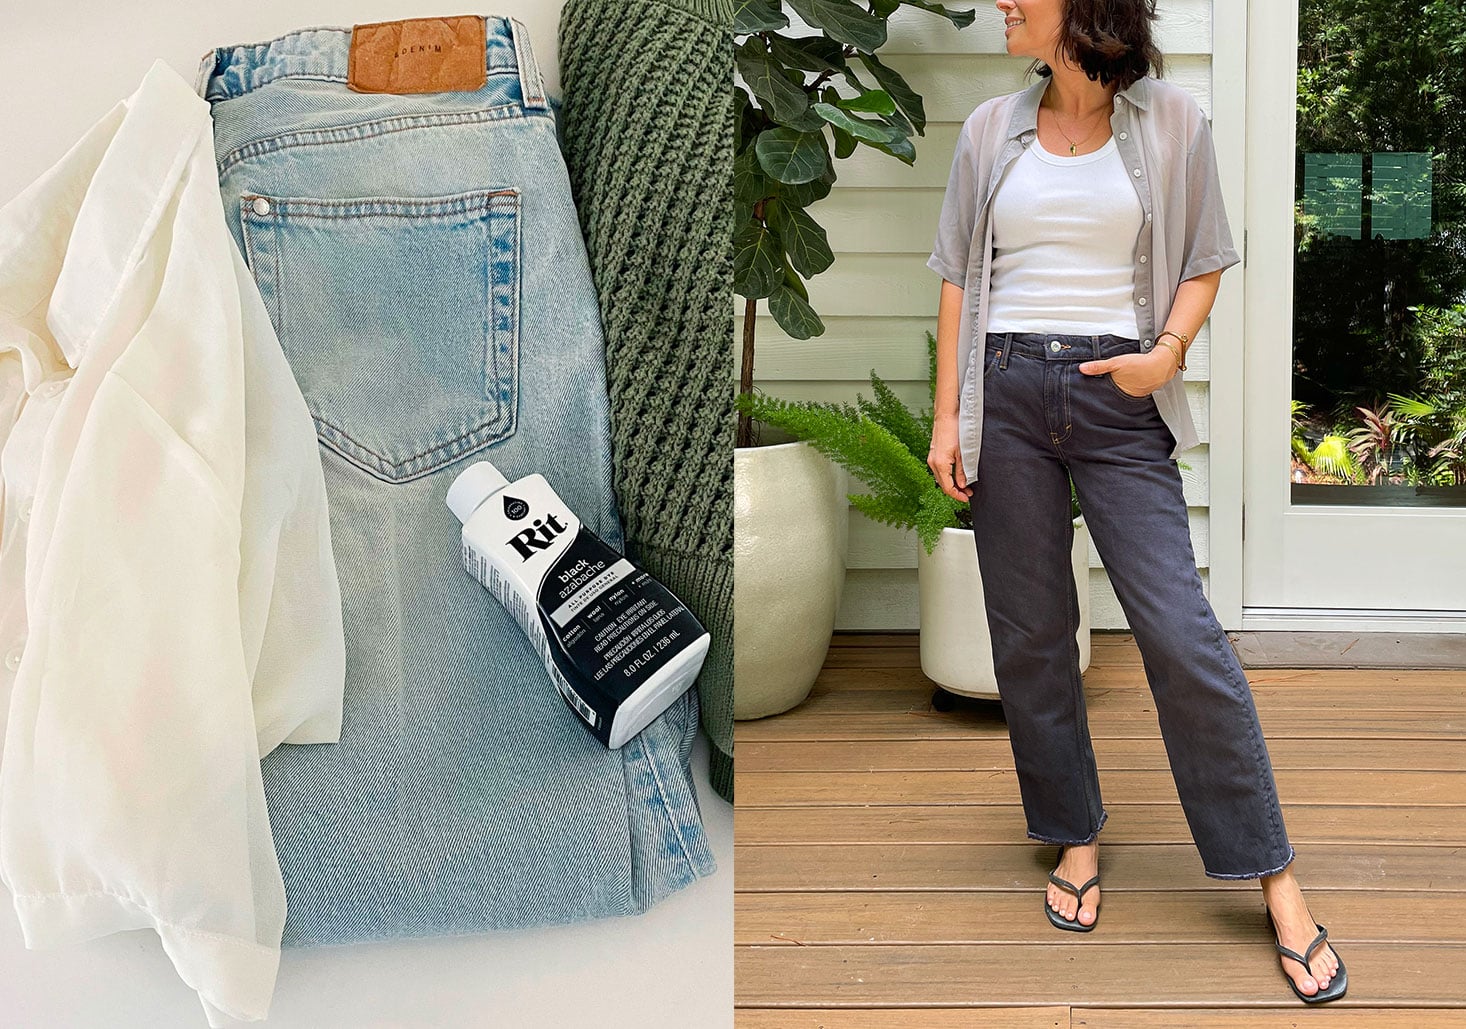
That faded shirt hiding in the back of your closet may not be finished with its fashion career. With the right fabric dye, a little patience, and a willingness to temporarily turn your laundry area into a tiny color laboratory, you can revive old clothing, cover stubborn discoloration, or create a completely new look.
Learning how to dye clothes is not difficult, but successful results depend on more than pouring color into a bucket and hoping for the best. Fabric composition, water temperature, dye type, garment construction, and stirring technique all affect the final shade. Cotton may absorb color beautifully, while polyester can sit in the same dye bath looking completely unimpressed.
This guide explains how to dye clothing at home using bucket, stovetop, and washing-machine methods. It also covers fabric selection, preparation, color mixing, creative techniques, common mistakes, and practical lessons from real-world dyeing projects.
Check the Fabric Before You Buy Dye
The care label is the most important piece of equipment in the entire project. Before choosing a color, read the fiber-content information printed on the tag. Fabric dye is fiber-specific, meaning a product designed for cotton may perform poorly on polyester, acrylic, or acetate.
Natural and Cellulose-Based Fibers
Cotton, linen, hemp, bamboo rayon, viscose, and modal generally accept dye well. Fiber-reactive dyes are especially effective on cellulose fibers because they chemically bond with the material, producing bright shades with good resistance to washing.
All-purpose dyes can also color many natural fabrics and are convenient for simple home projects. However, their colorfastness may vary according to the fabric, dye concentration, water temperature, and aftercare.
Protein Fibers
Wool, silk, alpaca, and other animal-based fibers are commonly colored with acid dyes. Despite the dramatic name, acid dyeing usually relies on a mild acid such as white vinegar or citric acid. These fibers require gentle handling because sudden temperature changes and aggressive stirring can shrink, felt, or distort them.
Synthetic Fibers
Polyester, acrylic, and acetate usually require dye specifically formulated for synthetic materials. Polyester is particularly demanding because it needs sustained, near-boiling heat for the color to penetrate effectively. A quick soak in warm water will rarely produce a strong shade.
Nylon is technically synthetic, but it often accepts certain acid or all-purpose dyes surprisingly well. It may also become darker more quickly than other fibers, so frequent color checks are helpful.
Blended Fabrics
Blends can create unpredictable but interesting results. A shirt made from 60% cotton and 40% polyester may dye unevenly because the cotton and polyester respond to different dye chemistries. Using only cotton-compatible dye may color the cotton portion while leaving the polyester lighter, creating a heathered appearance.
| Fabric | Recommended Dye Type | Difficulty |
|---|---|---|
| Cotton, linen, rayon | Fiber-reactive or all-purpose dye | Easy |
| Silk and wool | Acid dye or compatible all-purpose dye | Moderate |
| Nylon | Acid, all-purpose, or nylon-compatible dye | Moderate |
| Polyester and acrylic | Synthetic or disperse dye | More difficult |
| Mixed fibers | Dye selected for each fiber type | Unpredictable |
Can Every Garment Be Dyed?
Not every item is a good candidate. Clothes labeled dry-clean only, waterproof garments, heavily stain-resistant fabrics, and items with special surface coatings may resist dye. Water-repellent finishes are designed to block moisture, which is excellent during a rainstorm and extremely inconvenient during a dye bath.
Decorative stitching, plastic zippers, synthetic thread, buttons, elastic, and logos may remain their original colors. Most commercially manufactured clothing is sewn with polyester thread, so a dyed cotton shirt may develop contrasting seams. This can look intentional and stylishor like the sewing machine forgot to participate.
Avoid dyeing garments that cannot tolerate the temperature required by the dye. High heat may damage elastic waistbands, glued decorations, molded cups, sequins, or heat-sensitive plastics.
Choose a Realistic New Color
Fabric dye is transparent rather than opaque. It combines with the garment’s existing color instead of covering it like wall paint. A pale yellow shirt dyed blue may become green. A pink dress placed in blue dye may emerge purple. Understanding basic color mixing prevents many surprises.
Dyeing a light garment darker is usually straightforward. Turning a dark garment into a pale color is much more difficult. Dye cannot make fabric lighter, so the original color must first be removed or reduced with a product appropriate for the fiber. Even then, complete removal is not guaranteed, particularly with synthetic materials or commercially applied finishes.
Stains may also remain visible after dyeing. Oil, bleach, deodorant buildup, and uneven fading can affect absorption. A dark shade may disguise minor discoloration, but dye does not function like an eraser wearing a superhero cape.
Supplies You Will Need
- Fabric dye suitable for the garment’s fiber content
- A stainless-steel pot, plastic bucket, or suitable washing machine
- Rubber or disposable gloves
- Long stainless-steel tongs or a stirring spoon
- Measuring cups and spoons reserved for craft use
- Plastic sheeting, old towels, or trash bags
- Mild laundry detergent
- Salt, soda ash, vinegar, or dye fixative when directed
- A small fabric swatch for testing, when available
Use a pot and utensils dedicated to dyeing rather than food preparation. Cover nearby counters, floors, and cabinets before opening the dye. Dye has an extraordinary ability to travel farther than expected, particularly when the container is sitting beside a white countertop.
Prepare the Clothes for Dyeing
Wash the Garment
Prewash the item with detergent to remove body oils, sizing, fabric softener, dirt, and manufacturing residue. Do not use fabric softener during this wash because it can coat the fibers and interfere with even dye absorption.
Pay special attention to collars, underarms, cuffs, and oily stains. Clean, absorbent fabric produces more uniform results. Leave the garment damp unless the product instructions specifically request dry material.
Weigh the Dry Clothing
Many dyes specify coverage according to the dry weight of the fabric. A lightweight T-shirt may need far less dye than a pair of jeans or a cotton blanket. Using too little dye often produces a lighter color, while crowding too much fabric into a small bath encourages streaks.
Test the Color
Test the mixture on a hidden seam, removable belt, fabric scrap, or similar piece of material. Remember that wet fabric generally appears darker than it will after rinsing and drying. Create a slightly deeper shade in the bath than the final color you want.
How To Dye Clothes in a Bucket or Sink
The bucket method works well for cotton, linen, rayon, and other fabrics that do not require prolonged near-boiling temperatures. Always follow the measurements and additives listed on the dye package.
- Protect the work area. Cover surrounding surfaces and put on gloves.
- Fill the container. Add enough water for the garment to move freely without being packed into folds.
- Dissolve the dye. Mix powdered dye separately in a small amount of water before adding it to the bath. Stir liquid dye thoroughly before measuring.
- Add the recommended assistant. Depending on the dye and fiber, this may be non-iodized salt, soda ash, vinegar, or a manufacturer-supplied activator.
- Wet the garment. Fully saturate the clothing so dry areas do not float or absorb dye unevenly.
- Immerse and stir. Place the item in the bath and stir continuously during the early stage. Keep unfolding and repositioning the fabric.
- Check the shade. Lift a small section carefully, remembering that rinsing and drying will lighten it.
- Rinse thoroughly. Begin with the temperature recommended by the manufacturer, then continue rinsing until the water becomes nearly clear.
- Wash separately. Wash the garment with mild detergent to remove loose dye.
Agitation is one of the secrets to even color. The fabric must have enough space to circulate, and it should not remain folded in the same position. Leaving a shirt motionless at the bottom of a crowded bucket is an efficient way to create accidental camouflage.
How To Dye Clothes on the Stovetop
The stovetop method provides steady heat and is generally the most effective option for polyester, acrylic, acetate, nylon, and deeply saturated colors. Use a stainless-steel or enamel pot large enough for the garment to move freely.
- Fill the dedicated pot with enough water to cover the clothing generously.
- Heat the water to the temperature specified by the dye manufacturer.
- Add the dye and any required additives, stirring until fully dispersed.
- Add the pre-wetted garment.
- Maintain the required temperature while stirring regularly.
- Keep polyester or polyester blends in the bath for the full recommended period, often at least 30 minutes.
- Remove the garment carefully and allow the dye bath to cool before disposal.
- Rinse and wash according to the product instructions.
Never walk away from a heated dye pot. Water levels can drop, fabric can bunch, and splashes can stain nearby surfaces. Maintain ventilation and avoid inhaling powdered dye when opening or mixing it.
How To Dye Clothes in a Washing Machine
A washing machine is useful for large garments, bedding, curtains, and projects requiring consistent agitation. Top-loading machines are usually easier to control because the dye bath can be mixed before the clothing is added. Some front-loading machines can also be used, but the procedure depends on the model and dye product.
- Review the washing-machine manufacturer’s instructions and the dye label.
- Choose the hottest cycle the fabric can safely tolerate.
- Add the dissolved dye using the method recommended for the machine.
- Add salt, vinegar, or fixative only when required for the selected dye and fiber.
- Place the pre-wetted garment in the washer.
- Use a long cycle so the fabric receives adequate agitation and contact time.
- Wash the dyed item again with detergent.
- Run an empty cleaning cycle afterward and wipe the drum, lid, gasket, dispensers, and surrounding surfaces.
Inspect rubber seals carefully on front-loading machines because concentrated dye can collect in hidden folds. Do not assume the washer is clean merely because the stainless-steel drum looks spotless.
Creative Clothing Dye Techniques
Tie-Dye
Fold, twist, spiral, or scrunch damp fabric before securing it with rubber bands. Apply fiber-reactive dye to cotton garments for vivid, washable patterns. The tighter the folds and ties, the more undyed space will remain.
Dip-Dye and Ombre
Submerge the lower portion of the garment, then gradually raise it from the bath. The section left in the dye longest becomes the darkest. Move the fabric gently at each transition point to prevent hard horizontal lines unless sharp bands are part of the design.
Shibori-Inspired Resist Dyeing
Fold, clamp, stitch, wrap, or bind the fabric to prevent dye from reaching selected areas. Wooden blocks, string, clips, and rubber bands can produce geometric patterns without requiring advanced equipment.
Ice Dyeing
Place damp cotton fabric on a rack, cover it with ice, and sprinkle fiber-reactive dye powder over the surface according to the product’s safety directions. As the ice melts, the colors separate and travel through the folds, producing watercolor-like patterns.
Tea and Coffee Staining
Tea and coffee can give natural fibers a warm beige, tan, or aged appearance. These materials create stains rather than highly permanent commercial dye bonds, so results may fade with repeated washing. They are best used when a soft vintage effect is more important than exact colorfastness.
Common Dyeing Problems and Solutions
The Color Is Too Light
The bath may have contained too little dye, too much fabric, insufficient heat, or inadequate processing time. The fabric may also contain synthetic fibers that the selected dye cannot color. Allow the garment to dry before judging the shade, then repeat the process with the correct dye if necessary.
The Garment Looks Blotchy
Uneven results usually come from poor prewashing, cramped containers, incomplete wetting, undissolved powder, or insufficient stirring. Persistent oil stains and fabric finishes can also block absorption.
The Seams Stayed the Original Color
The garment was probably sewn with polyester thread. This is normal when natural-fiber clothing is dyed with a product that does not color synthetics. You can accept the contrast, add decorative stitching, or use a dye system compatible with both portions of the garment.
The New Color Is Unexpected
The original shade mixed with the dye. Yellow plus blue becomes green, red plus blue becomes purple, and existing undertones can shift neutral colors. Test swatches and color-wheel planning reduce surprises.
The Clothing Is Still Releasing Dye
Continue rinsing and wash the item separately with detergent. Some dye systems require a dedicated fixative or extended washout process. Do not rely on adding random household vinegar or salt after dyeing; these ingredients perform specific roles with particular dyes and cannot universally lock every color into every fiber.
How To Care for Dyed Clothes
- Wash newly dyed clothing separately for the first several washes.
- Turn garments inside out before laundering.
- Use cold or cool water after the initial washout unless the dye instructions say otherwise.
- Choose a mild detergent formulated for colored clothing.
- Avoid chlorine bleach unless you intentionally want to remove color.
- Dry away from intense sunlight when possible.
- Test for color transfer before washing the garment with light-colored items.
To test colorfastness, dampen a hidden area and press it against a clean white cloth. Visible color transfer suggests the garment should continue to be washed separately.
Safety and Cleanup
Wear gloves, protect your eyes from splashes, and work in a ventilated area. Avoid breathing powdered dye; measure it gently rather than shaking or pouring it from a height. Keep dyes, additives, and dye baths away from children and pets.
Never mix bleach with vinegar, ammonia, acids, or unapproved cleaning products. Dangerous gases can form. Follow the dye manufacturer’s disposal instructions and any local wastewater guidance. Use only the amount of dye needed, and clean spills promptly before the color reaches its lifelong dream of becoming part of your countertop.
Lessons From Common Home-Dyeing Experiences
The first lesson many home dyers learn is that the care tag deserves more respect than the color shown on the dye bottle. A white shirt may look like a perfect blank canvas, but a label reading “50% cotton, 50% polyester” changes the entire project. When that shirt is placed in cotton-compatible dye, the natural fibers absorb the color while the polyester stays much lighter. The result can be an attractive heather effect, but it can also look like the garment spent only half its time in the dye bath.
A second common experience involves container size. A medium bucket may appear large enough for a pair of jeans until the wet denim becomes heavy, folded, and determined to occupy every available inch. When fabric cannot move freely, pressure points and folded areas receive different amounts of dye. Larger containers use more water, salt, and dye, but they usually produce a smoother result. Saving one gallon of water is not much of a victory when the jeans emerge with mysterious pale rectangles on both knees.
Preparation also matters more than beginners expect. Consider a faded cotton sweatshirt with invisible traces of body oil around the collar and cuffs. The fabric may look clean, yet those residues can repel dye. After the project dries, the neckline appears lighter than the rest of the sweatshirt. A thorough hot wash with detergent before dyeing often prevents this problem. Fabric softener should be skipped because its coating can make absorption less predictable.
Color expectations provide another memorable lesson. A person may choose navy dye for a medium-red dress, expecting a sophisticated dark blue. Because dye adds color rather than covering the original shade, the dress is more likely to become plum, burgundy, or deep purple. This is not a dye failure; it is color theory arriving without an invitation. Testing a hidden piece first is far easier than trying to negotiate with an entire purple dress afterward.
Stirring is equally important. During a successful bucket project, the garment is continually opened, turned, and moved through the bath, especially during the first several minutes. During an unsuccessful project, someone answers a phone call, returns later, and discovers that half the shirt has been resting against the bottom of the container. The difference between even color and accidental tie-dye can be one surprisingly long conversation.
Wet fabric also creates false confidence. A freshly dyed black shirt may look deep enough to absorb all nearby light. After rinsing and drying, it may become charcoal gray. This is normal because wet fibers appear darker. Experienced dyers compensate by leaving garments in the bath until they are slightly darker than the desired finished shade, while still respecting the maximum processing time recommended for the material.
Finally, successful home dyeing becomes easier when the goal allows some flexibility. Recreating an exact retail color without professional measuring equipment is difficult. Reviving faded black jeans, turning stained towels dark green, or creating an ombre sweatshirt is much more forgiving. The best projects combine preparation with experimentation: identify the fiber, select the correct dye, test the color, make room for the fabric to move, and accept that handmade results may contain subtle variations. Those small differences are often what make the finished garment look unique rather than factory-produced.
Conclusion
Knowing how to dye clothes can extend the life of faded garments, transform thrift-store finds, and turn plain basics into personalized pieces. The process begins with one essential step: identifying the fabric. Once the dye matches the fiber, success depends on careful prewashing, adequate water, controlled temperature, consistent agitation, thorough rinsing, and appropriate aftercare.
Start with a washable cotton item in a forgiving dark color before attempting expensive wool, delicate silk, or stubborn polyester. Protect the workspace, follow the product instructions, and keep expectations realistic. You may not become a textile chemist in one afternoon, but you can leave with a great-looking shirt and only a moderately suspicious-looking laundry room.














