
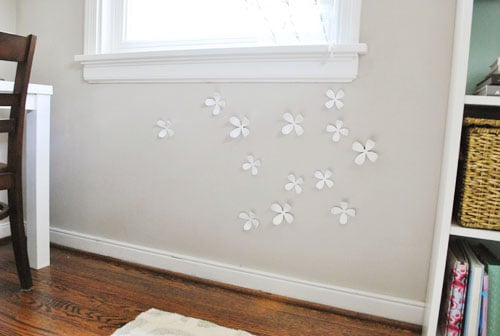
Some home projects announce themselves with sawdust, power tools, and a mild threat to your weekend plans. A secret magnet wall is sneakier. It looks like an ordinary painted wall, but behind that calm, civilized surface is a hidden zone where magnets can hold photos, notes, lightweight art, kids’ drawings, calendars, recipes, small labels, and all the tiny paper chaos that normally migrates to the refrigerator.
Using magnetic paint to make a secret magnet wall is one of those DIY ideas that sounds almost magical until you understand what is actually happening. The paint is not magnetic in the way a refrigerator magnet is magnetic. Instead, magnetic paint or magnetic primer contains very fine iron particles. Once it dries, magnets are attracted to those particles. Think of it as giving your drywall a secret metal personality. The wall is still a wall. It just has a useful little superpower.
The best part is that the finished wall does not have to look like a classroom, office board, or command center. You can topcoat magnetic primer with regular latex paint, blend it into the surrounding wall color, and create a hidden magnet-friendly area that guests will never notice until you casually stick a note to it like a domestic wizard.
What Is Magnetic Paint?
Magnetic paint is more accurately described as magnetic primer. It is usually a dark gray or black base coat loaded with iron particles. You roll it onto a wall, let it dry, then cover it with a finish paint. Once cured, the surface can attract magnets, especially strong lightweight magnets.
This distinction matters because magnetic paint does not create a wall that behaves like steel sheeting. It creates a magnet-receptive surface. The strength depends on several factors: how many coats you apply, how evenly the iron particles are distributed, how smooth the wall is, how thick your topcoat is, and what type of magnets you use.
In plain English: the more carefully you build the magnetic layer, the better the wall performs. This is not the project for one lazy coat, a bargain-bin foam roller, and blind optimism. Magnetic primer is thick, heavy, and slightly dramatic. Treat it well, and it rewards you. Rush it, and you get a wall that barely holds a grocery list.
Why Make a Secret Magnet Wall?
A secret magnet wall gives you the usefulness of a bulletin board without the visual clutter of cork, pushpins, nails, or a metal panel. It is especially helpful in small homes, rental-friendly design plans, kids’ rooms, kitchens, craft corners, home offices, mudrooms, and entryways.
Instead of adding another object to the room, you turn the wall itself into the organizing tool. That is the design trick: the magnet wall can disappear when empty. When you need it, it becomes a photo display, weekly planner, art gallery, recipe board, project tracker, or homework zone.
Great Places to Use Magnetic Paint
A kitchen magnet wall can hold recipes, meal plans, school reminders, and the mysterious coupon you keep meaning to use. A home office magnet wall can display project notes, mood boards, calendars, and inspirational quotes that are only slightly aggressive. A child’s bedroom or playroom wall can become a rotating art gallery without tape peeling paint off the wall. A hallway or mudroom magnet wall can organize keys, checklists, name tags, chore charts, and family schedules.
You can also use magnetic paint on smaller surfaces, such as cabinet doors, closet doors, pantry walls, wood panels, or the inside of a desk nook. The “secret” part works best when the topcoat matches the rest of the room. Nobody has to know the wall has hidden powers unless you want to show off, which you absolutely will.
What You Need Before You Start
Before opening the can, gather the right materials. Magnetic primer is heavier than standard paint because of the iron content, so good preparation makes the job much easier.
Tools and Materials
- Magnetic primer or magnetic paint
- Interior latex paint for the final topcoat
- Painter’s tape
- Drop cloth
- Dense foam roller or smooth-finish roller
- Small brush for edges
- Paint tray and liners
- Stir stick or drill mixer attachment
- Fine-grit sanding sponge
- Tack cloth or microfiber cloth
- Strong lightweight magnets
- Gloves and proper ventilation
If your wall has dents, nail holes, or texture bumps, add spackle and sandpaper to the list. A smoother wall gives magnets better contact, and better contact means better holding power. Tiny bumps may not matter much with regular wall paint, but magnetic primer is less forgiving. It wants a smooth runway.
Step-by-Step Guide: How to Make a Secret Magnet Wall
Step 1: Choose the Right Wall Area
Start by deciding how large your secret magnet wall should be. You do not always need to paint an entire wall. A hidden magnetic rectangle above a desk, beside a pantry, inside a hallway, or behind a door can be enough. Smaller zones are easier to control, cost less, and require fewer coats.
If you want the wall to stay secret, avoid outlining it with trim or a contrasting color. Paint the magnetic section first, then topcoat the entire wall or a larger surrounding area in the same finish color. That way, there is no visible edge where the magnetic section begins and ends.
Step 2: Clean and Repair the Surface
Wipe the wall to remove dust, grease, and fingerprints. In kitchens, this step is especially important because cooking residue can cling to walls even when they look clean. Use a mild cleaner, let the surface dry fully, then patch holes or dents.
Once repairs are dry, sand the area smooth. You are not trying to polish the wall like a grand piano. You just want a flat surface so the primer can sit evenly and magnets can make good contact later.
Step 3: Tape the Area Carefully
Use painter’s tape to mark your magnetic zone. Press the tape down firmly so the thick primer does not creep underneath. If the secret wall will be part of a larger wall, measure carefully and use a level. A crooked hidden magnet wall still works, but it will quietly bother you forever.
Step 4: Stir the Magnetic Paint Like You Mean It
This is one of the most important steps. Magnetic primer contains heavy iron particles that settle at the bottom of the can. If you do not mix it thoroughly, your first coats may be weak and your last coats may be sludge. Have the can shaken at the paint counter when possible, then stir again before and during application.
The texture can feel thicker than normal paint. That is expected. Keep stirring between coats to keep the iron particles suspended. If your arm gets tired, congratulations: you have discovered the gym membership hidden inside the DIY project.
Step 5: Apply Multiple Thin Coats
Apply the first coat using a dense foam roller or smooth roller. Work in steady vertical passes and avoid leaving ridges. Magnetic primer should be applied in multiple thin coats rather than one thick coat. Thick, gloppy layers can dry unevenly and create texture that weakens magnet contact.
Most magnetic primer projects need at least three coats, and some DIYers use four or more when they want stronger performance. Follow the product directions for dry and recoat times. Many common magnetic primers dry to the touch fairly quickly, but rushing the recoat window can trap moisture or make the surface rough.
After each coat dries, lightly check the texture. If you feel high spots, gently sand before continuing. Do not sand aggressively; you do not want to remove the iron-rich layer you just paid for and lovingly rolled onto the wall.
Step 6: Test the Magnetism Before Topcoating
Before covering the primer with your finish paint, test the wall with the magnets you plan to use. This is the moment of truth. Lightweight rare-earth magnets usually work better than weak craft magnets. If your magnet barely holds before topcoat, it will not become stronger after you add paint over it.
If the hold feels too weak, add another coat of magnetic primer. This is much easier before the topcoat goes on. Once you paint over the primer, correcting weak magnetism means repainting the magnetic layer, and nobody wants a sequel called “The Wall Strikes Back.”
Step 7: Add the Secret Topcoat
Once the magnetic primer is dry and tested, apply your finish paint. For the secret look, use the same color and sheen as the surrounding wall. A satin or eggshell finish usually cleans more easily than flat paint, which can be helpful if the wall will see lots of hands, magnets, and paper movement.
Keep the topcoat thin. Too much paint over the magnetic primer can reduce magnetic pull because it increases the distance between the magnet and the iron particles. One or two light coats are usually better than several heavy coats. The goal is to hide the dark primer, not bury the magnetic layer under a decorative snowdrift.
Step 8: Let the Wall Cure
Dry is not always the same as cured. A wall may feel dry to the touch while the coating is still hardening. Give the finished surface enough time before loading it with magnets. Waiting a day or two can help prevent smudges, dents, or marks in the fresh paint. If the product label recommends a longer cure time, follow it.
How Strong Is a Magnetic Paint Wall?
A magnetic paint wall is best for lightweight objects. It can hold photos, postcards, recipes, flash cards, schedules, thin calendars, children’s artwork, labels, and paper notes. It is not the right choice for heavy frames, shelves, tools, kitchen knives, or anything breakable. For heavy items, use proper wall anchors, studs, rails, or a metal sheet system.
The strength also depends heavily on the magnet. Flexible fridge magnets are often too weak. Strong neodymium magnets perform much better, especially when paired with lightweight paper. However, very strong magnets can pinch fingers, scratch paint, or damage delicate surfaces, so use them with care. Rubber-coated or silicone-covered magnets are a smart upgrade because they grip well and are gentler on painted walls.
Design Ideas for a Secret Magnet Wall
The Hidden Kitchen Command Center
Paint a magnetic area on the side wall near the pantry or breakfast nook, then topcoat it to match the room. Use small matching magnets to hold a meal plan, grocery list, school lunch schedule, and appointment reminders. When guests come over, remove the papers and the wall returns to looking perfectly ordinary.
The Minimalist Home Office Board
Instead of mounting a corkboard, create a magnetic rectangle above your desk. Use it for deadlines, project cards, invoices, mood boards, or design samples. Because the surface matches the wall, it keeps the office cleaner and less visually noisy.
The Kids’ Rotating Art Gallery
A secret magnet wall in a playroom lets children display drawings without tape, thumbtacks, or the classic “why is there glue on the wall?” mystery. Choose rounded magnets that are large enough to avoid choking hazards for young children, and keep small powerful magnets away from toddlers and pets.
The Entryway Drop Zone
Use magnetic paint near the front door for reminders, permission slips, return labels, and outgoing mail. It is a tiny life upgrade that helps prevent the dreaded morning sentence: “Where did I put that form?”
Common Mistakes to Avoid
Using Too Few Coats
The most common disappointment with magnetic paint is weak holding power. Usually, this happens because the primer layer is too thin. Magnetic primer needs enough iron particles on the wall to attract magnets effectively. Do not expect one coat to do the job.
Forgetting to Stir
The iron particles settle fast. Stir thoroughly before you start and again between coats. If you skip this step, the wall may have uneven magnetism, with some areas stronger than others.
Applying a Heavy Topcoat
A thick decorative topcoat can reduce magnetic strength. Use only what you need to cover the dark primer. If you are painting a light color over a dark magnetic base, choose a high-quality paint with good coverage rather than piling on coat after coat.
Expecting It to Hold Heavy Objects
Magnetic paint is clever, not supernatural. It is great for paper and lightweight displays. It is not a replacement for metal panels, pegboards, studs, screws, or storage systems designed for weight.
Skipping Ventilation
Many magnetic primers have a stronger odor than standard latex wall paint. Open windows, use fans, and follow the label directions. Good airflow makes the job more comfortable and helps protect indoor air quality while paint dries.
Magnetic Paint vs. Metal Sheet: Which Is Better?
Magnetic paint wins when you want a hidden, seamless, design-friendly surface. It is excellent for secret walls because it disappears under regular paint. It also works on many indoor surfaces, including drywall, wood, plaster, masonry, and some prepared surfaces.
A metal sheet wins when you need stronger magnetism. Sheet metal gives magnets direct contact with steel, so it can hold more weight and usually performs more consistently. However, it is harder to hide, requires cutting or mounting, and may look industrial unless you frame or cover it carefully.
For a secret magnet wall, magnetic paint is usually the better choice. For a heavy-duty tool wall, large magnetic organizer, or serious display board, metal may be more practical.
How to Make the Wall Truly “Secret”
The secret is not just the paint. It is the finishing strategy. If you paint only a small rectangle in a different sheen, people may notice the outline when light hits the wall. To hide it better, feather the final wall color beyond the magnetic section or repaint the whole wall after the magnetic primer cures.
Use the same finish as the surrounding wall. If the rest of the room is eggshell, use eggshell. If it is satin, use satin. Light texture differences can reveal the hidden area, so sand lightly between magnetic coats and roll the final paint evenly.
You can also hide the magnet wall behind function. Place it above a desk, inside a pantry, near a family calendar, or in a craft zone. When magnets are present, it looks intentional. When they are removed, it looks like a normal wall. That is the magic trick.
Maintenance Tips
Clean the wall gently with a soft cloth. Avoid harsh scrubbers that can dull the paint or create shiny spots. If magnets leave marks, switch to coated magnets or add felt dots to the back. If a section becomes scuffed over time, touch it up with the same wall paint, but keep touch-up coats thin so you do not weaken magnetic pull.
Store extra finish paint in a labeled container for future touch-ups. Also note where the magnetic section begins and ends. A photo with measurements saved on your phone can be surprisingly helpful later, especially if you repaint the room or move furniture.
Real-World Experience: What It Feels Like to Make and Use a Secret Magnet Wall
The first thing you notice when working with magnetic paint is that it does not behave like ordinary paint. It feels heavier, thicker, and more serious. Regular wall paint glides on like it has somewhere pleasant to be. Magnetic primer rolls on like it is carrying luggage. That is not a bad thing, but it changes the rhythm of the project. You slow down. You stir more. You pay attention to edges, ridges, and roller marks.
In practice, the best experience comes from treating the wall like a layered system instead of a one-step shortcut. The prep work matters more than people expect. A small bump in the drywall can keep a magnet from sitting flush. A dusty wall can affect adhesion. A poorly mixed can can make one area stronger than another. Magnetic paint is not difficult, but it rewards patience.
One useful lesson is to test magnets early and honestly. Many people grab cute decorative magnets from the refrigerator and assume they will work. Sometimes they do, but often they are too weak. Strong, small rare-earth magnets make the finished wall feel much more impressive. The difference can be dramatic. A weak magnet may slide down with a single sheet of paper, while a stronger coated magnet can hold several lightweight notes without drama.
Another experience-based tip is to think carefully about color. Since magnetic primer is dark, covering it with white or pale paint may require a better topcoat. But piling on too many coats can reduce magnetic strength. The compromise is to use high-quality interior paint with good hide and apply thin, even coats. A medium wall color is often easier than bright white if you want a secret finish with fewer layers.
The most satisfying moment comes after the wall cures and you place the first magnet on it. It is a small click, but it feels like discovering a hidden feature in your own house. Suddenly, the wall can do something it could not do before. It becomes useful without becoming bulky. There are no nail holes, no cork crumbs, no pushpins hiding in the carpet, and no metal board shouting for attention.
Over time, the secret magnet wall tends to become a rotating display. In a kitchen, it may start with recipes and become a family dashboard. In an office, it may begin as a project board and turn into a creative wall for sketches, fabric swatches, paint chips, and notes. In a child’s room, it can change every week depending on the latest masterpiece. Today it is a dinosaur. Tomorrow it is a purple house with eleven suns. Art is unpredictable. The wall is ready.
The biggest limitation is weight. A magnetic paint wall is not a heavy-duty storage system, and expecting it to act like one leads to disappointment. It is best for paper, thin cards, lightweight photos, and small flat objects. Once you accept that, it becomes incredibly useful. The secret is to use the wall for what it does well instead of forcing it to be a garage pegboard in disguise.
For renters, the idea is tempting but needs caution. Magnetic paint is still paint, and it usually requires several dark coats plus a finish coat. If your lease limits painting, ask first or use a removable panel painted with magnetic primer instead. A painted wood board can lean on a desk, mount inside a cabinet, or hang like art. It will not be as invisible as a true secret wall, but it can be easier to reverse.
The final experience is this: a secret magnet wall is not the fastest DIY project, but it is one of the most quietly satisfying. It makes a room more functional without making it busier. It hides in plain sight. And every time someone asks, “Wait, how did that stick there?” you get to smile like you planned the whole thing. Because you did.
Conclusion
Using magnetic paint to make a secret magnet wall is a clever way to add storage, display space, and personality without cluttering your room. The project works best when you prepare the wall carefully, stir the primer thoroughly, apply several thin coats, test magnet strength before topcoating, and finish with a light layer of regular paint that matches the surrounding wall.
It is not a solution for heavy objects, but it is excellent for notes, artwork, photos, calendars, recipes, and everyday reminders. With the right magnets and a patient approach, your wall can become a hidden command center, creative board, or family gallery while still looking like an ordinary painted surface. That is the charm: no bulky board, no nail holes, no visual mess. Just a wall with a secret.
Note: For best results, always follow the directions on your specific magnetic primer and finish paint, including dry times, ventilation instructions, surface recommendations, and cure times.













