
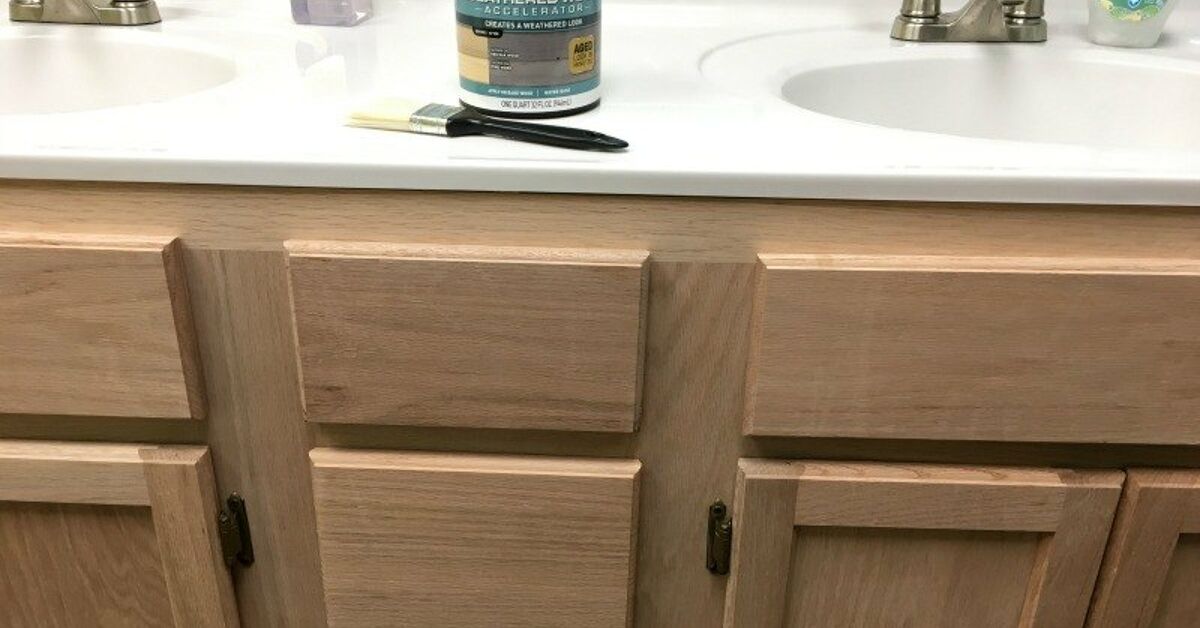
A “basic” cabinet is like a plain bagel: totally fine, but it’s begging for a little flavor. A rustic cabinet, on the other hand, has personalitysoft
wear on the edges, a mellow finish that looks like it has stories, and hardware that says “I’ve seen things… like brunch.”
The good news: you don’t need a full remodel (or a woodworking apprenticeship) to get that cozy, farmhouse-rustic vibe. With smart prep, the right
finish strategy, and a little patience, you can turn a standard cabinet into something that looks vintage, warm, and intentionally imperfectin the
best way.
What “Rustic” Really Means (and Why It Works)
Rustic style is less about “perfect” and more about “believable.” Think warm wood tones, visible grain, softened edges, and subtle variation in color
that makes the piece feel lived-in. In furniture and cabinets, rustic finishes usually include one (or more) of these traits:
Common rustic finish traits
- Depth: layered color (stain + glaze, or paint + glaze) so details pop.
- Texture:</strong visible grain, wire-brushed grooves, or light saw-mark character.
- Wear:</strong gently distressed edges and corners where “hands would naturally touch.”
- Muted sheen:</strong satin or matte-leaning finishes often read more rustic than glossy.
- Hardware that matches the vibe:</strong oil-rubbed bronze, black, antique brass, or iron-look pulls.
The secret: the rustic look is usually created with contrast (dark in crevices, lighter on edges) and restraint (a little distressing
goes a long waylike hot sauce).
Choose Your Rustic Route: 3 DIY-Friendly Options
Your cabinet’s current surface matters. Solid wood behaves differently than veneer, laminate, or a factory-finished surface. Pick the method that fits
what you’re working with and how “rustic” you want to go.
Option A: Paint + Distress + Glaze (the classic rustic/farmhouse look)
This is the most “storybook rustic” approach: you paint the cabinet, lightly distress high-wear areas, then use glaze (or tinted wax) to add age and
depth in corners and details. It’s also forgiving if your cabinet isn’t pristine to begin with.
Option B: Gel stain over an existing finish (wood tone makeover without stripping)
Gel stain can sit on top of a pre-finished surface more like a tinted coating than a traditional penetrating stain. That makes it popular for updating
cabinets without fully sanding down to bare woodespecially if you want a darker, richer rustic wood tone.
Option C: Rustic texture with wire-brushing + stain or wash (best for real wood)
If your cabinet is solid wood (or you’re working with new unfinished wood), wire-brushing can emphasize grain by removing softer wood fibers. Follow
with stain, a diluted paint wash, or a layered finish for a textured, tactile rustic look.
Not sure which route fits? Here’s a quick cheat sheet: if your cabinet is laminate, go painted rustic (Option A) with a bonding primer.
If it’s already stained/finished wood and you want a wood tone change, consider gel stain (Option B). If it’s unfinished or
raw wood, texture + stain (Option C) is your playground.
Prep Like a Pro (Because Rustic Is a Style, Not a Flaking Finish)
Rustic finishes still need strong adhesion. The “old-world charm” is supposed to be intentional, not “my topcoat gave up in week two.”
1) Remove hardware and label everything
Take off doors, drawers, and knobs/pulls. Label each door and its location (painter’s tape works great). This sounds fussyuntil you try to rehang
12 doors and realize each one has its own personality.
2) Clean like you mean it
Cabinets collect invisible grime: cooking oils, hand lotion, mystery smudges. Use a degreaser suitable for painted/finished surfaces and rinse/wipe
per product directions. Let everything dry fully. Cleaning is not optional; paint and topcoats hate grease more than cats hate cucumbers.
3) Repair dings and old hardware holes
If you’re changing hardware spacing, fill old holes with wood filler, let dry, and sand smooth. For chipped edges, patch and feather the repair so it
disappears under paint or stain.
4) Scuff-sand (or degloss) for grip
For most painted rustic routes, you’re not trying to remove the entire old finishyou’re creating tooth so primer/paint can grab. Use a sanding sponge
or paper and focus on glossy areas and corners. Vacuum dust and wipe with a tack cloth or lint-free cloth.
5) Prime when needed
If you’re painting over a slick factory finish, laminate, or a stubborn stained surface, use a quality bonding primer. This step is a huge reason
“DIY rustic” can look great for years instead of months.
Step-by-Step: Basic Cabinet to Rustic (Paint + Distress + Glaze Method)
This is the most popular rustic DIY path because it creates depth and “age” fastand you can control how subtle or dramatic the result looks.
Step 1: Set your rustic “story level”
Before you start, decide how rustic you want the cabinet to feel:
- Subtle rustic: satin paint, minimal distressing, light glaze in creases.
- Medium rustic: noticeable edge wear, warm glaze tone, slightly aged hardware.
- Full farmhouse: heavier distressing, darker glaze in corners, lots of contrast.
Step 2: Prime (if needed) and let it dry
Apply primer in thin, even coats. Don’t flood cornersdrips dry into tiny mountains you’ll have to sand later. Once dry, lightly sand to knock down
texture and dust nibs, then remove dust.
Step 3: Paint the base color (2 thin coats beat 1 thick coat)
Choose a durable cabinet paint (often an enamel-style finish). Apply thin coats using a quality brush for details and a small roller for flat areas.
Let the first coat dry fully, then lightly sand if needed for smoothness, remove dust, and apply the second coat.
Color ideas that read rustic: warm whites, creamy off-whites, greige, sage, dusty navy, charcoal, or a muted “barn” tone like deep
green. Rustic is usually more “softly grounded” than “neon confident.”
Step 4: Distress with intention (edges, corners, and raised details)
Once the paint is dry (and ideally still within the early curing window), use fine sandpaper or a sanding sponge to gently rub:
- outer corners and door edges
- around knobs/pulls
- raised trim and decorative profiles
- drawer edges where hands naturally grab
The goal is selective wear. If you distress the center of every door equally, it won’t look agedit will look like you got bored and
started sanding wherever you stood.
Step 5: Add glaze for “age” and depth
Glaze is what makes rustic cabinets look like they’ve been loved for decades. Use an antiquing glaze (or mix glaze medium with a darker paint tone)
and work in small sections. Apply, then wipe back with a clean cloth until the depth looks rightleaving more glaze in corners, seams, and details.
Pro move: step back often. Glaze can look subtle up close and suddenly dramatic from across the room (like eyeliner).
Step 6: Seal for real life
If your cabinet will be touched a lot (kitchen, bath, entry), add a protective topcoat compatible with your paint/glaze. Choose a sheen that matches
your rustic goalusually satin works beautifully. Apply thin coats and follow dry-time directions. A rushed topcoat is how you get tacky doors that
feel like they’re whispering, “We should have waited.”
Step 7: Reassemble carefully and respect cure time
Paint can be dry to the touch quickly, but it takes longer to fully cure and harden. Reinstall hardware gently, avoid slamming doors for the first
stretch, and hold off on harsh cleaners while the finish toughens up.
Example: Turning a plain bathroom cabinet rustic
Let’s say you have a basic builder-grade vanity cabinet: flat doors, shiny knobs, and a finish that screams “I came free with the house.” A rustic
makeover could look like this:
- Base: warm white cabinet enamel (satin)
- Distress: light edge wear on doors and drawer corners
- Glaze: medium brown glaze wiped back so it sits in door seams
- Hardware: matte black cup pulls + matching knob
- Optional upgrade: add a thin trim frame to flat doors to mimic shaker style
The result looks custom, warmer, and intentionally styledwithout replacing the cabinet.
Alternative Rustic Method: Gel Stain for a Wood-Tone Transformation
Want rustic wood vibes without stripping to bare wood? Gel stain is often used to shift the tone of existing finished cabinetsespecially when you
want to go darker and richer. Because it tends to sit on top of the surface more than soaking in like traditional stain, prep focuses on cleaning and
scuffing for adhesion, then sealing for durability.
How to get gel stain to behave
- Clean and scuff first: oils and shine are the enemy of adhesion.
- Work thin: multiple thin passes look better than one heavy coat.
- Watch crevices: gel stain can collect in profiles and cornersbrush it out and wipe consistently.
- Topcoat matters: a durable clear coat is a must for high-touch cabinets.
Gel stain shines when your current cabinets have strong wood grain you still want to see, but you want the color to feel more rusticlike weathered
walnut, deep oak, or a warm brown that plays nicely with matte black hardware.
Alternative Rustic Method: Wire-Brushed Texture + Stain or Wash
If you’re working with solid wood (or unfinished wood), wire-brushing can create a rustic, tactile texture by emphasizing grain. After brushing with
the grain, you can stain, do a color wash (diluted paint), or layer tones for a reclaimed look.
Where wire-brushing works best
- flat panels and broad rails/stiles where grain can shine
- woods with visible grain (like oak) for high texture payoff
- projects where you want “touchable rustic,” not just “painted rustic”
Keep it controlled: the goal is texture that looks intentional, not gouges that look like a raccoon got access to your tool box.
Rustic “Glow-Up” Details That Make It Look High-End
Swap hardware (big impact, low effort)
Rustic hardware does a lot of visual heavy lifting. Consider:
- matte black bar pulls for modern farmhouse
- cup pulls for a vintage vibe
- antique brass for warm, old-world character
- iron-look knobs for a rugged rustic feel
Add trim to flat doors (instant “custom cabinet” energy)
If your cabinet doors are flat slabs, adding thin trim to create a shaker-style frame can dramatically upgrade the look before painting and glazing.
Rustic style loves simple profiles because glaze and distressing can highlight the edges beautifully.
Consider a “feature” finish inside
For a cabinet with glass doors or open shelves, paint the interior a contrasting muted tone (like charcoal or dusty green) or line the back with a
subtle beadboard panel. Rustic is cozygiving the inside a little attention helps the whole piece feel designed.
Troubleshooting: Fixes for Common Rustic Cabinet Problems
Problem: Paint scratches too easily
Usually it’s one of three things: not cleaned well enough, not sanded/deglossed enough, or insufficient cure time. Lightly sand scratches, touch up,
and add a compatible protective topcoat if you skipped it.
Problem: Glaze looks blotchy or too dark
Work in smaller sections and wipe back sooner. If it’s already dry, you may be able to soften it with a damp cloth (depending on the glaze type) or
reapply a tiny amount to re-wet and blend. Going lighter is easier than going darkerstart subtle.
Problem: Brush marks everywhere
Thin coats, quality tools, and light sanding between coats help. A small foam roller can smooth flats. Also: don’t overwork paint as it starts drying;
that’s how you get texture that looks like it’s trying to learn braille.
Problem: Sticky doors after reassembly
Paint may be dry but not cured. Give it more time. Avoid stacking doors face-to-face while curing, and keep airflow moving.
How to Care for Rustic Cabinets (So They Age Gracefully)
- Clean gently at first: avoid harsh scrubbing while the finish cures.
- Use mild cleaners: a soft cloth with gentle soap/water is usually plenty.
- Fix chips fast: keep a small touch-up kit (paint + tiny brush) so little damage doesn’t spread.
- Protect high-wear areas: add bumpers to doors and drawers to reduce impact.
Rustic finishes are forgiving, but the best rustic cabinets still have a protective backbone.
Real-World Experiences: What DIYers Usually Learn the Hard Way (So You Don’t Have To)
If you’ve never taken a cabinet from basic to rustic before, here’s the part nobody tells you: the project is less about the “cute finish” and more
about the tiny, unglamorous moments that decide whether your cabinet looks charming or chaotic.
First, most people are surprised by how much labeling matters. In theory, every door seems identical. In reality, cabinets are like a
friend groupeveryone looks similar until you mix up their seats and suddenly nothing fits right. DIYers often say the best five minutes they spent
was sticking tape labels on doors, writing “Top Left,” “Bottom Right,” and even marking hinge positions. When reassembly day comes, it feels like you
gave your future self a thoughtful gift.
Next comes the cleaning reality check. A cabinet that looks “not that dirty” can still be coated in oils that repel paint and primer.
DIYers often start confident, then watch their finish fish-eye or peel in test spotsand that’s when the degreaser becomes the hero of the story.
Many people end up cleaning twice: once to remove grime, and again after sanding to remove dust. It feels excessive until you see how much smoother
the paint lays down.
Then there’s the moment you discover that rustic is an art of restraint. Most DIYers over-distress their first door. They sand too much
in the middle (because it’s easy) instead of focusing on edges and corners (where wear would naturally happen). The fix is simple: step back, look at
the door from across the room, and ask, “Would a human hand actually wear this spot?” When distressing follows real-life logic, it looks authentic.
When it doesn’t, it looks like a bored beaver did it.
Glaze creates another learning moment: it looks different depending on lighting and distance. DIYers often report that glaze seems subtle up close,
but suddenly reads “muddy” from ten feet away. The best workaround is to glaze one door fully, let it dry, then evaluate it in the room’s normal
lighting before committing to the whole cabinet. People who test first almost always end up with a more polished rustic lookbecause they adjust the
wipe-back timing, choose a warmer or cooler glaze tone, or simply use less.
Finally, the biggest “aha” experience is cure time. DIYers love the moment it looks donethen they rehang doors too soon, tighten
hardware aggressively, or stack pieces while the finish is still soft. That’s when fingerprints and tacky spots happen. The folks who get the most
durable results treat curing like the last step of the project: they wait longer than they want to, handle pieces gently, and avoid harsh cleaning for
a bit. It feels slow, but it’s what turns “pretty for a week” into “still looks great next year.”
If you remember only one thing from other DIYers’ experiences, make it this: rustic cabinets look relaxed, but the process isn’t sloppy. The charm is
intentionaland once you build that foundation with prep, patience, and a light hand, your cabinet ends up looking like a piece with history (even if
it was basic last Tuesday).













