
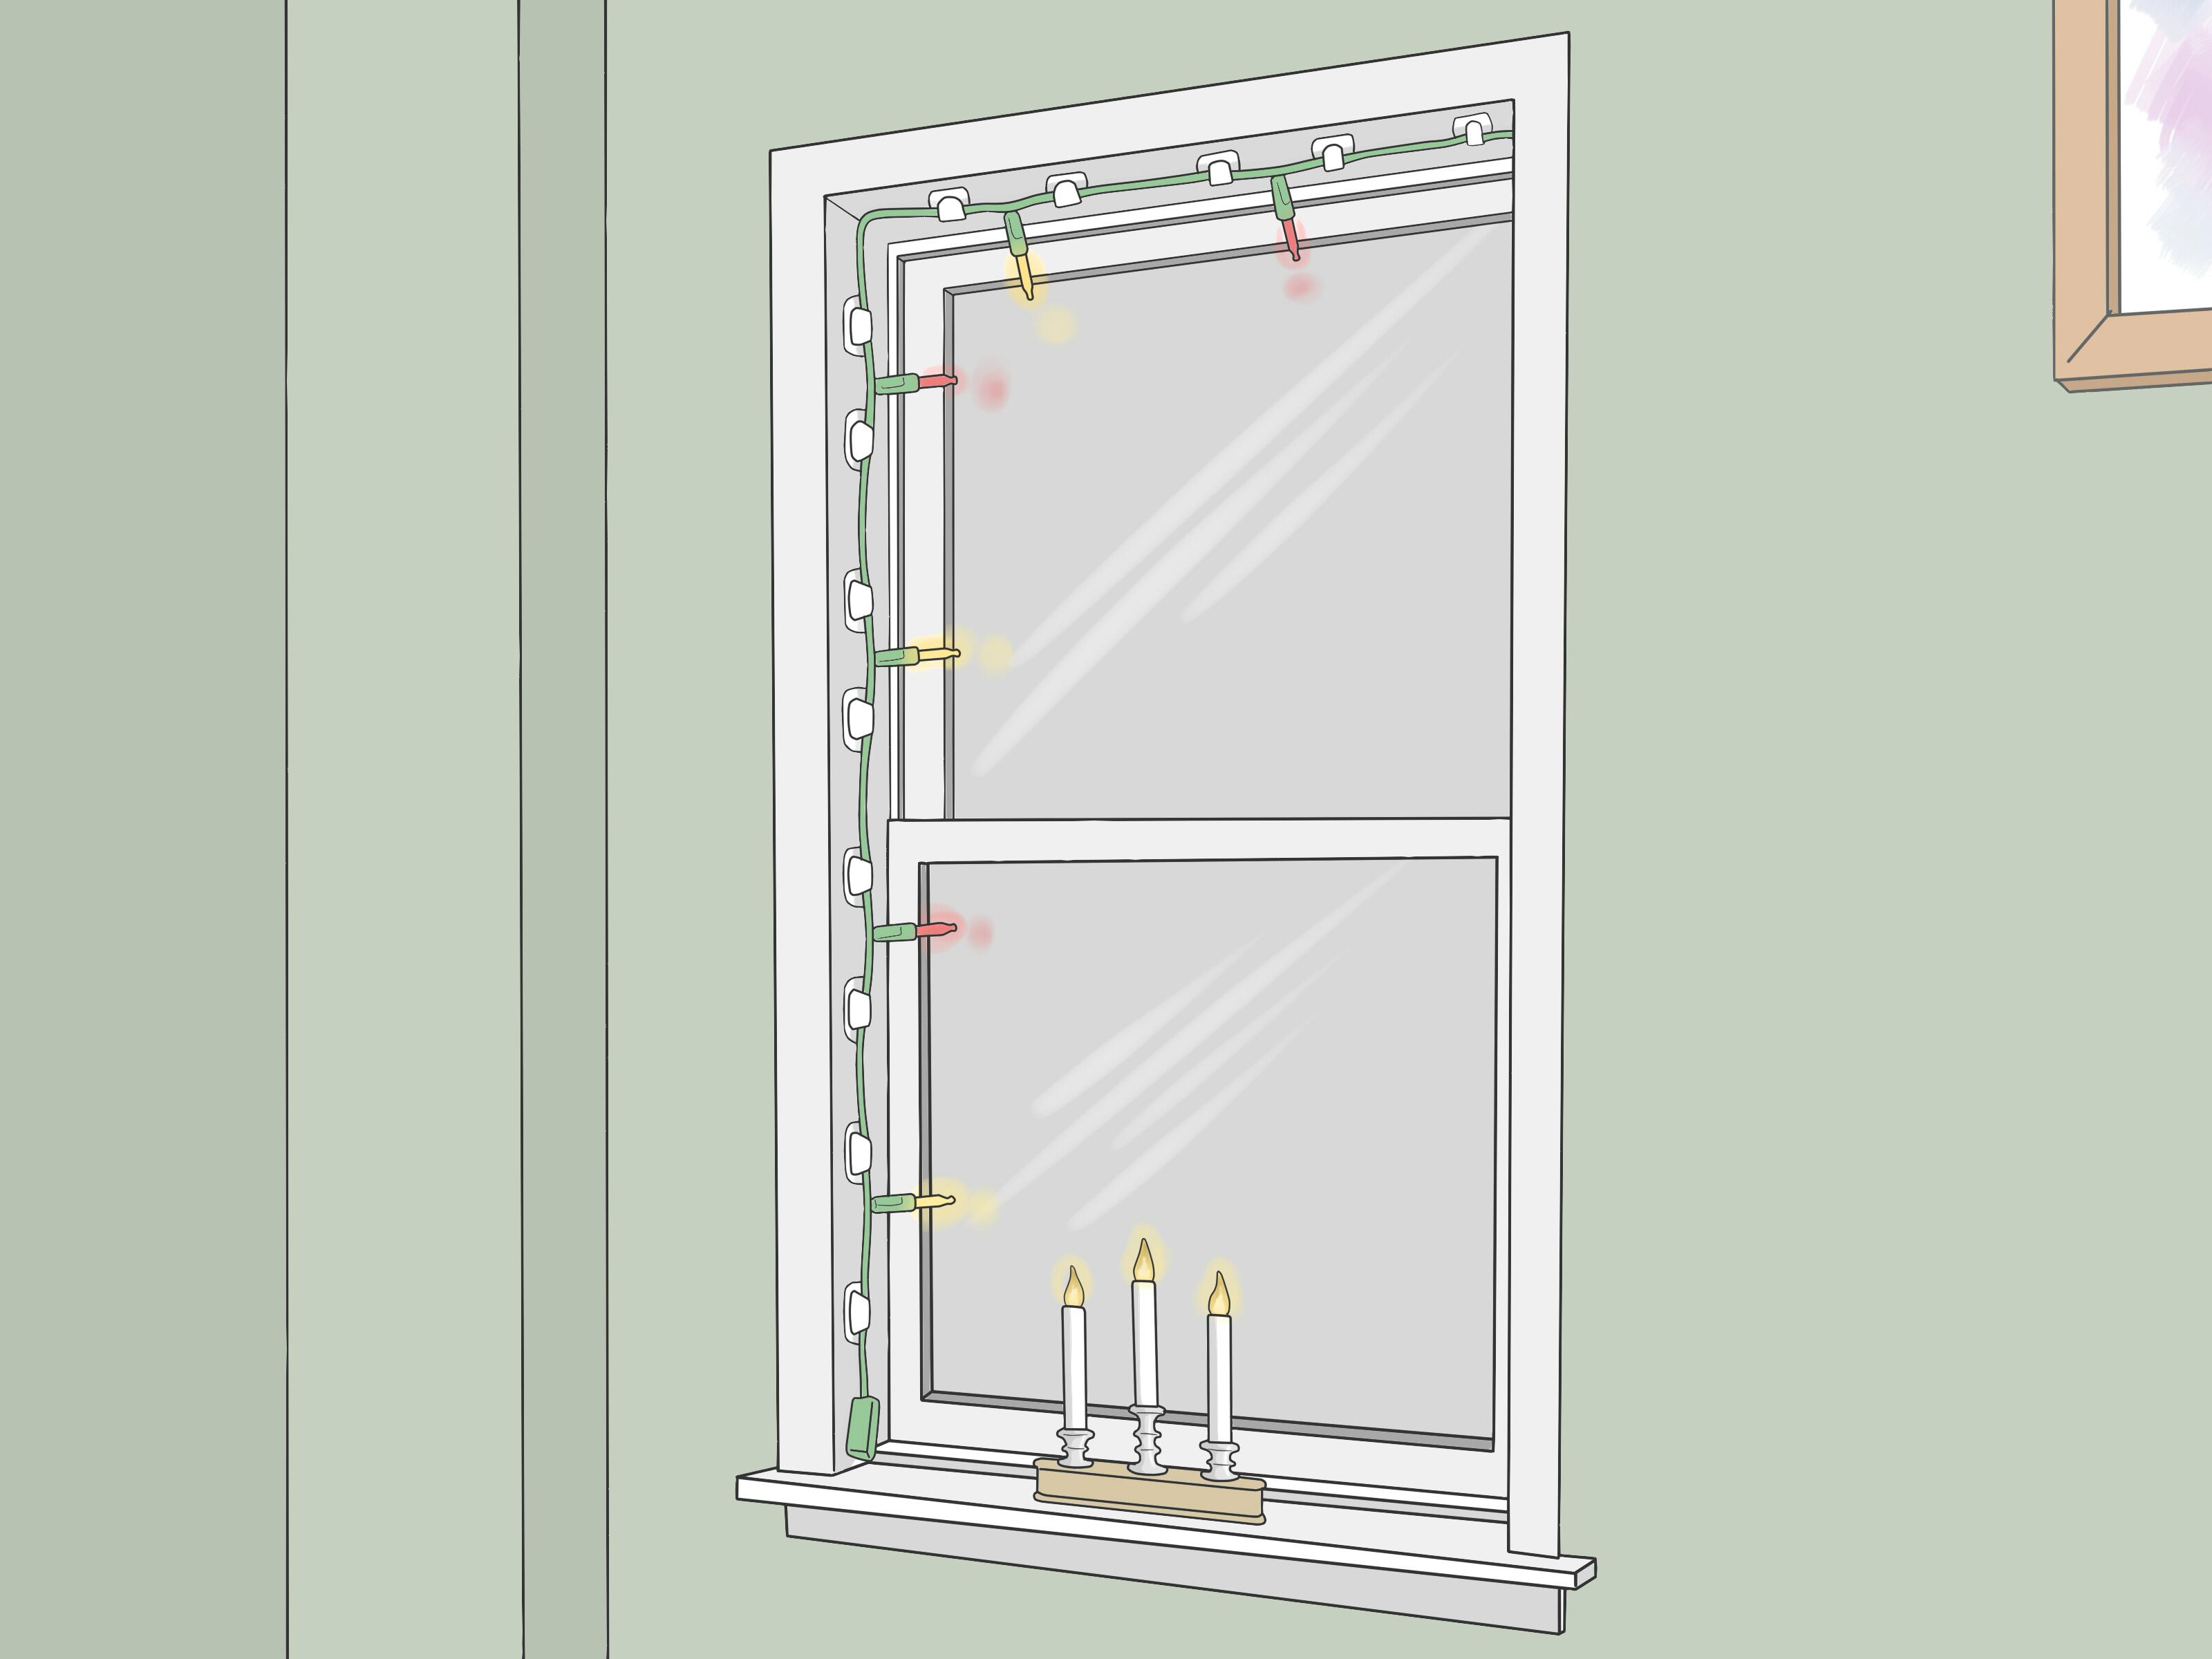
Hanging Christmas lights inside windows gives your home a cheerful glow without requiring a ladder, frozen fingers, or a dramatic rescue from the roof. Better still, an indoor window display can be enjoyed from both sides of the glass: neighbors see the sparkle outside, while you get a cozy holiday atmosphere indoors.
The project is simple, but a professional-looking result requires more than tossing a strand over the curtain rod and hoping gravity develops some Christmas spirit. You need the right lights, accurate measurements, secure mounting points, and a sensible plan for hiding the cord.
This tutorial explains how to hang Christmas lights inside windows using adhesive clips, suction cups, or an existing curtain rod. It also covers electrical safety, design ideas, troubleshooting, and practical lessons that help the display remain straight, bright, and securely attached throughout the holiday season.
Why Hang Christmas Lights Inside Windows?
Outdoor Christmas lighting looks wonderful, but it can involve wet extension cords, icy ladders, unpredictable weather, and a suspicious amount of time spent untangling wires in the driveway. Hanging lights inside the window avoids most of those problems.
An indoor installation offers several advantages:
- The lights are protected from rain, snow, wind, and temperature changes.
- You can install and remove them from the comfort of your home.
- Adhesive clips and suction cups can create a damage-free display.
- The lights decorate both the interior and exterior view of the window.
- Indoor outlets are usually easier to reach and control with a timer.
This approach is especially useful for apartments, rental homes, upper-story windows, dorm rooms, and houses where exterior decorating is restricted. It is also ideal for anyone who believes holiday decorating should not require mountaineering equipment.
Supplies You Will Need
Gather everything before beginning so you do not have to balance on a step stool while searching for one missing clip. For most window-lighting projects, you will need:
- Indoor-rated or indoor/outdoor LED Christmas lights
- A tape measure
- Clear adhesive decorating clips or light clips
- Clear suction cup hooks or clips, if mounting directly on glass
- Rubbing alcohol and a lint-free cloth
- Painter’s tape for temporarily marking the layout
- A stable step stool or stepladder
- An indoor-rated extension cord, if necessary
- A plug-in timer or compatible smart plug
- Reusable twist ties for managing excess wire
Choose LED Christmas Lights When Possible
LED holiday lights are generally the easiest choice for indoor windows. They use considerably less electricity than traditional incandescent strands, produce less heat, and are available in numerous colors, bulb shapes, and lighting modes.
Mini LED lights create a classic window outline, while micro fairy lights give the display a softer, more delicate appearance. Curtain lights work well for large picture windows, and battery-operated strands can be useful where no nearby outlet is available.
Before using any strand, confirm that it is labeled for indoor use and carries certification from a recognized safety-testing organization. Inspect the plug, sockets, insulation, and wires. Retire any strand with exposed conductors, cracked sockets, scorched areas, or loose electrical connections. Christmas nostalgia is lovely; electrical nostalgia is less charming.
Step 1: Measure the Window and Plan the Design
Start by deciding what shape the lights will create. The most common arrangement is a simple outline around the inside edge of the window frame. You can also create a glowing curtain, a scalloped design, a Christmas tree shape, or a row of hanging stars.
For a Basic Window Outline
Measure the width and height of the area you want to illuminate. For a complete rectangle, calculate the perimeter using this formula:
(Window width × 2) + (Window height × 2) = required lighted length
For example, a window measuring 4 feet wide and 5 feet tall has a perimeter of 18 feet. Choose a strand with at least 18 feet of lighted length, plus enough unlit lead wire to reach the outlet.
Do not rely only on the total strand length printed on the package. Some products include several feet of unlit cord between the plug and the first bulb. Check both the lighted length and the overall length.
Locate the Power Source
Identify the nearest suitable outlet before choosing your starting corner. In most cases, beginning at the lower corner closest to the outlet makes the power cord easier to hide.
Keep cords away from walkways, heaters, moving window parts, and places where furniture could crush them. Never close a window tightly over an electrical cord. The pressure can damage the insulation, even when the cord initially appears unharmed.
Step 2: Test and Untangle the Lights
Lay the strand on the floor and gently untangle it before installation. Plug it in and check every section. Test flashing modes, dimming controls, remotes, and timers while the lights are still within easy reach.
Replacing a faulty strand takes two minutes when it is on the floor. Discovering the problem after installing 24 perfectly spaced clips feels more like a holiday-themed character-building exercise.
Unplug the lights again before mounting them. Electrical decorations should remain disconnected while you are adjusting bulbs, attaching clips, or handling damaged sections.
Step 3: Clean the Mounting Surface
Adhesive clips and suction cups need a clean, smooth surface. Dust, grease, glass cleaner residue, and condensation can weaken their grip.
- Wipe the window glass or frame with a dry cloth.
- Clean the exact attachment points with rubbing alcohol.
- Allow the surface to dry completely.
- Avoid applying adhesive to damp, dusty, peeling, or freshly painted surfaces.
Follow the mounting-product instructions regarding surface compatibility and waiting time. Some adhesive strips need time to bond before weight is added. Attaching the lights immediately may work for ten minutes and then produce a tiny plastic avalanche during dinner.
Step 4: Choose the Best Hanging Method
There are three reliable ways to hang Christmas lights inside windows. The best option depends on the window material, the light strand’s weight, and whether you want the lights on the glass or around the frame.
Method 1: Clear Adhesive Light Clips
Clear adhesive clips are the most versatile option for painted trim, sealed wood, tile, metal, and other compatible smooth surfaces. They are small, nearly invisible after dark, and designed to hold lightweight cords without nails or screws.
- Use painter’s tape to mark evenly spaced clip positions.
- Place clips approximately 8 to 12 inches apart.
- Add clips near every corner to prevent sagging.
- Install the adhesive strips according to the manufacturer’s directions.
- Wait for the required bonding period.
- Press the light wire gently into each clip.
Attach the wire, not the bulb or socket, unless the clip is specifically designed to hold that bulb style. Do not stretch the strand tightly. Leave a small amount of slack so the wire is not pulling continuously against the clips.
This method works particularly well for creating a crisp rectangular border around the inside window casing.
Method 2: Suction Cup Hooks on Glass
Suction cup clips are useful when you do not want adhesive on painted trim. They work best on clean, flat, nonporous glass.
- Clean and dry the glass thoroughly.
- Inspect each suction cup for warping or cracks.
- Press the cup firmly against the glass to remove trapped air.
- Space the cups close enough to prevent the wire from drooping.
- Insert the light wire into the hook or center slot.
A tiny amount of water can sometimes help a basic suction cup form a seal, but follow the product’s instructions rather than improvising with oil, glue, or mystery substances from the junk drawer.
Suction cups can lose their grip when the glass is dirty or exposed to substantial temperature changes. Check them occasionally, especially during the first day. Use more clips than the bare minimum so one loose cup does not bring down an entire side of the display.
Method 3: Curtain Rod or Tension Rod
If your window has curtains, a curtain rod can support lightweight Christmas lights without placing anything on the glass or frame. This method is excellent for fairy lights, icicle lights, and curtain-style strands.
- Remove the curtain rod if necessary.
- Loop the light strand loosely around the rod or attach it with reusable twist ties.
- Space the hanging sections evenly.
- Reinstall the rod and adjust the drops.
- Keep the plug and controller accessible.
A removable tension rod can also be fitted inside the window recess. Wrap or tie the lights to the rod, then position it near the top of the window. This creates a clean installation that can be removed as one piece after Christmas.
Do not wrap lights tightly around curtain fabric, and keep bulbs away from paper shades, dried greenery, and other combustible decorations.
Step 5: Hang the Lights Neatly
Begin at the corner closest to the outlet. Work upward, across the top, down the opposite side, and across the bottom if you are creating a complete outline.
Insert the wire into each clip as you go. Do not install the entire strand loosely and attempt to straighten it afterward; that usually produces uneven spacing and a collection of accidental loops.
At corners, use an extra clip on each side of the turn. Avoid making a sharp bend directly at a bulb socket. A gentle curve reduces stress on the wire and creates a cleaner appearance.
Step back every few feet and inspect the display from across the room. It is much easier to correct a sagging section before reaching the final corner.
Step 6: Manage the Power Cord
Once the lights are positioned, route the unlit lead wire toward the outlet. Clear cord clips can guide it down the side of the window frame or along a baseboard.
Keep the cord visible enough to inspect but unobtrusive enough that it does not distract from the display. Never place an electrical cord under a rug, through a doorway, beneath heavy furniture, or where people may trip over it.
When an extension cord is required, use one that is rated for indoor use and capable of handling the connected load. Do not connect multiple extension cords end to end. Avoid overloaded outlets, crowded adapters, and improvised plug arrangements that look as though they were designed by a caffeinated octopus.
Step 7: Add a Timer or Smart Plug
A plug-in timer automatically turns the window lights on in the evening and off later at night. A compatible smart plug may also provide scheduling, remote control, or voice-assistant functions.
A typical schedule might run the lights from 5:00 p.m. until 11:00 p.m. This provides several hours of illumination without leaving them operating throughout the night.
Make sure the timer or smart plug is rated for the light strand’s electrical requirements. Keep control devices uncovered and in an accessible, ventilated location.
Christmas Window Light Design Ideas
Classic Warm-White Border
Outline the window with warm-white mini LEDs. This timeless design complements wreaths, garlands, candles, and traditional Christmas decorations without making the room resemble a game-show set.
Multicolor Family Display
Use red, green, blue, and yellow lights around children’s bedroom or playroom windows. Choose a slow twinkle mode rather than rapid flashing when the lights will be visible from inside the room.
Fairy-Light Curtain
Hang vertical strands from a curtain rod or tension rod. Add lightweight paper snowflakes between the strands for a layered winter scene.
Christmas Tree Silhouette
Arrange a flexible fairy-light strand in a triangular tree shape on a large window. Use clear clips to form the outline, then add a short vertical section for the trunk.
Lighted Garland Frame
Combine LED string lights with lightweight artificial garland around the window trim. Support the garland independently so its weight does not pull on the electrical wire.
Essential Safety Tips
- Use lights that have been tested by a recognized safety organization.
- Inspect every light strand and extension cord before installation.
- Discard damaged strands rather than repairing exposed wiring with household tape.
- Use plastic hooks or approved light clips instead of nails, tacks, or metal staples.
- Follow the manufacturer’s limit for connecting multiple strands.
- Keep cords from being pinched by windows, doors, or furniture.
- Keep lights and cords away from space heaters, fireplaces, candles, and heat vents.
- Use a stable step stool or ladder on a level surface.
- Keep children and pets away from plugs, controllers, and loose cords.
- Turn off the lights before leaving home or going to sleep.
Holiday light strings are temporary decorations. Even when a strand is operating normally, inspect the installation throughout the season for loose clips, warm plugs, damaged wires, or discoloration around an outlet.
Common Problems and Easy Fixes
The Adhesive Clips Keep Falling
Remove the failed strips and clean the surface again with rubbing alcohol. Confirm that the clips are compatible with the surface and that the room is within the recommended installation temperature. Add more clips to distribute the strand’s weight.
The Suction Cups Will Not Stick
Wash both the glass and suction cups, then dry them carefully. Replace any cups that have become stiff, curled, or distorted. Suction cups generally perform poorly on textured, frosted, or uneven glass.
The Lights Sag Between Clips
Reduce the spacing between support points. Lightweight fairy lights may look attractive with deliberate curves, but a window outline usually looks better when the wire follows the frame consistently.
Part of the Strand Is Dark
Unplug the lights and check the manufacturer’s troubleshooting instructions. Depending on the design, the cause may be a loose bulb, a failed fuse, a damaged socket, or an internal wiring problem. Replace the entire strand when damage is visible or the cause cannot be identified safely.
The Lights Create Too Much Reflection
Move the strand closer to the glass or reduce the brightness if the lights are dimmable. Turning off nearby room lamps can also improve the exterior appearance. Darker curtains behind the display may make the lights more visible from outside.
How to Remove and Store the Lights
Unplug the strand before taking it down. Support the wire with one hand while releasing each clip so the lights do not fall or pull against the remaining attachment points.
Remove adhesive strips exactly as directed. Many stretch-release products must be pulled slowly in a particular direction. Pulling outward instead of along the surface can damage paint or break the tab.
Wipe suction cups clean and store them flat. Wrap each light strand around a piece of sturdy cardboard, a cord reel, or a purpose-made light storage spool. Label the strand with the window location and required mounting supplies.
Next December, “living room window18 feet20 clear clips” will be far more useful than opening a box labeled “Christmas stuff” and meeting a glowing wire knot the size of a fruitcake.
Experience-Based Lessons for Better Window Lighting
The most successful indoor window displays are rarely the most complicated. In real-world decorating situations, careful preparation consistently matters more than the number of bulbs. A basic strand installed neatly usually looks better than an elaborate arrangement held together by three tired suction cups and holiday optimism.
Measure the Actual Route, Not Just the Window
One common mistake is measuring the glass but forgetting that the lights will follow the outer frame, curve around corners, or travel several feet to the outlet. The package may claim a strand is 20 feet long, but part of that length can be unlit lead wire. Planning with the lighted length prevents an awkward gap near the final corner.
A useful approach is to trace the proposed route with a flexible measuring tape or a piece of string. Measure the string afterward and add a modest allowance for corners and slack.
More Support Points Create a Cleaner Result
Using too few clips saves several minutes during installation but often creates sagging lines later. The top edge of the window usually needs the most support because gravity is pulling the entire strand downward. Corners also deserve extra clips because the wire naturally tries to straighten itself.
For lightweight mini lights, spacing clips roughly 8 to 12 inches apart is often a practical starting point. Heavier decorative bulbs may require closer spacing or mounting hardware specifically designed for their size and weight.
Install During Daylight, Judge the Display at Night
Daylight makes it easier to clean the frame, align clips, and spot damaged wires. However, the final design should also be evaluated after dark. A strand that appears slightly uneven during the day may look perfectly balanced when illuminated, while reflections can reveal areas that need adjustment.
View the window from indoors and outdoors. This helps identify exposed extension cords, bright controllers, twisted bulbs, or curtains that block part of the display.
Warm White and Cool White Are Not the Same
Mixing white-light strands from different manufacturers can create an accidental patchwork of yellow, blue, and almost-purple tones. When using multiple sets in the same window or room, test them together before installation.
Warm-white lights generally create a traditional, comfortable appearance. Cool-white lights produce a crisp, icy look that works well with silver ornaments, snowflakes, and modern decor. Neither is automatically better, but consistency makes the display feel intentional.
Keep Controls Easy to Reach
Remote receivers, mode buttons, transformers, and timers should not be buried behind heavy furniture or trapped between the window and curtain. You will probably need to adjust them at least once during the season. Positioning the controller near the lower corner of the window simplifies troubleshooting.
Use Restraint With Flashing Modes
Animated settings can be entertaining, but rapid blinking becomes distracting when the window is beside a television, desk, or bed. Slow fades, gentle twinkles, and steady illumination tend to be easier to live with during several weeks of nightly use.
The goal is a welcoming Christmas window, not an emergency landing zone for Santa’s sleigh.
Conclusion
Learning how to hang Christmas lights inside windows is a manageable holiday project that can transform a room in less than an afternoon. Measure the window, test the lights, clean the mounting surface, and select a hanging method suited to the glass or frame. Clear adhesive clips create sharp outlines, suction cups attach directly to smooth glass, and curtain or tension rods support cascading displays without permanent fasteners.
For the safest and cleanest result, choose certified LED lights, avoid damaged wires, protect cords from pressure and foot traffic, and turn the display off when you leave home or go to sleep. Add a timer, straighten the final arrangement, and enjoy a window that looks festive from the sofa and the sidewalk.










