
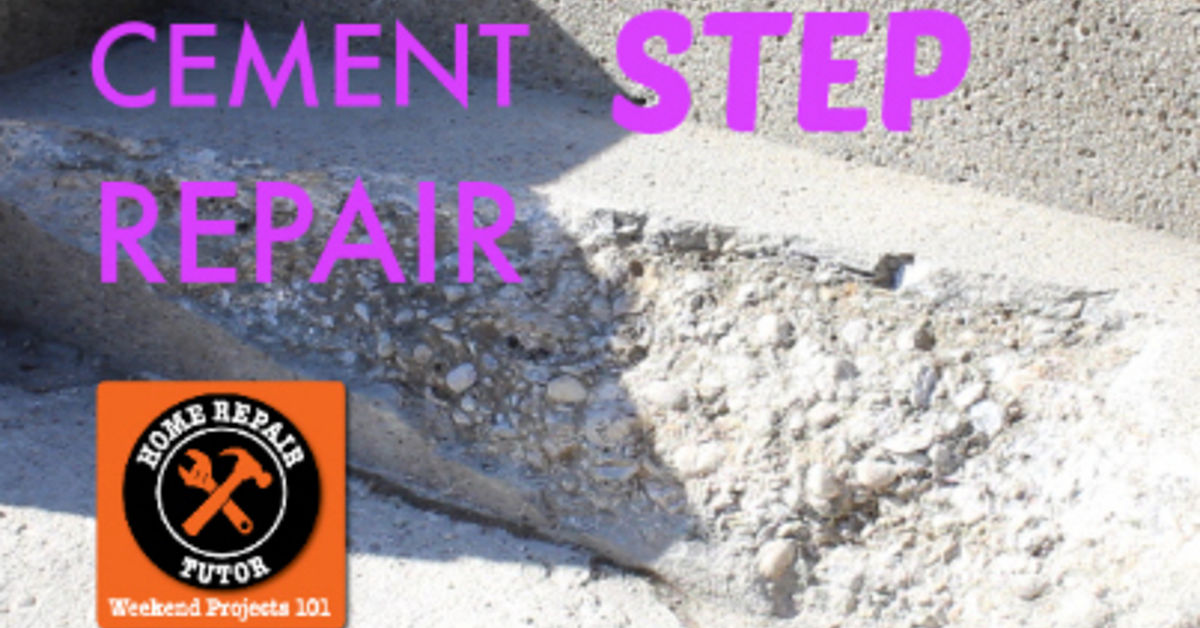
A chipped front step has a remarkable talent for making an otherwise handsome house look tired. The lawn may be trimmed, the door freshly painted, and the porch decorated like a magazine cover, but that crumbling concrete corner still announces, “We have postponed this project since three presidents ago.”
Fortunately, many cosmetic step problems can be repaired in a single day. Small cracks, shallow pits, worn surfaces, and broken edges are often manageable with basic masonry tools and a fast-setting repair compound. You may complete the hands-on work before dinner, although the repaired area will still need protected curing time before it can handle normal traffic.
Technically, most “cement steps” are concrete steps. Cement is the powdered binding ingredient, while concrete combines cement, water, sand, and aggregate. Homeowners commonly use both terms, so this guide uses cement step repair and concrete step repair where they sound natural.
Concrete and cement distinction informed by industry guidance.
Can Your Concrete Steps Be Repaired?
Before grabbing a trowel, determine whether you are dealing with surface deterioration or structural movement. A repair compound can restore missing material, but it cannot persuade a sinking staircase to reconsider its life choices.
Good Candidates for a DIY Repair
A one-day DIY repair may be appropriate when the steps are stable and the damage is limited to:
- Small chips along a tread or riser
- A broken corner that has not exposed badly corroded reinforcement
- Shallow pitting or surface scaling
- Narrow, nonmoving cracks
- A worn surface that needs a thin resurfacing coat
- Minor cosmetic damage caused by weather or impact
When to Call a Professional
Stop and consult a qualified concrete or masonry contractor if the steps are sinking, leaning, separating from the house, rocking underfoot, or showing wide cracks that continue through multiple steps. Rust stains, exposed reinforcing steel, major voids, or repeated cracking after previous repairs can also indicate a deeper problem.
A surface patch is not a structural cure. Resurfacing can improve appearance and protect sound concrete, but it will not stabilize a failed base or correct ongoing soil movement. When in doubt, choose safety over cosmetic optimism.
Professional evaluation is recommended for settling and structural damage.
Why Concrete Steps Chip and Crumble
Concrete is durable, but outdoor steps live a difficult life. They absorb rain, endure temperature swings, collect ice, support heavy foot traffic, and occasionally meet an enthusiastic snow shovel at full speed.
Common causes of deterioration include:
- Freeze-thaw cycles: Water enters porous concrete, freezes, expands, and gradually breaks away surface material.
- Deicing chemicals: Some salts can accelerate scaling and surface damage.
- Poor drainage: Water that repeatedly collects on or beside the steps increases deterioration.
- Impact damage: Shovels, hand trucks, lawn equipment, and dropped objects can break vulnerable edges.
- Weak original concrete: Excess mixing water, inadequate curing, or improper finishing can produce a fragile surface.
- Movement beneath the steps: Eroded or settling soil can create cracks that no surface patch will permanently stop.
Repairing the visible damage is useful, but correcting the cause is even better. Redirect downspouts, improve drainage, limit harsh deicers, and address moving soil before expecting a patch to last.
Freeze-thaw damage, moisture, and deicing salts are recognized causes of scaling and deterioration.
Tools and Materials for Cement Step Repair
You will not need a truckload of equipment. For a typical chipped edge or shallow surface repair, gather:
- Safety glasses
- Waterproof work gloves
- Dust control equipment appropriate for the work
- Hammer and cold chisel
- Stiff masonry brush or wire brush
- Shop vacuum
- Bucket and clean mixing water
- Margin trowel, pointing trowel, or putty knife
- Finishing trowel
- Small piece of lumber for an edge form
- Screws, clamps, or strong tape for holding the form
- Concrete bonding agent or acrylic fortifier, when required
- Fast-setting concrete repair mortar
- Plastic sheeting for curing protection
Read the repair product label before starting. Some polymer-modified compounds bond directly to prepared concrete, while others require a separate bonding liquid. Mixing and installation instructions are not decorative suggestions. They are the difference between a durable patch and a concrete cracker that jumps off the step next spring.
A Safety Note About Concrete Dust
Cutting, grinding, drilling, or aggressively chiseling concrete can create dust containing respirable crystalline silica. Avoid dry grinding whenever possible, control dust at the source, keep other people away from the work zone, and use suitable protective equipment. A simple paper nuisance mask should not be treated as a universal solution for heavy masonry dust.
NIOSH warns that concrete grinding can generate high exposures to respirable crystalline silica.
Choose the Right Day for the Job
Plan the repair for dry, moderate weather. Exact temperature limits vary by product, so follow the manufacturer’s instructions rather than trusting a generic rule. Avoid starting immediately before rain, freezing temperatures, or intense afternoon heat.
Direct sun and strong wind can pull moisture from the repair too quickly. On a hot day, work during the cooler morning hours and shade the steps when practical. On a chilly day, confirm that both the air and the concrete surface fall within the product’s approved temperature range.
How to Repair Concrete Steps in One Day
Step 1: Inspect and Mark the Damage
Tap around the damaged area with the handle of your hammer. Solid concrete usually produces a sharper sound, while loose or delaminated material may sound hollow. Mark the questionable area with chalk.
Look beyond the obvious chip. A small missing corner may be surrounded by weak material that must also be removed. Patching over crumbling concrete is like frosting a collapsing cake: visually ambitious, structurally disappointing.
Step 2: Remove Loose Concrete
Put on eye protection and gloves. Use a cold chisel and hammer to remove every loose, flaking, or unsound fragment. Work carefully so you do not enlarge the repair unnecessarily.
For a broken edge, shape the repair area so the patch has something substantial to grip. A slightly undercut or irregular interior is generally better than a shallow, feather-thin cavity. Avoid leaving fragile concrete beneath the new material.
If the damaged area keeps growing as you chisel, pause. Extensive hidden deterioration may require a larger repair or professional evaluation.
Step 3: Clean the Repair Area Thoroughly
Vacuum loose dust and debris. Scrub the cavity with a stiff brush, paying attention to corners and small pockets. Remove dirt, oil, paint, algae, old filler, and anything else that can interfere with bonding.
Rinse when permitted by the product instructions. Some cement-based patches are placed on a damp, surface-dry substrate, meaning the old concrete is moist but has no standing water. Other products require a dry surface. The label wins this argument every time.
Surface preparation is the least glamorous part of the job and the most important. A five-minute cleaning shortcut can produce a five-month repair.
Manufacturers consistently emphasize removal of loose material and thorough surface preparation.
Step 4: Install a Form for Broken Corners
If you are rebuilding a step edge or corner, attach a straight piece of lumber along the vertical face. For a corner, join two boards at a right angle to create an L-shaped form.
Position the boards flush with the original step surfaces. Secure them firmly with clamps, screws, or strong tape. Apply an approved form-release material only if recommended. Keep release material away from the exposed concrete because contamination can weaken the bond.
Step 5: Apply the Bonding Treatment
Apply a concrete bonding agent, primer, or acrylic fortifier if the chosen repair system requires one. Some products must be placed while the bonding coat is tacky; others require it to dry first. Do not assume all bonding products behave the same way.
For small vertical repairs, polymer-modified or rapid-setting mortars are especially convenient because they can hold their shape rather than sliding down the riser like sad gray pudding.
Step 6: Mix a Small Batch
Measure the water instead of pouring by eye. Too much water can make the compound easier to spread but may reduce strength, increase shrinkage, and encourage cracking.
Mix only as much fast-setting material as you can place within its working time. Some rapid repair products begin firming in minutes. Prepare the form, tools, water, and cleanup area before mixing. Once the clock starts, it does not care that you misplaced your trowel.
For a horizontal patch, the mixture may be workable and spreadable. For a vertical edge, a stiffer, putty-like consistency is usually easier to shape. Always stay within the product’s permitted water ratio.
Step 7: Pack the Repair Compound Firmly
Use the trowel to press material into every recess. Apply firm pressure to eliminate voids, especially along the boundary between the old concrete and the repair.
For deep repairs, build the patch in layers when required by the manufacturer. Some compounds allow thick placement in one pass; others specify maximum lift thicknesses. Applying a thin-patch product several inches deep is an excellent way to create an expensive removable sculpture.
Step 8: Shape and Blend the Surface
Overfill the repair slightly, then use a straightedge or trowel to bring it level with the surrounding step. Re-create the original nose, corner, or riser line while the compound remains workable.
Feather the boundary only as thinly as the product allows. Some repair mortars can taper to a thin edge, while others require a minimum thickness. A patch that becomes too thin at the perimeter is vulnerable to chipping.
Step 9: Match the Existing Texture
A perfectly smooth patch on a broom-textured step can look like a shiny island in a gray ocean. It may also become slippery when wet.
When the material has stiffened enough to hold texture, lightly drag a damp masonry brush or finishing broom across the surface. Follow the direction of the existing texture. For subtle blending, dab the surface with a sponge or brush instead of making aggressive strokes.
Step 10: Remove the Form at the Proper Time
Rapid-setting repair products can harden quickly, but “hard to the touch” does not necessarily mean ready for abuse. Remove the form only when directed. Taking it off too soon can pull away the corner; leaving it too long can make removal difficult.
After removing the form, use a trowel or rubbing stone, when permitted, to soften any sharp ridge and blend the repair.
Step 11: Protect the Repair While It Cures
Keep people, pets, packages, bicycles, and delivery carts away from the steps for the required period. Block the area clearly rather than assuming everyone will notice wet concrete through intuition.
Covering the repair with plastic can help limit rapid moisture loss when recommended by the manufacturer. Protect it from rain, freezing, direct sun, and strong wind. Although a rapid-setting product may permit foot traffic the same day, the material can continue gaining strength afterward.
Moisture retention supports cement hydration; recognized methods include plastic coverings and other evaporation-control measures.
Repair Methods for Different Types of Damage
Hairline and Narrow Cracks
Clean the crack and use a repair material designed for its width, depth, location, and expected movement. Rigid cement-based fillers work best where the crack is stable. Flexible masonry sealants may be more appropriate for joints or cracks that experience minor movement.
Do not merely smear compound across the top of a dirty crack. The repair should reach the prepared interior and bond to clean surfaces.
Chipped Step Edges
Remove unsound material, establish a solid repair cavity, and use a moldable rapid-setting mortar suitable for vertical or overhead placement. A form can help produce a crisp line, but many stiff repair mortars can also be sculpted by hand with a trowel.
Shallow Pits and Surface Scaling
Scattered shallow defects may be filled individually. If most of the tread is worn but the underlying step remains sound, a compatible concrete resurfacer can create a more uniform appearance.
Resurfacing requires extensive cleaning and proper surface profile. It should not be used to conceal unstable cracks or loose layers. Any weak concrete beneath the coating will eventually become weak concrete wearing a newer outfit.
Deep Voids or Exposed Reinforcement
Deep repairs require a structural repair mortar approved for the necessary thickness. Exposed steel may need cleaning and corrosion treatment. Because reinforcement damage can affect structural performance, larger repairs are best evaluated by a professional.
Common Concrete Step Repair Mistakes
Patching Over Loose Material
The new compound bonds to whatever remains beneath it. If that layer is dusty, painted, oily, or crumbling, the patch may detach with it.
Adding Too Much Water
A soupy mix may feel cooperative, but convenience comes at a price. Follow the specified water ratio and mix consistently.
Mixing Too Much Fast-Setting Mortar
Small batches provide more control. A bucket of material that hardens before placement is not a repair product anymore. It is an unusually heavy bucket liner.
Ignoring Weather Conditions
Rain can wash or discolor fresh material. Heat and wind can cause rapid drying. Cold weather can delay strength development or damage a repair that freezes too early.
Making the Surface Too Smooth
Exterior steps need traction. Match the surrounding texture instead of polishing the tread like a kitchen countertop.
Expecting a Cosmetic Patch to Stop Movement
If a crack is caused by settlement, frost heave, or poor support, it may return. Correct the movement before repeatedly filling the same opening.
How to Improve Curb Appeal After the Repair
A fresh patch may be lighter or darker than the surrounding concrete. Color differences often become less noticeable as the material cures and weathers, but an exact match is difficult because old concrete has years of exposure, dirt, and surface wear.
For a more unified finish, consider resurfacing the entire tread or complete set of sound steps with a compatible exterior product. Concrete stain or masonry coating may also improve consistency, but only after the repair has cured for the period, but only after the repair has cured for the period required by both the repair compound and the coating manufacturer.
Finish the makeover by cleaning nearby railings, edging the walkway, replacing a worn doormat, and trimming vegetation. Suddenly the repaired step is no longer the entire project; it is simply the part that makes everything else look intentional.
How to Help the Repair Last
- Keep gutters and downspouts from discharging onto the steps.
- Seal gaps where water can collect beside the staircase.
- Remove snow with tools that will not gouge concrete edges.
- Use deicing products cautiously and follow concrete-safe recommendations.
- Consider a breathable exterior concrete sealer when appropriate.
- Repair small chips before water enlarges them.
- Inspect repaired areas after the first winter.
Experience Notes: What One-Day Step Repairs Really Teach You
The first practical lesson from repairing cement steps is that the visible chip is rarely the whole repair. A corner that appears to be missing two inches may reveal another inch of weak concrete after gentle chiseling. This is not a disaster. Finding the weak material now is better than attaching a beautiful patch to a section that was already preparing to leave.
Preparation also takes longer than most first-time DIYers expect. Mixing and troweling may occupy only a small portion of the day. Cleaning, arranging tools, building forms, protecting nearby siding, and creating a safe alternate entrance consume much of the schedule. That is why an organized work area matters. When fast-setting mortar begins to stiffen, searching the garage for a finishing brush feels like participating in a game show with an extremely dull prize.
Another useful experience is learning to mix less material. Beginners often fill the bucket because a larger batch seems efficient. In reality, small batches are easier to control and reduce waste. For a modest corner repair, the ideal quantity may look laughably small while dry. Once mixed and packed into the cavity, however, it often proves sufficient.
Form placement deserves patience. A board that is misaligned by even a small amount can leave a slanted riser or an awkward bulge. Before mixing, view the form from the front, side, and top. Check it with a level and compare it with the undamaged edges. Tighten every clamp. Wet mortar has no respect for a form held together by positive thinking.
Texture matching is another skill learned through experience. The best time to broom a patch is after the surface has begun to firm but before it becomes hard. Brush too early and the repair may slump or tear. Brush too late and the marks will sit on top instead of blending naturally. Test a hidden edge with one light stroke. If the brush pulls material, wait briefly and try again.
Color matching can surprise homeowners. Fresh repair mortar may look dramatically different from old concrete, especially while wet. Do not immediately add random pigments, dust, or driveway dirt in a moment of artistic panic. Allow the material to cure. The contrast usually softens, and a planned resurfacing or coating can be considered later if uniform color is important.
Successful one-day projects also require realistic expectations about the phrase “one day.” You can often remove damage, prepare the area, place the patch, finish the surface, and begin curing before sunset. That does not mean the front steps should host a moving crew that evening. Fast-setting and fully cured are not identical. Respect the product’s reopening time and continue protecting the repair afterward.
Finally, take photographs before and after the job. The change is easy to underestimate while you are crouched beside gray concrete for several hours. A side-by-side comparison reveals how much a small repair improves the entrance. The step becomes cleaner, safer, and sharper, while the entire home gains a more cared-for appearance. Few projects provide that much visual improvement from one bucket, one trowel, and a Saturday morning.
Frequently Asked Questions
Can I put new concrete directly over damaged concrete?
Only if the existing concrete is clean, stable, properly prepared, and compatible with the repair system. New material placed over loose or contaminated concrete is likely to separate.
Do I always need concrete bonding adhesive?
No. Some products require it, some use an acrylic fortifier, and some polymer-modified mortars are designed to bond without a separate adhesive. Follow the complete system specified by the manufacturer.
How soon can I walk on repaired concrete steps?
Traffic time varies widely. Certain rapid-setting materials permit light use within hours, while other products require a day or longer. Temperature, humidity, repair depth, and curing conditions also affect performance. Use the package instructions as your minimum requirement.
Will the repaired area match the old concrete?
Probably not exactly. Age, weathering, aggregate, moisture, and finishing technique all affect color. Resurfacing or coating the full step can provide a more uniform appearance.
Can I repair concrete steps during winter?
Some cold-weather products exist, but ordinary repair materials have minimum application temperatures and must be protected from freezing. Waiting for suitable conditions often produces a better result unless the damage creates an urgent safety hazard.
Conclusion: A Small Repair With a Big Visual Payoff
Cement step repair is one of those home projects that looks intimidating from the driveway but becomes manageable when divided into simple stages. Confirm that the steps are structurally sound, remove loose concrete, clean the area thoroughly, choose the correct repair mortar, mix carefully, and protect the finished patch.
The work can often be completed in a day, and the improvement is immediate. Instead of a crumbling edge greeting every visitor, you get a neat, solid entrance that supports the rest of your landscaping and exterior upgrades. Your front steps may not receive compliments at dinner parties, but that is fine. Concrete usually prefers quiet respect.
Note: This guide is intended for small, nonstructural repairs. Steps that are sinking, moving, separating, severely cracked, or exposing damaged reinforcement should be inspected by a qualified concrete or masonry professional.














