
Glitter nail polish is the beauty equivalent of confetti: fun, festive, slightly chaotic, and absolutely determined to be noticed. Whether you want a delicate shimmer for brunch, a full disco-ball manicure for New Year’s Eve, or one sparkly accent nail that says, “Yes, I do own tiny rhinestones and no, I will not apologize,” learning how to apply glitter on nail polish properly makes all the difference.
The tricky part? Glitter polish can be stubborn. Brush it on too casually and you may get three lonely sparkles floating in clear polish like they missed the party bus. Layer it too heavily and you end up with thick, lumpy nails that take approximately one business week to dry. The good news is that glitter nails are much easier once you know the right technique.
In this guide, we’ll walk through three practical ways to apply glitter on nail polish: the classic brush method, the makeup sponge method, and the loose glitter method. You’ll also learn how to prep your nails, seal your sparkle, avoid common manicure mistakes, and remove glitter polish without feeling like you’re sanding a tiny disco floor off your fingertips.
Before You Begin: Prep Your Nails for Glitter Success
Great glitter nails start before the glitter ever touches your manicure. Nail prep may not be as exciting as sparkles, but it is the quiet little backstage manager making sure the show does not fall apart.
Clean and Shape the Nails
Start with clean, dry nails. Remove any old polish, wash your hands, and make sure there is no lotion, oil, or dust sitting on the nail plate. If your nails are oily, polish may lift faster. Shape the free edge with a nail file, moving gently rather than aggressively sawing back and forth. A soft square, oval, or almond shape works beautifully with glitter because the reflective finish catches light along the edges.
Protect the Nail with Base Coat
Always apply a thin layer of base coat before color or glitter. Base coat helps polish adhere more evenly, reduces staining from bold shades, and creates a smoother surface for your manicure. Think of it as primer before painting a wall. Could you skip it? Technically, yes. Should you? Only if you enjoy regret with a glossy finish.
Choose Your Base Color
Glitter can be worn over bare-looking nails, clear polish, nude polish, dark polish, jelly polish, or bright color. Your base color changes the entire personality of the manicure. Silver glitter over navy looks celestial. Gold glitter over burgundy feels holiday-ready. Iridescent glitter over a sheer pink gives “fairy dust but make it office appropriate.”
Apply one or two thin coats of your base color and let each coat dry until it is tacky but not wet. Thin layers are key because thick coats chip faster, smudge more easily, and can trap air bubbles under glitter.
Method 1: Apply Glitter Nail Polish with the Brush
The brush method is the simplest way to apply glitter nail polish. It works best when you want a sheer sparkle, scattered glitter, a soft topper effect, or a quick accent nail. This is the technique most people try first because it uses the polish brush that comes in the bottle. No extra tools, no tiny craft station, no glitter explosion across your desk.
Best For
This method is ideal for beginners, subtle shimmer, glitter top coats, jelly glitter polish, and manicures where you want the base color to show through. It is also perfect when you want a low-effort nail look that still catches the light.
How to Do It
- Apply base coat and let it dry.
- Apply one or two thin coats of your chosen base polish.
- Roll the glitter polish bottle between your palms to distribute the glitter. Avoid shaking hard, which may create bubbles.
- Wipe one side of the brush against the bottle neck so you do not overload the nail.
- Brush a thin coat of glitter from the base of the nail toward the tip.
- For more sparkle, dab the brush in sparse areas instead of dragging repeatedly.
- Let the layer dry, then add a second thin glitter coat if needed.
- Finish with top coat, making sure to cap the free edge.
Pro Tip: Dab, Don’t Drown
Many glitter polishes contain a clear or tinted base with suspended glitter pieces. If you brush too much product onto the nail, you get lots of wet polish but not always lots of glitter. Instead, use a light dabbing motion to place glitter exactly where you want it. This is especially helpful near the tip of the nail if you are creating a glitter gradient.
Common Mistakes to Avoid
The biggest mistake with the brush method is trying to get full glitter coverage in one coat. That usually leads to thick, uneven polish. Another mistake is dragging the brush over the same spot again and again. This can move glitter around instead of placing it. Let the polish settle, then add another thin layer if you want more sparkle.
Method 2: Apply Glitter Nail Polish with a Makeup Sponge
If you want maximum sparkle, the makeup sponge method is the superstar. This technique is popular because the sponge absorbs some of the clear polish base while leaving concentrated glitter on the surface. The result is denser glitter coverage without needing five gloopy coats.
In other words, this is how you go from “a few sparkles wandered in” to “my nails have a VIP section.”
Best For
The sponge method is best for full-coverage glitter nails, chunky glitter polish, party manicures, accent nails, opaque sparkle, and glitter gradients. It works especially well with glitter polish that looks amazing in the bottle but disappointingly sparse when brushed directly onto the nail.
Tools You Need
- Base coat
- Base nail polish color
- Glitter nail polish
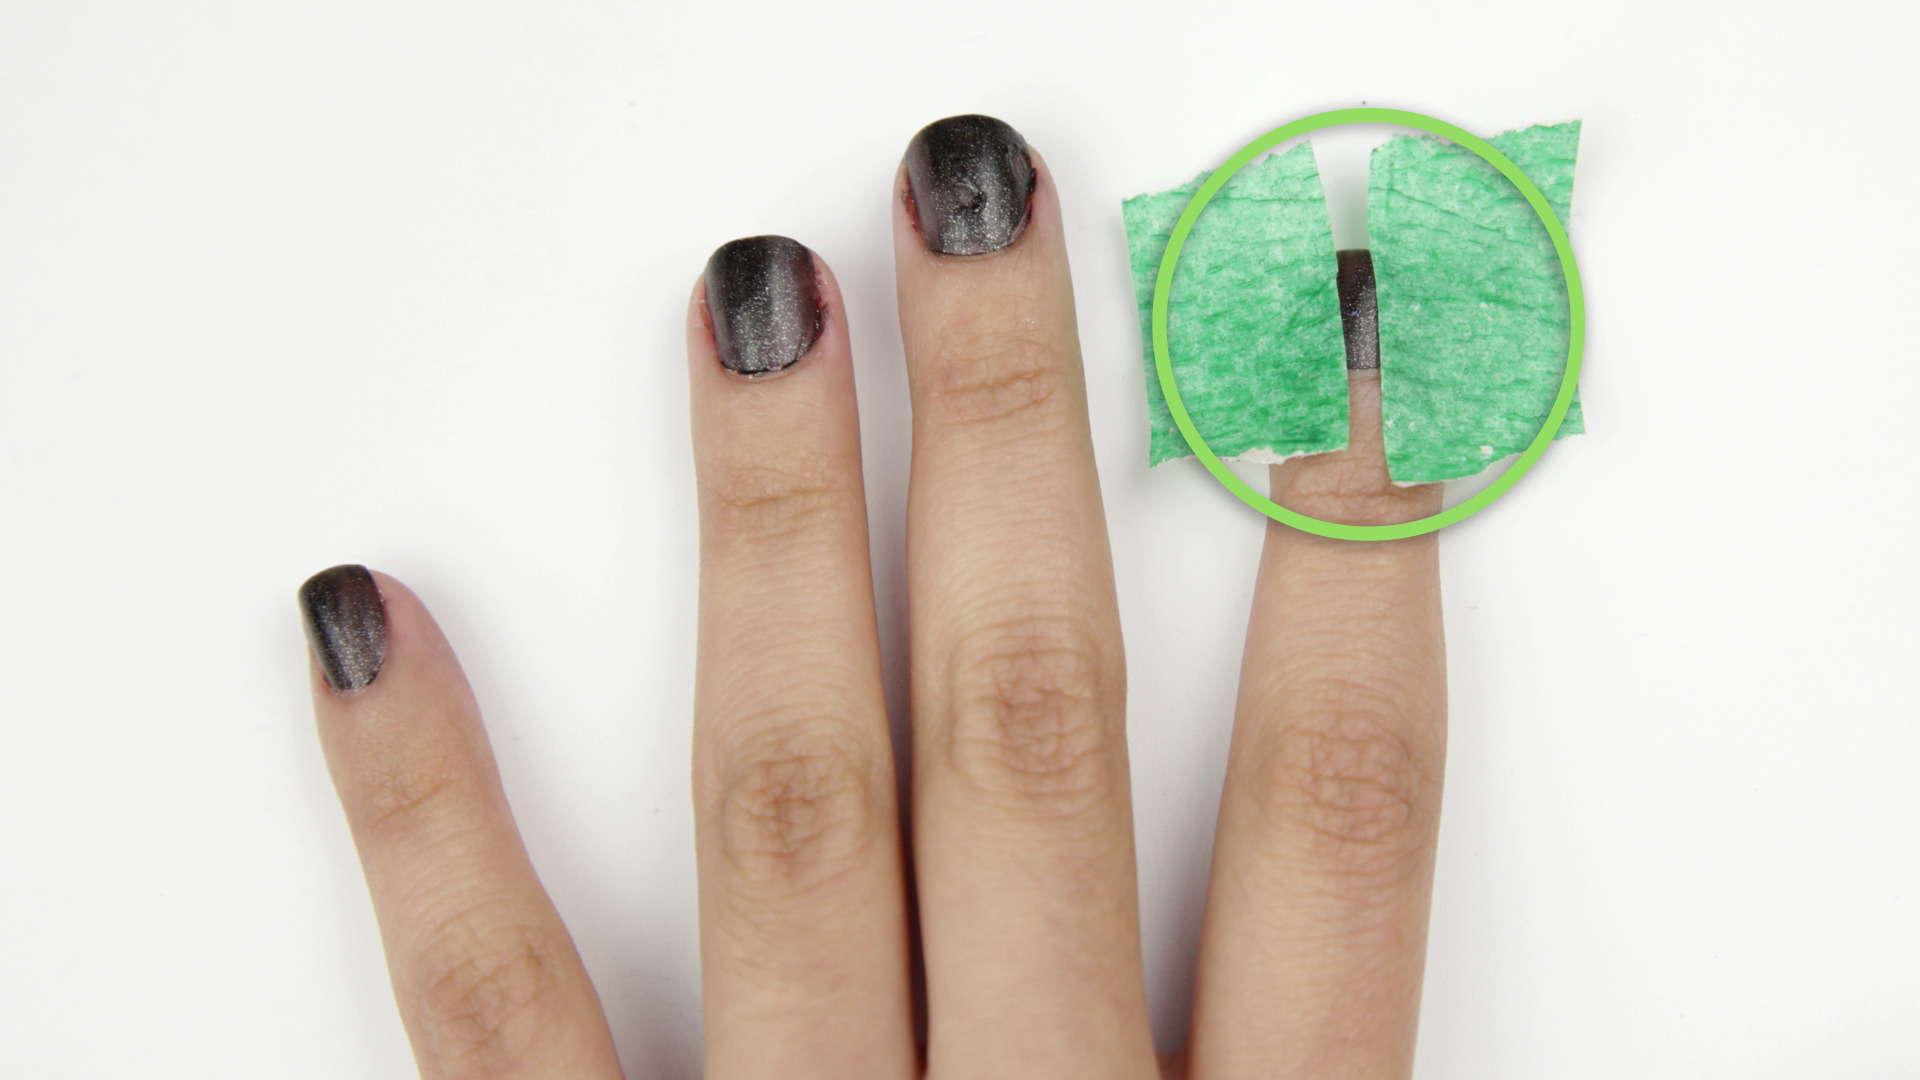
- Latex barrier, peel-off cuticle guard, petroleum jelly, or tape
- Disposable makeup sponge
- Cleanup brush or cotton swab
- Nail polish remover
- Glossy top coat
How to Do It
- Prep nails with base coat and your chosen background color.
- Apply a barrier around the skin near your nails. This step saves cleanup time because the sponge can be messy.
- Paint a small amount of glitter polish onto the edge of a makeup sponge.
- Wait a few seconds so the sponge absorbs some excess clear base.
- Gently dab the sponge onto the nail. Press lightly; do not smash it like you are stamping a passport in a hurry.
- Repeat until you reach the glitter coverage you want.
- Peel off the barrier or clean the skin with a brush dipped in remover.
- Apply one or two layers of top coat to smooth and seal the glitter.
How to Create a Glitter Gradient with a Sponge
For a glitter gradient, concentrate the glitter at the tip or base of the nail and fade it toward the center. Dab the sponge more heavily where you want the most sparkle, then use lighter taps as you move away from that area. A silver glitter fade over pale pink is soft and bridal. Gold glitter fading from the cuticle over nude polish looks chic and expensive, even if your manicure was done at the kitchen table next to a half-finished coffee.
Why the Sponge Method Works So Well
Glitter polish often contains more clear suspension base than actual glitter in each brush stroke. The sponge method removes some of that excess liquid and transfers more glitter to the nail. This creates an opaque sparkle effect faster and helps prevent the manicure from becoming too thick.
Method 3: Apply Loose Glitter Over Nail Polish
Loose glitter gives you the most control and the boldest texture. Instead of relying on glitter suspended in polish, you place dry cosmetic-grade glitter directly onto tacky polish or a sticky layer. This method is fantastic for nail art, glitter French tips, ombré glitter, accent nails, and dramatic special-event manicures.
Best For
Use loose glitter when you want precise placement, custom color mixes, chunky sparkle, metallic effects, or full glam nails. It is also useful when your polish collection does not have the exact glitter shade you want.
Important Safety Note
Use cosmetic-grade glitter intended for nails or skin. Craft glitter may have sharper edges, larger particles, or dyes that are not suitable for beauty use. Your nails deserve sparkle, not a tiny craft-store hazard.
Tools You Need
- Base coat
- Colored nail polish
- Cosmetic-grade loose glitter
- Small flat brush, fan brush, or silicone nail tool
- Paper towel or tray to catch fallout
- Top coat
- Cleanup brush
How to Do It
- Apply base coat and your base polish color.
- Let the color coat become tacky, not fully dry.
- Place a small amount of loose glitter on a tray or paper towel.
- Use a brush or silicone tool to pick up glitter.
- Press the glitter gently onto the tacky nail surface.
- For full coverage, continue pressing glitter until the nail is evenly coated.
- For a gradient, apply more glitter at the tip or cuticle and fade inward.
- Tap off excess glitter carefully.
- Seal with top coat, floating the brush lightly so you do not drag glitter out of place.
How to Keep Loose Glitter Smooth
Loose glitter can feel textured, especially if the particles are chunky. To smooth it, use a thicker glossy top coat or apply two thin layers of top coat. Let the first layer settle into the glitter, then apply the second for shine and durability. If the surface still feels rough, wait until dry and lightly add another layer of top coat rather than pressing down hard with the brush.
How to Choose the Right Glitter Style
Not all glitter is the same. Fine shimmer gives a soft glow. Micro-glitter creates dense sparkle without much texture. Hex glitter looks playful and bold. Holographic glitter flashes rainbow colors under light. Iridescent glitter shifts depending on the base shade. Chunky glitter makes a statement but needs more top coat to feel smooth.
If you are new to glitter manicures, start with fine glitter polish over a neutral base. If you love bold nails, try chunky silver glitter over black or emerald polish. For everyday wear, use glitter only on one or two accent nails. That gives you sparkle without making your hands look like they are auditioning for a music video, unless that is exactly the goal.
How to Make Glitter Nail Polish Last Longer
Glitter manicures can last beautifully when sealed correctly. The key is structure: base coat, thin color layers, controlled glitter placement, and a durable top coat. Cap the free edge by running the brush lightly along the tip of each nail. This helps reduce lifting and chipping because the polish wraps around the edge.
Use Thin Layers
Even with glitter, thin layers are better than thick ones. Thick polish may look dramatic at first, but it dries slowly and dents easily. Thin layers dry more evenly and give you more control.
Refresh the Top Coat
If you are wearing glitter for several days, add a fresh layer of top coat after two or three days. This revives shine and helps lock down any glitter pieces trying to escape. Glitter is glamorous, but it also has a rebellious streak.
Protect Your Hands
Wear gloves when washing dishes or cleaning. Water, detergents, and friction can weaken a manicure. Also, avoid using your nails as tools. Opening cans, scraping labels, and picking at packaging can chip polish and stress the natural nail.
How to Remove Glitter Nail Polish Without Losing Patience
Glitter polish is famous for being difficult to remove. The same particles that make it sparkle also cling to the nail. The easiest method is to soak cotton with nail polish remover, place it on the nail, and let it sit for a few minutes before gently sliding it off. For stubborn glitter, wrap each fingertip with foil to hold the cotton in place.
Do not scrape aggressively. Scraping can damage the nail surface. If a few glitter pieces remain, re-soak rather than attack. After removal, wash your hands and apply cuticle oil or hand cream to restore moisture.
Which Glitter Application Method Is Best?
The best method depends on the look you want. For a quick shimmer, use the brush. For full sparkle, use the makeup sponge. For custom nail art, use loose glitter. Here is the easiest way to decide:
- Use the brush method for sheer sparkle, glitter toppers, and beginner-friendly manicures.
- Use the sponge method for dense glitter, accent nails, and dramatic party looks.
- Use loose glitter for nail art, gradients, French tips, and maximum creative control.
Specific Glitter Nail Ideas to Try
Classic Silver Accent Nail
Paint all nails in a soft nude or pale pink, then use the sponge method to apply silver glitter to the ring finger. Seal with glossy top coat. This is simple, polished, and works for weddings, holidays, or any day you want your coffee cup to look more glamorous.
Gold Glitter French Tips
Apply a sheer nude base and let it dry until tacky. Use a small brush or sponge to place gold glitter along the tips. Keep the line soft for a modern gradient French manicure.
Midnight Holographic Nails
Start with navy or black polish, then apply holographic glitter with a sponge. The dark base makes rainbow reflects pop dramatically. Finish with two layers of top coat for a glassy effect.
Rose Gold Glitter Fade
Use blush pink polish as the base, then dab rose gold glitter from the cuticle upward, fading toward the center. This looks romantic but still fun, like your nails booked a candlelit dinner and brought confetti.
Extra Experience: What I’ve Learned from Applying Glitter Nail Polish at Home
After experimenting with glitter manicures, one lesson becomes clear very quickly: glitter rewards patience. The first time many people apply glitter polish, they expect it to behave like regular nail color. It does not. Regular polish glides on in a predictable coat. Glitter polish needs placement, layering, and a little negotiation. If you rush, the glitter gathers in strange corners, the polish gets thick, and one nail somehow ends up looking like it was decorated during an earthquake.
The brush method feels easiest at first, but it is not always the most satisfying for bold looks. When using a glitter topper, brushing works beautifully because the goal is scattered sparkle. But if the plan is full coverage, brushing can be frustrating. You keep adding coats, waiting for more glitter to appear, and suddenly the nail is bulky while still having empty patches. That is when the sponge method becomes a tiny miracle. A cheap makeup sponge can turn an underwhelming glitter polish into a dense, salon-looking sparkle. The first time you try it, you may wonder why polish brands do not just tape a sponge to every glitter bottle.
Another experience worth mentioning is cleanup. Glitter travels. It gets on fingers, tables, cotton pads, and occasionally places that make no sense. A peel-off barrier or even careful tape placement around the nail can save a lot of time. If you skip this step with the sponge method, you can still clean up with a small brush dipped in remover, but it takes longer. For neat results, especially when working with chunky glitter, cleanup is not optional. It is the difference between “cute manicure” and “I fought a craft drawer.”
Top coat is also more important with glitter than with regular polish. A single thin top coat may not be enough, especially with loose or chunky glitter. Without enough top coat, the nail may feel rough, catch on fabric, or lose glitter pieces early. Floating the top coat over the nail works better than pressing down hard. Load the brush with enough product, glide it gently over the surface, and let the top coat settle. For textured glitter, a second layer can make the manicure look smoother and more professional.
Removal is where glitter polish tests your character. The best approach is not force; it is soaking. Holding remover-soaked cotton on the nail for a few minutes saves effort and helps prevent nail damage. Peel-off base coat can also be helpful for short-term glitter manicures, especially for parties or weekends. However, if you want your manicure to last longer, a regular base coat usually gives better wear.
Most importantly, glitter nails should be fun. They do not have to be perfect to be pretty. A slightly uneven glitter fade can still look intentional. One accent nail can rescue a plain manicure. A little sparkle at the tips can make grown-out polish look refreshed. Glitter is forgiving in a wonderfully chaotic way, which is why it remains a favorite for at-home manicures. Whether you prefer a subtle shimmer or full disco drama, the best glitter manicure is the one that makes you keep looking at your hands and smiling.
Conclusion
Learning how to apply glitter on nail polish gives you more than one way to shine. The brush method is simple and soft, the makeup sponge method creates bold full coverage, and loose glitter gives you total artistic control. With proper nail prep, thin layers, a reliable base coat, and enough top coat, glitter nails can look smooth, stylish, and surprisingly professional at home.
The secret is to match the method to the manicure. Want a delicate shimmer? Brush it on. Want sparkle that can be seen from across the room? Sponge it. Want custom nail art? Bring out the loose glitter and your inner tiny-paintbrush genius. Add smart cleanup and gentle removal, and your glitter manicure can be fun without becoming a beauty battle.













