
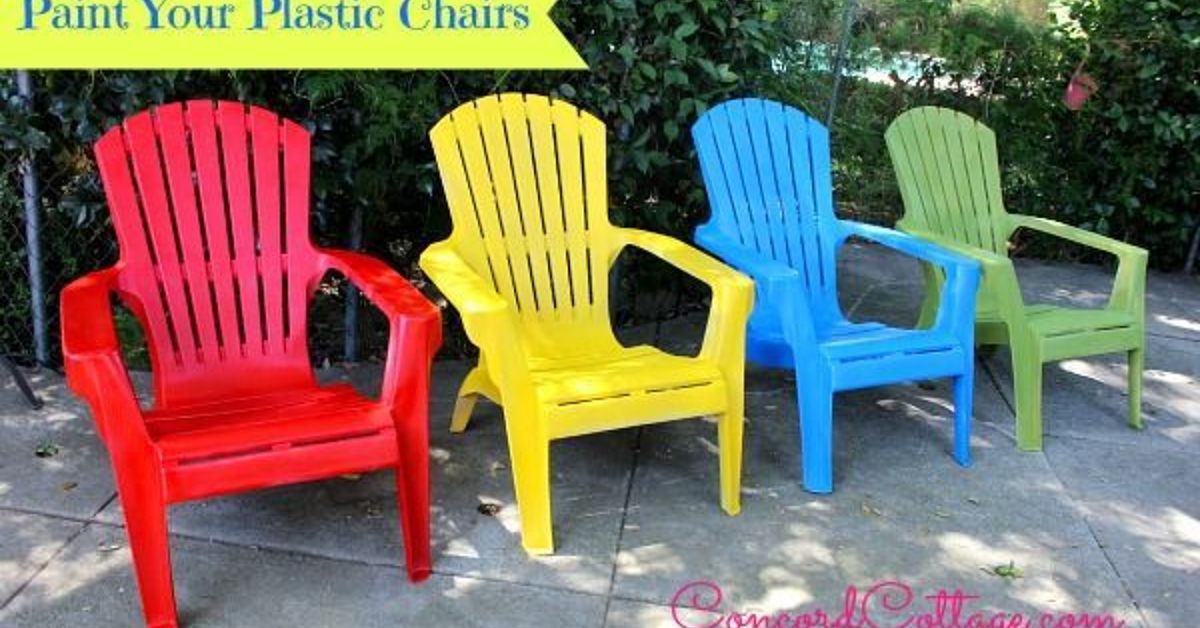
Plastic chairs are the unsung heroes of patios, porches, balconies, garages, garden corners, and last-minute backyard barbecues. They hold lemonade, tolerate muddy sneakers, survive summer storms, and somehow end up wearing a mysterious gray film that no sponge wants to talk about. The good news? You do not have to send those faded lawn chairs into retirement just because they look like they have been sunbathing since 1998. With the right prep, the right paint, and a little patience, you can paint your plastic chairs and make them look bright, modern, and ready for another season of outdoor lounging.
Painting plastic chairs is one of the easiest DIY furniture makeovers, but it is also one of the easiest to mess up if you skip the boring steps. Plastic is slick, nonporous, and not naturally eager to hold onto paint. It is basically the furniture version of “new phone, who dis?” That means success depends on cleaning, light sanding, using paint made for plastic, applying thin coats, and giving the finish enough time to cure before someone flops down with a plate of ribs.
This guide walks you through how to spray paint plastic chairs the smart way, from choosing colors to avoiding drips, peeling, tackiness, and other DIY crimes against patio furniture.
Can You Really Paint Plastic Chairs?
Yes, you can paint plastic chairs, including resin lawn chairs, plastic Adirondack chairs, stackable patio chairs, and many molded outdoor seats. The key is using products designed to bond to plastic or pairing a plastic primer with a compatible topcoat. Regular wall paint is not the hero here. It may look acceptable for about five minutes, then start peeling like a bad sunburn.
Most outdoor plastic chairs are made from resin, polypropylene, polyethylene, or other durable plastics. These materials are great for weather resistance, but they are also smooth and slightly flexible. A good plastic chair paint must be able to grip the surface and handle light movement, UV exposure, moisture, and repeated use.
Why Painting Plastic Chairs Is Worth It
Painting your plastic patio chairs is not just about making them pretty, though let’s be honest, “less sad beige-gray” is a noble goal. It can also extend the useful life of furniture you already own. Instead of buying a new set, you can refresh what you have for a fraction of the cost.
It Saves Money
A few cans of spray paint usually cost far less than replacing a full patio set. If the chair is structurally sound, not cracked, and still comfortable, paint can give it a second act.
It Reduces Waste
Keeping usable furniture out of the trash is a small but meaningful sustainability win. Plastic chairs are bulky, and refreshing them helps reduce unnecessary disposal.
It Lets You Customize Your Outdoor Space
Want sage green chairs around a fire pit? Matte black seats for a modern balcony? A cheerful coral chair that says, “I own SPF 50 and good snacks”? Paint makes it possible.
Best Paint for Plastic Chairs
The best paint for plastic chairs is usually a spray paint labeled for plastic, resin, PVC, or multi-surface use that includes plastic as an approved surface. Spray paint works especially well because molded chairs have curves, backs, slats, legs, and awkward little underside areas that love to laugh at paintbrushes.
Plastic-Bonding Spray Paint
Plastic-bonding spray paint is the easiest option for most homeowners. Many formulas are designed to adhere directly to plastic without a separate primer, although prep still matters. These paints are often available in matte, satin, gloss, and textured finishes.
Plastic Primer Plus Topcoat
If your chairs are very glossy, old, stained, or made from hard-to-paint plastic, use a plastic primer first. Plastic primer acts like a handshake between the chair and the paint. Without it, the paint may not bond properly.
Outdoor-Rated Paint
Because patio chairs live outside, choose paint suitable for exterior use. Outdoor paint is designed to handle sunlight, temperature changes, and moisture better than indoor-only formulas.
Supplies You Will Need
Before you begin, gather everything in one place. Nothing ruins DIY momentum like holding a half-clean chair while hunting for sandpaper in a drawer full of batteries, mystery keys, and one lonely birthday candle.
- Plastic chairs
- Dish soap or mild cleaner
- Bucket of warm water
- Scrub brush or sponge
- Garden hose or clean rinse water
- Microfiber cloth or lint-free rag
- Fine-grit sandpaper, usually 180- to 220-grit
- Plastic primer, if needed
- Spray paint made for plastic or outdoor multi-surface use
- Drop cloth, cardboard, or plastic sheeting
- Painter’s tape, if creating designs
- Disposable gloves
- Safety glasses
- Respirator or mask rated for paint fumes, especially in enclosed areas
Step-by-Step Guide: How to Paint Plastic Chairs
Step 1: Inspect the Chairs
Start by checking the condition of each chair. Paint can hide fading, stains, and scratches, but it cannot fix a cracked leg or a seat that flexes like a trampoline at a family reunion. If a chair is broken, brittle, or unsafe, replace it instead of painting it.
Look closely for cracks, deep gouges, chalky residue, mildew, grease, and areas where the plastic has become rough from sun exposure. These details tell you how much prep work you need.
Step 2: Clean Like You Mean It
Cleaning is the most important step when painting plastic chairs. Outdoor chairs collect pollen, dust, sunscreen, barbecue smoke, bird evidence, tree sap, and whatever your neighbor’s leaf blower contributed. Paint will not stick well to dirt, oil, or mildew.
Mix warm water with dish soap and scrub every surface, including the underside, legs, arms, and back. Use a brush to get into grooves and textured areas. Rinse thoroughly so no soap film remains. Then let the chair dry completely.
If mildew is present, clean it before painting. For heavily stained white plastic, some people use diluted bleach solutions, but be careful around plants, clothing, and colored plastic. Always rinse well and let the surface dry fully.
Step 3: Lightly Sand the Surface
Once the chair is clean and dry, lightly scuff the surface with fine-grit sandpaper. You are not trying to carve your initials into it. The goal is to dull glossy plastic and create a slight texture so primer or paint can grip better.
Focus on shiny areas, edges, arms, and spots where hands frequently touch. After sanding, wipe away all dust with a clean cloth. Any leftover dust can cause bumps, weak adhesion, or a finish that looks like it was painted during a sandstorm.
Step 4: Set Up a Smart Painting Area
Spray paint travels farther than people expect. Set up outside or in a very well-ventilated open garage. Choose a calm day with mild temperatures and low humidity. Wind can blow paint sideways, while extreme heat can make it dry too quickly and create a rough texture.
Place the chair on a drop cloth, flattened cardboard box, or plastic sheet. Leave enough room to walk around it. If you are painting several chairs, space them apart so you are not bumping wet furniture like a chaotic patio-chair domino game.
Step 5: Prime If Needed
If your spray paint is specifically designed for plastic and says no primer is required, you may be able to skip primer. However, primer is helpful for slick, glossy, old, or questionable plastic. It is also useful when changing from a dark color to a light color.
Apply plastic primer in thin, even coats. Let it dry according to the product directions before painting. Do not rush this step. Primer that is still tacky can cause the topcoat to wrinkle, smear, or behave like it has personal problems.
Step 6: Shake the Can Thoroughly
Shake the spray paint can for the full time recommended on the label, often one to two minutes. Shake again during the project. Proper mixing helps the paint spray evenly and keeps pigment, resin, and propellant working together.
Step 7: Paint the Underside First
Turn the chair upside down and paint the bottom first. This is one of the best tricks for painting plastic chairs because it lets you cover legs, edges, and hidden areas without accidentally touching fresh paint later.
Hold the can about 6 to 10 inches from the surface, depending on the paint instructions. Spray in steady side-to-side passes, slightly overlapping each stroke. Start spraying just before the edge of the chair and continue slightly past it to avoid heavy spots.
Step 8: Apply Multiple Thin Coats
The secret to a smooth spray paint finish is not one heroic coat. It is several light coats. Heavy coats cause drips, pooling, slow drying, and uneven sheen. Thin coats look better, dry more evenly, and bond more reliably.
Apply a light coat, wait the recommended recoat time, then apply another. Continue until the color looks even. Most plastic chairs need two to four light coats, depending on the original chair color and the paint color you choose.
Step 9: Let the Paint Dry and Cure
Dry time and cure time are not the same. A chair may feel dry to the touch in under an hour, but the finish can remain vulnerable for much longer. Curing is the process of the paint hardening fully. Until then, avoid stacking chairs, sitting on them, dragging them across concrete, or leaving them in heavy rain.
For best results, give painted plastic chairs at least 24 to 48 hours before normal use, or follow the manufacturer’s curing recommendations. If you can wait longer, your patience may be rewarded with a tougher finish.
Color Ideas for Painting Plastic Chairs
Choosing a color is the fun part, also known as the moment you realize there are 47 shades of blue and suddenly question your entire personality. Here are practical ideas that work well outdoors.
Classic White
White looks clean, coastal, and timeless. It reflects heat better than dark colors, but it also shows dirt faster. Choose it if you enjoy a crisp look and do not mind occasional cleaning.
Matte Black
Black gives inexpensive plastic chairs a modern, high-contrast look. It pairs well with wood decks, concrete patios, and neutral cushions. Keep in mind that dark colors can get hotter in direct sun.
Sage Green
Sage green blends beautifully with gardens, lawns, potted herbs, and natural landscaping. It feels relaxed without looking boring.
Navy Blue
Navy is a strong choice for coastal, traditional, or farmhouse-style outdoor spaces. It hides dirt better than white and looks polished with striped cushions.
Terracotta or Coral
Warm colors add personality to patios and balconies. Terracotta feels earthy and modern, while coral brings a cheerful summer energy.
Common Mistakes to Avoid
Skipping the Cleaning Step
Paint over grime and you are not painting the chair; you are painting the grime. Eventually the grime lets go, and the paint goes with it.
Using the Wrong Paint
Not all paint sticks to plastic. Use plastic-specific spray paint or a plastic primer and compatible topcoat.
Spraying Too Close
Holding the can too close creates drips and blotches. Keep the recommended distance and move steadily.
Applying One Thick Coat
Heavy coats may look satisfying at first, but they often dry unevenly and chip more easily. Thin coats are less dramatic but far more dependable.
Using the Chairs Too Soon
Even if the paint feels dry, it may not be fully cured. Give the finish time before stacking, sitting, or moving the chairs roughly.
How to Make Painted Plastic Chairs Last Longer
Once your chairs look good, protect your work. Keep them clean by wiping them with mild soap and water. Avoid harsh abrasives that can scratch the finish. During extreme weather or off-season months, store the chairs indoors, under a covered patio, or beneath breathable furniture covers.
If a chair gets scratched, lightly sand the damaged area, clean it, and apply a small touch-up coat. Save leftover paint or write down the brand, color, and finish so future touch-ups do not turn into a guessing game called “Was this satin navy or midnight emotional crisis?”
Experience Notes: What Painting Plastic Chairs Teaches You
The first thing you learn when you paint plastic chairs is that the chair is never as clean as it looks. From a distance, it may seem like a simple faded patio chair. Up close, it is a museum of outdoor life: pollen in the corners, dust under the arms, dried water spots on the legs, and a mysterious sticky place that no one in the household will admit knowing about. The cleaning stage feels unglamorous, but it changes everything. A chair that is scrubbed, rinsed, and fully dried accepts paint much better than one that gets a quick wipe and a hopeful prayer.
The second lesson is that patience beats confidence. Many beginners want full coverage on the first pass because the color change is exciting. You spray a little more, then a little more, and suddenly there is a shiny drip sliding down the back like the chair is crying. Thin coats feel slow, but they are the difference between a professional-looking finish and a project that whispers, “This happened at 11 p.m. in bad lighting.” Light coats also help preserve the shape and texture of the plastic, especially on chairs with molded details.
Another useful experience is learning to paint from every angle. Plastic chairs are sneaky. You think you covered the whole thing, then you move three feet to the left and discover an unpainted stripe under the armrest. Painting the underside first helps a lot. So does walking around the chair between coats and checking it from standing, sitting, and side angles. Outdoor light can reveal uneven coverage quickly, which is annoying but helpful.
Color choice also teaches practical lessons. A bright color can completely change the mood of a patio, but it may need extra coats over dark or stained plastic. Dark colors look sleek, but they can become hot in direct sunlight. Satin finishes are forgiving and often look more expensive than very glossy finishes, which may highlight every scratch and bump. Matte finishes look stylish but can show scuffs faster in high-use areas. There is no perfect color, only the right color for how you actually live.
The most satisfying part is the before-and-after moment. A faded chair that once looked ready for the curb suddenly looks intentional. Put four refreshed chairs around a table, add a planter or outdoor rug, and the whole patio feels cleaner. The project is small, but the visual payoff is big. It is also addictive. Once you paint one chair, you may start looking at every plastic item in your yard as a potential makeover candidate. Planters, side tables, storage binsnothing is safe.
The final lesson is to respect cure time. A freshly painted chair may look finished, but using it too soon can leave marks, dents, or fabric impressions. Letting the paint harden fully is not glamorous, but it is the final step that protects all the work before it. Painting plastic chairs is not difficult, but it rewards people who clean carefully, spray lightly, and wait patiently. In other words, it is DIY therapy with better patio seating.
Conclusion
Painting plastic chairs is a smart, budget-friendly way to refresh outdoor furniture without replacing it. The process is simple, but the details matter: clean thoroughly, scuff glossy surfaces, choose paint made for plastic, spray multiple thin coats, and allow enough curing time before use. With the right approach, faded resin or plastic patio chairs can become stylish, durable, and surprisingly good-looking again.
Whether you choose classic white, modern black, soft sage, coastal navy, or a bold summer color, the goal is the same: give tired chairs a fresh finish and a longer life. Your patio gets an upgrade, your wallet gets a break, and your old chairs get to make a comeback. Not bad for a weekend project and a few cans of paint.













