
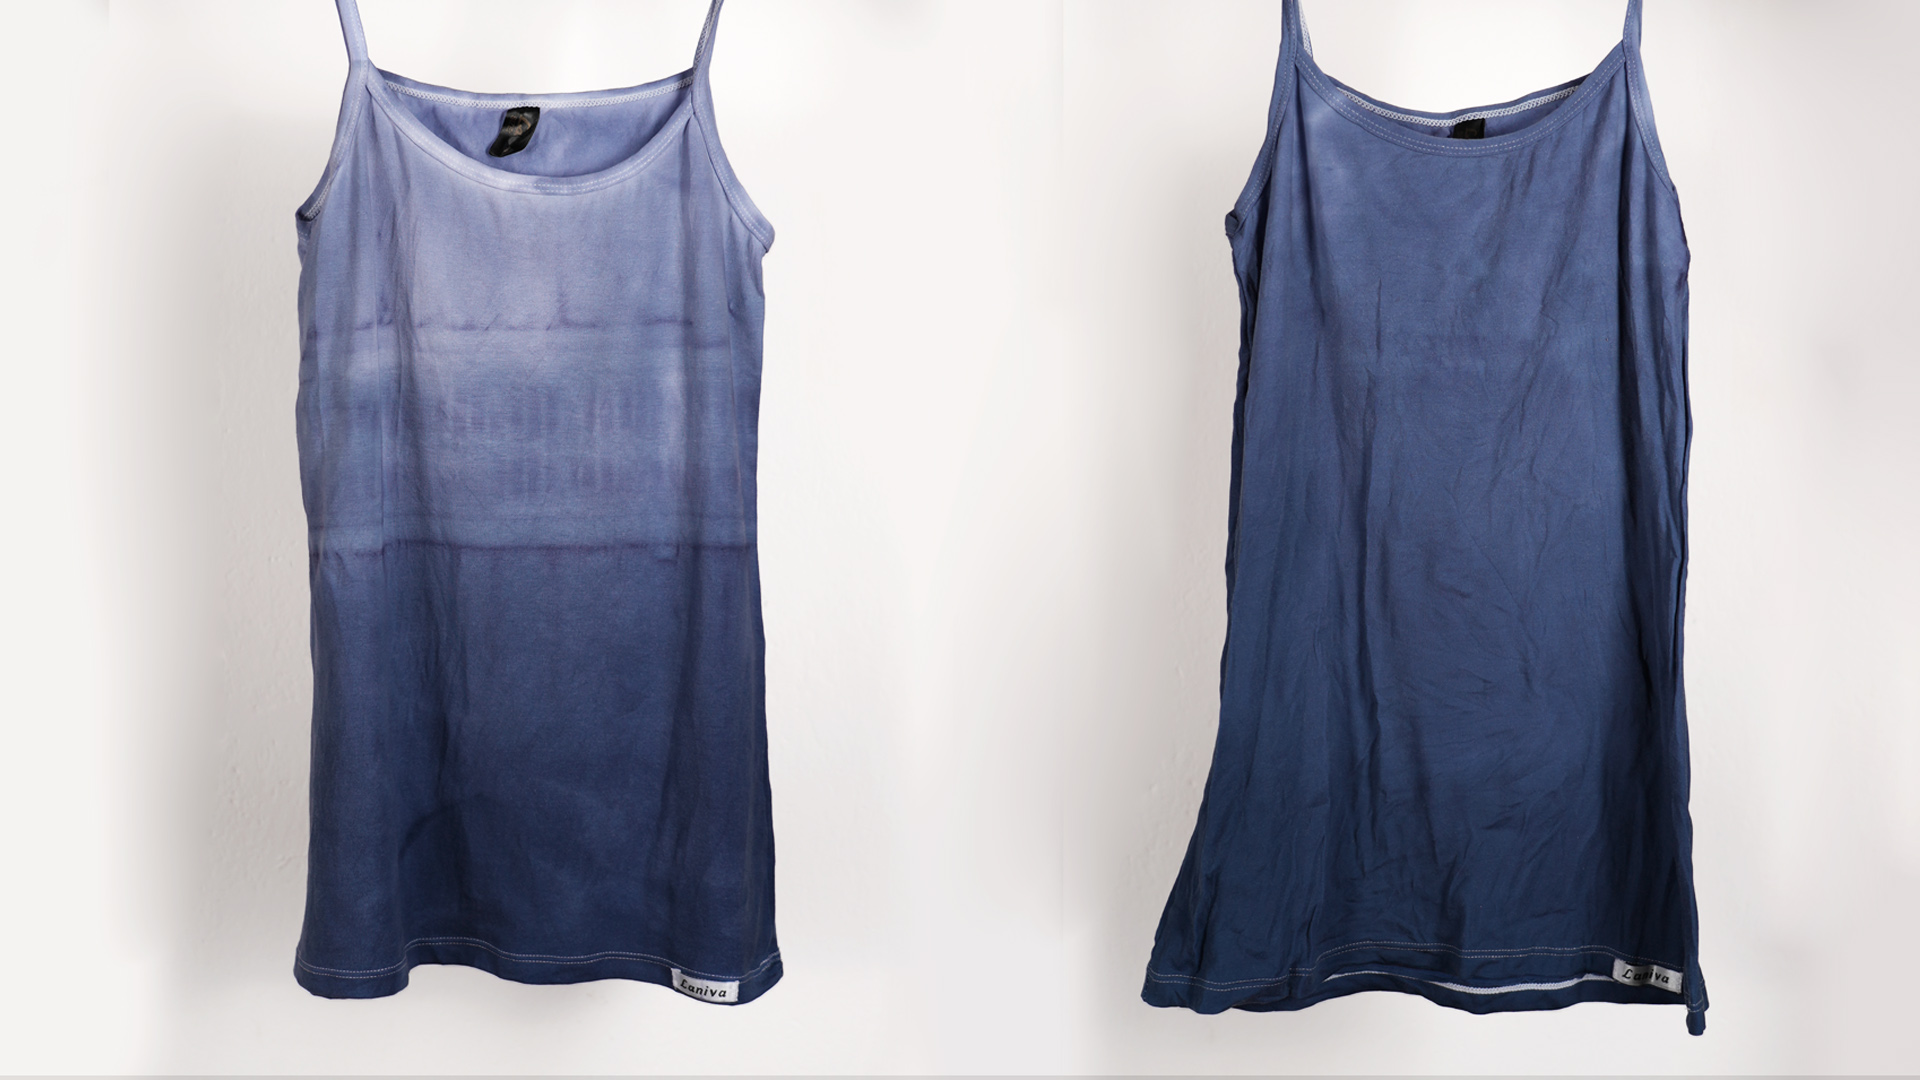
Dip dyeing fabric is one of those magical DIY projects that makes you feel wildly artistic with surprisingly little equipment. One bucket, one dye bath, one innocent-looking piece of fabric, and suddenly you are giving plain cotton the kind of dramatic ombré glow-up usually reserved for salon commercials and expensive boutique linens. If you want to freshen up old curtains, personalize a tote bag, revive a pillow cover, or turn a basic dress into something that looks suspiciously designer, learning how to dip dye fabric is a smart skill to have.
The beauty of this technique is that it can be simple or fancy depending on your mood. You can create a soft fade, a bold color block, or a layered gradient with several tones. The trick is not luck, fairy dust, or bargaining with the dye gods. It comes down to choosing the right fabric, using the right dye for that fiber, and dipping the material in a deliberate way so the color builds gradually instead of turning into a murky plot twist.
This guide walks you through exactly how to dip dye fabric in 14 steps, with beginner-friendly tips, common mistakes to avoid, and practical examples along the way. Whether you are dyeing a tea towel, a skirt, or a set of pillow covers, this dip dye fabric tutorial will help you get cleaner, prettier, and more predictable results at home.
Before You Dip: What You Need to Know
Before you start waving fabric over a dye bath like a crafting wizard, check the label. Fiber content matters more than people expect. Natural fibers such as cotton, linen, rayon, silk, and wool tend to accept dye better than many synthetics. Polyester-heavy fabric, acrylic, and some blends can be stubborn, patchy, or nearly impossible to dye with standard all-purpose products. In other words, if your fabric is mostly polyester, your beautiful ombré dream may come out looking like a mildly embarrassed beige.
You also need to prewash the fabric before dyeing. This step removes finishes, dirt, oils, and softeners that can block dye absorption. Even brand-new fabric may have sizing or treatments on it, so skipping the wash is like asking the dye to run a race while wearing ankle weights.
For the best beginner experience, choose white or light-colored fabric made from cotton or rayon. These fibers usually give bold, satisfying results. Keep your expectations realistic too: fabric looks darker when wet and dries lighter. That means your dramatic in-the-moment masterpiece may calm down a bit once it dries. Happily, that is normal.
Supplies for Dip Dyeing Fabric
- White or light-colored fabric
- Fabric dye appropriate for your fiber type
- A large bucket, bin, or stainless-steel sink
- Very hot water
- Rubber gloves
- A long spoon or stir stick
- Plastic table cover or trash bags to protect your work area
- Old towels or paper towels
- Mild detergent
- Salt or vinegar if your dye instructions call for it
- Hanger, clips, or drying rack
- Optional: a test swatch, measuring cup, and second container for rinsing
How to Dip Dye Fabric: 14 Steps
Step 1: Read the Fabric Label
Start with the least glamorous but most important step: read the label. If the fabric is cotton, linen, rayon, silk, or wool, you are in good shape. If it is a blend, note the percentages. A small amount of polyester may still dye, but the final shade may be lighter or less even. If it is heavily synthetic, use a dye specifically formulated for synthetics or choose a different project.
Step 2: Pick the Right Dye
Not all dyes work on all fabrics. All-purpose dyes are common for many natural fibers and some blends. Fiber-reactive dyes are popular for cellulose fibers like cotton, linen, and rayon. Synthetic fabrics often need a specialty dye and more heat. Matching the dye to the fabric is the difference between “wow, I made this” and “why does this pillowcase look emotionally unavailable?”
Step 3: Prewash the Fabric
Wash the fabric in warm water with a little detergent and skip the fabric softener. Do not dry it completely unless the dye instructions tell you to. Slightly damp fabric often takes dye more evenly because the fibers are already open to moisture. If your project has stains, remove them first, because dye can highlight stains instead of hiding them.
Step 4: Protect Your Workspace
Spread plastic over your table, counter, or floor. Wear old clothes and rubber gloves. Dye loves to travel, and it has a wicked sense of humor when it comes to white shirts, grout lines, and hands you planned to use in public later. Keep paper towels nearby for splashes and drips.
Step 5: Mix the Dye Bath
Fill a bucket or stainless-steel sink with enough hot water for the fabric to move freely. Follow the dye package directions for how much dye to add. If the instructions call for salt or vinegar, add the correct one for your fiber type. Stir thoroughly so the dye is evenly distributed. A patchy dye bath leads to patchy fabric, and nobody is aiming for accidental camouflage unless they truly are.
Step 6: Test a Swatch First
If you have extra fabric, test a small swatch before dyeing the entire piece. This tells you how intense the color will be, how fast the fabric absorbs dye, and whether your chosen shade is giving “moody elegance” or “sports drink spill.” It is a tiny step that can save a whole project.
Step 7: Wet the Fabric Evenly
Before dipping, wet the fabric with clean water and squeeze out the excess. Damp fabric generally absorbs dye more evenly than dry fabric. This is especially useful if you want a smooth ombré effect instead of harsh tide lines. Think of it as helping the fabric ease into the experience rather than cannonballing into color.
Step 8: Decide on Your Gradient Plan
Now figure out the look you want. For a simple dip-dyed edge, submerge just the bottom section and keep the top dry. For a gradual ombré, you will dip the fabric in stages, leaving the deepest section in longest and raising the fabric little by little. You can mark rough sections mentally or clip the top to a dowel or hanger for better control.
Step 9: Dip the Deepest Section First
Lower the bottom portion of the fabric into the dye bath. This section will become the darkest because it spends the most time in the dye. Let it sit for several minutes while gently moving the fabric to prevent blotches. If you want an intense lower border on curtains or a dress hem, this is where the drama begins.
Step 10: Lift the Fabric in Stages
For an ombré fade, gradually lift a few inches of fabric out of the dye after a set amount of time, then hold the rest in place. Repeat this process several times. The lower area stays submerged longest, the middle area gets less exposure, and the top may remain undyed or barely tinted. This staggered timing creates the dip dye effect people love. Slow, patient lifting is your friend here.
Step 11: Blend the Transition if Needed
If the color line looks too sharp, gently move the fabric up and down at the transition point. You can also lightly mist the boundary with water before or after dyeing, depending on the dye system you are using. The goal is a fade, not a cliff. Unless you are intentionally creating a crisp color block, soften the border while the dye is still workable.
Step 12: Remove and Rinse Carefully
Once the fabric reaches your desired color, remove it from the dye bath and squeeze out excess dye gently. Rinse starting with cooler water and continue until the runoff becomes much clearer. Do not panic if you see color release at first. That is normal. A good rinse helps prevent back-staining and keeps the lighter sections from getting muddy.
Step 13: Wash the Fabric Separately
After rinsing, wash the item separately with mild detergent according to the dye instructions. This removes loose dye and helps reveal the final result. The first wash is not the moment to toss your dip-dyed masterpiece in with white towels unless you want a whole new set of matching projects.
Step 14: Dry, Press, and Admire Your Work
Hang the fabric to dry or dry it as recommended for the fiber and dye type. Once dry, press it if needed to smooth out wrinkles and show off the gradient. This is the part where you hold it up, squint at it artistically, and pretend you always knew it would turn out this good.
Tips for Better Dip Dye Results
Use enough water
Crowded fabric folds over itself and dyes unevenly. The fabric should have room to move in the bath.
Keep the heat consistent
Some dyes need very hot water or sustained heat for strong color payoff, especially on more difficult fibers.
Do not skip stirring
Gentle stirring helps avoid spots and streaks. The first several minutes are especially important.
Expect lighter results on blends
If your fabric is a cotton-poly blend, the cotton portion may dye while the polyester stays paler. This can still look beautiful, just softer and less saturated.
Start with one color
Beginners usually get the cleanest results with a single shade. Multi-color dip dyeing can be gorgeous, but it is easier to create muddy overlaps if you rush.
Common Dip Dye Mistakes to Avoid
One of the biggest mistakes is choosing the wrong fabric. If the material will not accept the dye, no amount of enthusiastic stirring will fix it. Another common issue is skipping the prewash, which often causes uneven color. People also tend to underestimate how much darker wet fabric looks, so they pull it out too late and end up with a deeper shade than planned.
Then there is the classic “I got distracted for one tiny minute” problem. Dip dyeing rewards attention. The longer the fabric sits, the stronger the color becomes, so do not wander off to answer a text, reorganize a drawer, or begin a new life chapter. Stay with the project until the dipping stages are done.
Project Ideas for Dip Dyed Fabric
- Tea towels with a subtle blue or sage border
- Cotton curtains with a soft ombré hem
- Pillow covers in sunset-inspired shades
- A plain summer dress with a bold dip-dyed skirt
- Canvas tote bags with a two-tone base
- Table runners and napkins for handmade party decor
If you are new to fabric dyeing at home, start with something forgiving like a tea towel, pillow cover, or tote bag. These projects are easier to handle than a large garment, and they still look impressive. Curtains are beautiful too, but they involve more fabric, more dye bath management, and more opportunities for your arms to ask why you make these choices.
Real-World Experiences With Dip Dye Fabric
Dip dyeing always looks effortless in photos, but the real-life experience is a mix of creativity, patience, and a little improvisation. The first thing many people notice is that the process feels more physical than expected. You are holding wet fabric, keeping it level, judging color while water drips everywhere, and trying not to accidentally dunk the whole piece when your grip slips. It is not hard, but it is definitely a hands-on craft.
A common beginner experience is starting with way too much confidence. Someone grabs a large piece of fabric, mixes one dramatic color, and assumes the fade will just happen naturally. Then they lift the fabric out and discover a strong dye line where they wanted a whispery gradient. This happens because dip dyeing is all about timing and movement. Once people try a second project and begin lifting the fabric in stages, the results improve fast.
Another very real experience is discovering that fabric personality is a thing. Cotton usually behaves well and absorbs color like it understood the assignment. Rayon can look gorgeous and fluid, but it may need gentle handling when wet. Linen often gives a beautifully textured result, though the weave can make the finish look more organic than perfectly smooth. Blends can be surprising. Many crafters expect a deep, rich tone, only to get a softer vintage-looking fade because part of the fabric resists the dye. Sometimes that is disappointing. Other times it ends up being the exact look they did not know they wanted.
People also learn quickly that the bottom section gets dramatic fast. The deepest part of the dip can go from “nice color” to “hello, darkness” in less time than expected, especially with hot water and a thirsty natural fiber. That is why experienced crafters usually test first, keep the fabric moving gently, and pull it out a little earlier than their instincts suggest. Since the material dries lighter, patience beats panic nearly every time.
Drying is another stage that teaches humility. A project can look slightly underwhelming when freshly rinsed, then transform beautifully once dry and pressed. On the flip side, a piece that seemed perfectly blended while wet may reveal a line or blotch after drying. That is not always a failure. Handmade dip-dyed fabric often looks best when it is not suspiciously perfect. A slight variation can make it feel more artisanal and less factory-made.
One of the most satisfying experiences with dip dye fabric is rescuing something plain or tired. An old white table runner can become modern and elegant with a smoky gray ombré edge. A basic cotton dress can suddenly look boutique-worthy with a saturated coral hem. A set of inexpensive pillow covers can go from “fine” to “where did you buy those?” in one afternoon. That transformation is a big reason the technique stays popular.
Perhaps the most universal experience is this: after one successful project, people immediately start looking around the house for other things to dye. Napkins. Tote bags. Curtains. Maybe that shirt in the back of the closet that has done nothing wrong except be boring. Dip dyeing has a way of turning ordinary fabric into possibility, and that is part of the fun. The process is simple enough for beginners, but it still leaves room for experimentation, style, and the occasional happy accident that looks completely intentional once someone compliments it.
Conclusion
Learning how to dip dye fabric is equal parts technique and creativity. Once you understand the basics of fiber content, dye selection, timing, and staged dipping, the process becomes much less intimidating and much more fun. Start with the right material, work carefully, and give the dye enough room and time to do its thing. With a little patience, you can turn plain fabric into custom home decor, wearable art, or gifts that look far more expensive than they really are.
In other words, dip dyeing is a fantastic way to make fabric look stylish on purpose. And that, frankly, is the dream.














