
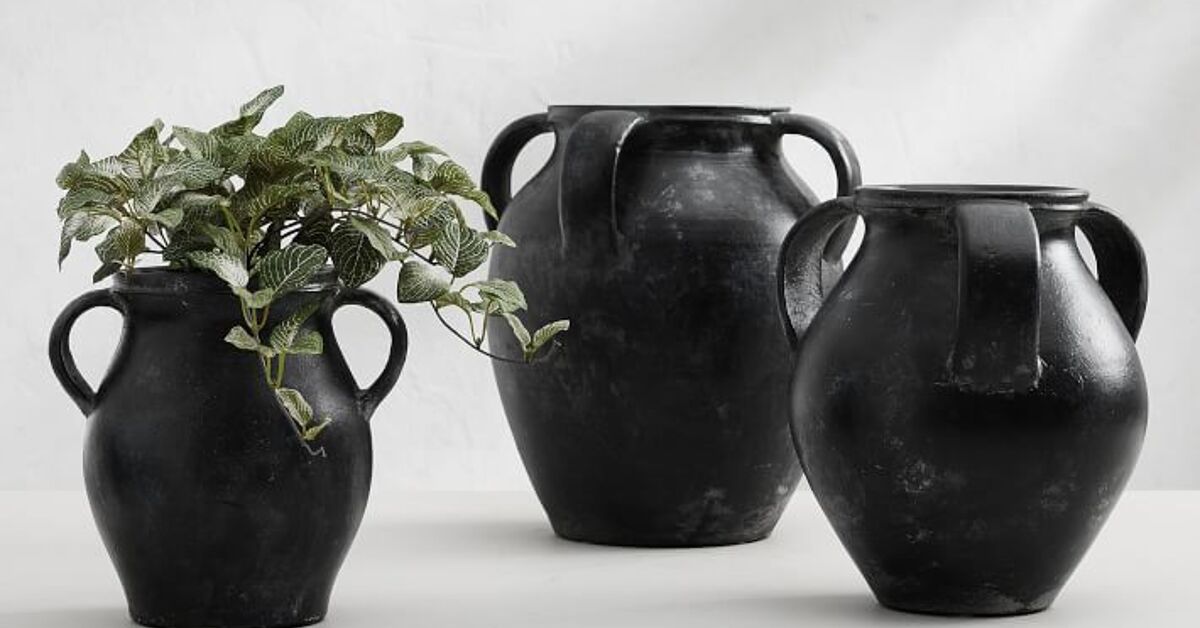
A plain glass vase is the white T-shirt of home décor: inexpensive, useful, and slightly underwhelming until you style it correctly. The good news is that you do not need a pottery wheel, a design degree, or a suspiciously large crafting budget to turn a dollar-store cylinder into something that looks as though it came from a boutique.
The secret is not adding more decoration. It is choosing one convincing finish, preparing the glass properly, and stopping before the project begins wearing every accessory it owns. The following glass vase makeover ideas use paint, texture, paper, metallic accents, and clever construction to create upscale results without upscale prices.
Before You Begin: Choose a Vase With Good Bones
Look for thick glass, a balanced silhouette, and a rim that is smooth and even. Simple cylinders, rounded urn shapes, wide hurricane vessels, and narrow bud vases are especially easy to upgrade. Skip chipped rims and hairline cracks; no finish is luxurious enough to make unsafe glass a good bargain.
Clean the Surface Like the Finish Depends on It
Wash the vase with warm, soapy water, remove adhesive residue, rinse thoroughly, and let it dry. Then wipe the exterior with isopropyl alcohol using a lint-free cloth. Oils from hands, label glue, dust, and mineral film can prevent paint or adhesive from bonding evenly. Handwashing is also gentler than repeated dishwasher cycles, which can contribute to permanent cloudiness on some glassware.
Whenever you use spray paint, etching cream, strong adhesive, gilding liquid, or sealant, work in a well-ventilated area and follow the manufacturer’s instructions for protective gear, temperature, drying time, and curing.
1. Create a Matte Faux-Ceramic Finish
Opaque, chalky surfaces instantly make clear glass feel more substantial. For a handmade ceramic effect, mix acrylic paint with a small amount of baking soda until the paint has a thick, lightly gritty consistency. Apply it with a foam brush or stiff-bristled brush, using overlapping strokes rather than trying to make the surface perfectly smooth.
How to Make It Look Expensive
Choose a restrained color such as warm white, mushroom, charcoal, putty, olive, or terracotta. Two thin coats usually look more refined than one heavy coat. For an aged finish, dry-brush a slightly lighter shade over the raised brush marks after the base has dried. This texture trick is commonly used to give ordinary containers the appearance of sculptural pottery.
Designer example: Paint three differently shaped vases in the same warm ivory. Group them on a dark wood console with one branch in the tallest vase. Repetition makes the collection look curated rather than crafty.
2. Add a Limestone or Concrete Texture
For a heavier, architectural appearance, coat the exterior with a thin layer of lightweight joint compound, premixed wall patch, or a craft product designed to imitate stone. Dab and sweep the material with a putty knife, sponge, or gloved fingers. Once dry, lightly sand any sharp peaks.
Build Depth With Layered Color
Use a medium taupe or gray-beige base, then stipple on two nearby shades. A dark glaze pressed into low areas creates convincing depth, while a pale dry-brush catches the high points. Keep the rim clean and smooth so the texture appears intentional. Concrete-inspired finishes have also been recommended as a way to modernize outdated vases without replacing them.
Do not coat the interior unless the chosen product is specifically suitable for prolonged water contact. A removable glass or plastic liner is the safest solution when you want to display fresh flowers.
3. Fake Frosted or Etched Glass
Frosted glass softens a cheap vase’s factory shine and gives it the quiet appearance of spa décor or custom architectural glass. Mask off stripes, arches, dots, or a wide lower band with painter’s tape and vinyl stencils. Apply a spray finish formulated for glass in light, even passes.
Use Negative Space for a Custom Result
A fully frosted vase can look elegant, but a combination of clear and frosted areas feels more thoughtfully designed. Try a clear monogram, a row of polished dots, or a transparent band around the middle. HGTV has featured painter’s-tape patterns with frosted spray for dollar-store vases, while paint manufacturers offer translucent and frosted products intended to create these glass effects.
Apply spray products outdoors or in strong ventilation, protect nearby surfaces, and follow the temperature and humidity range printed on the label. Avoid coating the inside of a vase that will repeatedly hold water unless the product explicitly permits it.
4. Make Vintage-Inspired Mercury Glass
Mercury glass has a mottled mirror finish that looks glamorous without being shiny in a brand-new, disco-ball way. To imitate it, lightly mist the inside of a clean vase with a water-and-vinegar mixture. Apply a mirror-effect spray paint intended for the reverse side of glass, blot selected droplets with a paper towel, and repeat until the reflection looks softly aged.
Keep the Distressing Irregular
Perfectly spaced marks look manufactured. Cluster some cloudy areas, leave others more reflective, and darken a few patches with a tiny amount of diluted black or brown craft paint. Mirror-effect vase projects often use uneven layering to recreate the antique character of traditional silvered glass.
Because the decorative coating sits inside, place a smaller watertight container inside the finished vase for fresh stems. That protects the finish and makes cleaning much easier.
5. Turn Clear Glass Into a Jewel-Toned Statement
Transparent color can make an ordinary vase resemble vintage amber, smoky green, cobalt, or ruby glass. Use stained-glass paint or another transparent coating formulated for glass. Apply several light coats, allowing each layer to dry as directed. The more coats you add, the deeper the color becomes.
Choose Sophisticated Colors
Olive, tobacco amber, oxblood, ink blue, and smoke gray often look more expensive than candy-bright shades. Krylon’s glass-project guidance notes that layered translucent coats can create varied stained-glass effects, while other DIY approaches tint clear vessels with decoupage medium and colorant.
For a designer grouping, tint two or three vases in variations of one color family. Keep their shapes different but their color story consistent.
6. Add a Gilded Rim, Base, or Graphic Band
A small amount of metallic detail can do more than covering the entire vase in gold. Mask a narrow line around the rim, a two-inch band at the base, or an asymmetrical brushstroke. Apply metallic glass paint, liquid gilding, or metal leaf with the adhesive and sealer recommended for the chosen system.
Restraint Is the Luxury Ingredient
Antique brass, champagne gold, pewter, and soft copper usually appear more refined than bright yellow metallics. Pair a gilded edge with a matte white body, smoky glass, or frosted panels. Decorative foil trims and liquid gilding are established ways to give inexpensive vessels and craft objects a polished accent.
For a crisp line, remove painter’s tape while the final coat is still slightly soft, unless the product instructions say otherwise. Pull the tape back over itself at a low angle.
7. Decoupage With Handmade Paper, Linen, or Botanicals
Decoupage becomes high-end when the material looks intentional. Instead of covering a vase with a busy collage, use one beautiful paper: handmade mulberry paper, a vintage botanical print, a linen-textured sheet, a monochrome map, or a restrained geometric pattern.
Apply the Design in Clean Sections
Brush decoupage medium onto a small area, smooth the paper from the center outward, and gently remove bubbles before continuing. Seal the exterior with compatible topcoats. Martha Stewart and HGTV both feature embellished glass vessels, while decoupage specialists recommend patterned tissue and fabric as practical glass treatments.
A wide paper cuff around the middle of a cylinder vase looks especially tailored. Leave an inch or two of clear glass visible at the top and bottom so the vase does not resemble a wrapped shipping tube with floral ambitions.
8. Wrap the Vase in Cane, Leather, Rope, or Linen
Texture can disguise inexpensive glass while adding warmth. Wrap only the lower third or middle section with narrow leather strips, flat jute, cotton cord, cane webbing, or heavy linen ribbon. Secure the material with a clear adhesive appropriate for glass and the chosen fiber.
Match the Wrap to the Room
Cane webbing suits coastal, organic-modern, and midcentury interiors. Dark leather makes a clear cylinder feel tailored and masculine. Fine cotton cord creates a clean Scandinavian look, while chunky rope leans rustic. The key is a neat seam placed at the back and perfectly level edges.
Use less material than your first instinct suggests. A six-inch band often looks more sophisticated than wrapping the vase from floor to ceiling as though it is preparing for winter.
9. Build a Raised Pattern, Then Paint It One Color
Raised decoration can transform a plain vase into something resembling carved pottery. Use glass-safe dimensional paint, flexible molding paste, narrow adhesive half-pearls, or small appliqués compatible with your adhesive. Create vertical ribs, irregular dots, arches, or a simple grid.
Unify Everything With a Monochrome Finish
Once the raised design has cured, prime as required and paint the entire exterior one matte color. The single-color coating makes separate materials read as one sculptural object. Better Homes & Gardens has highlighted dotted adhesive patterns and painted embellishments as ways to update ordinary vases.
For a modern look, space vertical ribs evenly. For an artisanal look, use slightly imperfect dots arranged in horizontal rows.
10. Create a Pedestal Vase From Two Thrifted Pieces
Changing the silhouette may be the most dramatic upgrade of all. Pair a straight-sided vase or shallow glass bowl with a sturdy glass candlestick, dessert cup, or small footed dish. Turn the base upside down if necessary, test the proportions, and bond the pieces with a clear adhesive specifically rated for glass.
Check the Balance Before Committing
Center the top vessel carefully and allow the adhesive to cure for the full recommended time. The base must be broad enough to support the vase when filled with water and flowers. When in doubt, use the finished piece only for dried stems or lightweight décor.
After assembly, leave the glass clear for a minimalist compote, frost both pieces, or paint the exterior in one faux-stone color. A unified finish hides the join and makes the two thrifted objects look like a single custom vessel.
How to Style a Budget Vase So It Looks Professionally Decorated
Even a flawless makeover can lose its magic when surrounded by clutter. Give the vase breathing room and repeat one element from the room, such as a metal finish, wood tone, or accent color. On a mantel or console, combine it with objects of different heights rather than lining everything up like suspects in a police procedural.
Use Flowers That Support the Finish
Matte stone vases look striking with sculptural branches, olive stems, or dried grasses. Jewel-toned glass pairs well with loose garden flowers. Mercury glass suits white blooms, winter greenery, and candlelight. A clear tape grid across the opening can support a fuller, more controlled arrangement while remaining hidden beneath the flowers.
For the vase-in-vase trick, place a narrow watertight vessel inside a larger decorative vase. The hidden container protects painted finishes and can hold flower stems upright. Event stylists also use nested vessels to produce polished, layered centerpieces.
Real-World Lessons From Budget Glass Vase Makeovers
The first lesson most DIYers learn is that preparation is less exciting than painting and far more important. A vase can look spotless while still carrying a faint layer of hand oil or adhesive. When paint beads up, separates, or scratches away with a fingernail, the problem often began before the brush touched the glass. Washing, drying, and wiping with alcohol may feel overly careful, but it is usually the difference between a convincing finish and a temporary one.
The second lesson is to test the technique on a jar before using the vase you actually like. A pasta jar can reveal whether a color dries darker than expected, whether a texture mix is too gritty, or whether a spray nozzle produces a fine mist or enthusiastic blobs. Testing also helps determine how many coats create opacity without burying attractive details in the glass.
Thin layers nearly always win. Thick paint runs, heavy decoupage wrinkles, and oversized blobs of adhesive announce that a project was rushed. Two or three controlled passes produce a smoother result and allow drying to happen evenly. This is especially important with translucent color, mirror paint, metallic finishes, and sealers, where one impatient coat can create permanent drips.
Another common discovery is that the vase’s shape matters more than its original price. A simple, well-proportioned cylinder often looks better after a makeover than an ornate vase with awkward curves. Bold silhouettes need quiet finishes, while basic silhouettes can handle more texture or pattern. When both the shape and finish are shouting, the flowers may quietly request a transfer.
Color selection also changes the perceived quality. Warm whites, clay tones, muted greens, brown-black, smoke gray, and aged metallics blend naturally with wood, stone, linen, and other materials commonly used in elevated interiors. Bright colors can still look beautiful, but they need a deliberate palette. Matching the vase to a fabric, artwork, or book spine already in the room makes the result feel connected rather than randomly added.
Drying time deserves respect. A surface may feel dry while remaining soft underneath, particularly when multiple coats have been applied. Handling it too early can leave fingerprints, tape marks, dents, or peeling edges. Full curing may take much longer than touch-drying, so follow the product label before filling, washing, or moving the vase.
Lighting provides one more useful test. Metallic and mirror finishes reveal every drip under direct sunlight, while textured surfaces can look flatter in a dark corner. View the finished vase during the day and evening before deciding where it belongs. Sometimes the vase needs another coat; sometimes it simply needs to move three feet to the left.
Finally, the best makeover often includes knowing when to stop. A textured stone finish may not need gold leaf. A jewel-toned vase may not need rope. A pedestal silhouette may not need a stencil, tassel, monogram, and inspirational quote. High-end décor tends to communicate one clear idea. Choose the feature that makes the vase special, execute it neatly, and let that decision do the work.
Conclusion
A cheap glass vase is not a decorating dead end; it is a blank surface with excellent potential. Matte faux ceramic can make it earthy, transparent color can make it vintage, and a narrow metallic band can make it quietly glamorous. Texture, decoupage, frosting, raised patterns, and pedestal construction offer even more ways to customize the shape and finish.
Start with a sound vase, clean it carefully, select one strong design direction, and use products intended for glass whenever possible. The final piece does not need to fool an antiques appraiser. It only needs to look intentional, work with your room, and make you slightly smug when someone asks where you bought it.
Research note: The techniques and safety principles in this guide were synthesized from practical guidance and project examples published by Martha Stewart, Better Homes & Gardens, The Spruce Crafts, HGTV, Apartment Therapy, Southern Living, Krylon, Rust-Oleum, The Home Depot, Lowe’s, Mod Podge Rocks, Craft Box Girls, and Repurpose and Upcycle.
Note: Decorative coatings may not be food-safe, dishwasher-safe, or suitable for continuous water exposure. Keep finishes on the exterior unless the manufacturer explicitly approves interior use, and use a removable liner for fresh flowers when necessary.














