
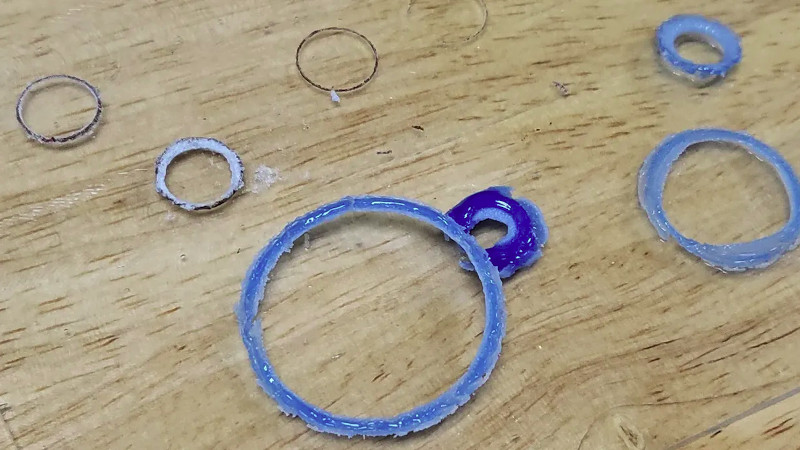
At first, the phrase “3D print glass with a laser cutter” sounds like something a sleep-deprived maker might say at 2 a.m. while surrounded by coffee cups, failed prints, and suspiciously crunchy powder. A laser cutter is supposed to cut and engrave. A 3D printer is supposed to build objects layer by layer. Glass is supposed to sit politely in windows, jars, lenses, and phone screens. Put the three together, and you get one of the most fascinating corners of experimental fabrication: using laser energy to fuse powdered glass into three-dimensional forms.
This is not the same as pressing “print” on a desktop machine and watching a perfect transparent vase appear before lunch. Glass additive manufacturing is still difficult, expensive, and full of little science gremlins. But the idea is very real. Researchers, engineers, artists, and adventurous makers have explored ways to print glass using selective laser sintering, molten glass extrusion, direct ink writing, binder systems, and powder-based methods. A laser cutter, in particular, can act as a surprisingly accessible test platform for experimenting with glass powder, laser passes, heat input, and layer-by-layer sintering.
In simple terms, the process borrows ideas from selective laser sintering, often called SLS. Instead of extruding melted plastic like an FDM printer, SLS spreads a thin layer of powder and uses a laser to fuse only the areas that belong to the part. The loose powder around it acts as support. With polymers, this is already a mature manufacturing method. With glass, it becomes a more delicate dance because glass softens, flows, cracks, crystallizes, and changes color depending on heat, cooling rate, particle size, chemistry, and laser focus. In other words, glass has personality. Dramatic personality.
What Does It Mean to 3D Print Glass With a Laser Cutter?
To 3D print glass with a laser cutter means using a laser cutter or laser engraver as the heat source for fusing glass powder, glass beads, or glass-rich material in a controlled pattern. A typical laser cutter moves a beam across a flat work area. If that beam is aimed at a thin bed of powdered glass, it can heat selected regions enough to soften or partially melt the particles. Once those particles bond, another layer of powder can be added, and the process can repeat.
The concept is similar to laser powder bed fusion, but the equipment is less specialized. A commercial SLS printer is built with controlled powder handling, chamber heating, atmosphere management, recoating systems, and software tuned for repeatability. A laser cutter, by contrast, is a flatbed tool. It was not designed to be a glass 3D printer. That is exactly why the idea is interesting. It shows how far creative fabrication can go when people look at a familiar machine and ask, “What else can this thing do?”
In maker experiments, repeated fast laser passes can gradually fuse powdered glass more effectively than a single slow pass. A less tightly focused beam may sometimes produce a smoother color or more even heat distribution. Resolution can become surprisingly fine in small tests, but the finished part may still be fragile, rough, porous, or inconsistent. Think “experimental fused glass prototype,” not “museum-grade optical lens.”
Why Glass Is So Hard to 3D Print
Plastic is forgiving. Heat it, push it through a nozzle, let it cool, and it usually behaves. Glass is less forgiving. It needs high temperatures, careful cooling, and good stress management. Many silica-rich glasses require processing temperatures that can reach well above 1,000°C in traditional sintering or melting workflows. That is far beyond the comfort zone of most hobby tools and many shop environments.
Glass Does Not Melt Like Plastic
Thermoplastics have relatively predictable melting behavior. Glass softens gradually over a temperature range. Its viscosity changes as it heats, meaning it may go from rigid to sticky to fluid without one clean “now I am melted” moment. If the laser energy is too low, the particles do not bond well. If it is too high, the surface can bubble, deform, darken, crack, or pull into blobs. If cooling is uneven, residual stress can build inside the part like a tiny invisible prank waiting to break something later.
Powder Size and Chemistry Matter
Glass powder is not just “dust that sparkles.” Particle size distribution affects how well the powder spreads, how densely it packs, how much laser energy it absorbs, and how smoothly the fused area forms. Glass chemistry also matters. Soda-lime glass, borosilicate glass, silica glass, glass beads, recycled glass, and specialty optical glasses all behave differently. Some absorb laser energy better than others. Some are more prone to devitrification, which is when glass begins forming crystals and loses desirable transparency or consistency.
Cooling Is as Important as Heating
The laser gets all the attention because lasers are flashy, but cooling is where many glass projects succeed or fail. If one region cools much faster than another, stress forms. That stress can produce cracks immediately or later during handling. Industrial glass processes often use annealing, a controlled heating and cooling cycle that allows internal stresses to relax. Without annealing, a printed glass piece can look fine until it suddenly decides to become a small pile of disappointment.
How a Laser Cutter Can Act Like a Tiny SLS Lab
A laser cutter already has three useful ingredients: a controlled beam, a motion system, and software that can trace digital patterns. When working with wood, acrylic, paper, leather, or coated materials, the laser removes or marks material. When working with glass powder, the goal is different. The beam should deliver enough energy to fuse particles together without blasting the powder bed into a glittery snowstorm.
The basic experimental workflow looks like this: prepare a thin layer of glass powder, scan the desired shape with the laser, add another thin layer, scan again, and repeat. In practice, every phrase in that sentence contains a headache. The powder must be spread evenly. The bed must remain flat. The laser settings must be tested. The machine must be protected from abrasive particles. Ventilation and filtration must be serious, not decorative. The finished part must be removed gently, cleaned, and possibly annealed or further fired.
Fast Passes Versus Slow Passes
One useful lesson from maker experiments is that repeated fast passes may work better than one slow, aggressive pass. A slow pass can overheat the surface, cause uneven melting, or create local defects. Multiple faster passes allow heat to build more gradually. This can help fuse more glass while reducing sudden thermal shock. It is a bit like toasting bread: one controlled cycle is breakfast; ten seconds under a blowtorch is a smoke alarm with crumbs.
Focus Is Not Always Your Friend
Laser users often chase the sharpest possible focus because it improves engraving detail and cutting efficiency. With glass powder, the tightest focus is not always best. A slightly defocused beam can spread energy over a wider area, producing more uniform heating and sometimes better visual results. The trade-off is lower detail. The best focus depends on powder type, laser wavelength, power, speed, layer thickness, and the desired texture.
The Powder Bed Is the Unsung Hero
Professional SLS systems rely on powder beds that are carefully managed. A hobby laser cutter setup must improvise. If the layer is too thick, the laser may only fuse the top and leave weak material underneath. If it is too thin, the underlying surface may overheat or the build may lose dimensional accuracy. A consistent recoating method is essential, whether it uses a blade, roller, frame, or manually leveled tray. The smoother the powder bed, the less the final part looks like it was made during an earthquake.
Can a CO₂ Laser Cutter Print Real Glass?
A CO₂ laser cutter can engrave glass and can heat certain glass-containing powders, but “printing real glass” depends on definitions and expectations. Standard CO₂ laser systems are often better at engraving or surface heating than cutting cleanly through clear glass sheets. For powder sintering, the beam interacts with many tiny particles rather than a solid pane. That creates a different opportunity: the particles can absorb heat, soften, and bond.
However, a normal laser cutter does not automatically become a safe or reliable glass printer. The optics, belts, rails, exhaust path, bed surface, and electronics may not appreciate abrasive glass powder floating around. Fine glass powder can damage moving components and create respiratory hazards. Anyone experimenting in this space should treat it as materials research, not a weekend craft project for the kitchen table.
How This Compares With Other Glass 3D Printing Methods
The laser cutter method is exciting because it is accessible, but it is only one branch of glass additive manufacturing. Other methods show where the field is heading and why glass printing has captured so much attention.
Molten Glass Extrusion
Molten glass extrusion uses a high-temperature system to melt glass and deposit it through a nozzle. This approach can create beautiful transparent objects with layered forms. The challenge is obvious: molten glass demands extremely hot equipment, precise temperature control, and careful annealing. It is closer to combining a 3D printer with a furnace than modifying a desktop machine.
Direct Ink Writing
Direct ink writing uses a printable glass-rich ink or paste that is extruded at room temperature or relatively low temperature, then cured or sintered later. Recent research has explored silicate solutions mixed with inorganic nanoparticles, allowing complex glass-like structures to be printed without the extreme temperatures traditionally associated with glass processing. This route may be especially promising for microfluidic devices, electronic components, custom optics, and lab hardware.
Glass-Filled Filament
Another practical approach is to load glass powder into a thermoplastic binder and print it on an FFF-style 3D printer. The printed “green” part is then debound and sintered in a kiln. This does not use a laser cutter, but it makes glass printing more familiar to users who already understand filament-based machines. Shrinkage, warping, binder burnout, and furnace schedules become the main challenges.
Industrial Laser Powder Bed Fusion
Industrial laser powder bed fusion offers better control than a repurposed laser cutter. These systems can manage layers, heat, scanning strategy, and atmosphere more carefully. Even so, glass remains difficult. Researchers continue to study laser power, scan speed, layer thickness, powder morphology, and thermal profiles to improve density, reduce cracking, and create usable parts.
What Can You Make by Laser-Sintering Glass Powder?
The most realistic early applications are not perfect drinking glasses or crystal-clear windows. Instead, laser-sintered glass is better suited to small experimental objects, textured tiles, decorative inserts, porous filters, art pieces, research coupons, and proof-of-concept geometries. With refinement, glass additive manufacturing could support microfluidic channels, high-temperature fixtures, chemical-resistant parts, optical diffusers, custom lighting elements, and electronic substrates.
Glass has properties that makers and engineers love: heat resistance, chemical stability, hardness, electrical insulation, transparency, and long-term durability. If additive manufacturing can unlock complex shapes in glass, designers could create parts that are difficult or impossible to mold, drill, cast, or machine. Imagine a lab-on-a-chip device with internal channels, a custom light guide with built-in diffusion, or a heat-resistant part with geometry too weird for conventional tooling. Weird geometry, of course, is where 3D printing likes to put on sunglasses and strut.
Major Challenges of Printing Glass With a Laser Cutter
1. Fragility and Porosity
Laser-sintered glass may not reach full density. Tiny pores can remain between particles, reducing strength and optical clarity. Porosity can be useful for filters or artistic texture, but it is a problem for transparent or load-bearing parts.
2. Surface Roughness
Powder-based glass parts usually have a rougher surface than polished or molded glass. Post-processing such as kiln firing, polishing, flame finishing, or coating may improve the surface, but each step adds complexity.
3. Cracking and Thermal Stress
Rapid heating and cooling are tough on glass. Localized laser energy can create steep temperature gradients, which can lead to cracks. Preheating the bed, controlling scan strategy, and annealing may help, but a simple laser cutter does not offer the same thermal control as an industrial system.
4. Machine Contamination
Glass powder is abrasive. It can scratch optics, wear rails, contaminate fans, and damage motion components. Any experiment should include containment, careful cleanup, and machine protection. A laser cutter full of fine glass powder is not a laser cutter having its best day.
5. Safety Risks
Fine glass powder can be harmful if inhaled. Laser radiation can injure eyes and skin. Heated materials can produce fumes, hot particles, and fire risks. Proper enclosure, ventilation, filtration, respiratory protection, eye protection, fire safety, and materials knowledge are essential. This is not a process to attempt casually, especially in shared spaces, classrooms, or homes without professional safety controls.
Design Tips for Better Glass Laser-Sintering Results
Designs for laser-sintered glass should start simple. Flat medallions, small tiles, rings, test coupons, lattices, and shallow relief patterns are better first targets than tall, thin, delicate sculptures. Uniform wall thickness helps reduce stress. Rounded corners are friendlier than sharp internal corners. Small test patterns are useful because they reveal how the powder responds to different scanning speeds, beam focus, and layer heights.
It is also wise to design for texture rather than perfect transparency. A laser-sintered glass object may have a frosted, ceramic-like, or granular surface. That can be beautiful if the design embraces it. Lighting panels, decorative badges, tactile surfaces, and diffusers may benefit from the natural texture. Trying to make a flawless optical lens on a hacked laser cutter, however, is a great way to develop a close personal relationship with frustration.
Where the Technology Is Going
The future of 3D printed glass will likely come from several directions at once. Research labs are improving low-temperature glass inks. Industrial teams are refining laser powder bed fusion. Material companies are developing printable glass-filled filaments and binder systems. Artists and makers are pushing accessible tools in unexpected ways. Over time, these paths may converge into safer, more repeatable workflows.
For now, laser cutter glass printing remains experimental. It is valuable because it teaches the fundamentals: laser energy, powder behavior, heat control, layer stacking, and material limits. Even failed prints are educational. A cracked sample can explain thermal stress. A bubbly sample can reveal overheating. A weak sample can point to poor fusion. In glass printing, the failures do not merely fail; they leave clues. Slightly sharp clues, so wear gloves.
Real-World Experience: What It Feels Like to Work With Laser-Sintered Glass
The first experience most people have with this topic is surprise. A laser cutter feels like a two-dimensional machine. It engraves logos, cuts plywood, marks anodized aluminum, and makes acrylic smell like regret. Asking it to build a three-dimensional glass object feels almost illegal, as if the machine manual might clear its throat and say, “Excuse me, I did not sign up for this.” But once you understand powder-bed printing, the idea begins to make sense. The laser does not need to lift a nozzle. It only needs to draw each slice of the object in heat.
The second experience is humility. Glass powder does not behave like PLA filament. It does not arrive on a tidy spool, feed through a hot end, and forgive bad slicer settings. It spreads unevenly, clings to surfaces, reflects light strangely, and makes cleanup a serious part of the workflow. Even preparing a level powder bed can become a small engineering project. A tiny ridge in the powder can turn into a raised defect. A thin spot can create weak fusion. A little air movement can disturb the surface. Suddenly, the “print bed” is not just a platform; it is half the process.
The third experience is that laser settings become a language. Too much power and the glass may discolor, bubble, or ball up. Too little power and the particles sit there like they are waiting for better management. Too slow and heat concentrates badly. Too fast and nothing bonds. Multiple quick passes can feel more controlled than one dramatic blast. Defocusing the beam slightly can sometimes produce a more even fused area. The process rewards patience, note-taking, and small experiments. It punishes the classic maker habit of saying, “Let’s just turn it all the way up and see what happens.”
The fourth experience is learning to respect post-processing. A part that survives the laser stage may still need careful handling, cleaning, firing, or annealing. Removing loose powder without breaking fragile features can feel like archaeology. You are not simply pulling a print off a plate; you are excavating a delicate object from a bed of abrasive particles. If the piece has internal stress, rough edges, or incomplete fusion, it may fail during cleanup. That can be annoying, but it is also useful feedback. Glass is brutally honest. It does not flatter your settings.
The fifth experience is creative excitement. Even rough laser-sintered glass has a visual quality that plastic cannot imitate. It catches light differently. It can look frosted, mineral, ancient, or futuristic depending on particle size and heat. Small tiles, symbols, textured panels, and experimental jewelry-like forms can have real charm. For artists, that imperfect surface may be a feature rather than a flaw. For engineers, it suggests future possibilities: porous glass filters, custom lab parts, heat-resistant fixtures, and compact devices with geometry that conventional glassmaking struggles to achieve.
The final experience is caution. This topic is exciting, but it belongs in a controlled workspace with proper safety practices. Lasers, glass powder, heat, fumes, and fragile parts are not casual materials. The best mindset is not “hack first, ask later.” It is “test small, document everything, protect the machine, protect the lungs, protect the eyes, and keep a fire plan nearby.” The reward is not instant perfection. The reward is participating in a frontier where digital fabrication meets one of humanity’s oldest engineered materials. That is a pretty good trade, even if the first few prints look like haunted sugar cubes.
Conclusion
3D printing glass with a laser cutter is not yet a plug-and-play manufacturing method, but it is one of the most intriguing experiments in accessible fabrication. By borrowing principles from selective laser sintering, a laser cutter can fuse powdered glass layer by layer and produce small, textured, glass-rich forms. The process is challenging because glass requires careful heat control, consistent powder layers, stress management, and serious safety precautions. Still, the idea points toward a future where glass objects can be designed digitally and formed with less tooling, more geometric freedom, and new creative possibilities.
For makers, the lesson is curiosity with discipline. For engineers, it is a reminder that material science matters as much as motion control. For artists, it opens a door to luminous, textured, experimental objects that carry the magic of glass without relying entirely on traditional glassblowing or casting. The laser cutter may not replace industrial glass 3D printers, but it can help us understand the principles behind them. And sometimes, understanding the principle is the spark that starts the next breakthrough.
Note: This article is for educational and editorial purposes. Laser-based glass powder experiments involve serious risks, including laser exposure, inhalable particles, heat, fire, machine contamination, and sharp fragments. Any practical work should be performed only with appropriate training, safety equipment, ventilation, containment, and professional supervision.














