
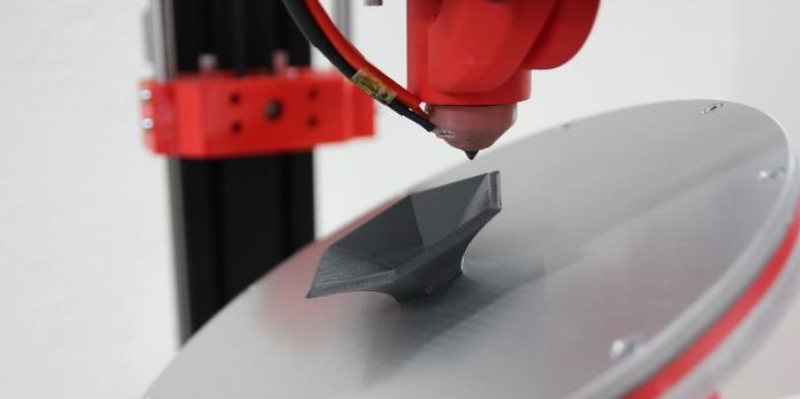
If a regular 3D printer is a disciplined office worker, a 3D printer with a tilted bed is the cousin who shows up in work boots, starts a side hustle, and somehow leaves with all the attention. This unusual machine flips the usual rules of FDM printing by changing the print angle and replacing the flat, stationary build plate with a moving belt or angled platform. The result is a printer that can make parts longer than its own frame, spit out finished pieces one after another, and generally behave like a desktop manufacturing line with a rebellious streak.
That sounds amazing, and sometimes it is. But a tilted-bed 3D printer is not a magic wand with a nozzle. It is a specialized tool with real strengths, very real compromises, and a learning curve shaped suspiciously like a ramp. If you are curious about whether this style of machine is clever engineering, glorious overkill, or both, this guide will walk you through how it works, where it shines, where it stumbles, and what the actual experience feels like when you live with one.
What Is a 3D Printer With a Tilted Bed?
In most cases, when people talk about a 3D printer with a tilted bed, they mean a belt printer or conveyor-style 3D printer. Instead of printing straight down onto a flat bed, the nozzle is angled relative to the print surface, and the print surface itself moves like a conveyor belt. This changes the geometry of the print in a big way. Suddenly, the machine is no longer limited by a fixed build volume in the same way as a standard Cartesian printer.
That is why tilted-bed printers are often described with phrases like continuous 3D printing, infinite Z-axis, or batch printing. Those terms are a little dramatic, but the basic idea is real: the machine can keep advancing the belt so completed parts move away from the nozzle, making room for more printing. In theory, it can print parts much longer than the machine itself, as long as the design, material, and setup all cooperate. In practice, physics still has a vote, and it tends to vote loudly.
How the Tilted-Bed System Works
The angle changes everything
A traditional FDM printer stacks layers upward on a horizontal bed. A tilted-bed printer rotates that relationship. The nozzle prints at an angle, often around 45 degrees, onto a moving belt. This means each new layer is not just stacked directly above the last one; it is also being carried forward by the belt as the build progresses.
This is the key trick. Because the belt is moving, the machine can keep creating geometry that extends “forward” off the print area. That is why a long rail, trim piece, organizer channel, cosplay blade core, or repeated batch of identical brackets becomes possible in a way that feels almost comical the first time you see it happen. It looks wrong. Then it works. Then you start thinking dangerous thoughts like, “Could I print a six-foot part in my apartment?”
The belt acts as both bed and exit ramp
The belt does two jobs at once. First, it provides the surface the first layers stick to. Second, it becomes the mechanism that advances the print and eventually ejects finished parts. That dual role is what makes the machine so interesting, but it is also why setup matters so much. If first-layer adhesion is off, belt tension is wrong, or slicer settings are not tuned for angled printing, the dream of an automated mini-factory turns into a very efficient spaghetti launcher.
Why People Want a 3D Printer With a Tilted Bed
1. It can print very long parts
This is the headline feature. A normal printer limits you to the dimensions of its build box. A tilted-bed printer lets one dimension stretch far beyond the machine’s frame. That makes it attractive for long jigs, trim pieces, rails, ducts, cosplay supports, cable channels, enclosures, and specialty components that would otherwise need to be split into smaller sections.
2. It can automate small-batch production
Instead of printing one part, waiting for the bed to cool, and manually removing it, a tilted-bed printer can keep feeding parts forward and dropping them off the end. For makers, that is delightful. For small businesses, it can be useful. If you are producing the same clip, hook, spacer, or bracket repeatedly, the printer starts feeling less like a hobby machine and more like a tiny factory that runs on plastic and optimism.
3. It solves certain orientation problems creatively
Because the print is built at an angle, some geometries behave differently than they do on a standard flat-bed printer. Features that would be awkward in a conventional orientation can sometimes print more naturally on a belt machine. That does not mean supports disappear forever like a magician’s assistant, but it does mean part orientation becomes a far more interesting design tool.
Where a Tilted-Bed Printer Really Shines
A 3D printer with a tilted bed is not the best machine for every print. But for certain jobs, it is genuinely brilliant.
- Long functional parts: rails, braces, channels, guides, trims, and elongated prototypes.
- Small production runs: clips, tags, fixtures, cable organizers, and repeatable shop parts.
- Oddly shaped parts: designs that benefit from a continuous print path or unique orientation.
- Experimental workflows: print farms, maker labs, and engineers who enjoy solving weird problems on purpose.
In other words, this is a tool for people who print with intent. If your idea of 3D printing bliss is making one dragon, one planter, and one desk toy every other weekend, you may not need this machine. If your idea of bliss is waking up to a pile of finished parts that quietly rolled off a belt at 3 a.m., now we are talking.
The Drawbacks Nobody Should Pretend Away
First-layer adhesion is more demanding
The first layer is always important in FDM printing. On a tilted-bed printer, it becomes the opening scene, the lead actor, and the insurance policy. If the part does not stick to the belt well enough, the print can fail early. If it sticks too aggressively or peels unevenly, the underside can suffer. This balancing act makes material choice, belt surface condition, and raft strategy especially important.
Supports and overhangs get weird fast
Traditional FDM design rules still matter. Overhangs are still overhangs. Cooling still matters. Gravity remains stubbornly employed. A tilted-bed printer does not erase those realities; it simply rearranges them. Some shapes become easier, while others become more annoying than they were on a flat bed. If a design has dramatic unsupported features, you still need to think like a designer and not like a wishful philosopher.
Dimensional thinking is different
When you print on a conveyor-style machine, the part is being built along a rotated coordinate system. That means tolerances, seam placement, bottom finish, and effective orientation all deserve extra attention. A part that looks easy in CAD can become surprisingly fussy when it meets a belt printer. Sometimes the machine is the hero. Sometimes it is the plot twist.
It is a niche tool, not a universal upgrade
This is the part buyers need to hear: a tilted-bed printer is not automatically “better” than a modern CoreXY or even a solid standard bed-slinger. It is better for certain workflows. If your top priorities are easy setup, broad community support, high-speed general printing, or straightforward dimensional parts, a mainstream printer may still be the smarter buy.
Slicing and Setup: The Secret Sauce
The hardware gets the attention, but the software earns the paycheck. A tilted-bed machine needs slicer support that understands belt geometry, angled toolpaths, seam behavior, and special adhesion features like belt rafts. This is not a printer you want to drive with random assumptions and crossed fingers.
Good slicing strategy usually includes:
- Choosing the correct belt-printer profile
- Using a belt raft when extra grip is needed
- Controlling seam placement so surface defects stay predictable
- Adjusting speed and cooling for overhang-heavy geometry
- Designing parts with the belt axis in mind
This is why many experienced users say the real learning curve is not the machine itself but the mindset. On a normal printer, you ask, “Will this fit on the bed?” On a tilted-bed printer, you ask, “How should this live on the belt?” That is a better question, but it takes time to learn.
Design Tips for Better Results
Respect the 45-degree logic
Standard FDM design wisdom still matters. Gentle angles, chamfers, smart orientation, and reasonable layer heights go a long way. If you try to force a belt printer to behave like a miracle machine, it will respond with the emotional range of a toaster and the output quality of a bad decision.
Design for release, not just adhesion
On a traditional printer, you mostly think about sticking to the bed. On a tilted-bed machine, you also need the part to release cleanly as it reaches the end of the belt. That means base geometry, raft thickness, and part shape all affect success.
Use the machine for parts that suit its strengths
The smartest use of a 3D printer with tilted bed is not to print everything on it. It is to print the things that only it does elegantly. Long parts, repeated parts, and automation-friendly parts are where this format earns its keep.
Examples of Tilted-Bed Printers and Related Systems
Several machines and projects have helped define this category. Consumer interest grew around conveyor-style systems such as the Creality CR-30, sometimes marketed as a print-mill concept. Industrial and prosumer designs, including BlackBelt and Sliding-3D style systems, pushed the idea of continuous printing further. Meanwhile, community-built projects and conversion kits have made the concept more accessible to tinkerers who would rather mod an existing printer than buy a dedicated machine.
That last point matters because tilted-bed printing attracts a certain kind of user: the kind who sees a normal printer and immediately wonders how much more interesting it would be if the bed moved like a treadmill. This category rewards curiosity, patience, and a willingness to troubleshoot things that most printer owners never have to think about.
Should You Buy a 3D Printer With a Tilted Bed?
You should consider one if at least one of these statements feels true:
- You regularly need parts longer than a conventional build volume.
- You want automatic batch printing without constant bed clearing.
- You enjoy experimenting with slicing, orientation, and machine tuning.
- You run a small workflow where repeated simple parts matter more than all-purpose flexibility.
You probably should not make it your first printer if you are still learning the basics of bed adhesion, extrusion, and support tuning. A tilted-bed machine adds new opportunities, but it also adds new variables. If you are already confident with FDM printing, that can be exciting. If you are brand new, it can feel like learning to drive in a snowstorm because you liked the color of the car.
Experience: What Living With a Tilted-Bed 3D Printer Is Actually Like
Using a 3D printer with a tilted bed feels a little like adopting a very talented pet that knows a trick no other pet in the neighborhood can do. The first few prints are equal parts thrilling and suspicious. You watch the nozzle move at an angle, the belt crawl forward, and the part slowly appear in a way that seems to ignore the laws of common sense. When the machine finally pushes a finished part off the end by itself, it is hard not to grin. It is the kind of moment that reminds you why people fall in love with fabrication tools in the first place. A normal printer makes an object. A tilted-bed printer performs a stunt.
Then the romance becomes a relationship, and that is when the real experience starts. You begin noticing that success has a routine. Belt surface condition matters. Cleanliness matters. Tension matters. Slicer settings matter more than you expected. Tiny changes in orientation can produce very different outcomes. Prints that seem easy in CAD can ask rude questions in real life. Long thin parts may wobble, adhesion may vary across the belt, and what looked like an “automatic production setup” in your imagination may actually require a week of tuning before it earns that title.
Still, when it clicks, it really clicks. There is something deeply satisfying about loading a queue of parts and letting the machine keep going. For repetitive jobs, the workflow feels more industrial than hobbyist. Instead of treating every print like a separate event, you start thinking in runs, throughput, and output consistency. It changes your relationship with desktop manufacturing. You begin designing parts not only for printability, but for flow. Can this eject cleanly? Will this raft peel predictably? Can I fit ten of these in a sequence without inviting a disaster at hour seven? Those are wonderfully nerdy questions, and a tilted-bed printer makes them feel worth asking.
The machine also teaches humility. Some parts that should be perfect are not. Some parts that seem ridiculous print beautifully. You discover that “infinite build length” is true in the same way “all-you-can-eat” is true: technically generous, but still limited by your stamina, discipline, and the consequences of your choices. A six-foot print sounds heroic until you realize it needs uninterrupted feeding, stable cooling, clean motion, and enough physical space to go somewhere after leaving the belt. Suddenly, the machine is not just part of your desk. It is part of your room layout, your workflow planning, and occasionally your emotional development.
There is also a fun social side to owning one. Standard 3D printers are common enough now that non-makers usually nod politely and move on. A tilted-bed printer gets questions. It gets lingering stares. It gets the same reaction every time a part slides off the end: “Wait, it can do that?” Yes, it can. And no, you are not entirely over how cool that is.
In the long run, the experience is best for people who enjoy process as much as results. If you want a machine that quietly prints ordinary parts with minimal drama, there are easier options. If you want a tool that opens unusual manufacturing possibilities and rewards experimentation, a tilted-bed printer is wildly compelling. It is not the calmest machine in the room, but it may be the most memorable. And for many makers, that is exactly the point.
Conclusion
A 3D printer with a tilted bed is one of the most inventive twists on FDM printing. It is part conveyor system, part geometry hack, part production experiment, and part “what if we ignored tradition and tried something fun?” For long parts, repeated parts, and automation-minded printing, it can do things ordinary desktop printers simply cannot do gracefully.
But this is not a universal replacement for conventional machines. It is a specialized format that rewards smart design, careful slicing, and patience. When used for the right jobs, it feels brilliant. When used for the wrong jobs, it can feel like explaining modern art to a smoke alarm.
If your workflow demands long builds, batch output, or continuous production, a tilted-bed printer deserves serious attention. If nothing else, it proves that desktop fabrication still has room for clever ideas. And in a category full of rectangular boxes making plastic objects one layer at a time, that counts for a lot.














