
Conditioning your knuckles should make your hands better prepared for boxing, kickboxing, or martial arts trainingnot turn them into an orthopedic case study. Despite what dramatic training montages suggest, repeatedly punching walls, bricks, trees, or concrete does not create invincible fists. It creates a very efficient shortcut to bruising, nerve irritation, damaged joints, and fractures.
The hand contains numerous small bones, joints, tendons, ligaments, and nerves that must work together during every punch. A poorly aligned strike can concentrate force on the smaller fourth and fifth metacarpals. That is one reason punching a hard object commonly causes a fifth-metacarpal injury known as a boxer’s fracture. Hand and wrist injuries are also common across combat sports, with metacarpal fractures among the frequently reported problems.
Effective knuckle conditioning is therefore less about damaging the skin and bones until they “toughen up” and more about improving alignment, technique, strength, load tolerance, and recovery. The following four methods offer a practical way to develop more durable hands without treating pain as a personality test.
What Does It Mean to Condition Your Knuckles?
Knuckle conditioning is the gradual preparation of your hands and wrists for the forces created during punching. In a sensible program, several adaptations occur together:
- You learn to form a stable fist without crushing your thumb.
- You improve wrist alignment so force travels through the forearm.
- You strengthen the muscles controlling the fingers, hand, and wrist.
- You gradually become comfortable with controlled impact on suitable equipment.
- Your skin may become slightly less sensitive to friction from wraps and gloves.
This is not the same as deliberately creating microfractures. Bone adapts to appropriate mechanical loading, but uncontrolled impact can exceed the tissue’s ability to recover. More pain does not automatically mean more progress. Sometimes it simply means your hand would like to file a formal complaint.
1. Develop Proper Fist and Wrist Alignment
The first and most important way to condition your knuckles is to learn how to deliver force safely. Strong hands cannot rescue a punch that lands with a bent wrist or loose fist.
When punching, the wrist should generally remain close to neutral rather than bending sharply upward, downward, or sideways. The forearm and hand should form a stable line at contact. Poor wrist positioning can place unnecessary stress on the wrist joints, tendons, and smaller bones of the hand. Sports-medicine guidance consistently emphasizes proper positioning, suitable technique, gradual progression, and strengthening as foundations of injury prevention.
How to Form a Stable Fist
- Begin with an open, relaxed hand.
- Fold your fingertips firmly into the palm.
- Close the fingers from the smallest finger toward the index finger.
- Place the thumb across the outside of the index and middle fingers.
- Never tuck the thumb inside the fist.
- Tighten the fist shortly before contact rather than squeezing at maximum effort throughout the entire movement.
For most straight punches, aim to transfer force primarily through the first two knucklesthe index and middle knuckleswhile maintaining a straight wrist. Hooks and uppercuts involve different angles, which is why beginners should learn them from an experienced boxing or martial arts coach.
Practice Without Impact First
Start with slow shadowboxing in front of a mirror. Throw single jabs and crosses at 25 to 40 percent speed. Pause just before full extension and inspect your wrist. It should not droop, twist excessively, or buckle sideways.
Next, press your closed fist gently against a wall-mounted pad or a coach’s focus mitt. Do not punch yet. Apply light pressure and notice whether the fist, wrist, elbow, and shoulder feel connected. This isometric drill teaches your body what solid alignment feels like without adding a high-speed collision.
Perform two or three sets of five controlled repetitions per hand. Technique should remain identical from the first repetition to the last. Once fatigue causes the wrist to wobble, the useful portion of the drill is over.
2. Use Gradual Heavy-Bag Training With Proper Protection
Once your technique is reasonably consistent, controlled bag work can help your hands adapt to impact. The key word is controlled. A heavy bag is training equipment, not an enemy who insulted your family.
Wear correctly applied hand wraps and appropriately sized boxing gloves. Wraps help stabilize the wrist, thumb, and hand, while gloves spread and cushion impact. Organized boxing also regulates competition equipment, and experienced gyms generally require suitable wraps and gloves for bag work and sparring.
A Beginner-Friendly Impact Progression
Weeks 1 and 2: Perform three rounds of one minute, resting one minute between rounds. Use approximately 30 percent power and throw mostly jabs and crosses. Concentrate on clean contact and immediate retraction.
Weeks 3 and 4: Increase to three rounds of 90 seconds at roughly 40 to 50 percent power. Add simple combinations such as jab-cross and jab-cross-jab.
Weeks 5 and 6: Progress to three or four two-minute rounds. Include hooks only after a coach has checked your form. Keep most punches below maximum power.
After Week 6: Add a limited number of harder punches, but do not turn every round into a knockout audition. Power work should be brief, technically clean, and followed by adequate recovery.
Choose the Right Target
A traditional heavy bag should have some movement and give when struck. An excessively dense, compacted bag may feel more like punching a utility pole in a leather jacket. Beginners can start with focus mitts, a double-end bag, or a softer heavy bag before progressing to denser equipment.
Never begin conditioning by striking wood, metal, concrete, masonry, or an unpadded wall. Punching rigid objects is a classic mechanism for metacarpal fractures, especially around the smaller-finger side of the hand. A fractured knuckle may appear flattened or sunken, and the finger can become misaligned.
Use the 24-Hour Response Test
Mild muscular fatigue after bag work can be normal. Sharp pain, joint tenderness, reduced movement, or swelling is not a desirable training adaptation.
Check your hands immediately after the session and again the next morning. If discomfort is worse after 24 hours, reduce the intensity, volume, or density of the target during your next workout. Training should gradually expand your capacity, not create a collection of mysterious lumps.
3. Strengthen Your Grip, Wrists, and Forearms
Your knuckles do not work alone. The muscles of the fingers and forearms help maintain fist tension and control wrist position during impact. Strengthening these supporting structures may improve stability and reduce the likelihood that the wrist collapses when a punch lands imperfectly.
Hand specialists and fitness organizations commonly recommend controlled grip work, wrist exercises, mobility training, and balanced strengthening of both the muscles that close the hand and those that open it. Progressive grip training is also used in other hand-intensive sports to improve tolerance gradually.
Simple Knuckle-Support Circuit
Perform this circuit two or three times per week. Begin with one or two sets and use light resistance.
- Soft-ball squeezes: Hold a tennis ball, therapy ball, or rolled towel. Squeeze for three seconds, relax, and repeat 10 to 15 times per hand.
- Finger extensions: Place a light rubber band around your fingertips. Open the hand slowly against the band for 12 to 20 repetitions. This balances all the squeezing work.
- Wrist flexion and extension: Rest the forearm on a bench while holding a light dumbbell. Raise and lower the hand through a comfortable range for 10 to 15 repetitions in each direction.
- Pronation and supination: Hold one end of a light hammer or dumbbell. Slowly rotate the forearm so the palm turns upward and downward. Avoid jerking at the end of the movement.
- Farmer carries: Hold light or moderate dumbbells at your sides and walk for 20 to 30 seconds while keeping the wrists neutral.
ACE guidance on wrist exercises emphasizes controlled movement and warns against allowing weights to roll into the fingertips or using rapid, jerking motions. Harvard Health also identifies ball squeezes, putty exercises, and other hand-specific movements as accessible ways to develop grip.
Do Not Overtrain Your Grip
Your forearms already work during bag sessions, weight training, pull-ups, carrying, and ordinary daily tasks. Adding a heroic grip workout after every session can irritate the same tissues you are trying to strengthen.
Leave at least one recovery day between demanding hand-strength sessions. Stop an exercise if it causes joint pain, tingling, numbness, or a noticeable decline in coordination. Nerve-related hand problems may produce abnormal sensations, weakness, or reduced control and should not be treated by simply squeezing harder.
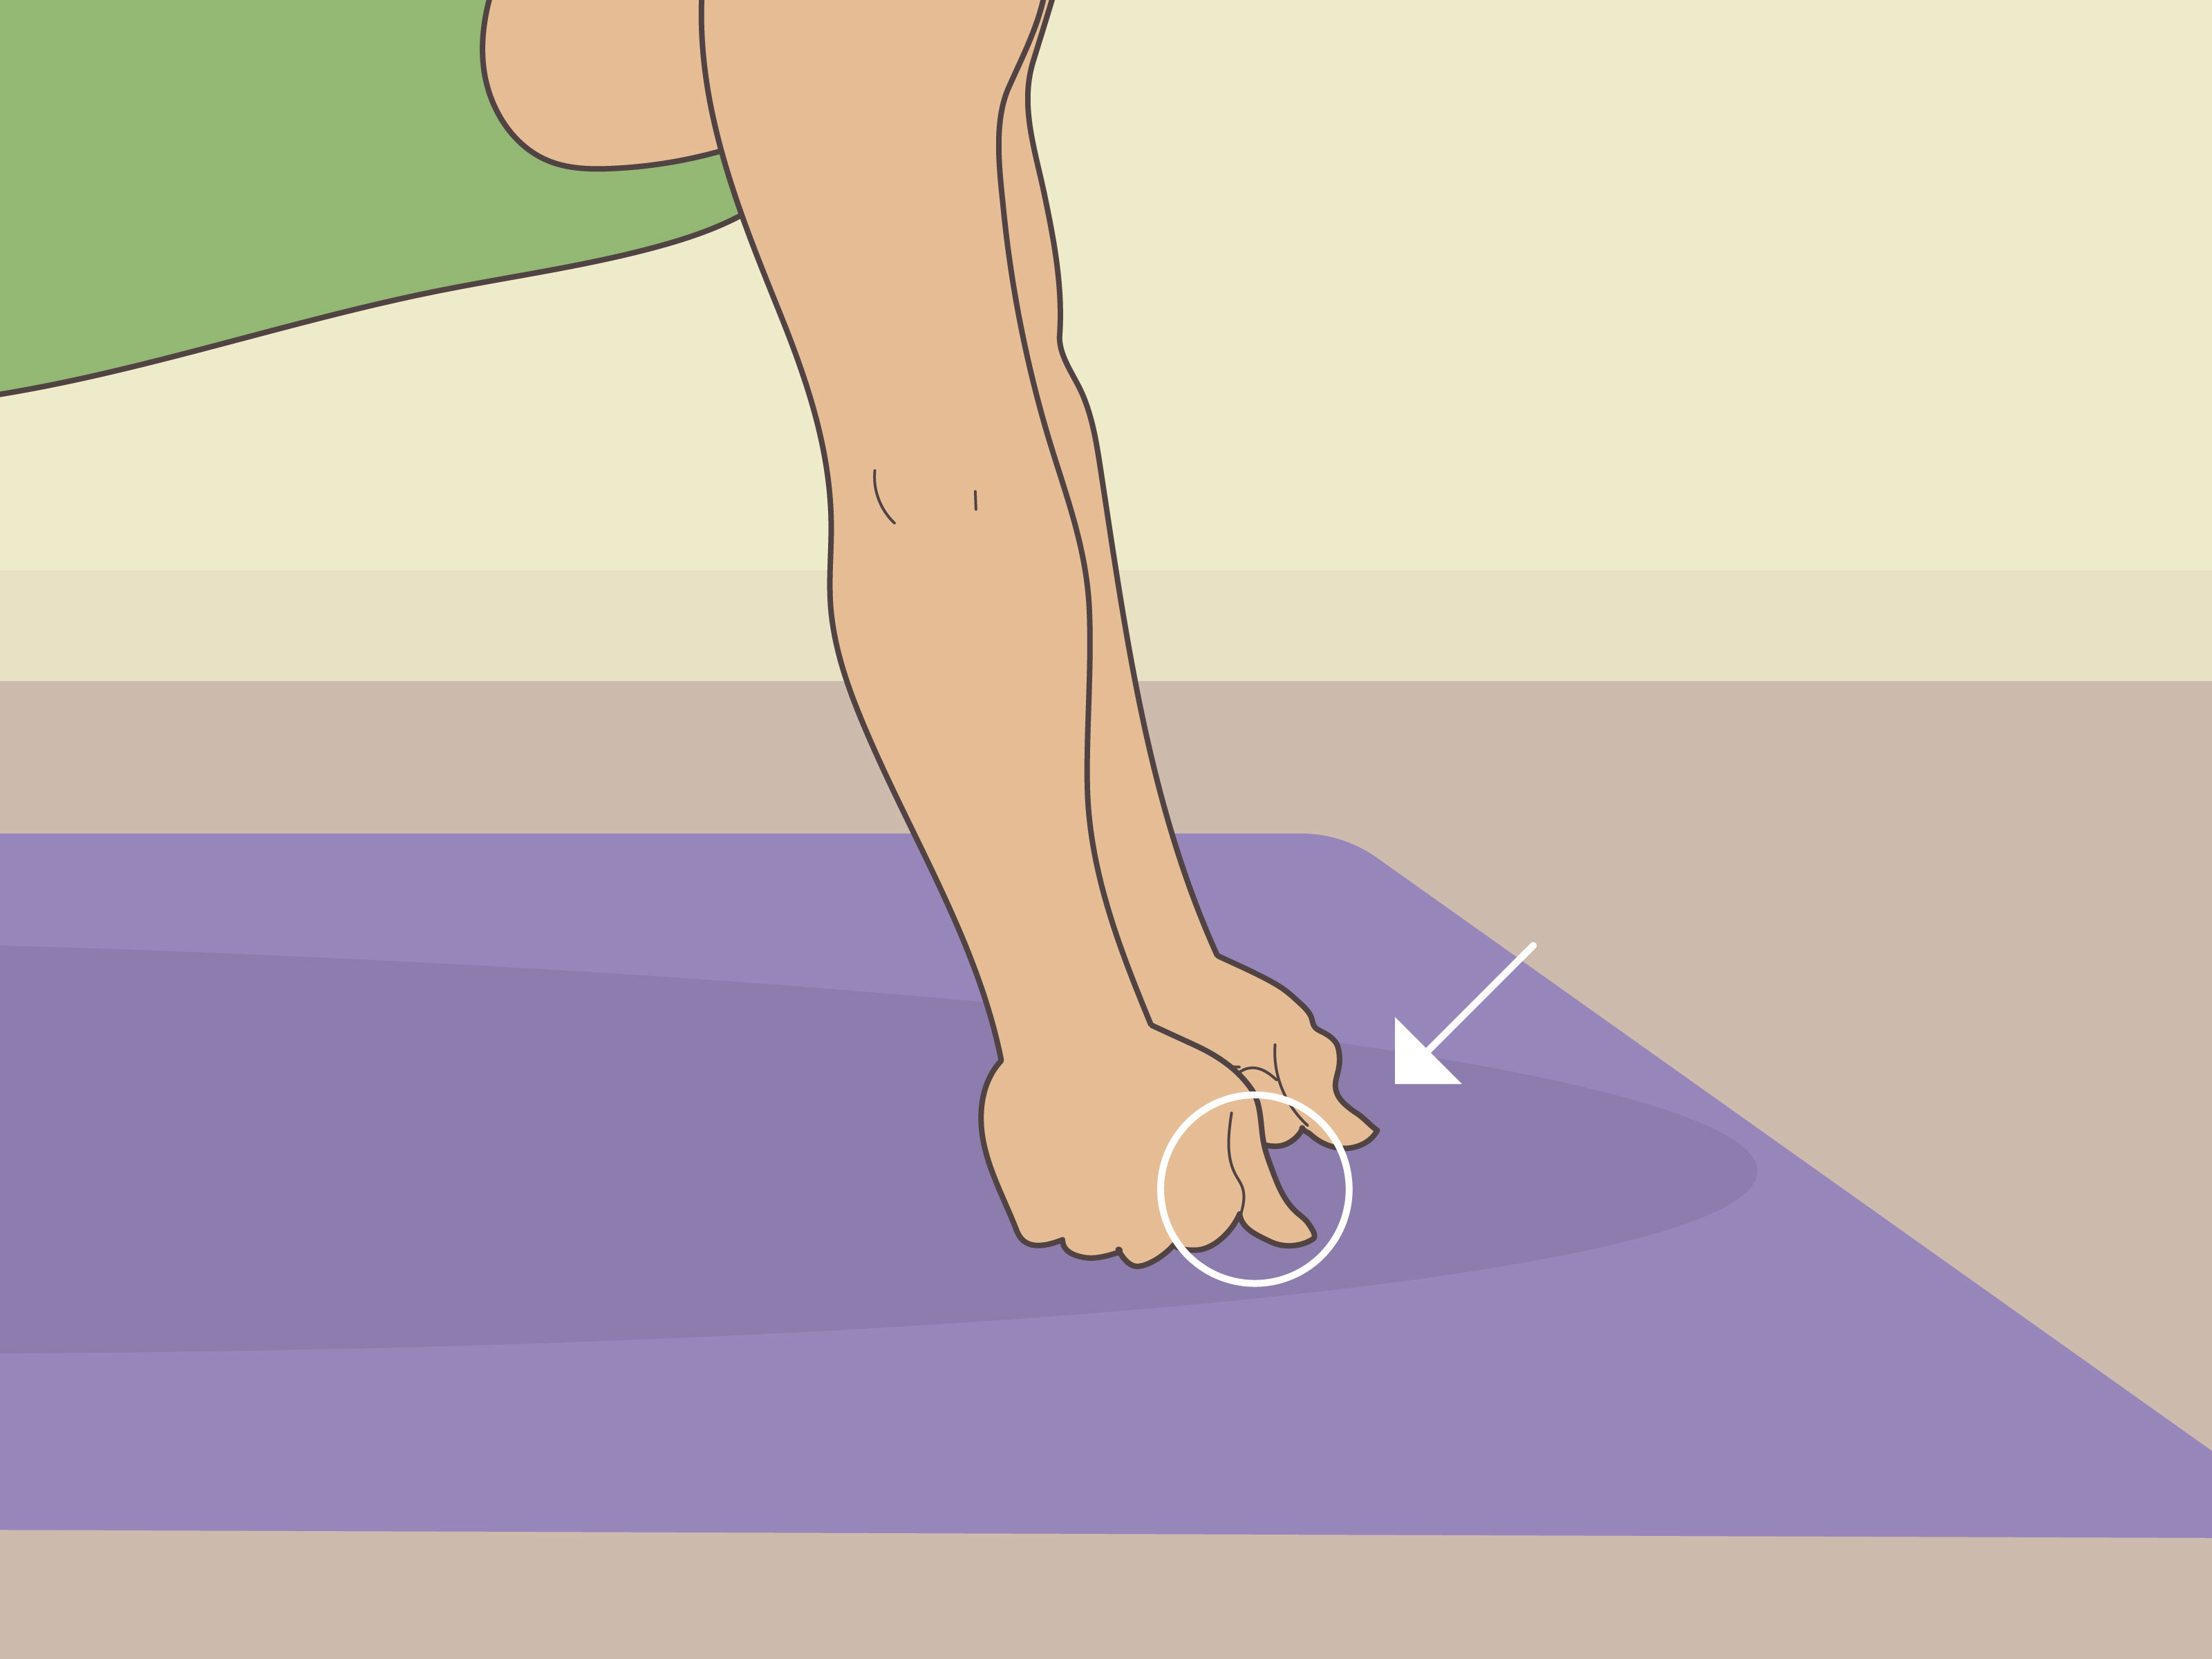
4. Introduce Controlled Weight-Bearing Through the Fists
Knuckle push-ups are often advertised as the secret handshake of serious martial artists. Used carefully, fist-supported positions can teach wrist stability and gradually expose the knuckles to controlled pressure. However, there is limited evidence that knuckle push-ups specifically prevent punching injuries or magically strengthen the knuckle bones.
Treat them as an optional stability exercisenot a mandatory test of toughness. The load should progress gradually, and the surface should be padded.
Start With a Wall
- Stand an arm’s length from a wall.
- Make two relaxed but stable fists.
- Place the first two knuckles of each hand against a folded exercise mat or wall pad.
- Keep the wrists straight and perform eight to 12 shallow wall push-ups.
If that is painless for several sessions, progress to a sturdy countertop or elevated bench. Later, you may try a fist plank from the knees on a thick mat. Full knuckle push-ups should come only after you can maintain stable wrists without pain or excessive pressure on one knuckle.
Progress Pressure, Not Punishment
Use a yoga mat, folded exercise mat, or padded gym flooring. Do not use concrete, tile, gravel, or rough pavement. The objective is to practice force transfer and build tolerance, not remove your fingerprints through enthusiasm.
General sports-injury guidance supports progressive strengthening, warming up, using appropriate equipment, and increasing activity slowly. It does not support forcing painful repetitions or repeatedly traumatizing a joint.
If fist-supported exercises feel uncomfortable, use push-up handles or hold dumbbells on the floor so the wrist remains neutral. You can obtain much of the wrist-stability benefit without placing direct pressure on the knuckles.
Knuckle-Conditioning Methods to Avoid
Punching Walls or Trees
Rigid targets do not absorb much force, so your hand absorbs it instead. Walls are particularly good at remaining undefeated. Punching hard, immovable objects is one of the most common causes of boxer’s fractures.
Training Bare-Knuckle at Full Power
Bare-knuckle drills provide less protection from friction, cuts, and concentrated impact. Advanced combat athletes may use specialized bare-knuckle training under professional supervision, but it is not an appropriate starting point for general conditioning.
Continuing Through Sharp Pain
Sharp pain is not weakness leaving the body. It may be a ligament, tendon, joint, or bone asking you to stop. Repeatedly training through pain can convert a manageable irritation into a longer-lasting injury.
Using Painkillers to Finish a Session
Masking pain can make it harder to recognize worsening tissue damage. If your hands hurt enough that you need medication just to strike the bag, skip the impact work and determine why they hurt.
Warning Signs That Need Medical Evaluation
Stop punching and seek prompt medical advice if you experience any of the following:
- A knuckle that looks flattened, sunken, or crooked
- Rapid swelling or extensive bruising
- Severe pain when gripping or moving a finger
- A finger that overlaps another when you make a fist
- Numbness, tingling, burning, or loss of sensation
- An open cut over a swollen knuckle
- Reduced grip strength that does not improve with rest
- Pain that remains significant after several days
Hand fractures can affect alignment and function even when the injury initially seems minor. Medical evaluation may include an examination and imaging to determine whether a bone, tendon, ligament, or nerve has been damaged.
A Sample Weekly Knuckle-Conditioning Schedule
| Day | Training Focus |
|---|---|
| Monday | Shadowboxing, technique drills, and light bag work |
| Tuesday | Grip, wrist, and finger-strength circuit |
| Wednesday | Rest from impact training or perform lower-body conditioning |
| Thursday | Moderate bag work with wraps and gloves |
| Friday | Wall fist push-ups or padded fist plank, followed by mobility work |
| Saturday | Technical boxing class or light mitt work |
| Sunday | Complete hand and wrist recovery |
Beginners do not need impact training every day. Two or three well-structured sessions are usually more productive than seven daily arguments with a heavy bag.
Common Experiences During Knuckle Conditioning
The following is a realistic composite of what beginners commonly experience during a cautious eight-week knuckle-conditioning program. It is not a claim of personal experience, and individual responses will vary.
Weeks 1 and 2: Technique Feels Surprisingly Difficult
Many beginners assume they already know how to make a fist. Then they put on wraps, face a bag, and discover that one wrist bends slightly every time they throw the rear cross. The first two weeks often feel less like “conditioning” and more like correcting tiny mechanical errors.
The hands may feel tired after only a few short rounds because the fingers are learning when to relax and when to tighten. Beginners commonly squeeze their fists continuously, causing the forearms to burn before the rest of the body is even warm. Relaxing between punches usually improves speed and delays fatigue.
A properly wrapped hand may initially feel bulky. After several sessions, most trainees become more comfortable forming a fist inside the glove and recognizing the difference between useful support and a wrap that is painfully tight.
Weeks 3 and 4: Confidence Increases Faster Than Tissue Capacity
By the third week, punches often sound sharper. That satisfying crack against the bag can tempt a beginner to double the power immediately. This is where patience matters. Technique may improve within a few practices, while bones, tendons, joints, and skin adapt more slowly.
Some trainees notice mild tenderness over the first two knuckles after adding volume. When the tenderness is slight and disappears quickly, reducing the next session’s intensity may be enough. Persistent soreness, swelling, or pain while gripping is a reason to stop impact training rather than “work through it.”
Grip exercises also reveal imbalances. One hand may complete 15 controlled squeezes easily while the other begins trembling after 10. Tracking the weaker side can prevent the stronger hand from quietly doing all the work.
Weeks 5 and 6: Better Alignment Makes Punches Feel Easier
As coordination improves, trainees often report that punches feel more solid even though they are not trying as hard. This usually reflects better force transfer from the floor, through the hips and torso, and into a stable arm and fist.
At this stage, the wrists may feel more reliable during straight punches, but hooks can expose new mistakes. A hook thrown from too far away may land at an awkward angle. A coach’s feedback is especially valuable because the trainee cannot always feel a small wrist deviation while moving at speed.
Controlled fist-supported exercises may also become easier. A wall variation that once felt unfamiliar can begin to feel stable, allowing progression to an elevated bench. The improvement should appear as better controlnot a growing ability to tolerate sharp pain.
Weeks 7 and 8: Restraint Becomes the Real Skill
By the seventh or eighth week, the hands may feel stronger, bag rounds may be longer, and minor friction from wraps may be less noticeable. The biggest lesson, however, is often psychological: durable hands are developed through consistency, not through one legendary punishment session.
Experienced trainees learn to adjust. If the bag has become unusually compacted, they choose another station. If the wrist feels unstable, they switch to shadowboxing. If a knuckle is swollen, they rest instead of conducting an experiment titled “Maybe It Will Loosen Up.”
The most successful conditioning programs tend to feel almost boring. Loads increase gradually, technique remains the priority, and recovery days are respected. That approach may not produce an exciting movie montage, but it is far more likely to leave you with hands that still work when the credits roll.
Conclusion
The safest ways to condition your knuckles are to improve punching alignment, progress gradually on appropriate bags, strengthen the hands and forearms, and introduce carefully controlled weight-bearing exercises. None of these methods requires punching concrete or collecting bruises as proof of commitment.
Keep the wrist stable, use wraps and gloves, increase training volume slowly, and allow soreness to resolve before adding more stress. Most importantly, treat persistent pain, swelling, numbness, deformity, or reduced function as warning signsnot obstacles to be conquered.










