
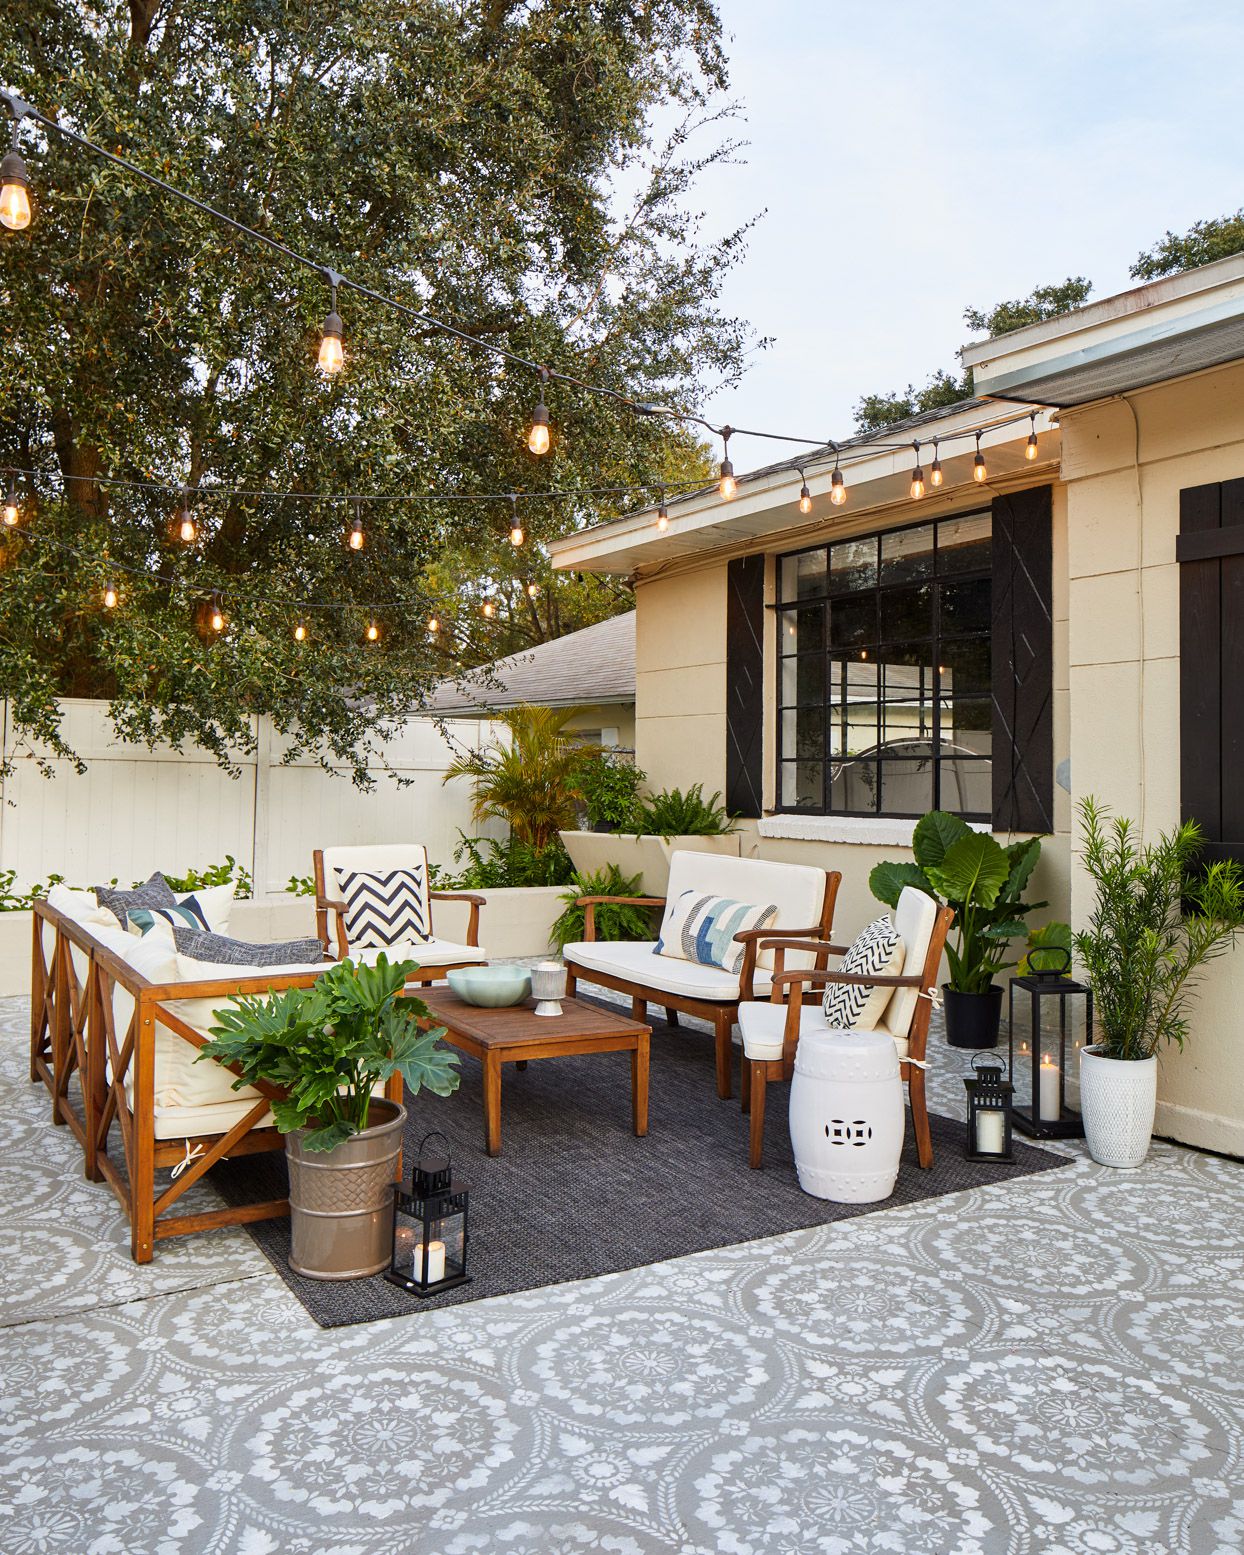
Your patio shouldn’t turn into a black hole the moment the sun clocks out. With the right outdoor lighting, you can stretch dinner parties, family game nights, and “just one more drink” conversations well past dusk without making your yard look like a mini-stadium.
The secret is layered lighting: mix ambient (overall glow), task (where you actually need to see), and accent (the “ooh, fancy” factor). Do that, and even a small patio feels bigger, warmer, and more inviting.
A 60-Second Patio Lighting Plan (So You Don’t Overbuy)
- Pick the vibe: cozy café, modern lounge, or backyard campfire (minus the smoke in your hair).
- Choose warm light first: most patios look best with warm color temperature, not icy-blue “office breakroom.”
- Think lumens, not watts: brightness is about lumens; you want enough to see faces and steps, not attract aircraft.
- Know your rating: “damp” is for covered areas; “wet” is for fixtures exposed to rain and spray.
- Decide power: plug-in (fast), solar (easy), or low-voltage (clean + pro-looking).
- Control it: dimmers, timers, and smart plugs are the difference between “magical” and “why is it still on at noon?”
1) Bistro String Lights Overhead (The Fastest Way to Make It Feel Like a Party)
If patio lighting had a celebrity, it would be bistro string lights. They’re affordable, instantly charming, and forgivingkind of like that friend who never judges your hosting playlist.
How to pull it off
- Go high enough: aim for roughly 8 feet or higher so nobody clotheslines themselves mid-conversation.
- Map first, hang second: lay the strands on the ground in your planned pattern to confirm length and outlet reach.
- Use a guide wire for big spans: a tensioned cable prevents sagging and keeps bulbs from taking wind surfing lessons.
- Choose outdoor-rated, shatter-resistant bulbs: your patio should sparkle, not become a glass scavenger hunt.
- Add a dimmer: bright for cleanup, low for ambiancesame lights, totally different mood.
Example setup
For a 12′ x 14′ patio, try a simple zig-zag canopy with two anchor points on the house and two poles at the far corners. It reads “intentional” without requiring a physics degree.
2) Pergola Glow-Up: Wrap, Weave, or “Ceiling” Your Lights
Got a pergola, gazebo, or covered patio? Congratsyou have a built-in lighting framework. Instead of one lonely strand, treat the overhead structure like a ceiling and layer light across beams for a more polished look.
Easy approaches
- Beam wrap: spiral string lights around posts or run them neatly along rafters.
- Grid pattern: weave multiple strands back-and-forth to create an even glow (very “outdoor living room”).
- Hidden LED tape: tuck LED strips along a beam edge so the light washes down without showing the source.
Pro tip
If you entertain often, add a two-zone setup: a brighter “dining” circuit and a dim “lounge” circuit. Same pergola, two personalitieslike a daytime talk show host who turns into a jazz singer at night.
3) Lantern Clusters and Candlelight (Maximum Cozy, Minimum Commitment)
Lanterns are the patio equivalent of throw blankets: instantly cozy, endlessly movable, and suspiciously good at making people stay longer. They also solve a common problemdark cornerswithout drilling a single hole.
Ways to use lanterns well
- Cluster by the seating area: group 3–5 lanterns in mixed heights near a sofa or dining set.
- Mark “edges”: place lanterns near steps, planters, or the perimeter so the patio feels defined.
- Go flameless for sanity: LED candles give the flicker without the wind blowing out your vibe every 90 seconds.
- Try solar lanterns: great for rental-friendly patios or spots far from outlets.
Example
Put two lanterns at the bottom of steps, a larger lantern near the seating corner, and one tabletop candle for “restaurant energy” at homeno reservations required.
4) Outdoor Wall Sconces (The “Grown-Up” Upgrade That Makes Everything Look Intentional)
If your patio is attached to your home, wall sconces are a smart anchor. They add real task lighting (hello, grilling and not dropping food in the dark) while making your exterior look finished.
What to look for
- Right rating for the location: covered patios often use damp-rated fixtures; exposed walls need wet-rated.
- Shielded or downlight styles: reduce glare and keep the light where you need iton the patio, not in your eyes.
- Proportion matters: a fixture that’s too tiny looks like it got lost on the way to the dollhouse.
- Consider motion + dusk-to-dawn modes: great for safety and convenience (and for finding the door key you always swear you put “right here”).
Specific placement idea
Install sconces to frame a patio door or outdoor bar area. Pair them with softer ambient lighting (like strings or lanterns) so the space feels layered, not harsh.
5) A Pendant or Outdoor Chandelier Over the Dining Table (Yes, It’s Allowed)
Outdoor pendants and chandeliers aren’t just for fancy magazines. Over a dining table, a hanging fixture creates a true “room” effectyour patio suddenly has a ceiling moment, even if the sky is doing most of the heavy lifting.
Make it practical
- Only use outdoor-rated fixtures: pick damp-rated for covered ceilings; wet-rated for exposure.
- Hang at a comfortable height: a common guideline is roughly 30–36 inches above the tabletop so it lights faces without blinding everyone.
- Choose warm bulbs: warm white reads inviting and makes food look better (which matters more than we admit).
- Put it on a dimmer: bright for dinner, lower for dessert and lingering.
Design example
A black metal lantern pendant over a teak table + soft string lights around the perimeter = modern, balanced, and not trying too hard.
6) Low-Voltage Path and Step Lights (Because Falling Isn’t a Patio Activity)
The most underrated patio lighting idea is the one that keeps people from tripping. Step lights, deck lights, and pathway fixtures add safety, define boundaries, and make your outdoor space feel professionally designed.
Why low-voltage works
Low-voltage systems (typically 12V) are popular because they’re efficient, flexible, and can be DIY-friendly with the right kit and planning. You run cable from a transformer to each fixture, then position lights where they’ll guide movement.
Placement tips that actually help
- Light the transition zones: steps, changes in surface, and the path from door to seating.
- Use “pools” of light: aim for coverage that overlaps gently, rather than bright circles with dark gaps between.
- Don’t overdo it: the goal is a welcoming, balanced effectnot a runway.
Example layout
Put small step lights on each riser or along the side of stairs, then add a few path lights leading to the patio. Finish with a soft overhead element (strings or pendant) so the space feels complete.
7) Uplighting and “Moonlighting” for Instant Drama (In a Good Way)
If you want your patio to feel special, add accent lighting that highlights trees, textured walls, or large planters. Uplighting gives you depth and shadowbasically the difference between “flat” and “wow.”
Two looks to try
- Uplighting: place a small spotlight at the base of a tree or feature and aim upward to showcase structure.
- Moonlighting: mount lights higher (often in a tree) and aim down so you get soft “moon” glow and natural-looking shadows.
Keep it comfortable
- Avoid glare: angle fixtures so the beam doesn’t hit eye level from seating areas.
- Use shields when possible: it helps keep light on your property, not in your neighbor’s bedroom window.
- Warm + subtle wins: accent lighting should feel like ambiance, not interrogation.
Example
Uplight a Japanese maple near the patio with one warm spotlight, then add a softer wall wash on a fence line. The patio suddenly has layerslike your favorite outfit, but for landscaping.
8) Smart Controls, Timers, and Scenes (The Difference Between “Cute” and “Effortlessly Perfect”)
Patio lighting is best when it’s easy. If turning on your lights feels like launching a rocket, you’ll stop using them. Smart controls make outdoor lighting automatic, consistent, and energy-friendly.
Simple upgrades
- Smart plug: perfect for string lightsschedule on/off, control from your phone, or use voice commands.
- Photocell or dusk-to-dawn: lights come on automatically when it gets dark.
- Timers: set the patio lights to shut off at bedtime so you’re not lighting the neighborhood all night.
- Dimming + zones: one scene for dinner, one for relaxing, one for “we’re cleaning up, please go home.”
Buying tip
LEDs are usually the best default for outdoor lighting because they’re efficient and long-lasting. When shopping, look at the brightness (lumens) and color temperature (Kelvin) so the light matches the mood you want.
Quick Safety & Sanity Checklist (Read This Before You Plug Anything In)
- Use GFCI protection outdoors: outdoor power + moisture is not a “wing it” situation.
- Match fixture rating to exposure: covered patios often use damp-rated fixtures; exposed areas need wet-rated.
- Use outdoor-rated cords and connections: keep plugs off the ground and protected from water.
- Mind the walking path: route cords and stakes so nobody trips (including you, at midnight, holding a plate).
- Less glare, more glow: shield and aim lights thoughtfully to avoid harsh brightness and light spill.
Conclusion: The Brightest Patio Is the One You’ll Actually Use
The best patio lighting doesn’t scream, “I bought lights!” It quietly makes your outdoor space feel comfortable, safe, and welcoming. Start with one anchor (usually string lights or a dining pendant), add a practical layer (path/step lights or sconces), then finish with accents (uplights or lanterns). That’s the recipe for a patio you’ll use on purposenot just when you accidentally stay outside too long.
Real-World Experiences: What People Learn After Installing Patio Lights (The Fun Part)
Here’s the part nobody tells you in the product description: patio lights behave differently once you live with them. Not in a scary “haunted bungalow” waymore in a “why is my string light suddenly a kite?” way.
First, wind is the unofficial quality tester. A strand that looks perfectly draped at 4 p.m. can sag, swing, or twist into a tangled necklace by 10 p.m. That’s why people who span a bigger patio often end up adding a guide wire or extra anchor points after the first breezy night. The lesson: if your patio is open and gusty, plan for support from day one. Your future self (and your bulbs) will thank you.
Second, rain doesn’t care about optimism. Plenty of homeowners learn the difference between “covered” and “actually protected” the hard way. A patio roof with a wide overhang might keep things mostly dryuntil wind-driven rain shows up and soaks the fixture on the edge. The practical takeaway: if a light is even sometimes exposed, choose a rating that can handle it. It’s less “overkill” and more “not replacing it in six months.”
Third, brightness feels different outdoors. Indoors, a bright bulb is normal. Outdoors, bright light can flatten the atmosphere and make everyone look like they’re waiting for a DMV number to be called. Many people end up swapping bulbs (or adding dimmers) because the first setup is too intense. Warm, dimmable light usually wins for patiosespecially for dining and loungingwhile brighter task lighting is best reserved for grills, stairs, and cleanup.
Fourth, bugs have opinions. In many areas, cooler, bluish light can attract more nighttime insects than warm light. People who switch to warmer tones or use shaded fixtures often notice a more comfortable seating arealess buzzing, more relaxing. No lighting plan can completely outsmart mosquitoes (they are relentless), but warmer, downward-directed lighting usually makes the patio feel calmer.
Fifth, solar lights are amazing… if you feed them sunshine. A common scenario: someone installs solar path lights under dense trees, then wonders why they glow for 37 minutes. Solar works best where the panel gets solid daylight. If your yard is shady, the “solar everywhere” dream may need a hybrid approach: solar in sunny spots, low-voltage or plug-in elsewhere.
Finally, controls are what make the lighting feel effortless. People who add a timer or smart plug tend to use their patio more, because the lights become part of a routine. They turn on automatically at dusk, dim down after dinner, and shut off at a reasonable hour. That small upgrade often feels bigger than adding another strand of bulbsbecause it turns your patio lighting from a project into a lifestyle. (Yes, that sounds dramatic. No, it’s not wrong.)










