
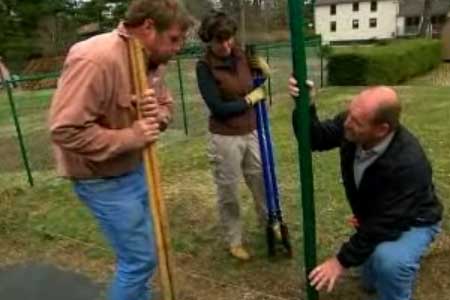
Some tools look simple until they meet real soil. A post hole digger is one of them. At first glance, it is just two handles, two blades, and a promise that your fence, mailbox, arbor, deck footing, or garden trellis will stand upright like a responsible citizen. Then you hit clay, gravel, roots, mystery bricks, and one rock that seems personally committed to ruining your Saturday.
The good news is that using a post hole digger is not complicated once you understand the process. The great news is that a little planning can save your back, your budget, and your perfectly straight fence line. This comprehensive guide explains how to choose the right post hole digger, prepare the site, dig clean holes, avoid common mistakes, and set posts that do not lean dramatically after the first thunderstorm.
What Is a Post Hole Digger?
A post hole digger is a tool designed to create narrow, deep holes for posts and supports. Unlike a regular shovel, which removes soil from a wide area, a post hole digger removes dirt from a tight vertical column. That makes it ideal for fence posts, mailbox posts, deck supports, pergolas, signposts, clothesline poles, garden structures, and small landscape projects.
The main purpose of a post hole digger is precision. When you dig a post hole with a standard shovel, the hole often becomes too wide at the top and too messy at the bottom. That means more concrete, more backfill, more cleanup, and more chances for a wobbly post. A proper post hole digger keeps the hole neat, deep, and roughly the right diameter.
Types of Post Hole Diggers
Manual Clamshell Post Hole Digger
The manual clamshell digger is the classic version. It has two long handles connected to two curved steel blades. You drive the blades into the soil, pull the handles apart to close the blades, lift the soil out, and repeat until your shoulders begin negotiating with your brain.
This type is affordable, quiet, easy to store, and excellent for small jobs. If you are installing a mailbox, a short garden fence, or a few posts for a small backyard project, a manual post hole digger usually does the job well.
Hand Auger
A hand auger has a spiral-shaped bit attached to a handle. You twist it into the ground, then lift out the loosened soil. It works well in softer soil and for planting holes, but it can be slower in rocky or compacted ground.
Gas, Electric, or Battery-Powered Auger
A powered auger uses a rotating bit to drill into the ground. It can save serious time when you need many holes, such as for a long fence line. However, it also requires more caution. Powered augers can bind suddenly when they hit roots or rocks, and the spinning bit is not something you want near loose clothing, pets, or daydreaming helpers.
Tractor-Mounted Post Hole Digger
For farms, large properties, and heavy-duty fencing, a tractor-mounted auger can handle big jobs quickly. It is powerful, efficient, and best used by someone who understands equipment safety. This is not the tool for “I watched half a video and feel confident” energy.
When Should You Use a Post Hole Digger?
Use a post hole digger whenever you need a deep, narrow hole with straight sides. Common projects include:
- Installing wood, vinyl, or metal fence posts
- Setting mailbox posts
- Building pergolas, arbors, and trellises
- Digging deck footing holes
- Planting small trees or shrubs, depending on root ball size
- Installing signs, gates, or clothesline poles
- Repairing or replacing rotten fence posts
If the hole needs to be wide and shallow, use a shovel. If the hole needs to be narrow and deep, reach for the post hole digger.
Step 1: Plan Before You Dig
The most important part of using a post hole digger happens before the blades touch the dirt. Planning keeps the project straight, safe, and legal.
Call 811 Before Digging
Before digging any hole, contact 811 in the United States so underground utilities can be marked. This applies even if you are “only digging one little hole.” Buried gas, water, electric, internet, and irrigation lines do not care about your confidence. Hitting one can be dangerous, expensive, and deeply embarrassing in front of the neighbors.
Check Local Codes and Permits
Fence height, post depth, property line setbacks, and deck footing requirements can vary by location. If the project is structural, such as a deck, pergola, or tall privacy fence, check with your local building department. Frost depth is especially important in colder states because shallow posts and footings can move when soil freezes and expands.
Mark the Layout
Use stakes, string, marking paint, and a tape measure to mark every post location. For fences, string lines help keep posts aligned. For decks and pergolas, square the layout carefully before digging. A post that is off by two inches at the bottom can create a headache at the top.
Step 2: Choose the Right Hole Size
A common rule for fence posts is to make the hole about three times the width of the post. For example, a 4-inch by 4-inch post typically needs a hole around 10 to 12 inches wide. This allows enough room for concrete, gravel, or compacted backfill around the post.
Depth depends on the post height, soil type, local frost line, and the load the post will carry. For many fence projects, the hole is often one-third to one-half the above-ground height of the post. A 6-foot fence post may need a hole at least 2 feet deep, while heavier gates, taller fences, and structural supports may need more depth.
For deck footings and other structural projects, do not guess. Follow local code and inspection requirements. In cold climates, footings often need to extend below the frost line to prevent frost heave.
Step 3: Gather Tools and Safety Gear
A post hole digger is the star, but it should not work alone. Gather these items before you start:
- Post hole digger or auger
- Round-point shovel
- Digging bar for rocks and compacted soil
- Tape measure
- String line and stakes
- Level
- Work gloves
- Safety glasses
- Closed-toe shoes or work boots
- Gravel, concrete, or backfill material
- Tarp or wheelbarrow for excavated soil
If using a powered auger, add hearing protection, read the manual, and keep loose clothing, jewelry, drawstrings, and long hair away from moving parts. A spinning auger has no sense of humor.
Step 4: Start the Hole Correctly
Begin by removing grass, sod, mulch, or surface debris from the marked spot. A round-point shovel can help cut a clean outline. For a fence line, place soil on a tarp so cleanup is easier and you do not accidentally create small dirt mountains across the yard.
With a manual post hole digger, hold the handles together and drive the blades straight down into the center of the marked hole. Pull the handles apart so the blades close around the soil, lift the tool out, and drop the soil onto your tarp or into a wheelbarrow. Repeat the process, keeping the hole vertical.
Step 5: Dig Straight and Measure Often
The secret to a good post hole is consistency. Check depth with a tape measure every few passes. Also check that the sides are not drifting out of alignment. Holes have a sneaky way of wandering underground while looking innocent at the surface.
If you are digging several holes, use a marked stick as a depth gauge. Mark the required depth on a scrap 2×4 or pole, then drop it into each hole as you work. This is faster than wrestling with a tape measure every five minutes.
The bottom of the hole should be firm, clean, and free of loose soil. Loose dirt under a post can compress later, causing the post to settle unevenly.
Step 6: Deal With Tough Soil
Clay Soil
Clay is sticky, heavy, and emotionally exhausting. Dip the blades of a manual digger in water occasionally to help clay release from the metal. A digging bar can break compacted clay before you remove it with the post hole digger.
Rocky Soil
For rocks, use a digging bar to loosen and pry them out. Do not force a powered auger through large rocks. If the auger catches suddenly, it can twist hard and injure your wrists, arms, or shoulders.
Roots
Small roots can sometimes be cut with a digging bar, pruning saw, or root cutter. Larger roots may require moving the post location if possible. Cutting major tree roots can harm the tree and create stability problems.
Sandy Soil
Sandy soil can collapse into the hole as you dig. Work carefully, keep the hole as narrow as possible, and consider using a form tube for structural footings or loose soil conditions.
Step 7: Add Drainage Material When Needed
For many wood posts, adding several inches of gravel or crushed stone at the bottom of the hole helps drainage and keeps the post base from sitting directly in water. This is especially useful for fences, mailboxes, and garden structures. Tamp the gravel so the post sits on a stable base.
Drainage matters because trapped moisture is one of the main enemies of wood posts. Even pressure-treated lumber lasts longer when water can move away from the base instead of holding a swamp party underground.
Step 8: Set the Post
Place the post in the hole and check that it is plumb on two adjacent sides using a level. If you are building a fence, also check that the post touches or aligns with your string line. Temporary braces can hold the post steady while you add concrete, gravel, or compacted backfill.
If using concrete, follow the manufacturer’s directions. Some fast-setting mixes can be poured dry around the post and then hydrated with water, while traditional concrete is mixed first. Slope the top of the concrete slightly away from the post so water sheds off instead of pooling around the wood.
If backfilling with gravel or soil, add material in layers and compact each layer firmly. Do not dump everything in at once and hope gravity becomes a licensed contractor.
Manual Post Hole Digger vs. Power Auger: Which Is Better?
A manual post hole digger is best for smaller projects, tight spaces, and situations where control matters. It is inexpensive, easy to transport, and less likely to damage nearby landscaping. It also gives you more feedback when you hit rocks, roots, or buried debris.
A power auger is better for large projects, deep holes, and repeated digging. If you are installing a long privacy fence, renting a power auger can save hours of labor. However, powered augers require more strength and attention than many people expect. In difficult soil, a two-person auger may be safer and easier to control than a one-person model.
The best choice depends on your project size, soil conditions, experience level, and tolerance for sore muscles. For five holes, manual digging may be fine. For fifty holes, your future self may send you a thank-you card for renting an auger.
Common Mistakes to Avoid
Skipping Utility Marking
Never skip utility marking. Even shallow digging can hit lines. A quick call or online request is far easier than explaining to the neighborhood why the internet disappeared.
Digging Holes Too Shallow
Shallow holes lead to leaning posts, weak fences, and unstable structures. Account for post height, soil, load, wind exposure, and frost depth.
Making Holes Too Wide
Oversized holes waste concrete and backfill. They also create more disturbed soil around the post. Aim for a clean, appropriately sized hole.
Ignoring Drainage
Poor drainage shortens the life of wood posts. Gravel at the bottom and sloped concrete at the surface can help manage water.
Forgetting to Check Plumb
A post can look straight from one angle and lean like it heard bad news from another. Check both sides with a level before the concrete sets.
How to Maintain a Post Hole Digger
After digging, clean soil from the blades or auger bit. Dry the metal parts to reduce rust. Sharpen dull blades when needed, tighten loose bolts, and lightly oil pivot points on manual diggers. For powered augers, follow the manufacturer’s maintenance schedule, including fuel, battery, spark plug, gearbox, and bit inspection recommendations.
Store the tool in a dry place. Leaving it outside in the rain is a fast way to turn a useful tool into decorative yard archaeology.
Best Practices for Better Results
Work at a steady pace instead of rushing. Digging post holes is physical work, and fatigue leads to crooked holes and poor decisions. Take breaks, especially in hot weather. Keep water nearby, and avoid twisting your back while lifting soil.
For long fence runs, do not dig every hole blindly and then discover the layout is wrong. Set corner posts first, stretch string lines, and verify spacing before digging intermediate holes. For gates, use stronger posts and deeper holes because gate posts carry more stress than regular line posts.
If the project is structural, such as a deck, porch, or elevated platform, treat the hole as part of the foundation. Follow building codes, use proper footings, and schedule inspections when required.
Real-World Experience: Lessons From Using a Post Hole Digger
The first thing you learn from using a post hole digger is that soil has personality. Sandy soil is slippery and impatient. Clay is clingy and dramatic. Rocky soil behaves like someone buried a bag of bowling balls in your yard just to test your character. The tool may be simple, but every hole teaches you something.
One practical lesson is to start earlier than you think you need to. Post hole digging always looks faster on paper. A project with eight holes may sound like a casual morning task, but one buried root can turn hole number three into a full-body workout with sound effects. Starting early gives you cooler weather, better light, and enough patience to measure twice instead of muttering creatively at the ground.
Another valuable experience is learning to keep the hole narrow. Beginners often widen the top too much because it feels easier. Unfortunately, a wide messy hole means more concrete, more backfill, and more trouble keeping the post aligned. A post hole digger shines when you let it do what it was made to do: remove soil from a tight vertical shaft. Use a shovel only to clean the surface or remove loose material, not to excavate half the yard.
Marking depth on a stick is one of those tiny tricks that feels almost too simple, but it saves time. Instead of repeatedly bending down with a tape measure, you drop the marked stick into the hole and instantly know whether you are close. When digging multiple fence posts, this keeps the holes consistent and prevents the classic mistake of making the first hole perfect, the second acceptable, and the last one “probably fine.”
Water can help, but it can also betray you. A little water on sticky clay can keep soil from clinging to the blades. Too much water turns the bottom of the hole into pudding. If you need to soften hard ground, use water sparingly and give it time to soak in. Do not flood the hole unless you enjoy digging soup.
The biggest lesson is to respect alignment. A fence post that is slightly off may not bother you during digging, but it becomes painfully obvious when rails, panels, or gates are installed. Use string lines, levels, and temporary braces. Step back often and look at the whole layout. Your eyes can catch problems that a tape measure misses.
Finally, remember that post hole digging rewards patience. The best holes are not made by brute force alone. They come from steady rhythm, smart tool use, careful measuring, and knowing when to stop and clear the hole before forcing the blades deeper. In other words, using a post hole digger is part construction, part gardening, part problem-solving, and part humble negotiation with the planet.
Conclusion
A post hole digger is one of the most useful tools for outdoor projects because it turns a messy digging job into a controlled, repeatable process. Whether you are setting fence posts, building a pergola, installing a mailbox, or preparing deck footings, success depends on planning, safety, correct hole sizing, soil awareness, and careful post alignment.
Call 811 before digging, check local requirements, choose the right tool, and measure often. Use gravel for drainage where appropriate, brace posts before setting them, and take your time. The result is a cleaner project, stronger posts, and a yard that looks professionally planned instead of aggressively improvised.
Note: This article is written for general educational purposes and synthesizes practical guidance commonly used by U.S. home improvement, utility safety, concrete, equipment, and building-code resources. Always follow local codes, utility-marking requirements, and manufacturer instructions for your specific tool and project.













