
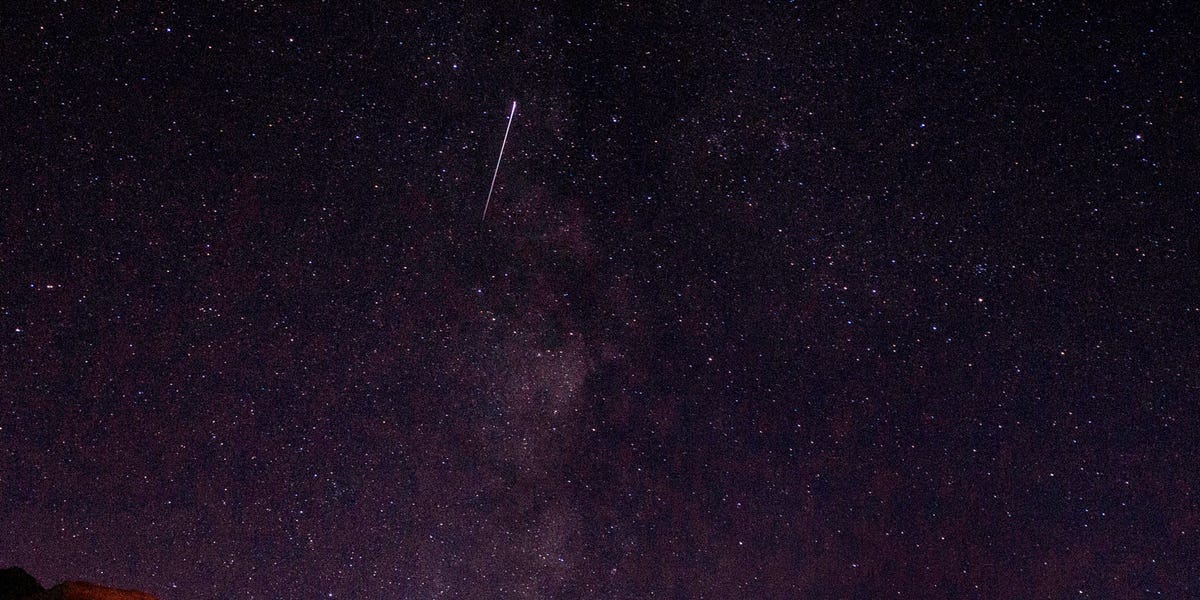
Astrophotography sounds like the kind of hobby that requires a telescope the size of a refrigerator, a PhD in celestial mechanics, and a backyard observatory with a dramatic sliding roof. Good news: it does not. You can begin photographing the night sky with a smartphone, a DSLR, or a mirrorless camera, plus a tripod and a little patience. The universe has been posing for billions of years. It can wait while you figure out manual focus.
At its simplest, astrophotography is the art of capturing objects in the night sky: the Moon, stars, planets, meteors, the Milky Way, auroras, star trails, nebulae, and galaxies. For beginners, the easiest wins usually come from wide-field night sky photography: a landscape under stars, the Moon over a city skyline, or a Milky Way shot from a dark rural road. From there, you can move into telescopes, tracking mounts, image stacking, and deep-sky imaging. But do not sprint into the expensive gear swamp too soon. Astrophotography rewards practice more than shopping carts.
What Makes Astrophotography Different?
Normal photography often has plenty of light. Astrophotography has the opposite problem. You are trying to photograph faint light from faraway objects while standing on a spinning planet under an atmosphere that may or may not cooperate. That means every decision matters: shutter speed, aperture, ISO, focus, location, moon phase, weather, and even whether a streetlight is photobombing your masterpiece.
The biggest beginner mistake is treating the night sky like a daytime subject. Autofocus hunts, automatic exposure panics, and handheld shooting turns stars into decorative noodles. Instead, you need manual control, stability, and a plan. Once you understand those basics, the process becomes surprisingly approachable.
Start With the Gear You Already Own
The best astrophotography camera is not always the newest one. It is the one you understand well enough to use in the dark without accidentally recording a ten-minute video of your shoes. A modern smartphone can capture the Moon, bright planets, constellations, and even the Milky Way if it has night mode or manual exposure controls. A DSLR or mirrorless camera gives you more flexibility, especially for RAW files, interchangeable lenses, and long exposures.
Beginner Astrophotography Gear Checklist
For your first night sky session, keep the kit simple. You need a camera or smartphone, a sturdy tripod, a wide-angle lens if using a camera, spare batteries, a memory card with room on it, a red flashlight or headlamp, and warm clothing. The warm clothing part is not glamorous, but neither is quitting after 12 minutes because your fingers have unionized.
A wide-angle lens between 14mm and 24mm on a full-frame camera is popular for Milky Way and star photography because it captures more sky and allows longer shutter speeds before stars visibly trail. A fast aperture, such as f/2.8 or wider, helps gather more light. If your lens only opens to f/3.5 or f/4, do not panic. You can still make good images, especially under darker skies.
Choose the Right Subject First
Astrophotography is easier when you choose a beginner-friendly target. The Moon is bright, large, and forgiving. Star trails are also beginner-friendly because you are intentionally allowing the stars to streak across the frame. The Milky Way is more challenging but very achievable with a wide lens and dark skies. Planets require more focal length, and deep-sky objects such as nebulae and galaxies usually require tracking, stacking, and more specialized processing.
Easy First Targets
Start with the Moon if you want quick results. It is bright enough that you can use faster shutter speeds and lower ISO settings. For a wider creative shot, photograph the Moon rising near a building, mountain, tree, or person. If you want stars, try a simple constellation photo or a wide landscape under the night sky. Once you are comfortable with focus and exposure, try the Milky Way during a moonless night away from city lights.
Find Dark Skies Before Buying More Gear
Light pollution is the sneaky villain of astrophotography. A basic camera under a dark sky often beats expensive gear under a bright suburban glow. Darker locations reveal more stars, better Milky Way detail, and cleaner images. National parks, rural areas, desert regions, mountain overlooks, and designated dark-sky places can be excellent options, as long as you follow local rules and stay safe.
Use a light pollution map before leaving home. Check where the darkest nearby skies are, then compare that with weather, road access, and moon phase. Also avoid shining bright white lights around other stargazers. A red light helps preserve night vision and keeps you from becoming the person everyone silently judges under the stars.
Plan Around the Moon, Weather, and Timing
The Moon is both a beautiful subject and a giant natural flashlight. For Milky Way photography, new moon periods or nights when the Moon sets early are usually best. For Moon photography, of course, you want the Moon visible, and many photographers prefer partial phases because side lighting reveals craters and texture better than a flat full moon.
Clouds are not your friend unless you enjoy photographing gray mystery. Check the weather forecast, cloud cover, humidity, and wind. Atmospheric haze can reduce contrast, while strong wind can shake your tripod. If you are chasing auroras, monitor space-weather forecasts and Kp index predictions. Aurora photography also depends on latitude, darkness, weather, and patience. Mostly patience. The sky runs on sky time, not your calendar app.
Camera Settings for Beginner Astrophotography
Manual mode is your new best friend. Automatic mode will usually brighten the wrong things, focus on nothing, and act personally offended by darkness. A good starting point for star and Milky Way photography is: manual exposure, RAW format, widest available aperture, ISO 1600 to 6400, and a shutter speed between 10 and 25 seconds depending on focal length and sensor size.
Starter Settings for Stars and the Milky Way
Set your lens to its widest aperture, such as f/2.8, f/3.5, or f/4. Use a wide focal length. Begin with ISO 3200 and a shutter speed around 15 seconds. Take a test shot. If the image is too dark, raise ISO or lengthen shutter speed slightly. If the stars trail, shorten the shutter speed. If the image is too noisy, lower ISO and consider stacking multiple images later.
The old “500 rule” is a simple way to estimate the longest shutter speed before stars trail: divide 500 by your focal length. For example, 500 divided by 20mm gives 25 seconds. On crop-sensor cameras, account for the crop factor. This rule is only a starting point. High-resolution cameras often reveal star movement sooner, so many photographers use more conservative values or the NPF rule for sharper stars.
Starter Settings for the Moon
The Moon is bright, so do not use the same settings you would use for the Milky Way. Try ISO 100 to 400, aperture around f/5.6 to f/8, and a shutter speed near 1/125 second as a starting point. Adjust from there. If the Moon looks like a glowing white tortilla, reduce exposure. The goal is to preserve detail in the lunar surface.
How to Focus in the Dark
Focusing is where beginners often suffer, and the universe does not provide customer support. Do not simply twist your lens to the infinity mark and trust it blindly. Many lenses focus past infinity, which sounds philosophical but is mostly annoying.
Use live view, point at a bright star, planet, or distant light, then magnify the display. Slowly adjust manual focus until the star appears as small and sharp as possible. Take a test shot and zoom in to check. Once focus is nailed, avoid touching the focus ring. Some photographers use a small piece of tape to hold the ring in place. It is not elegant, but neither is discovering that every photo from your dream night is softly blurred.
Composition: Make the Sky Feel Like a Story
A photo of stars can be beautiful, but a photo of stars over a winding road, old barn, mountain ridge, lake, cactus, tent, or lonely tree has a stronger sense of place. Foreground elements give scale and emotion. They tell the viewer, “This is not just space. This is where I stood while space looked amazing.”
Scout compositions during daylight when possible. Walking around in total darkness while holding expensive gear is an advanced form of comedy. Use apps to plan where the Milky Way, Moon, or constellations will rise. Then arrive early, set up calmly, and refine your framing before the sky reaches peak darkness.
Smartphone Astrophotography: Yes, It Counts
Smartphone astrophotography has improved dramatically. Many phones now offer night modes, long exposure options, or dedicated astrophotography features. The rules are still the same: stabilize the phone, lock focus, use a timer, avoid digital zoom when possible, and process carefully.
Use a small phone tripod or clamp. If you do not have one, improvise with a bag, rock, or jacket, but make sure the phone cannot slide off into darkness and become an archaeological discovery. For the Moon, tap to focus and lower exposure so details are not blown out. For stars, use night mode or a manual camera app that allows longer exposures and higher ISO settings.
Understanding Star Trails
Star trails happen because Earth rotates. For regular star photos, you try to avoid trails by limiting shutter speed. For creative star trail images, you embrace them. Aim toward Polaris in the Northern Hemisphere to create circular trails around the north celestial pole. Compose with a strong foreground, then shoot many long exposures and stack them in software.
A common approach is to take dozens or hundreds of 20- to 30-second exposures with a short interval between each frame. This reduces sensor heat and gives you more control than one extremely long exposure. It also gives you plenty of time to contemplate your life choices while the camera clicks away like a tiny robot cricket.
When to Use a Star Tracker
A star tracker is a motorized mount that slowly moves your camera to match Earth’s rotation. This allows longer exposures without star trails, which means cleaner Milky Way shots and better deep-sky images. You do not need one on day one, but it is a logical upgrade when you want sharper stars, lower ISO, or longer total exposure time.
The catch is that a tracker moves with the sky, so the foreground becomes blurred during long tracked exposures. Many photographers solve this by taking one tracked exposure for the sky and one static exposure for the foreground, then blending them in editing. That is more advanced, but it opens the door to impressive results.
Deep-Sky Astrophotography: The Next Level
Deep-sky astrophotography focuses on faint objects beyond our solar system, such as nebulae, galaxies, and star clusters. This is where tracking mounts, telescopes, dedicated astronomy cameras, filters, calibration frames, and stacking software become important. It is also where your computer begins sounding like it is preparing for launch.
The basic idea is to capture many individual exposures, called light frames, then combine them to improve signal and reduce noise. Calibration frames such as darks, flats, and bias frames help remove sensor noise, dust shadows, and optical unevenness. This may sound intimidating, but you can learn it gradually. Start with a camera and lens on a star tracker before jumping into a full telescope setup.
Editing: Where the Magic Becomes Visible
Astrophotography editing is not cheating. Cameras record more information than they show in a flat preview, especially if you shoot RAW. Editing helps reveal contrast, color, detail, and structure. Basic adjustments include white balance, exposure, contrast, highlights, shadows, noise reduction, sharpening, and color correction.
Be careful not to overprocess. If the Milky Way starts looking like a radioactive rainbow smoothie, step away from the saturation slider. A good astrophotograph should feel dramatic but believable. The goal is to reveal the sky, not convince people that the galaxy was dipped in neon frosting.
Common Beginner Mistakes
The first common mistake is forgetting to focus. The second is using a shaky tripod. The third is shooting under bright city lights and blaming the camera. Other classics include leaving image stabilization on while using a tripod, forgetting spare batteries, filling the memory card, shooting only JPEG, and not checking sharpness until arriving home.
Another mistake is expecting perfection immediately. Astrophotography has a learning curve, and your first images may include noise, blur, odd colors, crooked horizons, or a surprise airplane streak. That is normal. Every excellent astrophotographer owns a private museum of terrible early photos.
A Simple First-Night Astrophotography Plan
Pick a clear night near the new moon. Choose a safe location with darker skies than your neighborhood. Arrive before dark. Set up your tripod, compose with an interesting foreground, and switch your camera to manual mode. Use RAW format, set the aperture wide open, choose ISO 3200, and start with a 15-second shutter speed. Focus manually on a bright star using magnified live view. Take a test shot, review it, and adjust.
Once you get one sharp exposure, take several more. Try vertical and horizontal compositions. Change the foreground. Experiment with ISO and shutter speed. Make notes on what works. The goal of your first night is not to win Astronomy Photographer of the Year. The goal is to come home with a few sharp images and enough excitement to try again.
Safety and Etiquette Under the Stars
Night photography often happens in remote places, so safety matters. Tell someone where you are going. Bring water, layers, a headlamp, and a backup light. Watch your footing. Respect private property, wildlife, and park rules. If you photograph in a popular dark-sky area, keep lights dim and avoid walking into someone else’s frame. In astrophotography, the phrase “just one more shot” can last three hours, so prepare accordingly.
Field Experience: What Beginners Learn the Hard Way
One of the most useful astrophotography experiences is discovering that planning beats luck. A beginner may drive to a scenic overlook, set up a tripod, and expect the Milky Way to appear exactly where the internet promised. Then reality arrives wearing hiking boots: the galactic core is behind a hill, the Moon is brighter than expected, clouds drift in like nosy relatives, and a nearby parking lot light turns the foreground orange. This is not failure. This is astrophotography introducing itself.
The first lesson is to scout locations before the night of the shoot. Visit during the day, look for safe parking, identify foreground subjects, and check whether trees, mountains, buildings, or power lines block the sky. A composition that looks obvious at noon can become a puzzle after dark. Mark your tripod spot if necessary, and take a phone snapshot for reference. Future-you, standing in the dark with cold hands, will be grateful.
The second lesson is that focus deserves more time than you think. Many beginners rush this step because the stars look sharp on the camera screen. Then they get home, open the files on a larger monitor, and realize every star looks like a tiny cotton ball. A better habit is to focus, take a test shot, zoom in, adjust, and repeat until the stars are crisp. This feels slow at first, but it saves the entire session.
The third lesson is that comfort affects creativity. Cold, mosquitoes, wind, hunger, and anxiety all make you impatient. Bring layers, snacks, water, gloves, and a chair if you will be shooting for a while. A calm photographer makes better decisions. A freezing photographer starts negotiating with the universe: “Just one acceptable photo and I’ll go home.” The universe rarely responds to bargaining, but it does respond to preparation.
The fourth lesson is to shoot more frames than you think you need. Take extra exposures of the same composition. Capture darker and brighter versions. Photograph the foreground separately if needed. Try one frame with a person holding still under the stars. Try another with a tent, trail, tree, or rock formation. Variety gives you options later, especially when one otherwise perfect image contains a blinking airplane, a shaky tripod moment, or your friend’s flashlight beam entering from stage left like a UFO audition.
The fifth lesson is to keep editing natural. Beginners often push clarity, contrast, and saturation until the sky becomes crunchy. Start gently. Correct white balance, lift shadows, protect highlights, reduce noise, and bring out detail gradually. Compare your edit to the original and ask whether the scene still feels like night. The best beginner astrophotos often have restraint. They say, “Look how beautiful the sky is,” not “Look how hard I attacked the sliders.”
Finally, the best experience is repetition. Photograph the Moon one week, star trails the next, and the Milky Way after that. Return to the same location in different seasons. Learn how your camera behaves at ISO 1600 versus 6400. Learn how your lens handles coma in the corners. Learn which apps help and which ones distract you. Astrophotography is part science, part art, part weather complaint department. The more nights you spend outside, the more the process becomes familiar. Eventually, you stop fighting the dark and start working with it.
Conclusion
Astrophotography is one of the most rewarding ways to combine photography, astronomy, travel, patience, and mild sleep deprivation. You do not need to begin with expensive equipment. Start with a stable setup, manual controls, dark skies, careful focus, and realistic expectations. Photograph the Moon, stars, and simple night landscapes first. Then explore the Milky Way, star trails, auroras, tracking mounts, and deep-sky objects as your skills grow.
The night sky is generous, but it asks you to slow down. You plan, wait, adjust, test, and try again. Some nights will be cloudy. Some photos will be blurry. Some batteries will die at the exact moment the sky becomes perfect, because batteries apparently enjoy drama. But when you capture your first sharp image of stars over a landscape, the frustration fades fast. Suddenly, the universe feels less distant. It becomes something you can frame, study, and share.














