
Building a concrete patio is one of those DIY projects that sounds simple until a wheelbarrow full of wet concrete is staring at you like it knows your weaknesses. The good news? A backyard concrete patio is absolutely doable for a careful homeowner. The better news? When planned correctly, it creates a durable, low-maintenance outdoor space for grilling, lounging, container gardening, and proudly telling guests, “Yes, I poured that myself.”
This concrete patio guide walks you through the process from planning and site prep to pouring, finishing, curing, and avoiding the classic mistakes that turn a weekend project into a cautionary tale. You do not need to be a professional mason, but you do need patience, accurate measurements, good weather, and a healthy respect for concrete’s favorite hobby: hardening before you are emotionally ready.
Why Choose a Concrete Patio?
A poured concrete patio is popular because it offers a clean, solid surface at a relatively affordable cost compared with many stone or premium paver options. It resists weeds better than jointed paving, supports patio furniture without wobbling, and can be finished in several ways, from a simple broom texture to decorative scoring, staining, or stamped concrete.
Concrete is also flexible from a design standpoint. A small 10-by-10-foot slab can become a cozy bistro corner, while a larger patio can support dining, a grill station, planters, and an outdoor sofa. For most residential patios, a 4-inch-thick concrete slab over a compacted gravel base is a common practical target. Heavier loads, poor soil, or local code requirements may call for thicker concrete, reinforcement, or professional help.
Before You Start: Planning Your DIY Concrete Patio
Pick the Right Location
Choose a spot that connects naturally to your house and yard. A patio near the kitchen makes outdoor dining easier. A shaded corner may be more comfortable in hot climates. A sunny spot may be better if you want planters, a reading chair, or a place where your dog can dramatically nap like royalty.
Think about drainage before you think about furniture. A concrete patio should slope away from the house so rainwater does not collect near the foundation. A common rule of thumb is about 1/8 to 1/4 inch of fall per foot. That slope is subtle enough that your table will not feel like it is auditioning for a ski resort, but effective enough to move water in the right direction.
Check Permits, Utilities, and Codes
Before digging, contact your local utility marking service. Buried utility lines are not a surprise you want to discover with a shovel. Also check local building codes, homeowners association rules, and permit requirements. Some areas regulate patio size, drainage, setbacks, or work near property lines.
Choose a Practical Size
For a small seating area, 10 by 10 feet can work well. For a dining table and chairs, 12 by 12 feet or larger is more comfortable. For a grill, lounge area, and traffic flow, 15 by 20 feet may be more realistic. Bigger is not always better, especially if you are mixing bagged concrete by hand. A patio grows very quickly on paper and even faster when you are hauling 80-pound bags.
Tools and Materials You Will Need
Basic Tools
- Tape measure, stakes, string line, and marking paint
- Shovel, rake, and wheelbarrow
- Level or laser level
- Hand tamper or rented plate compactor
- Circular saw for cutting form boards
- Drill or screw gun
- Screed board, usually a straight 2×4
- Bull float or magnesium float
- Edger and groover
- Broom for texture
- Plastic sheeting or curing compound
Materials
- 2×4 or 2×6 lumber for forms
- Wood stakes and deck screws
- Compacted gravel base
- Concrete mix or ready-mix concrete delivery
- Reinforcement, such as welded wire mesh or rebar, if needed
- Expansion joint material where the patio meets existing concrete or the house foundation
- Concrete sealer for later maintenance
Safety Gear
Wet concrete and cement-based products can irritate skin and eyes, and prolonged contact can cause serious burns. Wear waterproof gloves, long sleeves, long pants, eye protection, and waterproof boots. If you kneel near fresh concrete, use kneeboards or waterproof kneepads. Concrete is useful, but it is not gentle. Treat it like a helpful but grumpy dragon.
Step 1: Mark the Patio Layout
Use stakes and string to outline the patio. Measure the sides, then measure diagonally from corner to corner. If the diagonal measurements match, the layout is square. If they do not, adjust the stakes until they do. This step matters because a slightly crooked form becomes a very permanent slightly crooked patio.
Mark the edges with spray paint or a shovel. Add extra room outside the form lines so you have space to work, place stakes, and compact the base properly.
Step 2: Excavate the Patio Area
Excavate deep enough for both the gravel base and the concrete slab. For many patios, that means roughly 7 to 8 inches total: about 3 to 4 inches of compacted gravel and 4 inches of concrete. Remove grass, roots, topsoil, and soft spots. Organic material decomposes over time, and concrete does not appreciate being supported by what is essentially future compost.
The subgrade should be firm and evenly compacted. If the soil is muddy or spongy, pause and solve the drainage or soil problem first. Pouring concrete over weak soil is like building a dining table on a trampoline: technically possible, but nobody will be happy later.
Step 3: Add and Compact the Gravel Base
A compacted gravel subbase helps support the slab and improves drainage. Spread gravel evenly across the excavated area, then compact it thoroughly. A hand tamper can work for small patios, but a rented plate compactor saves time and delivers a firmer base. Aim for a consistent thickness, usually around 4 inches after compaction.
Use your level and string lines to maintain the desired slope away from the house. The gravel base should already reflect the final slope of the patio. Do not count on the concrete pour to magically fix a poorly graded base. Concrete is many things, but it is not a therapist for bad prep work.
Step 4: Build Strong Concrete Forms
Concrete forms create the shape and finished height of the patio. Use straight 2x4s for a 4-inch slab or 2x6s if you need extra depth or stronger forms. Set the form boards along your layout lines, screw them to stakes, and brace them securely. Wet concrete is heavy, and weak forms can bow outward during the pour.
Check that the forms are square, level across the width, and sloped lengthwise for drainage. The top of the form is usually the top of the finished slab, so take your time. A few extra minutes adjusting forms can save years of staring at a patio edge that annoys you every time you walk outside.
Step 5: Add Reinforcement When Needed
Reinforcement does not prevent every crack, but it can help hold concrete together and reduce crack movement. Welded wire mesh, rebar, or fiber-reinforced concrete may be useful depending on slab size, soil conditions, climate, and expected loads. A small patio on stable soil may not require much reinforcement, while a larger slab or questionable subgrade deserves more careful planning.
If you use wire mesh or rebar, it should sit within the slab, not lie flat on the gravel. Support it with chairs or lift it slightly during placement so it ends up near the middle of the concrete thickness. Reinforcement buried at the bottom is like a security guard standing outside the building: present, but not doing the job very well.
Step 6: Calculate How Much Concrete You Need
Calculate concrete volume by multiplying length by width by thickness. Convert the thickness to feet. For example, a 12-by-12-foot patio at 4 inches thick is 12 x 12 x 0.33, which equals about 47.5 cubic feet. Divide by 27 to convert cubic feet to cubic yards. That patio needs about 1.76 cubic yards, plus a small waste allowance.
For larger patios, ready-mix delivery is usually easier and more consistent than mixing dozens or hundreds of bags. For very small slabs, bagged concrete may be practical. Be honest about your labor, helpers, and timing. Concrete does not pause because someone needs a sandwich.
Step 7: Plan the Pour Day
Choose mild weather if possible. Hot, windy weather can dry the surface too quickly. Cold weather can slow curing and create other problems. Avoid rain, freezing temperatures, and extreme heat. Have every tool ready before the concrete arrives or before you start mixing. Once the pour begins, the project becomes a team sport with a ticking clock.
Line up helpers and assign jobs. One person can place concrete, another can spread it, another can screed, and another can manage tools and edges. For a larger DIY concrete patio, three or four capable helpers can make the difference between “nice backyard upgrade” and “abstract sculpture titled Regret.”
Step 8: Pour and Spread the Concrete
Place concrete as close to its final position as possible. Avoid dragging it long distances with a rake, because overworking can separate the mix. Use a shovel or concrete come-along to move it into corners and along edges. Slightly overfill the forms so the screed board has enough material to work with.
Tap along the form edges with a shovel or board to help consolidate the concrete and reduce voids. Work steadily from one side to the other. Keep the surface full and consistent, especially around corners, reinforcement, and form edges.
Step 9: Screed the Surface
Screeding levels the concrete by removing excess material and filling low spots. Rest a straight 2×4 on the forms and pull it toward you with a gentle sawing motion. Keep a small roll of concrete in front of the screed board. If you see low areas, toss in more concrete and screed again.
This is where the patio begins to look like a real slab. It is also where you realize how valuable straight lumber is. A warped screed board creates a wavy surface, which is charming in potato chips but less charming under patio chairs.
Step 10: Float, Edge, and Groove
After screeding, use a bull float or magnesium float to smooth the surface and push aggregate slightly below the top. Do not overwork the surface, and do not add water to make finishing easier. Extra water can weaken the surface and increase dusting, scaling, or cracking.
Use an edger along the forms to create a rounded edge that resists chipping. Then cut control joints with a groover while the concrete is still workable, or saw-cut them later after the slab hardens enough. Control joints encourage shrinkage cracks to happen in planned lines instead of random lightning-bolt patterns across your new patio.
Step 11: Space Control Joints Correctly
For a typical 4-inch patio slab, control joints are often spaced about 8 to 12 feet apart. A common guideline is to space joints in feet at roughly two to three times the slab thickness in inches. Joint depth should be at least one-quarter of the slab thickness, so a 4-inch slab needs joints at least 1 inch deep.
Try to create square or nearly square panels rather than long, skinny rectangles. Poor joint layout can encourage cracking. Joint planning is not glamorous, but neither is explaining to your neighbor why your brand-new patio looks like a map of river tributaries.
Step 12: Add a Broom Finish
For most outdoor patios, a broom finish is practical because it adds traction. Wait until the surface sheen has disappeared and the concrete is firm enough to hold texture without tearing. Then lightly drag a clean broom across the slab in straight, consistent lines. Keep the direction intentional; random broom marks can make the surface look rushed.
A smooth troweled patio may look sleek, but it can become slippery when wet. Unless the patio is covered and protected, a light broom texture is usually the safer, more forgiving choice.
Step 13: Cure the Concrete Properly
Curing is the process of keeping concrete moist enough and warm enough to gain strength. Concrete does not simply “dry”; it hardens through a chemical reaction between cement and water. If moisture disappears too quickly, the slab may become weaker and more prone to surface defects.
Cover the patio with plastic sheeting, use a curing compound, or follow another appropriate curing method. Many concrete practices call for keeping concrete protected and moist for about seven days under normal conditions, while full strength development continues longer. Keep foot traffic off the slab at first, and avoid placing heavy furniture, grills, or planters too soon.
Step 14: Remove Forms and Clean Up
Forms are often removed after the concrete has hardened enough to hold its edge, commonly after a day or two depending on conditions. Remove screws and stakes carefully. Backfill around the slab edges with soil or landscape material to prevent erosion under the patio edge.
Clean tools immediately after use. Concrete left on a shovel overnight becomes a fossil. Future archaeologists may admire it, but you will still need a new shovel.
Step 15: Seal and Maintain the Patio
After the concrete has cured sufficiently, consider applying a concrete sealer. Sealer can help reduce staining, moisture absorption, and surface wear. Follow the product directions for timing, surface preparation, and reapplication. Some sealers are breathable; others create more of a film. Choose one suited for exterior concrete patios.
Routine maintenance is simple: sweep debris, rinse dirt, clean spills, and avoid harsh deicing chemicals. In cold climates, use concrete-safe ice melt and remove snow carefully. A well-built patio does not need much pampering, but it does appreciate not being treated like a loading dock.
Common DIY Concrete Patio Mistakes to Avoid
Skipping the Gravel Base
Pouring concrete directly on poorly prepared soil increases the risk of settlement, cracking, and drainage problems. A compacted gravel base is one of the best investments you can make in long-term patio performance.
Adding Too Much Water
Extra water may make concrete easier to place, but it can weaken the slab and damage the finished surface. Use the correct mix consistency and work efficiently instead of turning the batch into gray soup.
Ignoring Control Joints
Concrete shrinks as it cures. Without control joints, cracks choose their own path. With control joints, you at least get a vote.
Finishing Too Early or Too Late
If you broom too early, the surface tears. If you wait too long, the broom barely leaves a mark. Watch the surface, not the clock. Concrete finishing is partly technique and partly timing.
Forgetting Drainage
A flat patio may collect water. A patio sloped toward the house may create bigger problems. Always slope the surface away from structures.
Design Ideas for a Better Concrete Patio
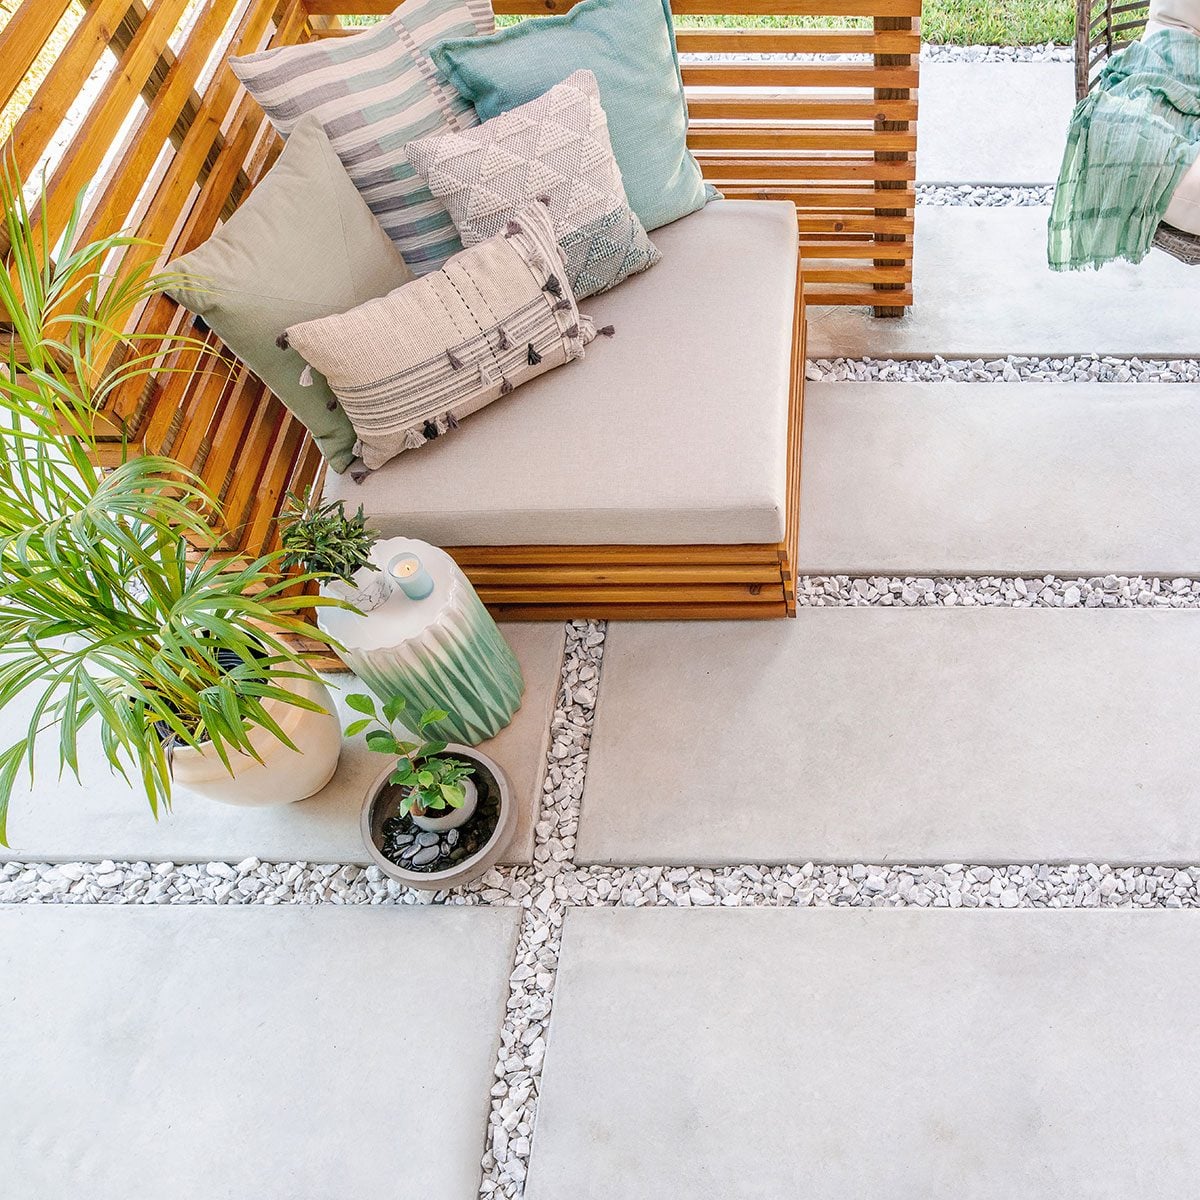
A basic concrete slab can still look polished with smart design. Score control joints in a grid pattern to make them look intentional. Add a border with landscaping stones or low plantings. Use outdoor rugs, planters, string lights, and furniture zones to soften the look. Concrete is neutral, which means it can go modern, rustic, farmhouse, minimalist, or “we bought all the patio cushions on sale and somehow it works.”
If you want a decorative finish, consider staining, integral color, exposed aggregate, or stamped concrete. However, decorative concrete often requires more skill and faster timing. For a first-time DIY project, a clean broom-finished slab is usually the most realistic and durable option.
When to Hire a Professional
DIY is satisfying, but concrete has limits. Hire a professional if the patio is large, heavily loaded, attached to complex drainage, located on steep or unstable ground, or requires decorative stamping. You should also get expert advice if local codes require inspections, frost footings, thickened edges, or structural reinforcement.
A contractor may cost more upfront, but a failed slab is expensive to remove and redo. Concrete is not like paint. You cannot simply say, “Oops,” and roll on another coat.
Real-World Experience: What DIY Patio Builders Learn the Hard Way
The first experience many homeowners have with a DIY concrete patio is learning that the work is not technically mysterious, but it is physically demanding. Measuring, digging, and building forms can feel slow, yet those steps decide the quality of the finished slab. People who rush the layout often end up fighting the project later. People who take time to square the forms, compact the base, and plan drainage usually have a smoother pour day.
Another lesson is that concrete rewards preparation and punishes improvisation. The pour itself is not the time to search for the edger, unwrap the broom, or debate where the control joints should go. Experienced DIYers lay tools out in order, check water access, plan wheelbarrow routes, and make sure helpers know their roles. One person should not be trying to mix, haul, spread, screed, float, edge, groove, and answer a neighbor’s questions about property values all at once.
Weather is another teacher. A mild, cloudy day can make the work feel manageable. A hot, windy afternoon can make concrete tighten quickly and leave beginners scrambling. If the forecast looks unfriendly, reschedule. There is no award for pouring concrete during the most dramatic weather event of the month.
Many DIY patio builders also discover that the base matters more than the surface at first glance. A beautiful broom finish cannot compensate for soft soil, poor drainage, or a thin gravel layer. The strongest patios start below the concrete. Digging out organic material, compacting in layers, and correcting low spots may not make for exciting photos, but it makes the slab last.
Control joints are another area where experience changes behavior. Beginners sometimes avoid joints because they want a perfectly smooth, unbroken slab. Then the concrete cracks anyway, usually in a place that looks personally insulting. More experienced builders treat joints as part of the design. They align them with doors, steps, furniture zones, or a simple grid so the patio looks intentional.
Finishing also teaches restraint. It is tempting to keep smoothing the surface because fresh concrete looks better every time the float passes over it. But overworking can bring too much paste and water to the top, weakening the surface. A solid patio finish is not about making concrete look like a kitchen countertop. For an outdoor slab, the goal is flat, durable, drained, and textured enough for traction.
Curing is the final test of patience. After the forms come off, the patio looks finished, and homeowners naturally want to drag out the grill, chairs, umbrella, and seven decorative planters immediately. Waiting is smarter. Concrete gains strength over time, and early abuse can mark the surface or stress the slab. Cover it, protect it, and give it time. Your future self will appreciate the restraint, even if your current self really wants to host a barbecue.
The most useful practical tip from experienced DIYers is simple: start smaller if this is your first concrete project. A modest patio or landing teaches the entire process without overwhelming the crew. Once you understand layout, forming, pouring, finishing, and curing, larger projects become less intimidating. Concrete work is a craft learned through preparation and feel. The first slab teaches humility. The second one teaches confidence.
Conclusion
A DIY concrete patio can transform a plain backyard into a useful, attractive outdoor living space. The project is not effortless, but it is achievable when you plan carefully, prepare the ground correctly, build strong forms, place control joints, finish at the right time, and cure the slab properly. The secret is not one magic tool or one heroic pour day. It is the combination of small correct steps that produce a patio you can enjoy for years.
Build the base well. Respect the slope. Do not drown the mix. Give concrete time to cure. Do those things, and your patio will be ready for summer dinners, fall fire pits, morning coffee, and at least one proud speech that begins, “Funny story about this slab…”














