
A DIY farmhouse sign is one of those rare home projects that looks charming, costs very little, and does not require you to own a workshop full of terrifying tools. In fact, if you can sand a board, dab paint without panicking, and spell “Welcome” correctlyor at least confidentlyyou can make a farmhouse sign that looks like it came from a boutique home décor shop.
The beauty of farmhouse wall art is its relaxed, lived-in personality. It does not need to be perfect. Actually, if it looks too perfect, it starts giving “office lobby” instead of “warm kitchen with biscuits cooling somewhere.” A little distressing, soft neutral paint, natural wood grain, and simple lettering are what make this project feel cozy, personal, and handmade.
In this guide, you will learn how to make a farmhouse sign from scratch using easy-to-find materials, beginner-friendly techniques, and a few smart tricks that help avoid paint bleeding, crooked letters, and the emotional spiral caused by peeling off a stencil too early.
Why DIY Farmhouse Signs Are Still So Popular
Farmhouse décor continues to work because it blends comfort, simplicity, and personality. A handmade wood sign can warm up a blank wall, dress up an entryway, add charm to a laundry room, or make a kitchen feel more inviting. Unlike mass-produced wall art, a DIY farmhouse sign lets you choose the exact phrase, size, color, and finish that fits your home.
Popular farmhouse signs often feature words such as “Gather,” “Home,” “Blessed,” “Farmhouse Kitchen,” “Welcome,” or family names. But you do not have to stick with the classics. Your sign can say “Coffee First,” “Laundry Today or Naked Tomorrow,” or “Please Leave by 9.” That is the magic of DIY: your house, your rules, your passive-aggressive entryway messaging.
Materials You Will Need
You can keep this project simple or dress it up depending on your style. For a basic DIY farmhouse sign, gather the following supplies:
- Wood board, plywood, MDF, pine board, or reclaimed wood
- Sandpaper or sanding block, preferably medium and fine grit
- Wood stain or paint for the background
- Acrylic paint, chalk paint, or craft paint for lettering
- Stencil, vinyl stencil, transfer paper, or printed design
- Painter’s tape
- Foam brush, small detail brush, or stencil brush
- Clear matte sealer or polyurethane, especially for porch signs
- Optional: wood trim, sawtooth hanger, jute twine, or picture-hanging hardware
If you are making a framed farmhouse sign, you will also need thin wood strips for the frame, wood glue, clamps, and small nails or a brad nailer. If you do not own a brad nailer, do not worry. Wood glue and patience can still get you invited to the farmhouse party.
Step 1: Choose the Right Wood
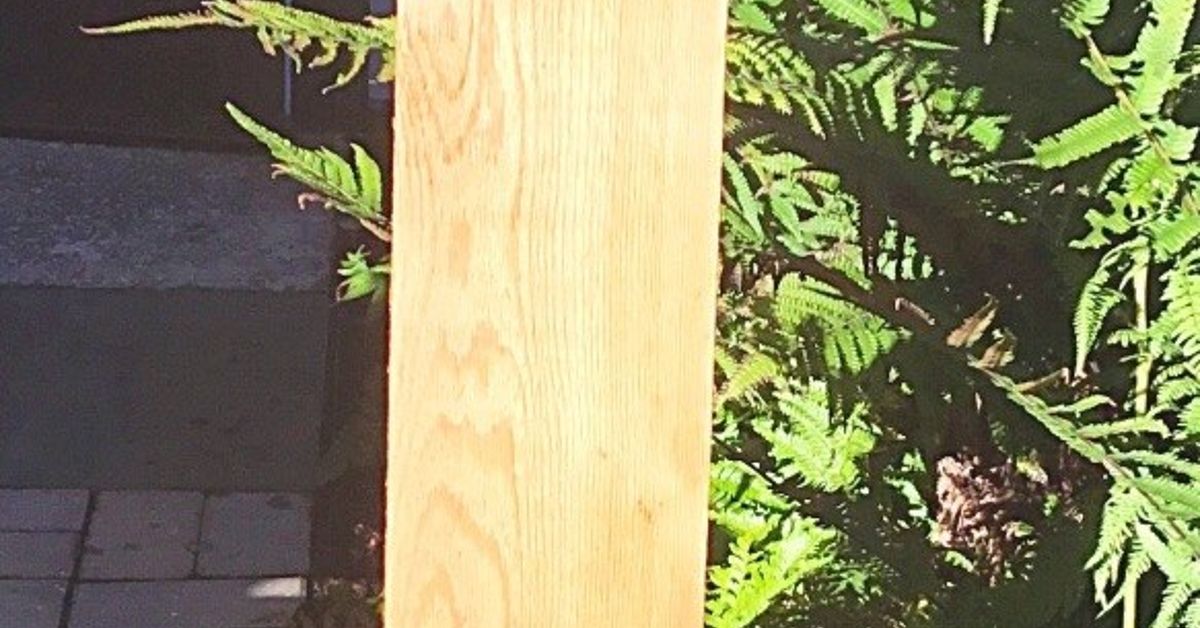
The wood you choose sets the mood for the entire sign. Pine is inexpensive, lightweight, and easy to work with, making it a favorite for beginner wood sign projects. Plywood is great for larger signs because it stays relatively flat and can be framed for a polished look. Reclaimed wood brings instant rustic character, but it may need extra sanding and cleaning before painting.
For an indoor farmhouse sign, MDF can also work well because it has a smooth surface that takes paint nicely. However, MDF is not ideal for outdoor signs unless it is sealed extremely well, because moisture can make it swell. For porch signs, solid wood or exterior-grade plywood is a safer choice.
Best Beginner Size
If this is your first sign, start with something manageable, such as 12 by 18 inches or 16 by 24 inches. A smaller board is easier to paint, stencil, and fix if your first attempt develops what we will politely call “rustic character.”
Step 2: Sand and Clean the Surface
Sanding is not glamorous, but it is the difference between a smooth farmhouse sign and a board that looks like it fought a squirrel and lost. Start with medium-grit sandpaper to remove rough areas, then finish with fine-grit sandpaper for a softer surface.
Always sand in the direction of the wood grain. After sanding, wipe the board with a clean cloth or tack cloth to remove dust. Paint does not enjoy sticking to dust. It is clingy, but not that clingy.
Step 3: Stain or Paint the Background
For the classic farmhouse look, you have two strong options: a stained wood background with white lettering, or a white painted background with black lettering. Both are timeless. Both look good in kitchens. Both make people think you have your life together, even if there is a pile of mail hiding behind the fruit bowl.
Option A: Stained Wood Background
Apply wood stain with a brush or cloth, following the grain. Let it sit briefly, then wipe off the excess. The longer stain sits, the deeper the color becomes, so test first on the back of the board or a scrap piece. Popular farmhouse stain tones include walnut, weathered gray, driftwood, and espresso.
Option B: Painted Background
Chalk paint, acrylic paint, and matte interior paint all work well for farmhouse signs. White, cream, soft gray, sage green, and muted blue are popular choices. Apply thin coats rather than one thick coat. Thick paint can create ridges and may peel when you remove a stencil.
Step 4: Create Your Design
Your design can be as simple as one word or as detailed as a quote with decorative flourishes. The most important rule is readability. A sign that says “Gather” should not look like “Gopher.” Unless you are making a sign for a very specific rodent-themed kitchen, in which case, carry on.
Choose fonts that match the farmhouse style. A mix of clean block letters and a soft script font often works beautifully. Avoid using too many fonts on one sign. Two is usually enough. Three is risky. Four is a ransom note.
Easy Design Ideas
- “Welcome to Our Home” for an entryway
- “Farmhouse Kitchen” for a kitchen wall
- “Gather” for a dining room
- “Fresh Eggs” for a rustic pantry look
- “Laundry Co.” for a laundry room
- Your family name and established year
- A favorite short quote or Bible verse
Step 5: Transfer the Lettering
There are several ways to get lettering onto your sign. Choose the method that matches your tools and comfort level.
Vinyl Stencil Method
If you have a cutting machine, such as a Cricut or Silhouette, vinyl stencil material gives crisp results. Cut the design, weed out the letters or shapes you want painted, apply transfer tape, and press the stencil firmly onto the board. Burnish the edges well so paint cannot sneak underneath like a tiny artistic criminal.
Reusable Stencil Method
Reusable plastic stencils are beginner-friendly and easy to find. Secure the stencil with painter’s tape, then use a stencil brush or foam pouncer. The secret is using very little paint. Offload excess paint onto a paper towel before touching the stencil. A dry brush is your best friend here.
Pencil Transfer Method
Print your design on regular paper. Shade the back of the paper with pencil, place it on the board, and trace the letters from the front. The pencil graphite transfers the outline onto the wood. Then you can fill in the letters by hand with a small brush. This method takes more time but works without special machines.
Step 6: Paint the Lettering
Use thin coats and light pressure. If you are using a stencil, dab straight up and down instead of brushing side to side. Brushing can push paint under the stencil edges and create blurry letters. For bold lettering, apply two light coats rather than one gloopy coat. Yes, “gloopy” is a technical term in the official dictionary of craft disasters.
For a white painted background, black or charcoal lettering gives high contrast. For a stained background, white, cream, or soft gray lettering creates a classic rustic finish. If your sign feels too stark, soften it later with distressing.
Step 7: Remove the Stencil Carefully
Peel the stencil while the paint is slightly wet or just barely dry, depending on your paint type. Pull slowly and at a low angle. If paint lifts, pause and use a craft knife to score any stubborn edges. This is not the moment for speed. Removing a stencil too fast is how perfectly nice people start muttering at plywood.
If you notice tiny paint bleeds, wait until everything is dry. Then touch up the edges with the background paint using a small detail brush. Do not panic. Most farmhouse signs are improved by tiny imperfections because they look handmade instead of factory-stamped.
Step 8: Distress for Farmhouse Character
Distressing gives your sign that aged, well-loved farmhouse look. Lightly sand the edges, corners, and raised areas where natural wear would happen. Focus on places that would realistically get bumped or handled over time. Random is good. Chaos is not.
You can also dry brush a small amount of brown, gray, or white paint over the surface to add depth. For a more weathered effect, use a little antiquing glaze or watered-down stain, then wipe most of it away. The goal is subtle age, not “rescued from a haunted barn during a thunderstorm.”
Step 9: Add a Simple Frame
A frame instantly makes a DIY farmhouse sign look more finished. Thin pine strips, lattice trim, or 1×2 boards work well. Stain the frame slightly darker than the sign background for contrast. Cut the trim to fit around the board, then attach it with wood glue and small nails.
If you do not want to cut mitered corners, use simple straight cuts. Butt joints are perfectly fine for farmhouse style. The rustic look is forgiving, which is one reason this project is so friendly to beginners and people who measure once, cut twice, and then pretend it was intentional.
Step 10: Seal the Sign
For indoor signs, sealing is optional but helpful. A clear matte sealer protects the paint from dust, fingerprints, and the occasional splash of coffee. For outdoor porch signs, sealing is much more important. Use an exterior-rated clear coat and cover the front, back, and edges of the wood to help protect against moisture.
Choose a matte or satin finish for the most natural farmhouse look. Glossy finishes can work, but they often feel less rustic. Let the sealer cure fully before hanging or leaning the sign against a wall.
Where to Display Your DIY Farmhouse Sign
A handmade farmhouse sign can work almost anywhere. Hang a “Gather” sign above a dining table, a “Welcome” sign near the front door, or a “Coffee Bar” sign above your morning caffeine station. In a laundry room, a funny sign can make folding towels slightly less tragic. Slightly.
For shelves and mantels, smaller signs look great layered with candles, greenery, framed photos, old books, or ceramic pitchers. On a porch, a tall vertical welcome sign adds instant curb appeal. Just make sure outdoor signs are sealed and protected from heavy rain whenever possible.
Common Mistakes to Avoid
Using Too Much Paint on the Stencil
This is the most common issue. Too much paint causes bleeding. Use a nearly dry brush and build color slowly.
Skipping Sanding
Rough wood can create uneven paint and jagged letters. Sanding takes a few minutes and saves frustration later.
Choosing Overly Complicated Fonts
Delicate script fonts can be hard to stencil cleanly. Use bold, readable lettering, especially for your first sign.
Forgetting to Seal Outdoor Signs
Outdoor wood signs need protection. Moisture, sun, and temperature changes can fade paint and warp wood over time.
Budget-Friendly Tips
You do not need expensive supplies to make a beautiful farmhouse sign. Check scrap wood piles, use leftover wall paint, repurpose an old cabinet door, or turn thrift-store framed art into a painted sign. Many of the best farmhouse projects start with something that looked hopeless in a garage corner.
If you want the look of reclaimed wood without the mystery splinters, stain new pine with a weathered finish. You can also dry brush white paint over stained wood to fake a sun-washed barnwood effect. The result looks rustic, but unlike actual barnwood, it probably has not hosted spiders with generational wealth.
Creative Variations to Try
Once you make one farmhouse sign, you may accidentally become a sign person. It happens quickly. One day you make a “Welcome” sign, and the next day every blank wall in your house is in danger.
- Vertical porch sign: Use a long board and bold stacked letters.
- Kitchen market sign: Add words like “Bakery,” “Pantry,” or “Fresh Produce.”
- Seasonal sign: Make interchangeable designs for fall, Christmas, spring, and summer.
- Family name sign: Add your last name and an established year.
- Mini shelf sign: Use small wood scraps for tiered trays or bookcases.
- Chalkboard farmhouse sign: Paint the center with chalkboard paint for changeable messages.
Experience Notes: What Making a DIY Farmhouse Sign Teaches You
The first thing you learn when making a DIY farmhouse sign is that the project is much easier when you stop trying to make it perfect. Farmhouse style has a wonderful sense of forgiveness built into it. A slightly uneven brushstroke can become “texture.” A sanded corner can become “character.” A tiny paint bleed can become “handmade charm,” especially if you say it with enough confidence.
One helpful experience is to test everything before committing to the final board. Try the stain on the back. Test the paint color on a scrap. Practice the stencil technique on cardboard or leftover wood. This small step prevents the classic DIY moment where you stare at a half-painted board and whisper, “Well, that was a choice.” Testing also helps you understand how much paint your brush holds and how quickly your surface absorbs stain.
Another lesson is that preparation matters more than fancy supplies. A well-sanded inexpensive pine board can look better than costly wood that was rushed. Clean edges, smooth paint, and balanced lettering make a bigger difference than buying every tool in the craft aisle. You can absolutely make a beautiful sign with simple materials if you take your time with the basics.
Stencil work also teaches patience. The best results come from light layers, careful pressure, and slow peeling. Most beginners want to load the brush with paint because it feels more efficient. In reality, that is usually how paint sneaks under the stencil. A dry brush may feel too slow at first, but it creates cleaner lettering and fewer touch-ups. Once you see the difference, you become oddly passionate about offloading paint onto paper towels. This is normal. Welcome to the club.
Distressing is another part of the process that improves with experience. At first, it is tempting to sand every inch of the sign because rustic style seems like it should be aggressively rustic. But the best distressing looks natural. Sand corners, edges, and a few raised areas. Step back often. If the sign starts looking like it survived a wagon accident, stop sanding and go have a snack.
You also learn that farmhouse signs make great personalized gifts. A handmade sign with a family name, wedding date, favorite quote, or seasonal message feels thoughtful without being overly complicated. Unlike many DIY gifts, it is useful as décor and easy to customize. A small sign can be finished in an afternoon, while a larger framed sign can become a weekend project.
Finally, making your own farmhouse sign gives you creative confidence. It is a beginner-friendly project, but it still includes real design decisions: color, layout, texture, finish, and placement. When you hang the finished sign and it actually looks good, there is a tiny but powerful moment of pride. You made that. With wood, paint, patience, and maybe one dramatic sigh. And now your wall looks warmer, your room feels more personal, and your inner DIY decorator is already wondering what else in the house could use a little white paint and distressing.
Conclusion
A DIY farmhouse sign is simple, affordable, and surprisingly satisfying to make. With a basic wood board, a little paint or stain, and a design you love, you can create custom farmhouse wall art that fits your home perfectly. The process is beginner-friendly, the materials are easy to find, and the final result can look charmingly rustic without requiring professional woodworking skills.
Whether you make a kitchen sign, porch welcome sign, laundry room sign, or personalized family name sign, the key is to keep the design readable, use thin coats of paint, distress lightly, and seal the finished piece when needed. Most importantly, enjoy the imperfect beauty of handmade décor. Farmhouse style is not about flawless finishes; it is about warmth, character, and making your home feel like yours.













