
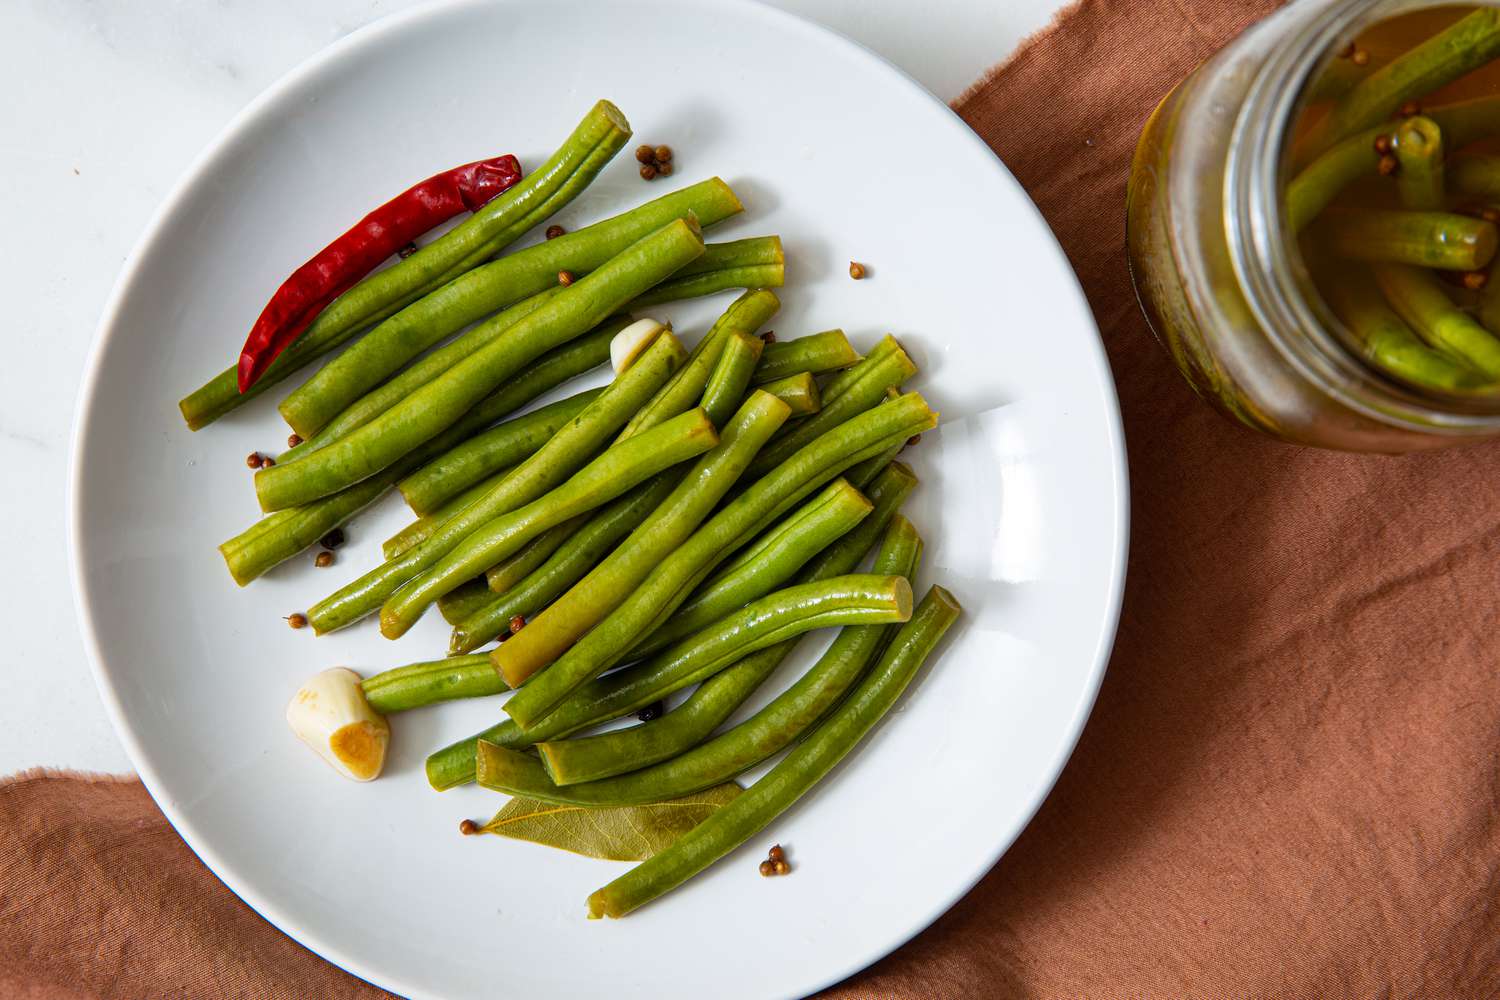
If green beans had a secret second life, it would be this: standing tall in a jar, wearing garlic, dill, and vinegar like a tiny crunchy tuxedo. This easy pickled green beans recipe turns a humble vegetable into the kind of snack that disappears from the fridge before anyone admits they opened the jar. Tangy, crisp, lightly salty, and customizable with garlic, dill, mustard seed, or a little heat, pickled green beans are one of the easiest ways to add instant personality to sandwiches, salads, cheese boards, grain bowls, and weeknight dinners.
The beauty of pickled green beans is that they feel fancy without demanding fancy behavior from you. You do not need a culinary degree, a farmhouse kitchen, or a pantry full of mysterious powders. You need fresh green beans, vinegar, water, salt, garlic, herbs, and a clean jar. That is it. The result is bright, snappy, and wildly useful. Think of them as the pickle spear’s taller, greener cousin who shows up to brunch and somehow makes everything more interesting.
This guide covers a simple refrigerator version for beginners, plus important safety notes for anyone interested in water bath canning. Refrigerator pickled green beans are the easiest route because they are stored cold and eaten within a shorter window. Shelf-stable canned pickled green beans require tested proportions, proper jars, correct headspace, and processing times. In other words, the fridge version is a casual kitchen project; the canned version is a science project that happens to taste amazing.
Why You’ll Love This Easy Pickled Green Beans Recipe
First, the texture is the star. Good pickled green beans should snap when you bite them. They are not supposed to be limp, sad, or apologetic. Starting with fresh, firm beans and pouring hot brine over them helps preserve that lively crunch. Second, the flavor is flexible. Dill and garlic create the classic “dilly beans” taste, while red pepper flakes bring a little drama. Mustard seed adds a gentle savory pop, black peppercorns add warmth, and a pinch of sugar can round out the acidity without making the pickles taste sweet.
Third, this recipe is practical. A jar of homemade pickled green beans can rescue a boring lunch, brighten a heavy dinner, or make a snack plate look like someone planned ahead. They are especially good next to grilled chicken, roasted potatoes, burgers, tuna salad, deviled eggs, sharp cheddar, smoked turkey sandwiches, and anything involving hummus. They also make a surprisingly excellent garnish for a tomato-based brunch drink or a fizzy mocktail with lemon and herbs.
Ingredients for Pickled Green Beans
For One Quart Jar of Refrigerator Pickled Green Beans
- 1 pound fresh green beans, washed and trimmed
- 1 cup distilled white vinegar, 5% acidity
- 1 cup water
- 1 tablespoon pickling salt or kosher salt
- 1 teaspoon sugar, optional
- 2 garlic cloves, peeled and lightly crushed
- 1 teaspoon dill seed or 2 to 3 fresh dill sprigs
- 1/2 teaspoon mustard seeds
- 1/2 teaspoon black peppercorns
- 1/4 teaspoon red pepper flakes, optional
Use distilled white vinegar if you want the cleanest, brightest flavor. Apple cider vinegar also works for refrigerator pickles, but it gives the brine a slightly fruitier taste and a warmer color. For the crispest result, choose beans that are firm, slender, and free from soft spots. If the beans bend like a pool noodle, keep walking. You want beans that snap.
How to Make Pickled Green Beans
Step 1: Prepare the Jar
Wash a one-quart glass jar and lid with hot, soapy water. Rinse well. For refrigerator pickles, the jar does not need to be processed like a canning jar, but it should be very clean. If you plan to can pickled green beans for shelf storage, use proper canning jars, new lids, and tested instructions.
Step 2: Trim the Green Beans
Trim the stem ends from the green beans. Cut the beans so they fit upright in your jar, leaving about 1/2 inch of space at the top. Keeping the beans vertical is not required, but it looks tidy and makes the jar easier to pack. It also gives the finished pickles that classic deli-counter look, which is half the fun.
Step 3: Add the Flavorings
Place the garlic, dill, mustard seeds, peppercorns, and red pepper flakes in the bottom of the jar. If you like a bold garlic flavor, use two cloves. If you want the green beans to stay more delicate, use one. Fresh dill gives a garden-like aroma, while dill seed creates a more concentrated pickle flavor.
Step 4: Pack the Beans
Stand the green beans upright in the jar as tightly as you can without crushing them. A snug pack helps keep the beans submerged once the brine is added. If a few beans are too tall, trim them and tuck the shorter pieces along the side. This is not a beauty contest, but a good-looking jar does make the project more satisfying.
Step 5: Make the Brine
In a small saucepan, combine the vinegar, water, salt, and optional sugar. Bring the mixture to a simmer, stirring until the salt dissolves completely. The sugar is not there to make sweet pickled green beans; it simply softens the sharp edges of the vinegar. If you prefer a bracing, extra-tangy pickle, leave it out.
Step 6: Pour and Cool
Carefully pour the hot brine over the green beans, covering them completely. Tap the jar gently on the counter to release trapped air bubbles. Add more brine if needed so the beans stay submerged. Let the jar cool at room temperature, then cover it and refrigerate.
Step 7: Wait Before Eating
The hardest part is waiting. The beans will taste lightly pickled after 24 hours, better after 48 hours, and best after about 5 to 7 days. During that time, the vinegar, garlic, dill, and spices settle into the beans. The flavor becomes rounder, sharper, and more addictive. Consider labeling the jar with the date, unless your household treats pickles like treasure and remembers exactly when they were made.
How Long Do Pickled Green Beans Last?
Refrigerator pickled green beans should be stored cold and eaten within about one month for best quality. Always use a clean fork to remove them from the jar. If the brine becomes cloudy in an unusual way, develops a bad smell, bubbles unexpectedly, or the beans feel slimy, discard the batch. Homemade food should be delicious, not suspicious.
For shelf-stable storage, do not simply place hot brine in a jar and leave it on the counter. Green beans are a low-acid vegetable, and safe shelf-stable pickling depends on tested vinegar-to-water ratios, correct jar size, headspace, and boiling-water processing. A tested dilled bean recipe generally uses 5% vinegar, canning or pickling salt, pint jars, 1/2-inch headspace, and altitude-adjusted processing. If you are new to canning, start with refrigerator pickles first, then learn water bath canning from reliable preservation instructions.
Flavor Variations
Classic Garlic Dill Green Beans
Use garlic, dill seed, black peppercorns, and a tiny pinch of red pepper flakes. This is the classic dilly bean profile: savory, tangy, and just spicy enough to keep things interesting.
Spicy Pickled Green Beans
Add sliced jalapeño, extra red pepper flakes, or a small dried chile to the jar. Start small. Pickle heat tends to grow louder as it sits, like a guest who finds the karaoke machine.
Lemon Herb Pickled Green Beans
Add a strip of lemon zest, fresh thyme, and a few coriander seeds. Avoid adding lemon juice as a replacement for vinegar unless you are using a tested recipe. Zest adds aroma without changing the safety structure of the brine.
Sweet and Tangy Green Beans
Increase the sugar to 1 tablespoon for refrigerator pickles. This creates a rounder flavor that pairs beautifully with spicy food, barbecue, and rich sandwiches.
Tips for Crisp Pickled Green Beans
Use the freshest beans you can find. Farmers market beans or garden beans picked the same day are ideal. Avoid beans that are rubbery, bruised, or overly mature with large seeds inside. Trim only what you need and pack them soon after washing.
Do not overcook the beans. This recipe does not require blanching, which helps preserve crunch. The hot brine softens them just enough while keeping their snap. If you prefer a slightly more tender pickle, you can briefly blanch the beans for 30 to 60 seconds and then chill them in ice water before packing, but the crisp raw-pack style is usually best for refrigerator pickles.
Use the right salt. Pickling salt dissolves cleanly and keeps the brine clear. Kosher salt can work in refrigerator pickles, but different brands vary in crystal size, so measuring by volume may change the saltiness. Avoid iodized table salt if you want the clearest brine and cleanest flavor.
What to Serve With Pickled Green Beans
Pickled green beans are more than a snack, although eating them directly from the jar while standing in front of the fridge is a perfectly valid lifestyle choice. Chop them into potato salad for crunch. Slice them into tuna salad or chicken salad for a tangy bite. Serve them with cheese, crackers, olives, nuts, and fruit. Add them to grain bowls with roasted vegetables and a creamy dressing. Tuck them into sandwiches instead of cucumber pickles. Place a few next to grilled meats to cut through richness.
They are also excellent on holiday appetizer boards because they bring color and acidity. A platter with pickled green beans, sharp cheddar, salami, roasted almonds, grapes, and whole-grain mustard looks polished with almost no effort. That is the kind of kitchen magic we can all support.
Common Mistakes to Avoid
Changing the Vinegar Ratio for Canning
For refrigerator pickles, you have more flexibility because the jar stays cold. For canned pickled green beans, do not reduce the vinegar, increase the water, or guess at processing times. The acid level is what makes boiling-water canning appropriate for pickled vegetables.
Using Weak Vinegar
Choose vinegar labeled 5% acidity. Some specialty vinegars may be milder, and homemade vinegar can vary. A pretty bottle is not enough; check the label.
Packing Beans Above the Brine
Beans sticking out of the brine will not pickle evenly. Trim them shorter or use a smaller glass weight made for jars. At minimum, shake the jar gently after a day to help redistribute the brine.
Eating Them Too Soon
Yes, you can taste them after 24 hours. No, they will not yet be their best selves. Give them several days if you want deeper flavor. Patience is the secret ingredient, which is annoying but true.
Recipe Summary
Prep time: 15 minutes
Cook time: 5 minutes
Chill time: 24 hours minimum, 5 to 7 days for best flavor
Yield: 1 quart jar
Storage: Refrigerate and enjoy within about 1 month
Personal Experience: What Making Pickled Green Beans Teaches You
The first thing you learn when making pickled green beans is that jars have opinions. You may think one pound of green beans will slide neatly into a quart jar, but the beans may disagree. Some are too tall. Some curve dramatically like they are auditioning for modern dance. A few refuse to stand upright. This is where the recipe becomes less about perfection and more about rhythm. Trim, pack, adjust, and keep going. By the time the jar is full, it feels less like a task and more like arranging a tiny edible bouquet.
The second lesson is that flavor changes with time. On day one, the beans taste bright and fresh, with vinegar sitting right at the front. On day three, the garlic starts to show up. By day five, the dill and pepper settle in, and the beans taste like they were always meant to live in brine. This is why pickled green beans are great for people who like low-effort cooking with high-reward results. You do a little work once, then your future self gets a crunchy bonus every time you open the refrigerator.
Another useful experience is learning how much spice your household actually likes. A quarter teaspoon of red pepper flakes gives a gentle warmth. A half teaspoon gets attention. A sliced jalapeño may cause one person to declare the beans “perfect” while another person reaches for a glass of water and questions your judgment. The good news is that small-batch pickling makes experimenting easy. Make one jar mild and one jar spicy. Label them clearly unless you enjoy dinner-table suspense.
Pickled green beans also teach you how acidity balances rich food. The first time you serve them next to something heavy, like burgers, creamy potato salad, mac and cheese, or roasted sausages, the whole meal suddenly feels brighter. That sharp crunch cuts through richness in a way plain steamed green beans never quite manage. They are also helpful when leftovers need a second act. A bowl of rice, leftover chicken, chopped herbs, and a few sliced pickled green beans can taste intentional instead of like a fridge cleanout wearing sweatpants.
The final experience is confidence. Pickling can sound intimidating, especially if you grew up hearing about canning like it was a high-stakes kitchen exam. Refrigerator pickles are a friendly place to begin. You learn how brine works, how herbs change flavor, how salt and vinegar interact, and how fresh vegetables transform with time. Once you understand those basics, the process feels less mysterious. You may start with green beans, then suddenly you are eyeing carrots, onions, cucumbers, radishes, and cauliflower like they are all potential jar residents. This is normal. The pickle enthusiasm arrives quietly, then takes over a shelf.
Conclusion
This easy pickled green beans recipe is crisp, tangy, simple, and endlessly useful. With fresh beans, 5% vinegar, garlic, dill, and a few pantry spices, you can make a jar that upgrades snacks, salads, sandwiches, and dinner plates all week long. Start with the refrigerator method if you want the easiest version. If you choose to can pickled green beans for shelf storage, follow tested canning instructions exactly and never guess with acid levels or processing times.
In the end, pickled green beans are proof that small kitchen projects can have big flavor payoffs. They are crunchy, cheerful, and just dramatic enough to make a meal feel more alive. Not bad for a vegetable that started the day minding its own business.













