
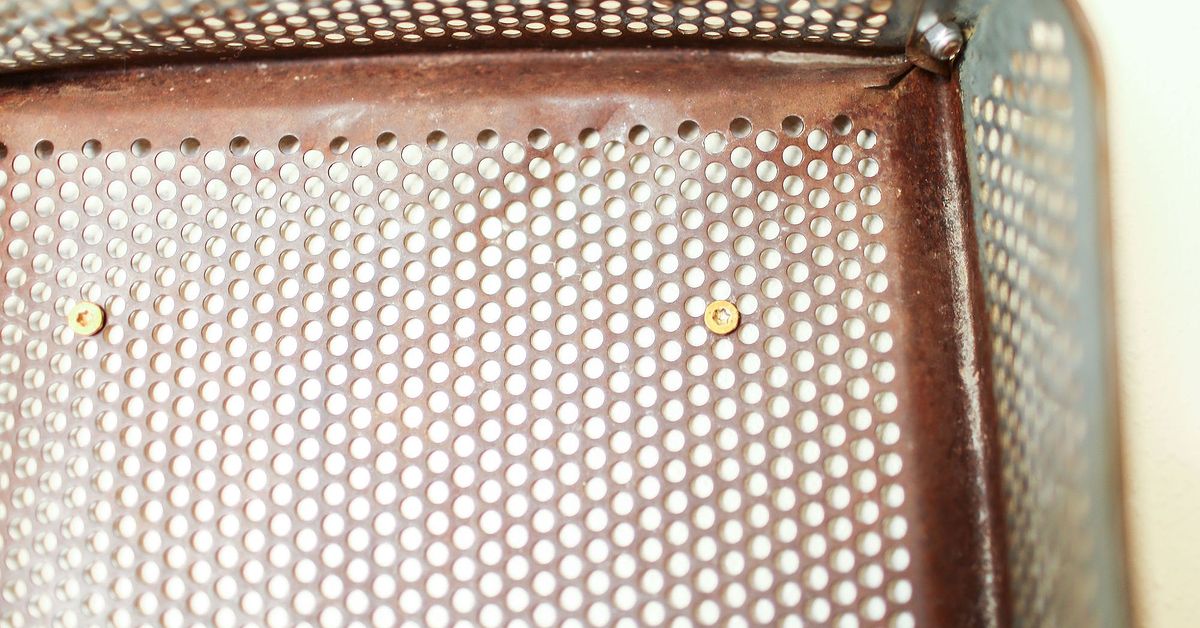
A rusty vintage tray has a certain kind of confidence. It has survived potlucks, cocktail parties, questionable garage storage, and possibly an aunt’s “fruit display” phase. So why let it spend retirement collecting dust in a thrift-store bin?
With a few basic tools and a little patience, an old metal tray can become a practical wall hanging file box for mail, bills, receipts, invitations, school papers, or the mysterious coupons that appear in every household despite nobody remembering signing up for them.
This DIY project combines vintage charm with real-life function. Instead of buying another plastic mail sorter that looks like it escaped from a cubicle farm, you can create an upcycled wall organizer with personality, texture, and a story. The finished piece can fit in an entryway, home office, kitchen command center, craft room, or even beside a desk where paper piles tend to reproduce overnight.
Below, you will learn how to transform a rusty tray into a sturdy, stylish file box while keeping its original character intact. The goal is not to make it look factory-new. The goal is to make it useful enough that you actually want to use it every day.
Why a Rusty Vintage Tray Makes a Great Wall File Organizer
Vintage trays are surprisingly useful as wall storage because they already have several qualities a file organizer needs: a flat back, raised edges, durable material, and visual interest. A large serving tray, cafeteria tray, metal advertising tray, or old industrial tray can become the decorative back panel of a shallow wall-mounted file box.
The raised rim gives the project instant structure. Instead of building an entire organizer from scratch, you are starting with a ready-made frame. That means less measuring, fewer opportunities to cut a board backward, and a lower chance of developing a dramatic relationship with your tape measure.
A rusty vintage tray wall organizer also brings warmth to a space that might otherwise feel too polished. The weathered patina can work beautifully in industrial, farmhouse, cottage, eclectic, retro, and modern rustic interiors. Even a tray with scratches, faded graphics, or minor dents can look intentional once it is cleaned, sealed, and paired with simple wood or metal storage components.
Most importantly, turning a tray into a wall hanging file box gives paper clutter a designated home. Vertical storage keeps important documents visible without allowing them to spread across counters like they have signed a long-term lease.
Choose the Right Vintage Tray for the Project
Before you begin, look for a tray that is large enough to hold your intended paperwork. A tray that is at least 12 inches wide and 16 inches tall works well for standard letter-size mail and folders. A larger tray can support multiple compartments for incoming mail, bills, school papers, and items that need attention.
What to Look For
- A metal tray with a relatively flat center area
- Raised edges or a shallow lip around the perimeter
- No sharp rust flakes or crumbling metal
- Enough surface area for file pockets or shallow wooden rails
- A shape that can be mounted vertically without looking awkward
Round trays can make charming mail holders, especially for a small entryway. Rectangular trays are usually better for a full file box because they hold folders and envelopes more efficiently. Oval trays can work too, although they may require a little creative trimming when adding wooden side rails.
Do not reject a tray simply because it has visible rust. Surface rust can add character. The problem begins when the rust is loose, flaky, sharp, or actively eating through the metal. A tray with deep holes may still be useful as wall art, but it is not the best candidate for holding a stack of unpaid bills and your emotional stability.
Materials and Tools You Will Need
This project is flexible, so you can adjust the materials based on your tray and preferred style. The simplest version uses the tray as a back panel and adds a shallow wooden pocket to hold folders and papers.
Basic Materials
- One rusty vintage metal tray
- Two narrow wood boards for side rails
- One wood board for the bottom ledge
- One narrow front rail or dowel to keep files in place
- Wood screws and short metal screws
- Wall screws and appropriate drywall anchors
- Rust converter, metal primer, or clear protective sealer
- Sandpaper or a wire brush
- Wood stain, paint, or wax finish
- Small labels, clips, or file folders
Helpful Tools
- Drill and drill bits suitable for wood and metal
- Screwdriver or drill driver
- Measuring tape
- Level
- Metal file
- Safety glasses and gloves
- Dust mask for sanding or wire brushing
Step 1: Clean the Tray Without Erasing Its Personality
Start by washing the tray with warm water, mild dish soap, and a soft scrub brush. This removes grime, grease, old dust, and any mysterious sticky residue from its former life. Dry the tray thoroughly with a clean towel, then let it air-dry completely before moving on.
Next, inspect the rust. You do not need to remove every speck of discoloration. In fact, some of the best-looking vintage organizers keep a little patina. Your job is to remove only the loose material that could continue flaking, stain the wall, or snag your fingers.
Use a wire brush, fine sandpaper, or a sanding sponge to gently remove loose rust and unstable paint. Work slowly around embossed lettering, decorative borders, and printed graphics. Those details are often what make the tray special.
After brushing, wipe away all dust with a slightly damp cloth. Let the tray dry fully. If the surface has heavy rust, apply a rust converter according to the product instructions. If the tray has only light rust, a clear protective topcoat may be enough to preserve the aged finish while keeping rusty dust from escaping later.
Step 2: Decide Whether to Preserve, Paint, or Refresh the Finish
The finish determines the personality of your wall hanging file box. There is no single correct choice. Your tray can remain rustic and worn, become bold and colorful, or receive a subtle refresh that still honors its vintage look.
Option 1: Preserve the Natural Patina
This is ideal for trays with interesting faded graphics, old logos, engraved details, or a beautiful mix of rust and metal tones. Once the tray is cleaned and stabilized, seal it with a clear matte or satin protective finish made for metal. A matte finish keeps the tray looking old without making it appear freshly dipped in syrup.
Option 2: Paint the Tray for a Fresh Look
If the tray is heavily stained, badly scratched, or visually chaotic, paint may be the better choice. Use a metal primer first, especially if rust is still visible. Then apply several light coats of paint rather than one thick coat. Thin coats dry more evenly and are less likely to drip, bubble, or create a finish that resembles melted candle wax.
Black, charcoal, cream, olive green, muted blue, and warm white are excellent choices for a vintage-inspired file organizer. For a more playful look, try mustard yellow, coral, teal, or red. A chalkboard-style paint finish can also be useful if you want to label the organizer directly.
Step 3: Build the Shallow File Box Pocket
The tray serves as the decorative back panel, while the wood pieces create the actual pocket that holds mail and folders. Keep the box shallow. A depth of about 3 to 4 inches usually provides enough room for paperwork without making the organizer bulky.
Measure the inside width of the tray. Cut a bottom board that fits across the lower portion of the tray, leaving enough space around decorative edges if you want them to remain visible. Then cut two side rails that run upward from the bottom board.
Attach the bottom board and side rails to the tray using short screws. Pre-drill holes in the metal first to prevent slipping and reduce the chance of bending the tray. Add washers where needed so the screw heads sit securely against the metal.
Next, add a narrow front rail, wooden dowel, or metal rod across the front of the pocket. Position it about halfway up the file box. This creates a barrier that keeps envelopes and folders from sliding out while still allowing you to see what is inside.
For a more polished design, use a thin wood strip across the front and stain it to match the side rails. For a more industrial look, use black pipe fittings, wire, or a salvaged metal bar. The key is to create a front edge that is strong enough to stop paper from escaping when someone opens the front door with unnecessary enthusiasm.
Step 4: Add Dividers for a More Useful Mail Station
A single pocket works well for simple mail storage, but dividers turn the project into a more practical home organization station. You can create two or three sections with thin pieces of wood, acrylic sheet, wire mesh, or narrow metal strips.
Try simple categories that match your household routine:
- To Do: Bills, forms, appointments, and documents that need action
- To File: Papers that should be stored later
- Read: Magazines, catalogs, school notices, and correspondence
- Outgoing: Mail that needs stamps, signatures, or a trip to the mailbox
Keep the labels short. A file organizer is supposed to reduce stress, not force you to decode a spreadsheet every time you receive a utility bill. Small metal label holders, painted wood tags, clip-on labels, or handwritten kraft-paper tags all work well with a vintage tray project.
Step 5: Mount the File Box Securely on the Wall
A wall hanging file box holds more weight than it first appears to. Paper is light one sheet at a time, but a thick pile of mail, folders, magazines, and documents can become surprisingly heavy. Use strong mounting hardware rather than adhesive strips or a single decorative hook.
The most secure method is to drive screws through the upper area of the tray into wall studs. If studs are not available in the right location, use drywall anchors rated for the expected weight and follow the package instructions closely.
Mark the mounting position with a level before drilling. It is much easier to correct a pencil line than to explain why your new wall organizer appears to be slowly sliding downhill. Use at least two mounting points so the tray cannot twist or tilt when files are added and removed.
Once installed, test the organizer gradually. Add a few envelopes first, then folders, then heavier papers. If the tray shifts, flexes, or pulls away from the wall, remove the contents and improve the mounting system before using it regularly.
Style Ideas for Your Upcycled Wall File Box
The fun part of a DIY wall organizer is that it can be customized to match almost any room. The same basic tray can look completely different depending on the finish, hardware, and labels you choose.
Industrial Vintage Office
Keep the rust visible, seal the metal with a matte clear coat, and pair it with dark stained wood. Use black screws, metal label holders, and kraft file folders. This version looks especially good near a reclaimed wood desk, metal shelving, or a vintage task lamp.
Farmhouse Entryway Organizer
Paint the tray warm white, cream, soft sage, or dusty blue. Use lightly distressed wood rails and simple labels such as “Mail,” “Bills,” and “Notes.” Add a small hook rail underneath for keys, dog leashes, or the sunglasses that somehow always vanish exactly when you are late.
Colorful Kitchen Command Center
Use a tray with bright vintage graphics or repaint it in a cheerful color. Add a cork strip, small clipboard, calendar card, or magnetic clip to the front. This creates a compact command center for grocery lists, takeout menus, permission slips, and reminders that dinner will not cook itself.
Common Mistakes to Avoid
Repurposing a vintage tray is a forgiving project, but a few mistakes can make the final result less durable or less useful.
- Ignoring loose rust: Charming patina is good; rusty flakes on your paperwork are not.
- Using screws that are too long: Long screws can poke through the front of the tray or damage nearby surfaces.
- Making the pocket too deep: A deep box hides papers and creates a bulky silhouette.
- Using weak wall hardware: The organizer may look lightweight until it is full of folders.
- Skipping labels: Without categories, the wall file box can become a vertical version of the junk drawer.
- Over-restoring the tray: Removing every imperfection can erase the reason you chose a vintage tray in the first place.
The Real-Life Experience of Turning a Rusty Tray Into Useful Storage
Projects like this tend to teach a useful lesson: the object that looks the least promising often has the most personality. A rusty tray may seem like an easy item to ignore at a flea market or thrift store. It may be scratched, faded, dented, or covered in the kind of dust that suggests it has been waiting patiently since 1987. But once it is cleaned and mounted on a wall, it can become the piece people notice first.
The first surprise is usually how much visual impact the tray has after it is hung vertically. On a table, it is just a tray. On a wall, it becomes art, storage, and conversation starter all at once. The original scratches begin to look intentional. The faded lettering starts to feel nostalgic. Even a small dent can look like part of the object’s history instead of a flaw that needs to be hidden.
The second surprise is how much easier paper organization becomes when the storage is visible. A drawer is useful, but it can also become a paper graveyard. Important documents disappear into it, join a pile of old manuals and expired coupons, and are never seen again until someone needs them in a panic. A wall hanging file box changes that behavior because it puts the papers where you can see them. It quietly reminds you that the electric bill exists, the school form still needs a signature, and that magazine you meant to read in February is now approaching its first birthday.
There is also something satisfying about using an object with a little imperfection. New organizers are often designed to look flawless, but they can feel anonymous. A tray with worn edges and a slightly uneven finish feels more personal. It does not pretend to be perfect, which makes it strangely easier to live with. The organizer becomes part of the room instead of looking like a temporary container waiting to be replaced.
Another practical lesson is that careful preparation matters more than complicated construction. You do not need advanced woodworking skills to make this project work. You need to clean the tray well, remove loose rust, use solid mounting hardware, and build a pocket that is deep enough for paperwork but shallow enough to stay useful. Those simple decisions make the difference between a pretty decoration and an organizer that handles daily life.
Many people also discover that the project naturally encourages better habits. Once the file box is mounted, it creates a small routine. Mail goes into one section. Bills go into another. Paperwork that needs action does not get buried under grocery flyers. The organizer becomes a visual checkpoint at the end of the day. It is not glamorous in the way a new sofa is glamorous, but it is the kind of household improvement that makes mornings less chaotic.
The most rewarding part is knowing that the finished piece cannot be duplicated exactly. Someone else may find a similar tray, choose the same paint color, and use the same type of wood rails, but the rust pattern, faded design, and history of your tray are unique. That makes the wall hanging file box more than a storage solution. It becomes a useful object with a past, a purpose, and enough charm to make even a stack of mail look slightly more civilized.
Conclusion
Turning a rusty vintage tray into a wall hanging file box is a simple way to combine upcycled home decor with practical organization. The project preserves the character of an old object while giving it a useful new role in your entryway, office, kitchen, or craft space.
With careful rust preparation, a shallow wood pocket, secure wall mounting, and a few smart labels, your old tray can become a reliable wall-mounted mail organizer. It is proof that useful storage does not have to look boring, and that a little rust can sometimes be exactly what a room needs.













