
If your spice cabinet looks like a tiny, fragrant game of Jenga, it might be time for a glow-up.
This DIY spinning spice rack (aka a spice carousel, aka “the reason you’ll stop buying paprika twice”)
uses a lazy Susan turntable and Mason jar herb holders so everything is visible, reachable, andmost
importantlyless likely to avalanche onto your toes.
In this guide, you’ll build a sturdy, countertop-friendly rotating spice organizer with Mason jars that
store dried herbs and spices neatly. We’ll talk sizing, hardware, jar-holding options, finishing, and
how to keep your seasonings fresh (because “vintage cumin” is not a flex).
Why a Spinning Spice Rack Is the Kitchen Upgrade You’ll Actually Use
A rotating spice rack works because it turns “digging” into “spinning.” Instead of pulling out three jars
to reach the one you want, you just rotate the rack and grab. The best part? A spinning design encourages
you to keep your spices organized by category (baking, heat, herbs, blends) and to rotate older jars forward
so they get used.
- Max visibility: You can see labels at a glance (no more sniff-testing every jar like a suspicious raccoon).
- Space efficiency: Vertical storage uses countertop space smarter than a cluttered tray.
- Custom capacity: Build for 8, 12, 16, or more jars based on how you cook.
- Easy cleaning: One rack to wipe instead of fifty tiny containers scattered across the cabinet.
Project Overview: Choose Your Size, Capacity, and Jar Style
Before you cut wood, decide what you want to store and how often you cook. A good “daily driver” rack holds
your most-used seasoningssalt, pepper, garlic powder, chili flakes, Italian blend, cinnamonwhile backup
spices can live in a pantry bin.
Recommended Build Specs (Beginner-Friendly)
- Capacity: 12 Mason jars (4 oz or 8 oz)
- Tiers: 2 tiers (6 jars per tier)
- Base diameter: 12–14 inches
- Lazy Susan bearing: 6–12 inches (bearing size doesn’t equal base diameter; it’s the hardware plate)
- Overall height: 12–16 inches (depending on jar height and tier spacing)
Pick the Right Mason Jars and Lids
For dried herbs and spices, small jars are your friend. Wide-mouth jars are easier to scoop from, while regular-mouth jars
can be a bit tidier if you’re using shaker inserts. If you like the “sprinkle while cooking” vibe, consider lids with shaker
tops or add spice shaker inserts under a Mason jar ring.
Pro tip: If you’ll store the rack on the counter, consider tinted jars (amber/blue) or place the rack away from direct sun.
Light can fade spices and dull flavor over time.
Materials and Tools
Materials
- 3/4-inch plywood, hardwood panel, or laminated boards (for base and tiers)
- 1/2-inch plywood or solid wood (optional: tier walls or a central column box)
- Lazy Susan bearing/turntable hardware (6–12 inches)
- Wood glue
- Wood screws (assorted: #6 and #8 are common)
- Sandpaper (80, 120, 180, 220 grit)
- Finish: polyurethane, water-based topcoat, or food-safe oil/wax blend (choose based on your preference)
- Mason jars (12 suggested)
- Jar-holding hardware (choose one method below):
- Option A: worm-gear hose clamps sized for your jars
- Option B: metal pipe straps (one-hole or two-hole)
- Option C: routed holes/shelves that cradle jars (no clamps)
- Labels (waterproof labels, label tape, or printable round labels)
Tools
- Jigsaw or band saw (or a router circle jig)
- Drill/driver + bits
- Measuring tape, pencil, straightedge
- Clamps
- Orbital sander (optional but nice)
- Forstner bits or hole saw (if you’re drilling cradles)
- Safety gear: eye protection and hearing protection
Step-by-Step: Build Your Spinning Spice Rack
Step 1: Decide Your Layout (So Your Jars Don’t Bonk Each Other)
For 12 jars on two tiers, you’ll typically place 6 jars per tier around the perimeter. Set a Mason jar on your wood panel and
trace a circle to estimate spacing. Leave at least 1/2 inch of breathing room between jars so you can remove them easily.
A simple way to plan: divide a circle like a pizza. Six jars = six slices (60 degrees each). Mark the center point of your base,
then mark 6 evenly spaced points near the edge where jars will sit or mount.
Step 2: Cut the Base and Tiers
Cut one large base circle (12–14 inches) and one or two smaller tier circles (10–12 inches). If you want a two-tier design,
cut two identical tier circles and separate them vertically with a center column. Sand the edges smoothyour future knuckles will
thank you.
Design note: A slightly larger base than the tiers improves stability when you spin it (especially if your jars are
heavier or you live with someone who spins things like they’re auditioning for a game show).
Step 3: Build the Center Support
You need something to hold the tiers up. Choose one:
- Center dowel method: A thick dowel (1–1.5 inches) with spacers between tiers. Quick and clean.
- Box column method: A small square column made from 1/2-inch plywood. Very stable and beginner-friendly.
- Stacked blocks method: Laminated wood blocks glued together and sanded smooth.
If you plan to add a top knob/handle for spinning, the center column is where it shines. A knob makes the rack easier to rotate
without grabbing jars (which reduces spills and prevents the “why is my oregano wearing a new lid?” moment).
Step 4: Add the Mason Jar Herb Holders (Three Solid Options)
This is the signature feature: Mason jar holders that keep jars secure while still removable.
Option A: Hose Clamp Holders (Adjustable and Strong)
Attach hose clamps under each tier (or along the outer wall, if you build one). The clamp hugs the jar body, and you tighten it
just enough to hold the jar without making it hard to slide out. Pre-drill small pilot holes and use short screws so you don’t
punch through the top surface of the tier.
Option B: Pipe Straps (Fast and Budget-Friendly)
Pipe straps can cradle jars like a belt loop. They’re less adjustable than hose clamps, but they’re simple: screw them in place,
test the fit, and tweak if needed. This method works best with consistent jar sizes.
Option C: Cradle Holes (No Hardware Look)
Drill shallow “nest” holes using a Forstner bit or hole saw so jars sit in a recessed pocket. This is a clean look and makes wiping
the rack easier. You can still add a small lip (thin trim ring) around the tier edge to prevent jars from sliding off when spinning.
Step 5: Install the Lazy Susan Bearing (The Spin Doctor Part)
Flip the base upside down and find the center. Line up your lazy Susan hardware so it’s centered. Many bearings have “top” and “bottom”
plates; the plate design often includes larger access holes that let you reach screw holes after the plates are aligned. Attach the
bearing to the base, then attach the mating plate to a bottom disk (or directly to your rack bottom if your design allows).
Stability tip: If your rack feels wobbly, make sure your bearing is centered and your screws are evenly tightened.
Also check that your base is flat (warped wood = a wonky spin).
Step 6: Sand and Finish (Make It Kitchen-Ready)
Sand everything smooth. Start at 80 or 120 grit for rough surfaces, then go to 180 and finish at 220. Remove dust before finishing.
For the finish, a durable clear coat works well for kitchen projects because it’s easy to wipe clean. If you prefer an oil/wax finish,
plan on occasional reapplication.
Let the finish fully cure before loading jarsotherwise, your spices may pick up that “freshly finished wood” aroma. It’s not a seasoning.
Step 7: Label, Fill, and Organize Like a Pro
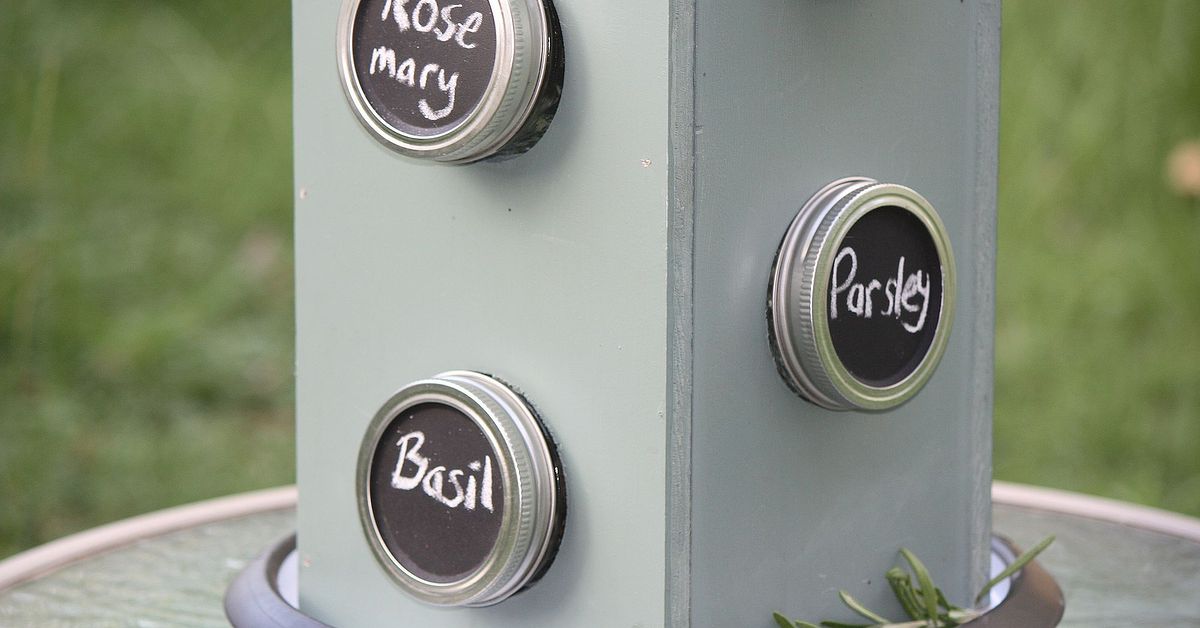
Label the jar lids or fronts. If you want maximum readability, label both the top (for when you look down) and the side (for when you spin).
Group spices by how you cook:
- Everyday: salt, pepper, garlic powder, onion powder, paprika
- Heat: chili powder, cayenne, crushed red pepper
- Herbs: oregano, basil, thyme, rosemary
- Baking: cinnamon, nutmeg, cloves, ginger
- Blends: taco, Italian, curry, BBQ rub
How to Keep Dried Herbs and Spices Fresh (So Your Food Actually Tastes Like Something)
Spices don’t usually “go bad” in the scary way, but they do lose flavor and aroma over time. The big three enemies are
heat, light, and moisture. That’s why storing spices above the stove is convenient… and also kind of rude to your future self.
Freshness Rules That Make a Big Difference
- Keep it airtight: Tight lids prevent moisture and air exposure that dulls flavor.
- Avoid heat: Store away from ovens, stoves, and sunny windows.
- Don’t shake over steam: Sprinkle into a spoon or pinch bowl first to avoid moisture clumping in the jar.
- Use the sniff test: If it smells like “dust with ambition,” replace it.
About How Long Spices Last
Shelf life depends on the spice and how it’s stored. As a general guide, whole spices keep their punch longer than ground spices,
and dried leafy herbs fade fastest. If you’re building this rack, consider dating the bottom of each jar (month/year) so you can rotate stock.
Design Variations (Make It Look Like It Belongs in Your Kitchen)
Farmhouse-Style Spice Carousel
Use stained wood, black metal hardware, and simple labels. Add a chunky wood knob on top and call it “rustic.” Nobody will argue.
Modern Minimalist Version
Use a clean maple or birch finish, clear labels, and cradle holes instead of visible clamps. Keep jar sizes uniform for that sleek look.
Extra-Capacity Rack
Add a third tier or widen the base to 16 inches. If you do, upgrade to a larger bearing and keep heavier jars lower for stability.
Troubleshooting: Common Issues and Easy Fixes
“My rack wobbles when it spins.”
- Check the bearing is centered and installed flush.
- Confirm your base isn’t warped (swap material or reinforce with a second layer).
- Make sure jars are evenly distributeduneven weight makes the spin feel lopsided.
“My jars are hard to remove.”
- If using hose clamps, loosen slightlysnug, not strangled.
- Sand the cradle holes (if drilled) for a smoother fit.
- Try smaller jars for tight layouts.
“My spices clump.”
- Stop shaking over steam; measure into a spoon first.
- Keep lids tightly closed and store away from humidity.
- Use fresh, fully dried herbs before jarring.
Cost and Time Estimate
Depending on what you already own, a DIY spinning spice rack can be very budget-friendly. If you use scrap wood and already have jars,
you may only need the lazy Susan hardware and a few fasteners. Expect roughly:
- Time: 2–5 hours (plus finish drying time)
- Cost: $20–$70 (mostly jars + bearing + finish)
Conclusion: Your Spices Deserve Better Than the Back of the Cabinet
A homemade spinning spice rack with Mason jar herb holders is one of those DIY projects that pays you back every single day.
It saves space, keeps your most-used seasonings in reach, and makes cooking feel smoother (and slightly more “I’ve got my life together”).
Build it simple, label it clearly, and keep it away from heat and humidity so your spices stay boldnot bland.
Real-World Builder Notes (What You’ll Experience While Making This)
Here’s the honest truth: this project is easy to start, satisfying to build, and weirdly addictive to optimize. You’ll begin by thinking,
“I just want my spices organized,” and end up having strong opinions about label fonts and whether garlic powder deserves top-tier placement.
The first thing most people notice is how fast planning turns into rearranging. You’ll trace circles, place jars, step back, and realize that
jar spacing is basically kitchen Tetris. If you’re using 8-ounce jars, you’ll likely discover they’re a little wider than you imagined once you
multiply by twelve. That’s not failurethat’s math showing up uninvited. The fix is simple: increase the base diameter, reduce jar count per tier,
or switch to smaller jars for frequently used spices. In real kitchens, smaller jars often work better because you refill them from bulk containers
instead of hoarding giant jars until the end of time.
When you install the lazy Susan hardware, you’ll probably have a short “Wait… why don’t these holes line up?” moment. This is normal. Many bearings
are designed so you rotate the plates to access different screw holes through larger access openings. Once you see how it works, it feels obvious.
Before that, it feels like the hardware is gaslighting you. Keep your pencil marks centered, pre-drill, and don’t overtighten screwstight enough to hold,
not so tight the bearing binds.
If you choose hose clamps or pipe straps, you’ll also learn the difference between “secure” and “impossible to remove.” The best clamp fit is when the jar
slides out with a gentle pullno twisting, no wrestling, no dramatic sighing. Test with an empty jar first, then adjust. It’s also worth sanding any sharp
edges near clamps because your fingers will visit that spot a thousand times over the rack’s life. A tiny burr today becomes a daily annoyance tomorrow.
Finishing is where patience wins. It’s tempting to load jars the minute the rack looks dry, but finishes often need more time to cure than to “feel dry.”
If you rush it, your rack can smell like finish and your spices can absorb odorsnobody wants cinnamon with a hint of workshop. Let it cure, then wipe it down.
Once loaded, the rack’s center of gravity changes, and you’ll immediately feel whether the base is wide enough. If spinning feels tippy, add stick-on rubber feet
for grip and consider adding weight underneath the base (a thin steel plate or a second wood layer) to calm the spin.
The most surprisingly satisfying part is labeling. You’ll start with basic names and end up making categories: “Weeknight Heroes,” “Baking Only,” and “Spices I Bought
for One Recipe in 2019.” For peak usefulness, label the lid and the side. Lid labels help when you’re looking down; side labels help when you’re spinning. And here’s a
practical habit you’ll actually keep: stop shaking spices over steam. Once your jars are pretty and organized, you’ll be protective of them, and that naturally pushes you
into better spice-handling habitsmeasuring into a spoon, closing lids right away, and keeping everything dry.
Finally, expect your rack to become a living system. You’ll tweak it after a week. You’ll move cumin closer to the front because you use it more than you admitted.
You’ll retire that ancient thyme that smells like cardboard. And one day you’ll spin the rack mid-cooking and think, “Wow. That’s… actually convenient.” That’s the win.














