
If your Moen 7650 kitchen faucet is dripping, getting stiff, refusing to shut off cleanly, or generally behaving like it has joined a tiny plumbing rebellion, the good news is that you can usually take it apart without replacing the whole faucet. The Moen 7650 is a single-handle kitchen faucet, and many repairs involve reaching the cartridge, inspecting the spout area, replacing worn seals, or cleaning out mineral buildup.
This guide walks you through how to disassemble a Moen 7650 faucet safely and logically. You will learn what tools to use, how to remove the handle, how to access the cartridge, what to watch for, and how to avoid turning a small faucet repair into an under-sink water park.
Before you start, remember this: faucet parts can vary slightly by production year and previous repairs. If your faucet has been in the kitchen for years, it may have replacement parts that differ from the original. Take photos as you go, keep small parts in order, and do not force anything unless you enjoy buying parts you did not plan to buy.
What Is a Moen 7650 Faucet?
The Moen 7650 is commonly described as a single-lever kitchen faucet. That means one handle controls both water temperature and flow. Instead of separate hot and cold handles, the faucet uses an internal cartridge system. When the handle moves, the cartridge regulates how much hot and cold water enters the spout.
That simple design is why many Moen single-handle faucet repairs focus on the cartridge. If the faucet leaks from the spout, drips after shutoff, becomes hard to move, or delivers uneven water flow, the cartridge or related seals may be the issue. In many older Moen single-handle kitchen faucets, a 1225-style cartridge or similar cartridge design may be involved, but you should always confirm by comparing the old cartridge with the replacement part or checking Moen documentation for your exact faucet version.
Reasons You May Need to Take Apart a Moen 7650 Faucet
You do not need to disassemble a faucet just because it has a bad attitude. But there are several practical reasons to take apart a Moen 7650 faucet:
- The faucet drips from the spout after the handle is fully closed.
- The handle is hard to move or feels gritty.
- Water leaks around the base of the spout.
- The hot and cold mixing feels inconsistent.
- The cartridge needs replacement.
- The spout O-rings are worn or dry.
- You want to clean mineral deposits inside the faucet body.
If the leak is under the sink, however, disassembling the top of the faucet may not solve the problem. Under-sink leaks often come from supply lines, mounting hardware, sprayer connections, or loose fittings. Always inspect below the sink with a flashlight before assuming the cartridge is guilty.
Tools and Supplies You May Need
Gather your tools before turning off the water. Nothing says “weekend project” like crawling under the sink six times because the screwdriver is in the garage, the pliers are in the laundry room, and your patience is somewhere in 2017.
Basic Tools
- Flat-head screwdriver
- Phillips screwdriver
- Adjustable wrench
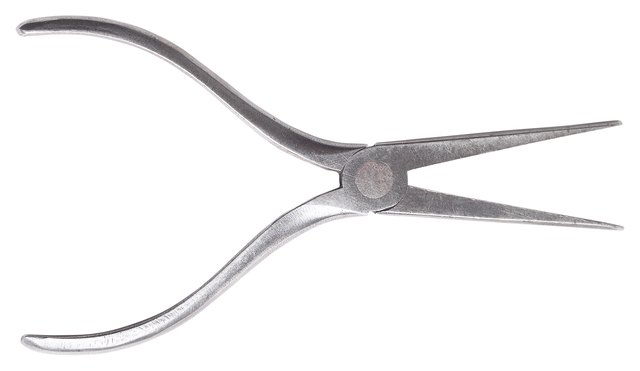
- Needle-nose pliers
- Adjustable pliers
- Allen wrench, if your handle uses a set screw
- Towel or rag
- Small container for screws and clips
- Flashlight
Helpful Supplies
- Replacement cartridge, if needed
- Replacement retaining clip, if damaged
- Plumber’s silicone grease for O-rings
- White vinegar for light mineral deposits
- Soft cloth
- Paper towels
A Moen cartridge puller can also be helpful if the cartridge is stuck. Older cartridges can cling to the faucet body with the determination of a toddler holding candy. If gentle twisting and pulling do not work, a cartridge puller may save time and prevent damage.
Step-by-Step Guide: How to Take Apart a Moen 7650 Faucet
Step 1: Turn Off the Water Supply
Look under the sink for the hot and cold shutoff valves. Turn both valves clockwise until they stop. After that, turn the faucet handle on to release pressure and confirm that the water is off. If the shutoff valves do not work or are missing, turn off the main water supply to the house.
This step is not optional. Taking apart a faucet with the water on is like opening a soda can after shaking it, except the soda is your kitchen plumbing and the cleanup is less fun.
Step 2: Protect the Sink and Drain
Place a towel in the sink basin and cover the drain. Small faucet screws and retaining clips are experts at disappearing. A towel helps protect the finish and keeps tiny parts from diving into the drain like Olympic swimmers.
Step 3: Remove the Handle Cover or Plug Button
Depending on the faucet version, the handle screw may be hidden under a decorative cap, plug button, or cover. Use a small flat-head screwdriver to gently pry off the cover. Work slowly so you do not scratch or crack the trim.
If the cap feels stuck, do not gouge it. Try working around the edge with light pressure. A thin cloth under the screwdriver tip can help protect the finish.
Step 4: Remove the Handle Screw
Once the screw is visible, remove it with the correct screwdriver or Allen wrench. Set the screw in your parts container. Pull the handle straight up and off the faucet stem. If it resists, wiggle it gently from side to side while pulling upward.
A stuck handle may have mineral buildup around the stem. A little patience is better than brute force. Brute force usually ends with a broken handle and a suspiciously quiet kitchen.
Step 5: Remove the Dome or Outer Housing
After the handle is removed, you may see a dome, sleeve, or outer housing. Carefully remove it by hand if possible. If it is threaded, turn it counterclockwise. If it is tight, use a cloth and pliers to avoid damaging the finish.
This part is mostly decorative, but it protects the internal assembly and gives the faucet its finished appearance. Place it aside in the same direction it came off so reassembly is easier.
Step 6: Remove the Retainer Nut
Use an adjustable wrench to loosen the retainer nut. Turn it counterclockwise. Once loose, remove it by hand. The retainer nut holds the cartridge assembly in place, so do not lose it and do not cross-thread it during reassembly.
If the nut is stuck, apply steady pressure rather than sudden force. Mineral deposits can make threaded parts stubborn. A cloth around the nut helps reduce scratches.
Step 7: Remove the Spout, If Needed
If your repair involves a leak around the base of the spout, lift or pull the spout assembly off after the retainer nut is removed. This gives access to the spout O-rings. Inspect the O-rings for cracks, flattening, or dryness. Worn O-rings can allow water to seep around the base even when the cartridge is fine.
Clean the spout area with a soft cloth. If you see light mineral deposits, use a small amount of vinegar on a cloth, then rinse and dry the area. Do not use steel wool or harsh abrasive pads on finished faucet parts.
Step 8: Remove the Retaining Clip
Many Moen single-handle cartridges are secured with a U-shaped retaining clip. Use needle-nose pliers to pull the clip straight up and out. Keep the clip in your parts container. If it is bent, corroded, or broken, replace it.
Do not try to pull the cartridge before removing the clip. That is the plumbing equivalent of trying to leave the driveway with the garage door closed. Something will object.
Step 9: Remove the Cartridge
With the retaining clip removed, pull the cartridge straight out. If the cartridge does not move, use the plastic removal tool included with many replacement cartridges to twist the cartridge slightly back and forth. Then pull again.
If it is still stuck, consider using a Moen-compatible cartridge puller. Avoid prying against the faucet body with screwdrivers because that can damage the valve housing. Once the cartridge is out, note its orientation. Many cartridges must be reinstalled in the correct direction for hot and cold operation to work properly.
How to Inspect the Parts After Disassembly
Once the faucet is apart, inspect everything before rushing to reassemble it. You are already inside the faucet, so this is the perfect time to solve the real problem instead of performing plumbing theater.
Check the Cartridge
Look for cracks, worn seals, mineral buildup, or stiffness. If the faucet was dripping from the spout, the cartridge is a common suspect. A replacement cartridge can often restore proper shutoff and smoother handle movement.
Check the Spout O-Rings
If water leaked near the base of the spout, inspect the O-rings. They should be flexible and round, not cracked, flattened, or brittle. Apply plumber’s silicone grease to new O-rings before reinstalling the spout.
Check the Retaining Clip
The retaining clip must slide fully into place during reassembly. If the clip is damaged, replace it. A cartridge that is not properly clipped can shift under pressure, and that is not a surprise you want after turning the water back on.
Check for Mineral Buildup
Hard water can leave deposits inside the faucet body. Clean gently with a soft cloth. Avoid scratching internal sealing surfaces. If deposits are heavy, it may be worth replacing worn parts rather than trying to rescue every old seal.
How to Reassemble the Moen 7650 Faucet
Reassembly is mostly the reverse of disassembly, but there are a few details that matter.
- Insert the cartridge in the same orientation as the original.
- Push the cartridge fully into the valve body.
- Reinstall the retaining clip completely.
- Reinstall the spout and lubricated O-rings if removed.
- Thread the retainer nut back on carefully.
- Replace the dome or outer housing.
- Reinstall the handle and handle screw.
- Snap the plug button or cover back into place.
- Turn the water supply on slowly.
- Test for leaks and proper hot/cold operation.
If hot and cold are reversed after reassembly, the cartridge may be installed backward. Turn the water off again, remove the handle and retaining components, rotate the cartridge as needed, and retest.
Common Mistakes to Avoid
Forgetting to Turn Off the Water
This is the big one. Always shut off the water and open the faucet to relieve pressure before disassembly.
Losing the Retaining Clip
The small U-shaped clip is easy to misplace. Without it, the cartridge cannot be secured correctly. Keep it in a cup or magnetic tray.
Scratching the Finish
Use a cloth between tools and finished surfaces. Avoid abrasive cleaners, steel wool, and harsh chemicals. A faucet should look repaired, not like it survived a raccoon attack.
Forcing a Stuck Cartridge
If the cartridge refuses to move, use the proper removal tool or cartridge puller. Excessive prying can damage the faucet body.
Skipping O-Ring Inspection
If you only replace the cartridge but ignore worn spout O-rings, a base leak may continue. Inspect all visible seals while the faucet is apart.
Troubleshooting After Reassembly
The Faucet Still Drips
Confirm that the cartridge is fully seated and clipped. If the cartridge is old, replace it. Also check for debris inside the valve body that may prevent a proper seal.
The Handle Is Hard to Move
The cartridge may be dry, misaligned, or defective. Remove it and inspect the seals. Use only plumber’s silicone grease where appropriate; do not use petroleum grease on rubber plumbing seals.
Water Leaks Around the Base
Inspect the spout O-rings and the spout seating area. Replace worn O-rings and clean the surface before reassembly.
Water Flow Is Weak
Check the aerator for sediment. Also make sure the supply valves are fully open. If the faucet was recently repaired, debris may have loosened and collected at the aerator screen.
When Should You Replace Instead of Repair?
Repairing a Moen 7650 faucet makes sense if the body is solid, parts are available, and the finish is still acceptable. However, replacement may be smarter if the faucet body is badly corroded, the mounting hardware is failing, the faucet has multiple leaks, or replacement parts are difficult to identify.
A cartridge and O-ring repair is usually much less expensive than a new faucet. But if the faucet is extremely old and has several worn components, replacing the full fixture can save repeat repairs.
Practical Experience: What It Is Really Like Taking Apart a Moen 7650 Faucet
In real kitchens, faucet repairs rarely happen in perfect lighting with a spotless sink and a smiling person holding a brand-new tool kit. More often, you discover the leak after dinner, the cabinet under the sink is packed with cleaning bottles, and the shutoff valve looks like it was last touched during the invention of dial-up internet.
The first experience many homeowners have with a Moen 7650 faucet is surprise at how simple the top assembly looks once the handle is removed. The handle, dome, retainer nut, clip, and cartridge follow a logical order. The challenge is not usually understanding the design. The challenge is dealing with age, mineral buildup, and parts that have not moved in years.
One useful habit is taking photos at every stage. Snap a picture before removing the handle, after removing the dome, before pulling the retaining clip, and before removing the cartridge. These photos act like breadcrumbs when it is time to reassemble everything. They are especially helpful if you step away mid-project and return later wondering why there are three small parts on the counter and one of them looks important.
Another real-world lesson is to test the shutoff valves before fully committing. Turn them clockwise, open the faucet, and make sure water actually stops. Some old shutoff valves look closed but still let water pass. If that happens, stop and use the main shutoff or replace the under-sink valves before continuing. A faucet repair is much calmer when water is not sneaking into the story.
The retaining clip deserves special respect. It is small, simple, and absolutely necessary. When removing it, pull straight up with needle-nose pliers and place it somewhere safe. If it looks bent or tired, replace it. During reassembly, the clip should slide into its slot without a fight. If it will not seat fully, the cartridge may not be pushed in all the way. Do not hammer it into place. Remove the cartridge, check alignment, and try again.
Stuck cartridges are another common experience. The best approach is gentle persistence. Twist the cartridge slightly using the plastic tool that comes with many replacement kits, then pull straight out. If that fails, use a cartridge puller. The puller may feel like an unnecessary purchase until it saves you from thirty minutes of sweating over the sink while whispering things you would not say at a dinner table.
It is also smart to clean as you go. Wipe mineral deposits from the spout area, inspect O-rings, and avoid harsh cleaners. A soft cloth, mild soap, and careful rinsing are usually enough for finished parts. For internal mineral deposits, a little vinegar on a cloth can help, but do not soak finished trim in strong chemicals.
Finally, turn the water back on slowly. Watch the faucet from above and below. Check around the handle, spout base, supply lines, and cabinet floor. Run hot and cold water, move the handle through its full range, and let the faucet sit for a few minutes. A dry paper towel under the faucet connections can reveal tiny leaks quickly.
The most satisfying part of taking apart a Moen 7650 faucet is realizing that the repair is not mysterious. It is a sequence. Turn off water, remove handle, remove trim, release the cartridge, inspect parts, replace what is worn, and reassemble carefully. With patience, the right tools, and a small container for parts, this is a very manageable DIY repair.
Conclusion
Taking apart a Moen 7650 faucet is a practical repair job for many homeowners. The key is to work slowly, keep parts organized, protect the faucet finish, and identify the cartridge and seals correctly. Most problems involve the cartridge, retaining clip, spout O-rings, or mineral buildup. Once you understand the order of disassembly, the faucet becomes much less intimidating.
For best results, shut off the water completely, take photos during the process, avoid forcing stuck parts, and use replacement components that match your faucet version. A careful cartridge or O-ring repair can stop leaks, improve handle movement, and extend the life of the faucet without replacing the entire fixture.
Note: Always confirm your exact faucet version and replacement part before buying parts, because older Moen faucets may have production variations or previous repairs that change what is installed inside.













